

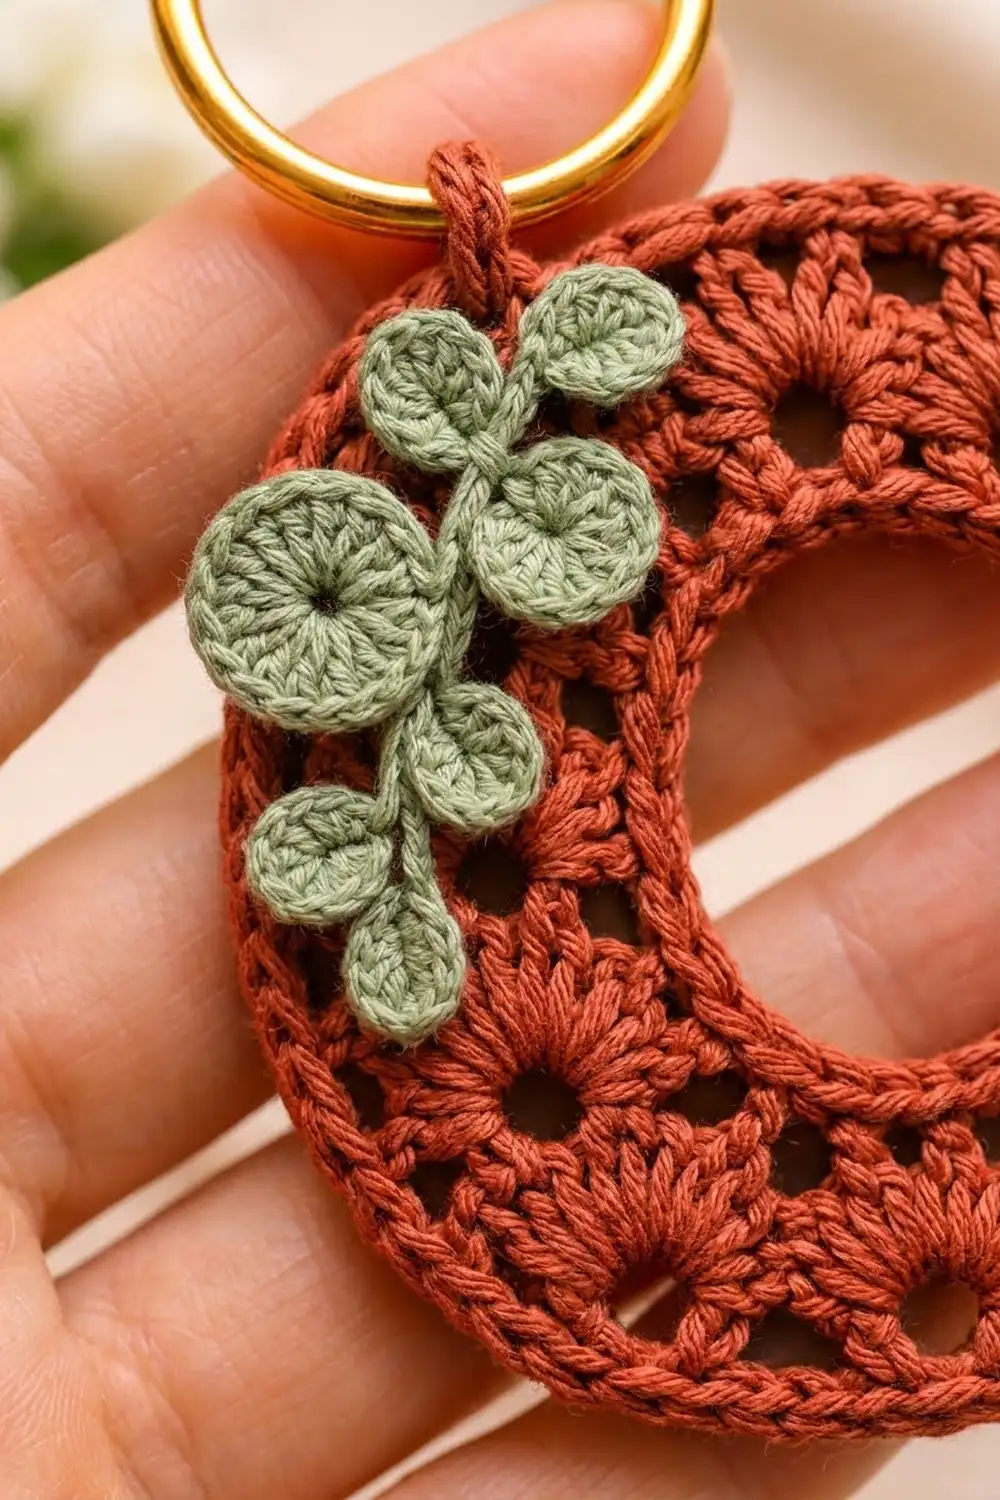
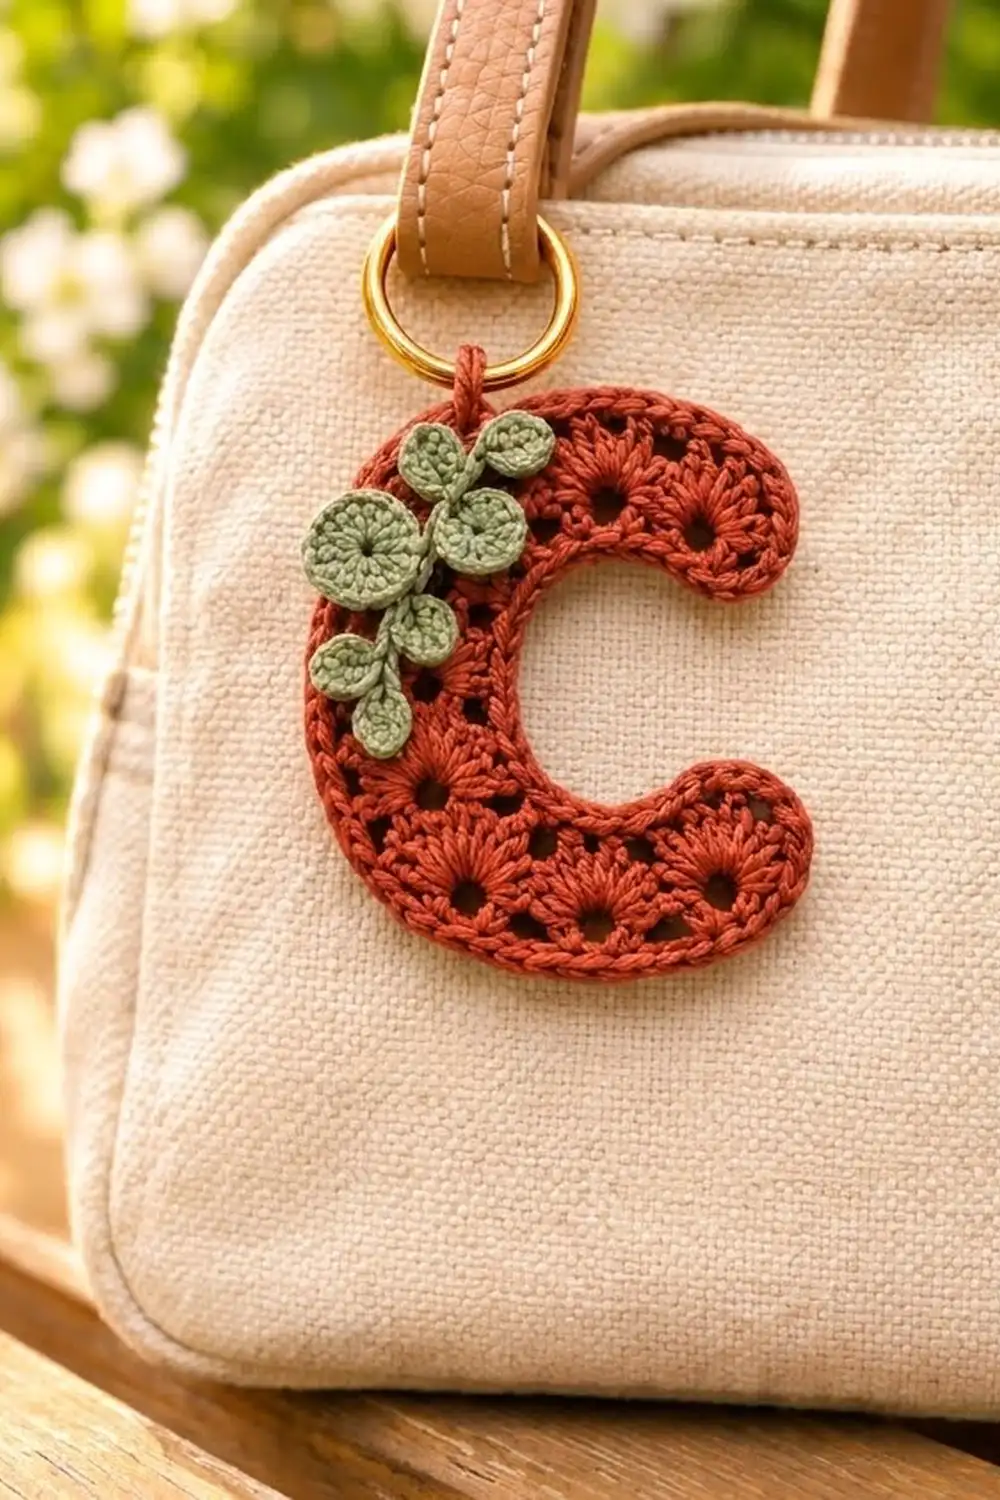
The Terracotta Sprig Letter C is a small lacy bag charm. It is solid enough to hang from a handbag and detailed enough to look special. The C is filled with little fans that open out from round eyelets, and a raised cord-like edge goes all the way around the letter.
The palette is warm and earthy: a rust or terracotta letter, a sage green leaf sprig, and a gold-tone ring. The sprig has one larger circle leaf and six small ones along a curved stem. It sits on the upper left of the letter and softens the shape.
This pattern uses US crochet terms. The finished letter is about 3.75 in (9.5 cm) tall and 3.25 in (8.3 cm) wide, not counting the hanging loop and ring.
The C is made as one piece, worked in rows along its length. You start with a short chain that becomes the inner curve. Each row has more stitches than the one before, so the strip curves into a C by itself. A two-round border goes around the whole letter and adds the hanging loop. Finally, you make the sprig and sew it on.
Finished Size and Construction
- Finished size: 3.75 in (9.5 cm) tall × 3.25 in (8.3 cm) wide
- Skill level: Easy-intermediate
- Terminology: US crochet terms
- Yarn weight: Fingering / super fine (#1) mercerized cotton
- Hook: 2.25 mm (US B-1)
- Number of pieces: 1 letter, plus a small sewn-on appliqué (1 stem and 7 circle leaves)
- Layout: Single letter, no joining
- Band width before border: 1 in (2.5 cm)
- Size before border: 3.5 in (8.9 cm) tall × 3 in (7.6 cm) wide
- Border depth: about 0.125 in (0.3 cm) on every edge
Materials
Use a smooth, tightly plied mercerized cotton. It shows the fans and eyelets clearly and keeps its shape on a bag. Avoid fuzzy or very stretchy yarns, because they hide the eyelets and let the C sag.
- Color A, rust/terracotta: 10 g (about 34 m)
- Color B, sage green: 3 g (about 10 m)
Both amounts include a margin for a gauge swatch and weaving in ends.
Tools:
- 2.25 mm (US B-1) crochet hook
- 1 gold-tone split ring or key ring, 1 in (2.5 cm) across
- Tapestry needle with a sharp point, for sewing the appliqué
- 2 locking stitch markers
- Rustproof pins and a foam blocking mat
- Spray bottle or steam iron
- Scissors and a ruler
Abbreviations (US Terms)
- ch – chain
- sl st – slip stitch
- sc – single crochet
- hdc – half double crochet
- dc – double crochet
- sp – space
- st(s) – stitch(es)
- RS – right side
- rev sc – reverse single crochet (crab stitch)
Special stitches:
- Fan: 5 dc worked into the same ch-2 sp.
- Reverse sc (rev sc): Work from left to right (right-handed). Insert the hook into the next st to the right, yarn over, and pull up a loop. Yarn over and pull through both loops on the hook. This makes the raised, cord-like edge.
Gauge and Checkpoints
Gauge:
- 28 sc and 32 rows of sc = 4 in (10.2 cm)
- One dc row is about 0.25 in (0.6 cm) tall
The letter is small, so a swatch takes a while compared to the project. The best test is to work Rows 1–3 and measure them against the checkpoints below.
Checkpoints:
- After Row 1: 19 sc, about 2.75 in (7.0 cm) long when relaxed.
- After Row 3: The strip is about 0.6 in (1.5 cm) tall and has already started to curve.
- After Row 5: The band is about 1 in (2.5 cm) wide. Ease it into a C on a flat surface: the outer edge should be about 8.5 in (21.6 cm) and the letter about 3.5 in (8.9 cm) × 3 in (7.6 cm).
- After the border: 3.75 in (9.5 cm) × 3.25 in (8.3 cm).
If your letter is too big: Go down to a 2.0 mm hook, or tighten your dc so the fans don’t flare.
If your letter is too small: Go up to a 2.5 mm hook.
If only the outer edge ruffles: Your fans are too loose for your base. Try one hook size smaller for Rows 3 and 5 only.
The Letter C
Use Color A for the whole letter. Turn at the end of every row.
Foundation: Ch 20.
Row 1 (RS, inner edge): Sc in the 2nd ch from the hook and in each ch across. Turn. (19 sc)
Row 2 (first eyelet row): Ch 5 (counts as dc + ch 2). Skip the next 2 sc. Dc in the next sc, ch 2, skip the next 2 sc; repeat from * 4 more times. Dc in the last sc. Turn. (7 dc, 6 ch-2 sps)*
The dc land on sc 1, 4, 7, 10, 13, 16 and 19, so the spacing is even from end to end.
Row 3 (inner fan row): Ch 1. Sc in the first dc. Work a fan (5 dc) in the next ch-2 sp, then sc in the next dc; repeat from * 5 more times. Work the last sc in the 3rd ch of the turning ch-5. Turn. (6 fans + 7 sc = 37 sts)*
Each ch-2 sp from Row 2 now sits as a round eyelet under a fan.
Row 4 (second eyelet row): Ch 5 (counts as dc + ch 2). Sc in the 3rd (center) dc of the next fan, ch 2, dc in the next sc. Ch 2, sc in the center dc of the next fan, ch 2, dc in the next sc; repeat from * 4 more times. Turn. (7 dc + 6 sc = 13 sts, 12 ch-2 sps)*
This row doubles the number of spaces. That is what makes the outer edge longer than the inner one.
Row 5 (outer fan row): Ch 1. Sc in the first dc. Work a fan in the next ch-2 sp, then sc in the next st; repeat from * 11 more times. The “next st” alternates between an sc and a dc, and the last one is the 3rd ch of the turning ch-5. Do not turn and do not fasten off. (12 fans + 13 sc = 73 sts)*
Lay the strip flat and ease it into a C, with the 19-st edge on the inside and the opening on the right. Check the After Row 5 measurements. The fans should lie flat. If they cup, steam lightly now.
Border
The border has two rounds worked around the whole letter. Round 1 smooths the edges and rounds the corners. Round 2 adds the cord edge and the hanging loop. Keep working with Color A.
Border gauge:
- Ends of the C: about 7 sc per inch (2.5 cm), the same as the swatch.
- Outer curve: about 8.8 sc per inch. The fan tops gather the sts slightly, which keeps the edge from waving.
- Inner curve: about 8 sc per inch.
Round 1 (conversion round): Ch 1. Work in this order:
- End B (where Row 5 ended): Work 7 sc across the row ends:
- 1 sc in the end of Row 5
- 2 sc around the turning-ch post of Row 4
- 1 sc in the end of Row 3
- 2 sc around the turning-ch post of Row 2
- 1 sc in the end of Row 1
- Inner edge: Work into the underside of the foundation ch. 3 sc in the first ch loop, 1 sc in each of the next 17 loops, 3 sc in the last loop. That is (19 worked 1 per st) + (4 extra) = 23 sc.
- End A: Work 7 sc across the row ends in the same way, from Row 1 back up to Row 5.
- Outer edge: 3 sc in the first st of Row 5, 1 sc in each of the next 71 sts, 3 sc in the last st. That is (73 worked 1 per st) + (4 extra) = 77 sc.
Sl st to the first sc. (7 + 23 + 7 + 77 = 114 sc)
Why the math works:
- Each end is 1 in (2.5 cm) across, and 7 sc at 7 sc per inch fits it exactly.
- The 4 extra sts on each curve go into the 4 corners where the ends meet the curves. That rounds the ends of the C without making them ruffle.
- The outer curve gets 77 sc, roughly 8.75 in (22.2 cm).
- The inner curve gets 23 sc, roughly 2.75 in (7.0 cm). That holds the inner opening at about 1.25 in (3.2 cm) across.
Mark the loop position: With the RS facing and the opening on the right, find the outer-edge sc directly above the upper end of the inner opening, a little left of top center. Place a marker in it.
Round 2 (cord edge and hanging loop): Ch 1. Rev sc in each sc around. When you reach the marked st, rev sc in it, ch 12, sl st into the same st, then keep working rev sc. Sl st to the first st and fasten off. (114 rev sc, plus 1 ch-12 loop)
The cord edge adds about 0.125 in (0.3 cm) on every edge. That brings the letter from 3.5 in × 3 in (8.9 cm × 7.6 cm) to 3.75 in × 3.25 in (9.5 cm × 8.3 cm).
Leaf Sprig Appliqué
Use Color B for every part of the sprig. Leave a 10 in (25.4 cm) tail on each part for sewing.
Large circle leaf (make 1):
- Round 1: Make a magic ring. Ch 3 (counts as dc), then work 11 dc in the ring. Pull the ring closed, leaving a small center hole. Sl st to the top of the ch-3. (12 dc)
- Round 2: Ch 1. Work 2 sc in each st around. Sl st to the first sc and fasten off. (24 sc)
It measures about 0.75 in (1.9 cm) across.
Small circle leaf (make 6):
- Round 1: Make a magic ring. Ch 1, then work 10 hdc in the ring. Pull the ring snug and sl st to the first hdc. Fasten off. (10 hdc)
Each one measures about 0.4 in (1.0 cm) across.
Stem (make 1): Ch 18. Sl st into the back bump of the 2nd ch from the hook and of each ch across. (17 sl st) The stem measures about 2.25 in (5.7 cm).
Placement:
- Lay the stem along the upper-left part of the band so it follows the curve of the C.
- Sew the large circle near the top end of the stem.
- Sew 2 small circles just above and to the right of the large one.
- Sew the remaining 4 small circles in two staggered pairs down the stem.
- Stitch through the back loops of the leaves only, with small stitches, so nothing shows on the front.
- Weave the tails into the back of the letter.
Attach the ring: Open the split ring and slide the ch-12 loop onto it.
Final Blocking
- Lightly mist the charm with water, or hold a steam iron just above it without touching.
- Lay it RS up on the blocking mat with the opening on the right.
- Pin the outer curve at the top, the bottom and the far-left point, so the letter measures 3.75 in (9.5 cm) tall and 3.25 in (8.3 cm) wide.
- Pin the two rounded ends so the inner opening is about 1.25 in (3.2 cm) across.
- Gently press each fan flat with a fingertip and make sure every eyelet is open and round.
- Leave it to dry completely before you unpin it. The ring and the sprig can stay attached while it dries.
Final Quality-Control Checklist
- [ ] Row counts were 19, 7 dc / 6 sps, 37, 13, and 73.
- [ ] The letter has 6 inner fans and 12 outer fans, each with an open eyelet.
- [ ] Border Round 1 has 114 sc: 7 + 23 + 7 + 77.
- [ ] The cord edge is even, with no gaps at the corners.
- [ ] The hanging loop sits a little left of top center and is secure.
- [ ] The letter measures 3.75 in × 3.25 in (9.5 cm × 8.3 cm).
- [ ] The sprig is sewn flat, and no stitches show on the front.
- [ ] All ends are woven in and trimmed.
Troubleshooting
The C closes into an O: Your outer fans are too generous. Make sure you used 5 dc per fan, not 6, and work the dc a little tighter.
The C stays too straight: Your base rows are too loose. Check that Row 4 put an sc in the center of every fan.
The outer edge ruffles after the border: Your Round 1 sc are too loose, or there are extra sts. Recount: there should be 77 sc on the outer edge.
The ends of the C look square: Check that you worked 3 sc at each of the 4 corners.
The hanging loop stretches: Work a round of sl st into the ch-12 loop to stiffen it.
The leaves curl: Steam them flat before you sew them on.
Care
Hand wash in cool water with a gentle soap, roll it in a towel, and dry it flat. Re-pin it to shape if needed. Remove the metal ring before washing so it doesn’t tarnish or mark the cotton.
Final Notes
Each stage depends on the one before:
- The 19-st inner edge (2.75 in / 7.0 cm) sets the size of the opening.
- Rows 2–5 build out to 73 sts, which makes the band 1 in (2.5 cm) wide and pulls the strip into a C of 3.5 in × 3 in (8.9 cm × 7.6 cm).
- The 114-st border adds 0.125 in (0.3 cm) on every edge, for a finished charm of 3.75 in × 3.25 in (9.5 cm × 8.3 cm).
If you check each checkpoint as you go, the letter will come out the right shape. The sprig and the gold ring finish it off.
Happy crocheting!