

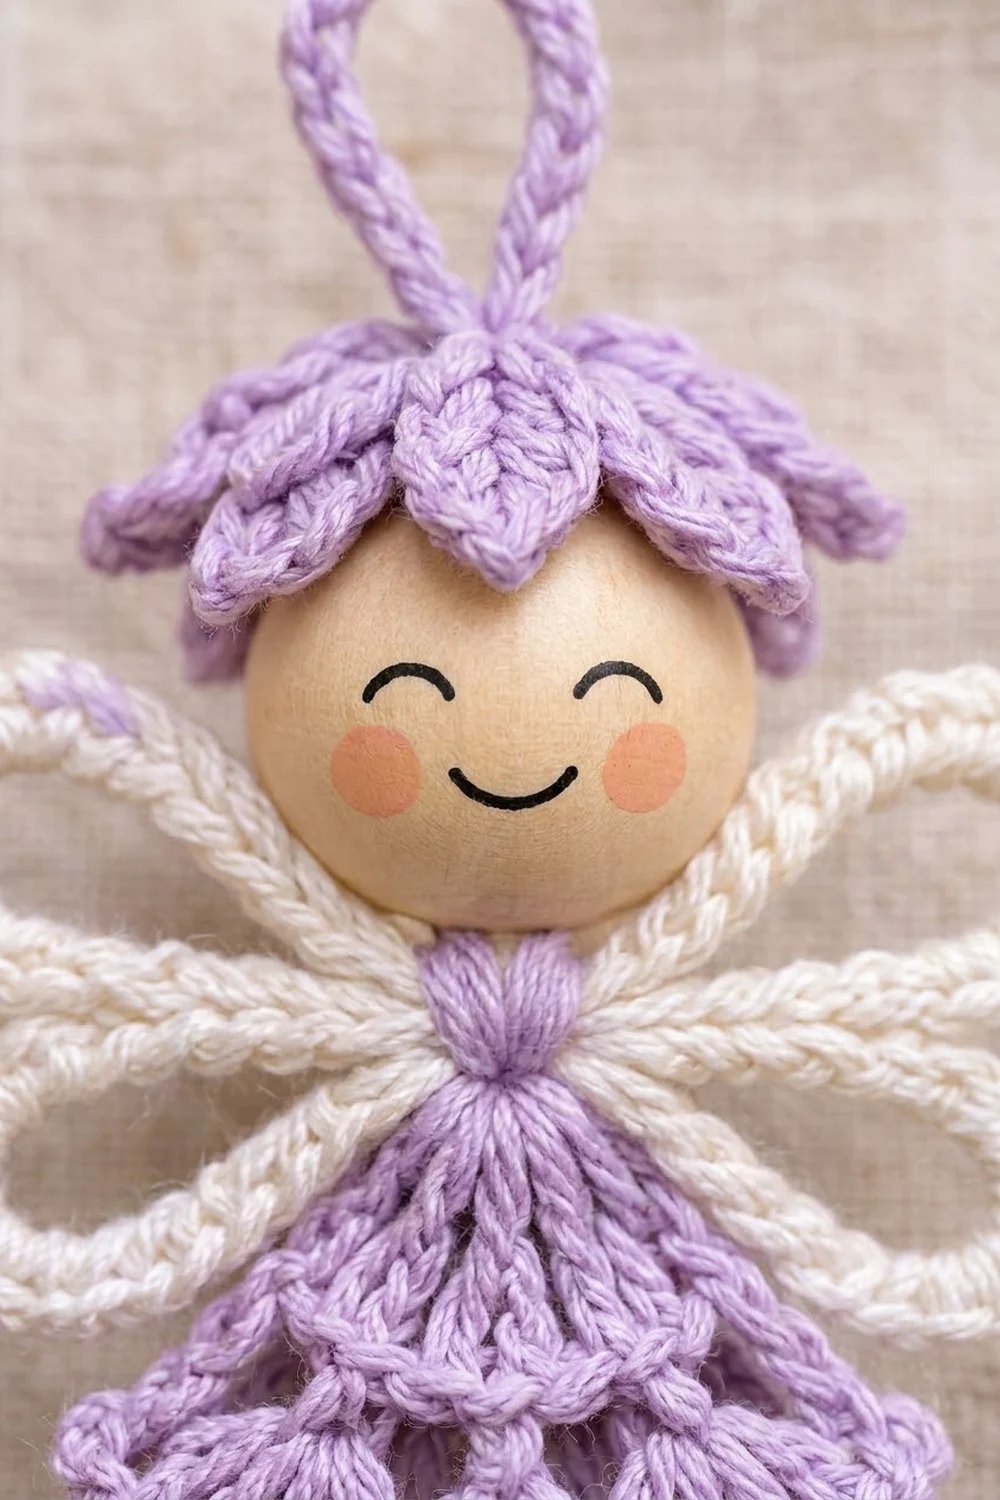
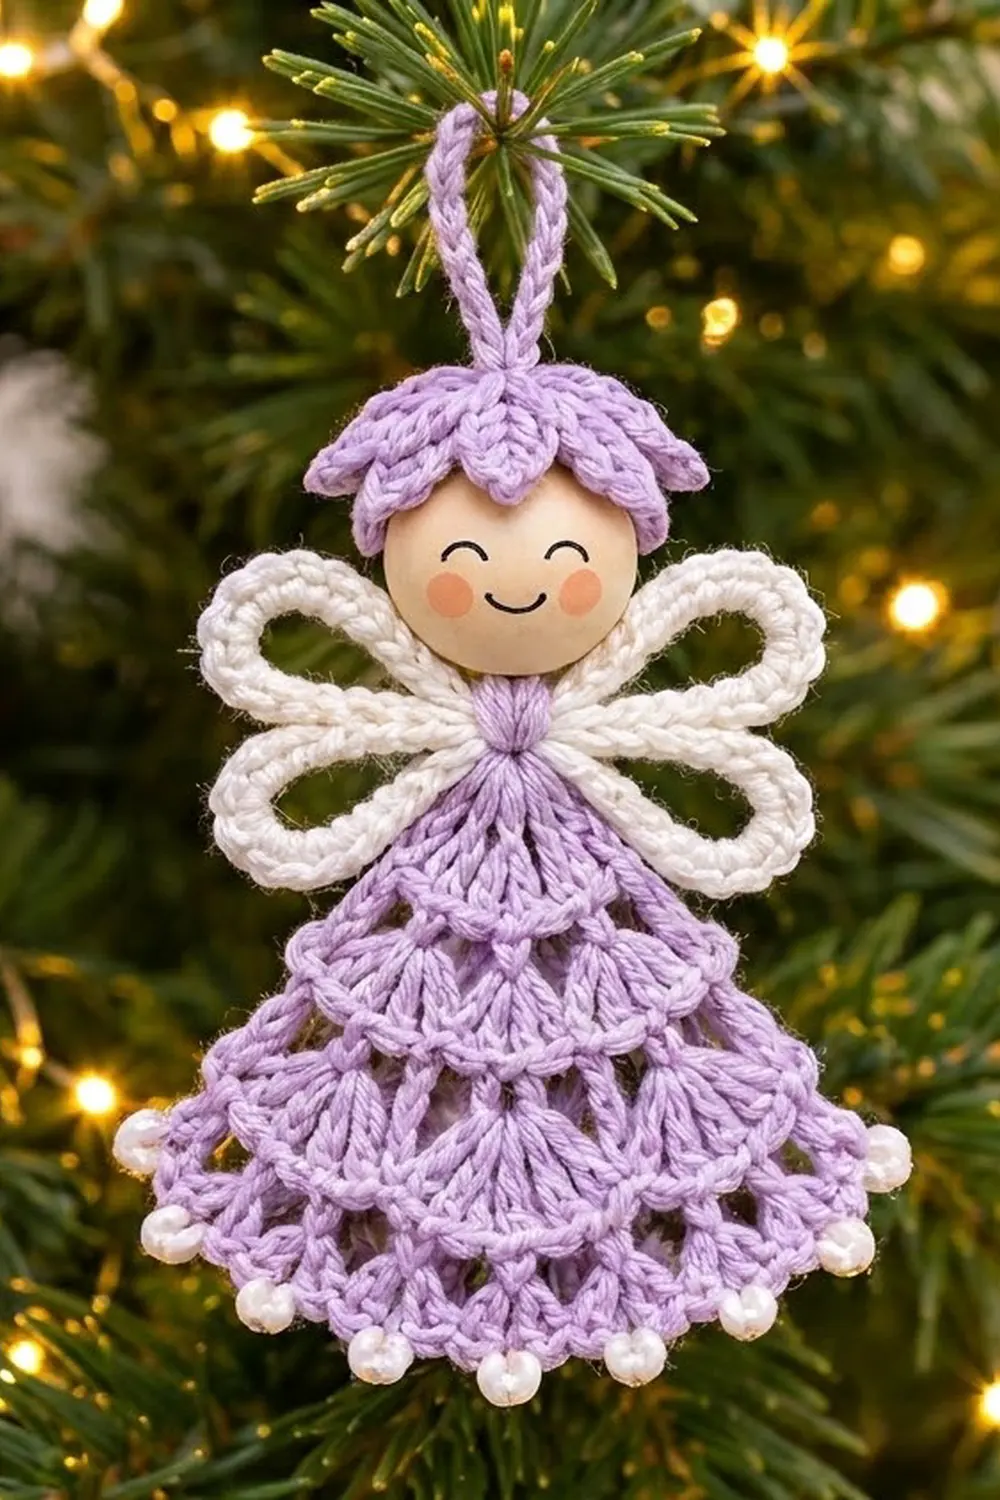
The Lavender Bell Angel is a small, lacy tree ornament with a tiered shell skirt, cream loop wings, a smiling wooden bead face, and a petal hat. Tiny white pearl beads along the hem catch the light, much like dew on a flower.
The palette is soft lavender and creamy white, with natural wood for the face. It looks vintage and delicate but is quick to make, and you can finish one in an evening. This pattern uses US crochet terms throughout.
The finished angel is 3.5 in (8.9 cm) tall from the hem to the top of the hat, or 4.5 in (11.4 cm) including the hanging loop. The skirt is 3.25 in (8.3 cm) wide at the hem, and the wingspan is 2.75 in (7.0 cm).
You crochet three small parts and add a wooden bead: a triangular skirt worked in rows from the top point, a four-loop wing piece, and a petal hat worked in the round. A slip-stitch cord threads through everything and becomes the hanging loop. The result is one single ornament.
Finished Size and Construction
- Finished size: 3.5 in (8.9 cm) tall without loop; 4.5 in (11.4 cm) with loop
- Skill level: Advanced beginner to intermediate
- Terminology: US crochet terms
- Yarn weight: Size 3 crochet thread or light fingering-weight cotton
- Hook: 2.25 mm (US B-1)
- Number of pieces: One ornament (skirt, wings, hat, cord, and wooden bead)
- Layout: Single standalone angel, no grid or joining
- Skirt size before border: 3 in (7.6 cm) wide × 2.25 in (5.7 cm) tall
- Border depth: 0.25 in (0.6 cm), on the hem only
- Skirt size after border: 3.25 in (8.3 cm) wide × 2.5 in (6.4 cm) tall
Materials
Yarn: Choose a mercerized cotton thread in size 3, or a light fingering-weight cotton of about 175 m per 50 g (about 3.5 m per gram). Mercerized cotton gives crisp shells and holds starch well.
- Lavender: 10 g (about 35 m), for the skirt, hat, cord, and wing wrap
- Cream: 3 g (about 11 m), for the wings
These quantities include a margin of roughly 25% for swatching and tails.
Tools and notions:
- 2.25 mm (US B-1) crochet hook
- 1 natural wooden bead, 16 mm (0.63 in), with a hole large enough for 2 strands of cord
- 10 white pearl beads, 4 mm (0.16 in); check that they fit your thread
- Fine beading needle or dental floss threader, for stringing beads
- Tapestry needle
- Fine black paint pen and pink colored pencil or blush, for the face
- Rust-proof pins, a blocking mat, and spray starch
- Scissors and a small dab of clear craft glue (optional)
Abbreviations (US Terms)
- ch: chain
- sl st: slip stitch
- sc: single crochet
- hdc: half double crochet
- dc: double crochet
- sp: space
- FLO: front loop only
- BLO: back loop only
- RS / WS: right side / wrong side
Special stitches:
- Shell: 7 dc worked into the same space.
- Bead-ch: Slide 1 pre-strung bead up against the hook, yarn over, and pull through, locking the bead into a single chain.
- Picot point: Ch 2, sl st in 2nd ch from hook.
- Petal: (hdc, dc, picot point, dc, hdc) worked into the same stitch.
Gauge and Checkpoints
Gauge is small but it matters, because the bead, hat, and wings must suit the skirt’s width. Work the skirt first and check it before making anything else.
Base gauge: One 7-dc shell is 0.5 in (1.3 cm) wide, and 4 rows are 1 in (2.5 cm) tall.
Checkpoints (measured flat, before blocking):
- After Row 1: the fan is 0.5 in (1.3 cm) wide.
- After Row 3: 1.25 in (3.2 cm) wide at the bottom edge.
- After Row 5: 1.75 in (4.4 cm) wide, 1.25 in (3.2 cm) tall.
- After Row 9: 3 in (7.6 cm) wide, 2.25 in (5.7 cm) tall.
If your piece is too big: go down to a 2.0 mm hook, or tighten your chain-5 spaces. If it is too small: go up to a 2.5 mm hook. Change the hook, not the stitch counts, so the shell math stays intact.
Skirt
Work in rows, starting at the top point. Turn at the end of every row. Row 1 is the RS.
Foundation: With lavender, ch 4 and sl st in the first ch to form a ring.
Row 1 (RS): Ch 1, (sc, 7 dc, sc) in ring. Turn. (1 shell, 2 sc; 9 sts)
Row 2: Ch 8 (counts as dc + ch 5), skip the first sc and the next 3 dc, sc in the center (4th) dc of the shell, ch 5, skip the last 3 dc, dc in the last sc. Turn. (2 ch-5 sps, 1 sc, 2 dc)
Row 3: Ch 1, sc in the first dc, shell in the next ch-5 sp, sc in the next sc, shell in the next ch-5 sp, sc in the 3rd ch of the turning ch-8. Turn. (2 shells, 3 sc; 17 sts)
Row 4: Ch 8 (counts as dc + ch 5), sc in the center dc of the first shell, ch 5, sc in the center dc of the next shell, ch 5, dc in the last sc. Turn. (3 ch-5 sps, 2 sc, 2 dc)
Row 5: Ch 1, sc in the first dc, [shell in the next ch-5 sp, sc in the next sc] twice, shell in the last ch-5 sp, sc in the 3rd ch of the turning ch-8. Turn. (3 shells, 4 sc; 25 sts)
Row 6: Ch 8, [sc in the center dc of the next shell, ch 5] 3 times, dc in the last sc. Turn. (4 ch-5 sps, 3 sc, 2 dc)
Row 7: Ch 1, sc in the first dc, [shell in the next ch-5 sp, sc in the next sc] 3 times, shell in the last ch-5 sp, sc in the 3rd ch of the turning ch-8. Turn. (4 shells, 5 sc; 33 sts)
Row 8: Ch 8, [sc in the center dc of the next shell, ch 5] 4 times, dc in the last sc. Turn. (5 ch-5 sps, 4 sc, 2 dc)
Row 9 (RS): Ch 1, sc in the first dc, [shell in the next ch-5 sp, sc in the next sc] 4 times, shell in the last ch-5 sp, sc in the 3rd ch of the turning ch-8. (5 shells, 6 sc; 41 sts)
Each shell row has (shells × 7) + (shells + 1) stitches, which gives 9, 17, 25, 33, and 41. Each mesh row anchors at every shell center plus both edges, so it always makes one more space than the shells above it. That is why each tier grows by exactly one shell.
Fasten off, leaving a 6 in (15.2 cm) tail. Check that the skirt is 3 in (7.6 cm) wide and 2.25 in (5.7 cm) tall.
Wings
With cream, ch 4 and sl st in the first ch to form a ring.
- Upper left loop: Ch 20, sl st in ring. Work 26 sc into the ch-20 loop, then sl st in ring.
- Lower left loop: Ch 14, sl st in ring. Work 20 sc into the ch-14 loop, then sl st in ring.
- Lower right loop: Repeat step 2.
- Upper right loop: Repeat step 1.
Fasten off, leaving an 8 in (20.3 cm) tail. (4 loops: 2 × 26 sc and 2 × 20 sc)
The sc stitches pack tightly over each chain, so each loop becomes a smooth, corded outline with an open center. Each upper loop should measure 1.25 in (3.2 cm) long and each lower loop 1 in (2.5 cm) long. The wingspan is 2.75 in (7.0 cm) from tip to tip.
Center wrap: With a 12 in (30.5 cm) length of lavender, wrap the center ring 6 times between the upper and lower loops. Knot it at the back and leave both tails for assembly.
Petal Hat
Work in the round with lavender. Do not join unless told to.
Rnd 1: Magic ring, 6 sc in ring. Leave a 1/8 in (0.3 cm) opening for the cord. (6 sts)
Rnd 2: 2 sc in each st. (12 sts)
Rnd 3 (BLO): [sc in the next st, 2 sc in the next st] 6 times. (18 sts) This leaves the 12 front loops of Rnd 2 free.
Rnd 4 (outer petals): [sl st in the next st, petal in the next st, sl st in the next st] 6 times. (6 petals, 18 sts used)
Rnd 5 (inner petals): Sl st into the first free front loop of Rnd 2. Working in the Rnd 2 front loops: [sl st in the next FL, petal in the next FL, sl st in the next FL] 4 times. (4 petals, 12 FLs used)
Fasten off and weave in the ends. The outer petals frame the bead’s top, and the four inner petals stand up as a little crown. The hat measures 1 in (2.5 cm) across, petal tip to petal tip.
Hanging Cord
With lavender, ch 31. Sl st in the 2nd ch from hook and in each remaining ch. (30 sl sts)
Fasten off. The cord measures about 3 in (7.6 cm). Fold it in half to form the loop.
Border
The border is worked on the hem only. The slanted sides keep their natural tiered lace edge.
Border gauge: 10 scallops span 3 in (7.6 cm), so each scallop is 0.3 in (0.8 cm). The border adds 0.25 in (0.6 cm) of depth.
Preparation: Using the beading needle, string all 10 pearl beads onto the lavender working yarn. With the WS facing, join the yarn with a sl st in the last sc of Row 9.
Border Row 1 (WS): Ch 1, sc in each st across. Turn. (41 sc: 41 worked 1-per-stitch + 0 added)
Border Row 2 (RS): Ch 1, sc in the first sc, [skip 1 sc, (2 dc, bead-ch, 2 dc) in the next sc, skip 1 sc, sc in the next sc] 10 times. (10 scallops, 11 sc, 40 dc, 10 bead-chs)
Fasten off and weave in the ends.
Why the math works: Each scallop repeat uses 4 stitches (skip, scallop, skip, sc), so 1 + (10 × 4) = 41. That exactly matches Row 9’s 41 stitches, and the row starts and ends with a sc at each hem corner. Border Row 1 keeps the shell tops level, so all 10 scallops sit evenly.
Final Blocking
- Weave in all ends except the skirt’s top tail and the wing-wrap tails.
- Soak the skirt and wings in cool water for 5 minutes, then press them gently in a towel.
- Pin the skirt into a triangle 3.25 in (8.3 cm) wide at the hem and 2.5 in (6.4 cm) tall. Put one pin in each shell’s center and one at each bead scallop.
- Pin the wing loops open into smooth teardrops, 2.75 in (7.0 cm) tip to tip.
- Mist with spray starch and let everything dry completely.
- Assemble: Draw the face on the bead with the paint pen and add pink cheeks. Thread both ends of the folded cord down through the hat’s center opening, then through the bead and the wing ring. Tie the cord ends and the wing-wrap tails firmly around the skirt’s top ring on the WS. Leave a 1 in (2.5 cm) loop above the hat, and add a dab of glue to the knot if you like.
Final Quality-Control Checklist
- Row 9 has 5 shells and 41 stitches.
- The hem has 10 evenly spaced scallops, each with one bead.
- The skirt measures 3.25 in (8.3 cm) × 2.5 in (6.4 cm) after blocking.
- The upper wing loops are visibly larger than the lower loops.
- The hat has 6 outer petals and 4 inner petals.
- The bead face points forward and is centered over the wings.
- The hanging loop is 1 in (2.5 cm) tall and the angel hangs straight.
Troubleshooting
- The skirt curls: Your chain-5 spaces are too tight. Loosen them, or block with more starch.
- The skirt ruffles: Your shells are too loose. Go down half a hook size.
- The beads won’t fit: Use beads with 1 mm holes or larger, or sew them on afterward at each scallop peak.
- The wing loops twist: Keep the chain untwisted before you sl st into the ring.
- The hat slides off: Tie the cord knot tighter so the hat presses down onto the bead.
- The angel hangs crooked: Recenter the cord knot on the skirt ring.
Care
Spot clean only with a damp cloth, and reshape and re-starch if needed. Store the ornament flat in tissue paper so the wings keep their shape.
Final Notes
The measurements build in a simple chain: one 0.5 in (1.3 cm) shell becomes a 3 in (7.6 cm) Row 9 with 41 stitches. The 41-stitch hem border brings the skirt to 3.25 in (8.3 cm) wide and 2.5 in (6.4 cm) tall. The 16 mm bead, 1 in (2.5 cm) hat, and 2.75 in (7.0 cm) wings are all sized to that skirt, which gives a finished angel of 3.5 in (8.9 cm), or 4.5 in (11.4 cm) with its loop. If your checkpoints match, every part will fit together neatly.
Happy crocheting!