

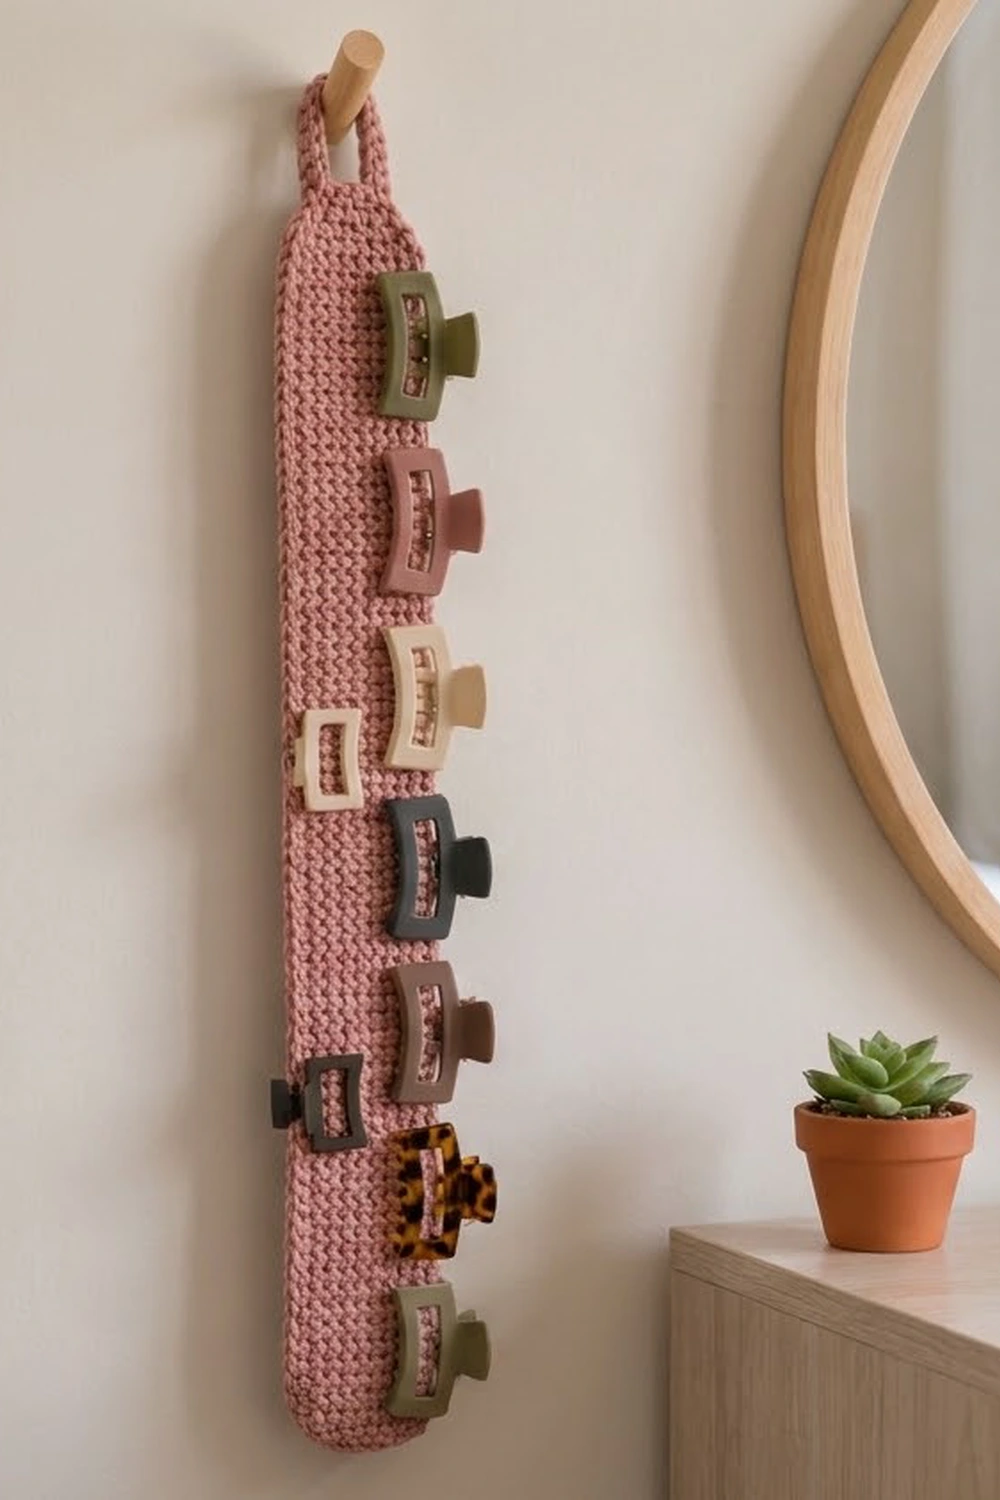
Claw clips tend to end up in the bottom of a bag or scattered across a dresser. The Rosewood Claw Clip Holder fixes that with one simple, sturdy strip that hangs on a wall peg or hook. You clip your claw clips onto its edges, and they stay in one neat column, easy to see and quick to grab.
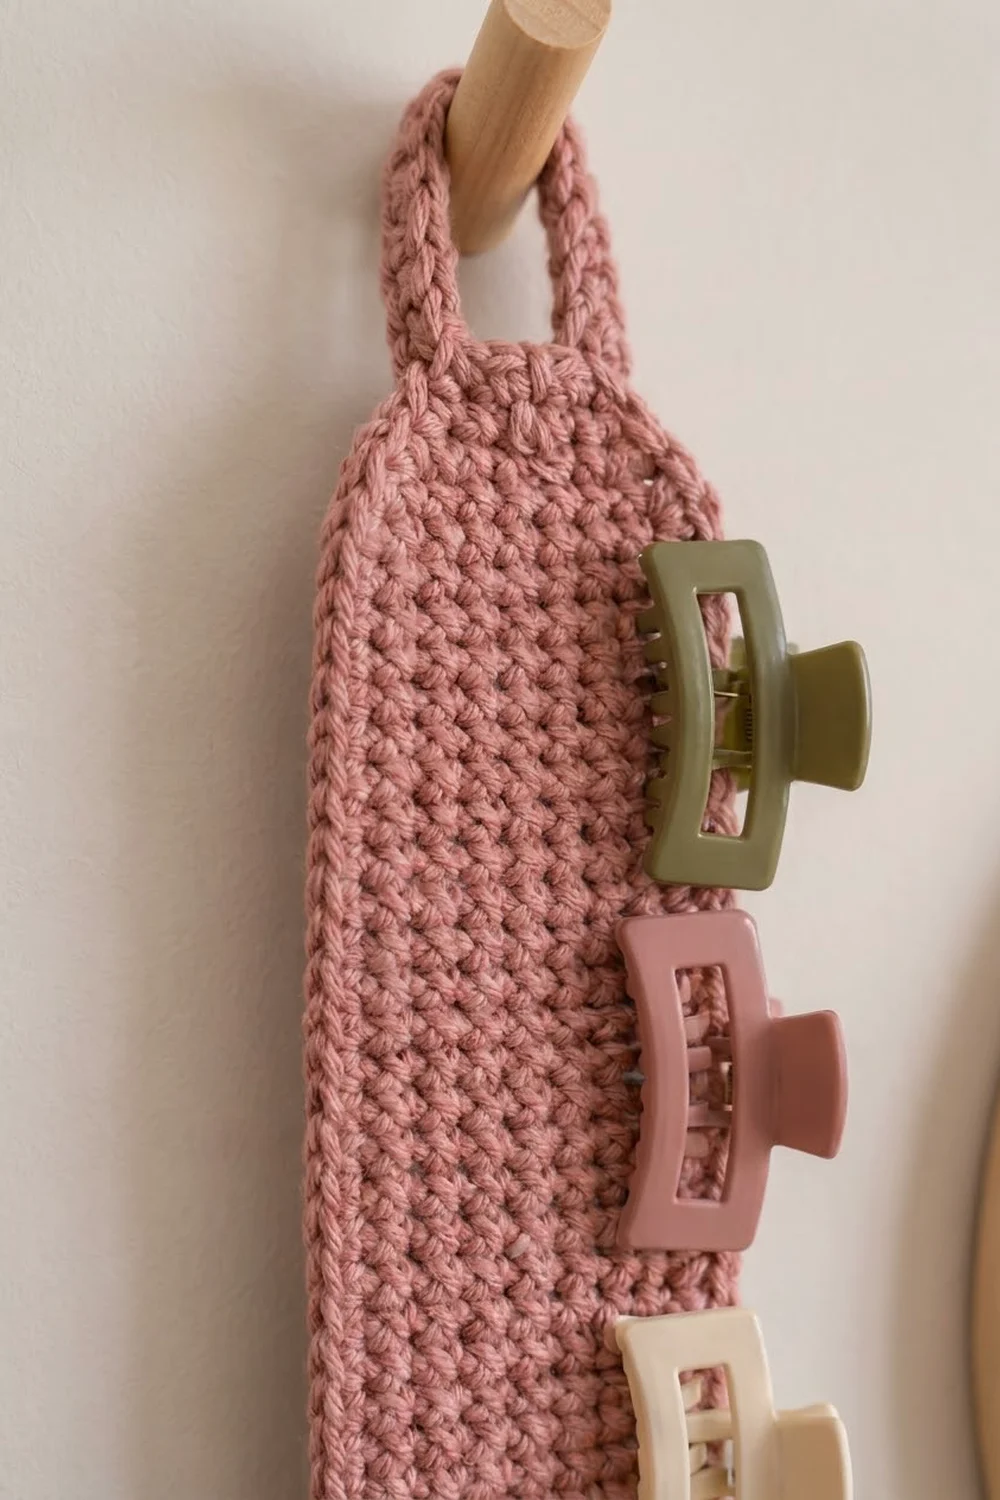
The strip is worked in a single dusty rose shade for a soft, calm look that suits a bedroom or vanity corner. The fabric is dense single crochet, so it’s firm enough to hold the weight of several clips without stretching or curling. At the top, the strip narrows with short angled shoulders into a slim strap, and that strap is folded back and stitched to make a hanging loop.
This pattern uses US crochet terms. The finished holder measures about 3.5 in (8.9 cm) wide and about 24.2 in (61.5 cm) long from the bottom edge to the top of the loop. It holds 7 to 8 standard claw clips.
It’s made as one piece. You work the body in rows from the bottom up, decrease into the strap, continue the strap, work one border round around the body, then fold and sew the loop. You don’t need to join anything or attach separate parts.
Finished Size and Construction
- Finished size: about 3.5 in (8.9 cm) wide × 24.2 in (61.5 cm) long, including the loop
- Skill level: Easy
- Terminology: US crochet terms
- Yarn weight: Worsted (#4), cotton or cotton blend
- Hook: 4.5 mm (US 7)
- Number of pieces: 1
- Layout: single vertical strip with a top hanging loop
- Body size before border: 3 in (7.6 cm) wide × 20 in (50.8 cm) long
- Shoulder taper: about 0.9 in (2.3 cm) tall
- Strap before folding: 1 in (2.5 cm) wide × 6 in (15.2 cm) long
- Finished loop: about 3 in (7.6 cm) tall
- Border depth: about 0.25 in (0.6 cm) on each edge, so the body ends up 3.5 in (8.9 cm) wide × 20.25 in (51.4 cm) long
Materials
Yarn: Use a smooth worsted-weight cotton or cotton blend. Cotton holds its shape under the pull of claw clips, and the stitches stay crisp. Acrylic also works, but it can stretch more over time. Pick a light-to-medium shade so the stitches stay easy to see while you work.
- Dusty rose: 60 g, about 105 m (115 yd)
The quantity above includes a margin of about 25% for your gauge swatch, tails, and small tension differences. The piece itself uses roughly 45 g.
Tools:
- 4.5 mm (US 7) crochet hook
- Tapestry needle
- Scissors
- 2 stitch markers
- Measuring tape or ruler
- Blocking mat and rust-proof pins
- Spray bottle with water
Abbreviations (US Terms)
- ch – chain
- sc – single crochet
- sc2tog – single crochet 2 together
- sl st – slip stitch
- st(s) – stitch(es)
- RS / WS – right side / wrong side
Special stitch – sc2tog: Insert the hook in the next st, yarn over and pull up a loop (2 loops on hook). Insert the hook in the following st, yarn over and pull up a loop (3 loops on hook). Yarn over and pull through all 3 loops. This makes 1 st from 2 sts and decreases by 1.
Turning chains: The ch 1 at the start of each row does not count as a stitch.
Gauge and Checkpoints
Gauge: 16 sc × 18 rows = 4 in (10.2 cm) in sc worked in rows.
That works out to 4 sts per inch and 4.5 rows per inch. Every measurement in this pattern comes from these two numbers, so gauge matters more here than it does for most small projects.
Test the piece first. Since this is a single strip, the first 10 rows are your gauge test. Work them, then lay the piece flat and measure:
- After Row 1: 12 sts should measure 3 in (7.6 cm) across.
- After Row 10: the piece should be 3 in (7.6 cm) wide × about 2.2 in (5.6 cm) tall.
- After Row 45: about 10 in (25.4 cm) tall.
- After Row 90: 20 in (50.8 cm) tall, before the border.
- After the strap: the strap measures 1 in (2.5 cm) wide × 6 in (15.2 cm) long.
If your piece is too big: If it’s wider than 3 in (7.6 cm), go down to a 4 mm (US G-6) hook and start again.
If your piece is too small: If it’s narrower than about 2.75 in, go up to a 5 mm (US H-8) hook.
Row height: If the width is correct but the length runs off, don’t change the hook. Work by measurement instead: continue Rows 2–90 until the body reaches 20 in (50.8 cm). In that case, recount the side border in the Border section using your actual row total.
Main Pattern: The Strip
Body
Foundation: Ch 13.
Row 1 (RS): Sc in the 2nd ch from the hook and in each ch across, turn. (12 sc)
Place a marker on the RS of Row 1. The underside of this foundation chain becomes the bottom edge for the border.
Row 2: Ch 1, sc in each st across, turn. (12 sc)
Rows 3–90: Repeat Row 2. Each row has 12 sc.
Check the edges every 10 rows. The first and last sc of each row are easy to miss, and both must be worked so the strip stays straight. If the count drops to 11, the strip will slant and narrow.
Checkpoint: The body measures 3 in (7.6 cm) × 20 in (50.8 cm). Do not fasten off.
Shoulder Taper
These four rows make the short angled shoulders that lead into the strap.
Row 91: Ch 1, sc2tog, sc in next 8 sts, sc2tog, turn. (10 sts)
Row 92: Ch 1, sc2tog, sc in next 6 sts, sc2tog, turn. (8 sts)
Row 93: Ch 1, sc2tog, sc in next 4 sts, sc2tog, turn. (6 sts)
Row 94: Ch 1, sc2tog, sc in next 2 sts, sc2tog, turn. (4 sts)
The four taper rows add about 0.9 in (2.3 cm) of height. Each side loses 1 st per row, which gives a gentle, even slope on both sides.
Strap
Row 95: Ch 1, sc in each st across, turn. (4 sc)
Rows 96–121: Repeat Row 95. Each row has 4 sc.
You’ve worked 27 strap rows in total (Rows 95–121). At 4.5 rows per inch, that’s 6 in (15.2 cm).
Checkpoint: The strap measures 1 in (2.5 cm) wide × 6 in (15.2 cm) long. Fasten off and leave a 12 in (30.5 cm) tail for sewing the loop later.
Border
The border is one round of sc that runs around the shoulders and body. It doesn’t go along the strap, so the strap stays a slim 1 in (2.5 cm) and folds neatly. The border tidies the bumpy row-ends, gives the long edges a firm rim for clips to grip, and softens the two bottom corners.
Border Gauge
Along the long sides, you’re working into row-ends. Rows are 4.5 per inch, but sc stitches are 4 per inch. To keep the edges flat, work 8 sc for every 9 row-ends. In other words, sc in 8 row-ends and then skip 1.
Border Round
With the RS facing, join the yarn with a sl st in the row-end of Row 94 on the left side, right where the strap begins.
Left shoulder: Ch 1. Working down the taper, sc in the row-ends of Rows 94, 93, 92 and 91. (4 sc)
Left side: Working down the row-ends of Rows 90 to 1, sc in each of the next 8 row-ends, skip 1 row-end; repeat from * 9 more times. (80 sc)
Bottom edge: Working along the underside of the foundation chain, 2 sc in the first ch, sc in each of the next 10 ch, 2 sc in the last ch. (14 sc)
The 2-sc increase at each corner softens it into a gentle curve instead of a sharp point.
Right side: Working up the row-ends of Rows 1 to 90, sc in each of the next 8 row-ends, skip 1 row-end; repeat from * 9 more times. (80 sc)
Right shoulder: Sc in the row-ends of Rows 91, 92, 93 and 94. (4 sc)
Total: 4 + 80 + 14 + 80 + 4 = 182 sc.
Fasten off and weave in this tail.
Why the Math Works
The body has 90 rows, so each long side has 90 row-ends. That’s 10 groups of 9 row-ends, and each group gets 8 sc, which makes 80 sc per side. At 4 sts per inch, 80 sc measure 20 in (50.8 cm). That exactly matches the 90 rows at 4.5 rows per inch. The border fits the edge without stretching it or making it wavy.
The bottom edge has 12 foundation stitches, which is 3 in (7.6 cm). The 2 extra corner stitches only round off the corners. Because the border adds about 0.25 in (0.6 cm) on each edge, the body grows to about 3.5 in (8.9 cm) wide × 20.25 in (51.4 cm) long.
Forming the Hanging Loop
- Lay the strip WS up.
- Fold the strap backward onto itself so that Row 121 meets the base of the strap at Row 95.
- Thread the 12 in (30.5 cm) tail onto the tapestry needle.
- Whipstitch the 4 sts of Row 121 to the back loops of the 4 sts of Row 95. Go through each stitch twice so the seam can hold weight.
- Stitch down each side of the doubled strap for about 0.5 in (1.3 cm) to strengthen the base.
- Weave the tail into the doubled section and trim it.
The folded strap gives a loop about 3 in (7.6 cm) tall with an opening of about 2.5 in (6.4 cm). That fits most wooden pegs and wall hooks.
Final Blocking
- Weave in all remaining tails along the WS, going through the stitches rather than along the edge.
- Lightly mist the strip with water until it’s damp, not soaked.
- Lay it RS up on a blocking mat.
- Pin the bottom edge to 3.5 in (8.9 cm) wide.
- Pin each long side straight, keeping the body at 3.5 in (8.9 cm) wide along its whole length. Measure every few inches.
- Pin the body length to about 20.25 in (51.4 cm). Don’t stretch it beyond that, because the strip needs to stay dense.
- Shape the shoulders into even, matching slopes.
- Lay the loop flat without pinning it tight.
- Let it dry completely, at least 12 hours, before you unpin it.
Final Quality-Control Checklist
- Every body row has 12 sc, and the edges are straight with no slant.
- The taper went from 12 to 10, 8, 6, then 4 sts, and both shoulders match.
- The strap has 4 sc in each of its 27 rows and measures 6 in (15.2 cm).
- The border has 182 sc in total: 4 + 80 + 14 + 80 + 4.
- The long edges lie flat, without ruffling or pulling in.
- The bottom corners are softly rounded and look the same.
- The loop seam is double-stitched and doesn’t move when you tug on it.
- The finished holder is 3.5 in (8.9 cm) wide and about 24.2 in (61.5 cm) long.
- All tails are woven in and hidden on the WS.
Troubleshooting
The strip is getting narrower as it grows. You’re missing the last stitch of some rows. Count every 10 rows, and mark the last stitch if you need to.
The strip is getting wider. You’re working into the turning chain. The ch 1 doesn’t count, so skip it.
The border ruffles along the sides. You’re working too many stitches into the row-ends. Check that you skip 1 row-end after every 8 sc.
The border pulls the edge inward. You’re working too few stitches, or your tension is too tight. Loosen up, or work the border with a 5 mm (US H-8) hook.
The shoulders look uneven. Make sure each taper row starts and ends with an sc2tog. Blocking will fix small differences.
The loop stretches over time. Use cotton yarn, and double-stitch the seam. You can also run a second line of whipstitches across the base.
Clips slide down the strip. The fabric is too loose. Remake it with a smaller hook for denser stitches.
Care
Hand wash in cool water with mild soap, then press out the water in a towel. Lay the holder flat to dry, reshaping it to 3.5 in (8.9 cm) wide.
Final Notes
The whole holder follows one measurement chain:
- 12 sc make a 3 in (7.6 cm) wide body.
- 90 rows make 20 in (50.8 cm) of length.
- Four taper rows bring the width down to a 4-st strap, 1 in (2.5 cm) wide.
- 27 strap rows make 6 in (15.2 cm), which folds into a 3 in (7.6 cm) loop.
- An 8-sc-per-9-row-ends border adds about 0.25 in (0.6 cm) on each edge, for a finished holder of 3.5 in (8.9 cm) × about 24.2 in (61.5 cm).
Check your gauge after Row 10 and count often, and the strip will come out straight and firm. Hang it on a peg, clip on your collection, and enjoy a tidier vanity.
Happy crocheting!