

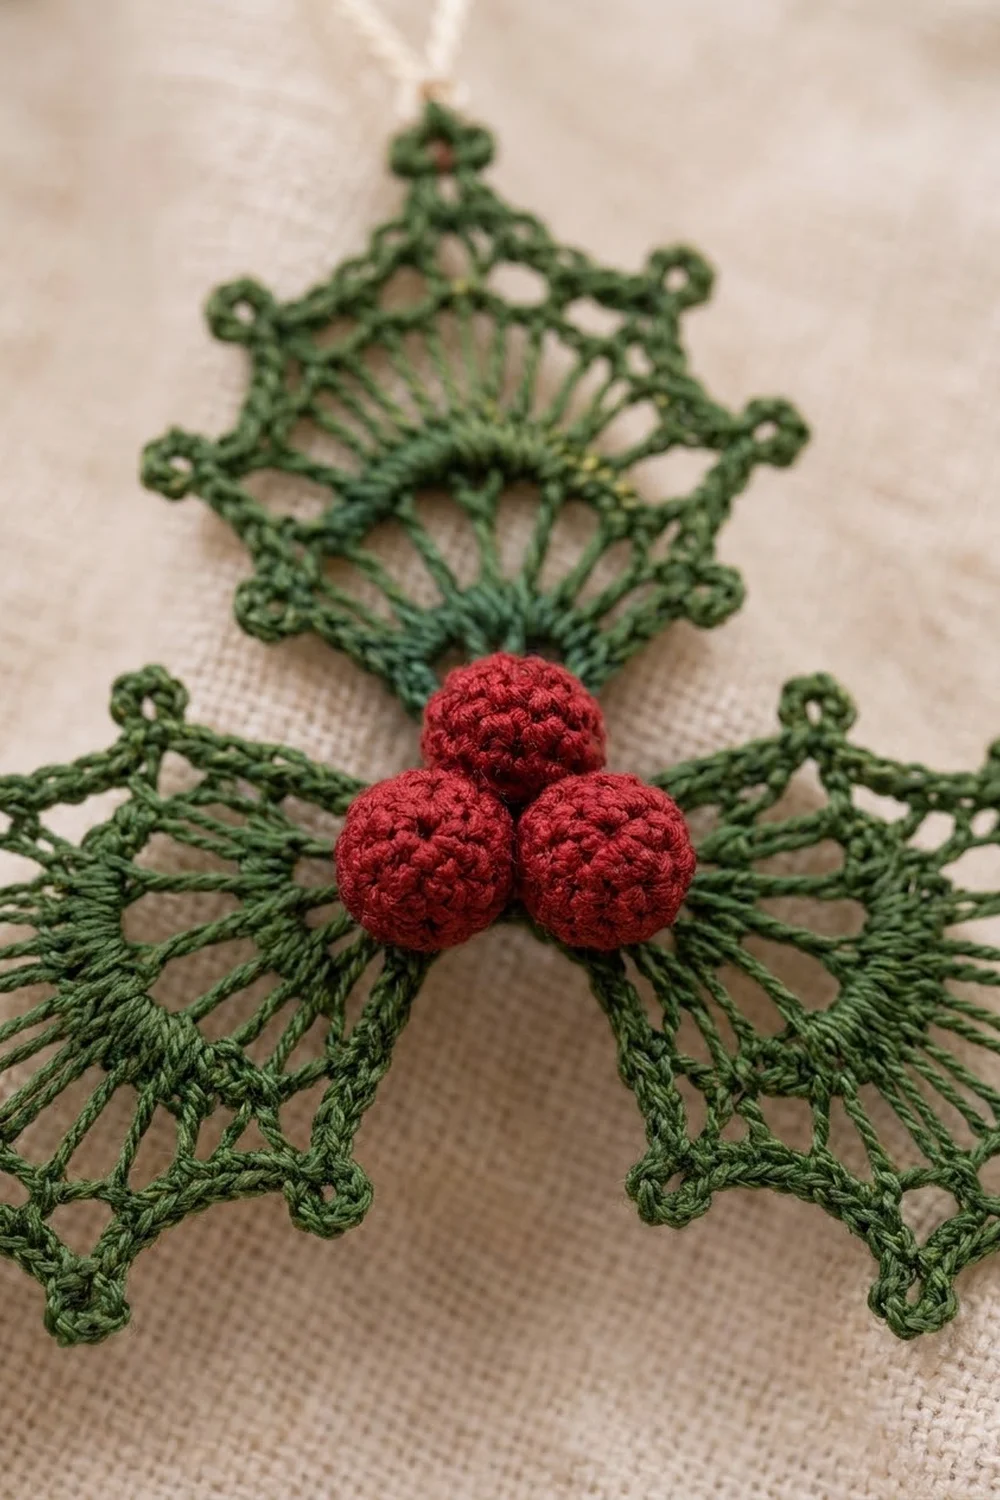
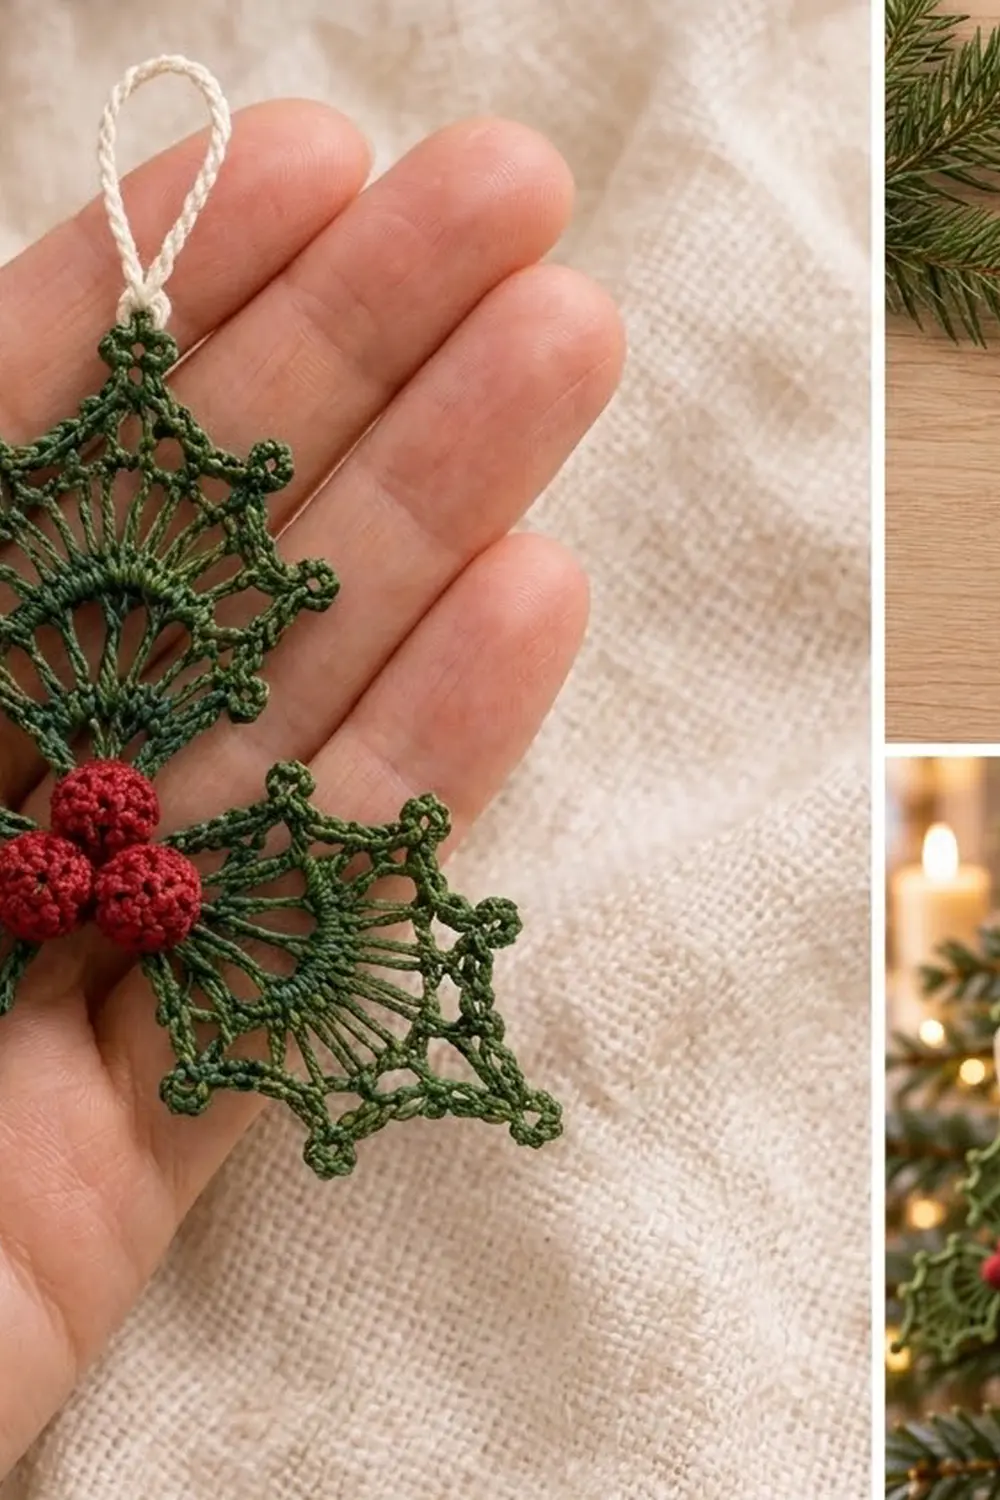
This lace holly ornament is made from three openwork leaves joined at one center point, with three round red berries and a cream hanging loop. Each leaf starts as a small fan of radiating spokes and crosses a solid arched band. It then opens into a lacy mesh and ends with an edging of picot points that gives it a spiky holly outline.
The colors are classic: deep evergreen for the leaves, cranberry red for the berries, and soft cream for the loop. Worked in size 10 cotton thread, the ornament is light and crisp. It works on a tree, a gift package, or in a window.
The pattern uses US crochet terms. The finished, blocked ornament measures about 3.5 in (8.9 cm) wide and 3.25 in (8.3 cm) tall. The hanging loop adds about 1.25 in (3.2 cm) above that.
Here’s how it comes together:
– Crochet three leaves in rows from a tiny base ring, and edge each one.
– Block each leaf into a 120-degree wedge.
– Whipstitch the bases together.
– Sew three stuffed berries over the join and add a slip-stitch cord loop.
Finished Size and Construction
- Finished size: 3.5 in (8.9 cm) wide x 3.25 in (8.3 cm) tall, plus a 1.25 in (3.2 cm) loop
- Skill level: Intermediate (thread crochet, picots, small-scale shaping)
- Terminology: US crochet terms
- Yarn weight: Size 10 mercerized cotton crochet thread (Lace, weight 0)
- Hook: 1.5 mm (US steel 8)
- Number of pieces: 7 (3 leaves, 3 berries, 1 hanging loop)
- Layout: 3 leaves radiating from one center at 120-degree intervals, one tip pointing up
- Leaf size (blocked): 1.75 in (4.4 cm) from base to tip picot, 2.25 in (5.7 cm) wide
- Leaf size before edging: about 1 in (2.5 cm) tall at center and 2 in (5.1 cm) across the straight edge, unblocked
- Edging depth: about 0.25 in (0.6 cm) along the arc, about 0.125 in (0.3 cm) along the sides
- Berry size: about 0.375 in (1.0 cm) in diameter
Materials
Choose a firmly twisted, mercerized size 10 cotton thread. It shows the stitches clearly, holds a picot, and takes starch well. Avoid soft or fuzzy fibers, which blur the lace and let the points droop.
- Evergreen (Color A), leaves: 5 g, about 25 m (27 yd)
- Cranberry red (Color B), berries: 1 g, about 5 m (5.5 yd), plus a few short scraps for stuffing
- Cream (Color C), hanging loop: 1 g, about 3 m (3.3 yd)
The quantities include a margin for a test leaf, sewing tails, and one ripped-out attempt.
Tools:
- 1.5 mm (US steel 8) crochet hook
- Fine tapestry needle that fits size 10 thread
- Rustproof pins and a foam blocking board
- Fabric stiffener or spray starch
- Ruler, plus a paper template with three lines at 120 degrees
- Small scissors and a stitch marker
Abbreviations (US Terms)
- ch chain
- sl st slip stitch
- sc single crochet
- hdc half double crochet
- dc double crochet
- tr treble crochet
- sc2tog single crochet 2 together
- sk skip
- sp(s) space(s)
- MR magic ring
- st(s) stitch(es)
Picot: Ch 3, sl st in 3rd ch from hook. Picots are never counted as stitches in this pattern.
Gauge and Checkpoints
Gauge controls whether the three leaves fit neatly around the center. Make one complete leaf first and measure it before you make the other two.
- After Row 1: the fan measures about 0.3 in (0.8 cm) from the ring center to the top of the dc.
- After Row 3: the straight edge measures about 1.25 in (3.2 cm) across, and the fan is about 0.6 in (1.5 cm) tall at the center.
- After Row 5: the straight edge measures about 2 in (5.1 cm) across, and the fan is about 1 in (2.5 cm) tall.
- After the edging, unblocked: about 1.5 in (3.8 cm) from base to tip picot.
- After blocking: 1.75 in (4.4 cm) from base to tip picot and 2.25 in (5.7 cm) wide.
If the leaf is more than 0.25 in (0.6 cm) too big after Row 5, switch to a 1.25 mm (US steel 10) hook. If it’s that much too small, switch to a 1.75 mm (US steel 6) hook. If only the mesh rows are off, look at your chains. They should be even and relaxed, not pulled tight or left loose.
Leaf (Make 3)
With Color A, ch 4, sl st in first ch to form a ring.
Row 1 (base fan): Ch 3 (counts as dc), 9 dc in ring. Turn. (10 dc)
The stitches cover only half of the ring, and that’s correct. The open half becomes the base point of the leaf.
Row 2 (spokes): Ch 4 (counts as dc + ch 1), dc in next dc, ch 1 8 times, dc in top of beginning ch-3. Turn. (10 dc, 9 ch-1 sps)
Row 3 (solid arched band): Ch 1, sc in first dc, sc in next ch-1 sp, sc in next dc 9 times, working the last sc in the 3rd ch of the turning ch-4. Turn. (19 sc: 10 sc worked 1 per dc + 9 sc added in the ch-1 sps)
Row 4 (outer spokes): Ch 5 (counts as dc + ch 2), sk next sc, dc in next sc, ch 2, sk next sc, dc in next sc 8 times. Turn. (10 dc, 9 ch-2 sps)
Check: the dc land in sc 1, 3, 5, and so on up to sc 19, so the last dc is in the last sc.
Row 5 (loop row): Ch 1, sc in first dc, ch 5, sc in next dc 9 times, working the last sc in the 3rd ch of the turning ch-5. (10 sc, 9 ch-5 loops)
Don’t turn and don’t fasten off. Go straight to the Edging section below and work the edging before you make the next leaf. Number the loops 1 to 9 in the order you’ll work them. Loop 5 is the center loop and becomes the leaf tip.
Make All Pieces
Berries (Make 3)
With Color B:
Rnd 1: 6 sc in MR, and pull the ring closed tightly. (6 sc)
Rnd 2: 2 sc in each st around. (12 sc)
Rnd 3: Sc in each st around. (12 sc)
Roll a few scraps of Color B into a tiny ball and push it inside. Red stuffing won’t show through the stitches the way white fiberfill would.
Rnd 4: Sc2tog 6 times. (6 sc)
Fasten off, leaving a 6 in (15.2 cm) tail. Thread the tail through the front loops of the last 6 sts and pull tight. Keep the tail for sewing. Firm, tight sc give the berry its pebbly, beaded surface.
Hanging Loop (Make 1)
With Color C, ch 26. Sl st in the back bump of the 2nd ch from hook and of each ch across. (25 sl st)
Fasten off, leaving a 6 in (15.2 cm) tail. The cord is about 2.5 in (6.4 cm) long and twists naturally as you work. Folded in half, it makes a 1.25 in (3.2 cm) loop.
Piece Count and Layout
- Color A: 3 leaves
- Color B: 3 berries
- Color C: 1 hanging loop
            [ Loop ]
           [ Leaf 1 ]
         tip pointing up
               (B)
            (B)   (B)
  [ Leaf 2 ]         [ Leaf 3 ]
  tip down-left      tip down-right
Joining
Block all three leaves (see Final Blocking) before joining. Blocked leaves fit together much more accurately.
Lay the leaves right side up on your template. Put the base rings at the center and the tips on the three 120-degree lines. Each leaf’s right side edge now lies against the next leaf’s left side edge.
Method: Whipstitch with a 12 in (30.5 cm) strand of Color A.
Stitch-to-stitch logic: Join only the lowest 4 sc of each side edge: the 2 sc in the Row 1 end and the 2 sc in the Row 2 end.
– Match the sc in pairs: Row 1 to Row 1, and Row 2 to Row 2.
– That’s 4 whipstitches per seam and 3 seams, so 12 whipstitches in total.
– Above Row 2, the sides stay free. The side picots stand out as separate holly points, with a small notch between each pair of leaves.
Finish by passing the needle through all three base sl sts and drawing them snugly together at the center.
Tension: Pull each whipstitch just enough to close the gap. If you pull harder, the bases pucker and the leaves cup forward.
Size checkpoint: The joined ornament should measure 3.5 in (8.9 cm) wide and 3.25 in (8.3 cm) tall. If it’s narrower, the seams are probably too tight or include more than 4 sc.
Berries: Sew the three berries in a tight triangle over the center so they cover the seams. Put one slightly above center and two below. Pass each tail through the leaf bases and back up through its berry twice.
Loop: Fold the cord in half. Sew both ends to the back of Leaf 1, just behind the tip picot, so the loop rises straight up.
Edging
The edging is each leaf’s border. Work it in one continuous round straight after Row 5, while the leaf is still on your hook.
Edging gauge: About 9 sc = 1 in (2.5 cm) along the row ends. The arc edging adds about 0.25 in (0.6 cm) at each point.
Side A (down to the base): Working in row ends, 2 sc around the end of Row 4, picot, 1 sc in the end of Row 3, 2 sc around the end of Row 2, 2 sc around the end of Row 1, sl st in ring. (7 sc, 1 picot)
Side B (up from the base): 2 sc around the end of Row 1, 2 sc around the end of Row 2, 1 sc in the end of Row 3, picot, 2 sc around the end of Row 4. (7 sc, 1 picot)
Arc: Skip the Row 5 sc and work into the loops only.
- Loop 1 (point): (2 sc, hdc, dc, picot, dc, hdc, 2 sc). (8 sts, 1 picot)
- Loop 2 (valley): 5 sc. (5 sts)
- Loop 3 (point): As Loop 1. (8 sts, 1 picot)
- Loop 4 (valley): 5 sc. (5 sts)
- Loop 5 (tip): (2 sc, hdc, dc, tr, picot, tr, dc, hdc, 2 sc). (10 sts, 1 picot)
- Loop 6 (valley): 5 sc. (5 sts)
- Loop 7 (point): As Loop 1. (8 sts, 1 picot)
- Loop 8 (valley): 5 sc. (5 sts)
- Loop 9 (point): As Loop 1. (8 sts, 1 picot)
Sl st in the last sc of Row 5. Fasten off and weave in the ends.
Arc total: 4 points x 8 = 32 sts, 4 valleys x 5 = 20 sts, and the tip’s 10 sts, for 62 sts and 5 picots.
Leaf edging total: 7 + 7 + 62 = 76 sts and 7 picots, plus 1 sl st at the base.
Why the math works:
– A ch-5 loop lies flat with about 5 sts in it, so the 5-sc valleys stay flat and slightly scooped.
– Each point loop holds 8 sts of increasing height. The extra stitches push the loop outward into a point.
– The tip loop holds 10 sts, including two tr, so it makes the tallest point.
– Along the sides, 2 sc per dc row end and 1 sc per sc row end keep the edges straight for joining.
Final Blocking
- Weave in all the ends on the leaves.
- Draw a template: a dot with three lines at 120 degrees, each 1.75 in (4.4 cm) long. Cover it with plastic wrap.
- Soak the leaves in cool water for 10 minutes, then roll them in a towel to remove the excess water.
- Pin each leaf as a 120-degree wedge. Put the base ring on the dot and the tip picot at the end of a line, and keep the side edges straight.
- Pin out all 7 picots, one pin per picot, angled outward.
- Brush fabric stiffener over the leaves, or spray them with starch until damp.
- Let them dry completely, at least 6 hours.
- Unpin the leaves and check them against the checkpoints. Then join them and add the berries and loop.
Final Quality-Control Checklist
- Each leaf has 10 dc in Rows 1, 2, and 4, 19 sc in Row 3, and 9 loops in Row 5.
- Each edging has 76 sts and 7 picots.
- All 21 picots are open and crisp.
- Each leaf measures 1.75 in (4.4 cm) long and 2.25 in (5.7 cm) wide.
- Each of the 3 seams joins exactly 4 pairs of sc.
- The berries are firm and round, and they cover the center join.
- The loop is centered behind Leaf 1’s tip, and the ornament hangs straight.
- The ornament measures 3.5 in (8.9 cm) by 3.25 in (8.3 cm).
Troubleshooting
Fan ruffles in Row 2 or Row 4: The chain spaces are too loose. Use one hook size smaller for the chains.
Fan cups in Row 3: You probably skipped a ch-1 sp. Recount to 19 sc.
Points look rounded: Check that each point loop holds all 8 sts, and pin the picots outward while drying.
Leaves overlap at the center: Block each leaf to a 120-degree wedge, not a half circle.
Berry stuffing shows: Use only red scraps, and close Rnd 4 tightly.
Ornament tilts when hung: Move the loop so it sits exactly behind the tip picot.
Care
Spot clean with cool water and a little mild soap, then reshape and re-starch if needed. Store the ornament flat in a box with tissue so the picots don’t get crushed.
Final Notes
The measurements build in a short chain:
– After Row 3, the leaf measures 1.25 in (3.2 cm) across.
– After Row 5, it measures 2 in (5.1 cm) across.
– The edged leaf blocks to 1.75 in (4.4 cm) by 2.25 in (5.7 cm).
– Three leaves joined at 120 degrees make a 3.5 in (8.9 cm) by 3.25 in (8.3 cm) ornament.
– The berries and a 1.25 in (3.2 cm) loop finish it.
Check each stage, and the leaves will fit together the first time.
Happy crocheting!