

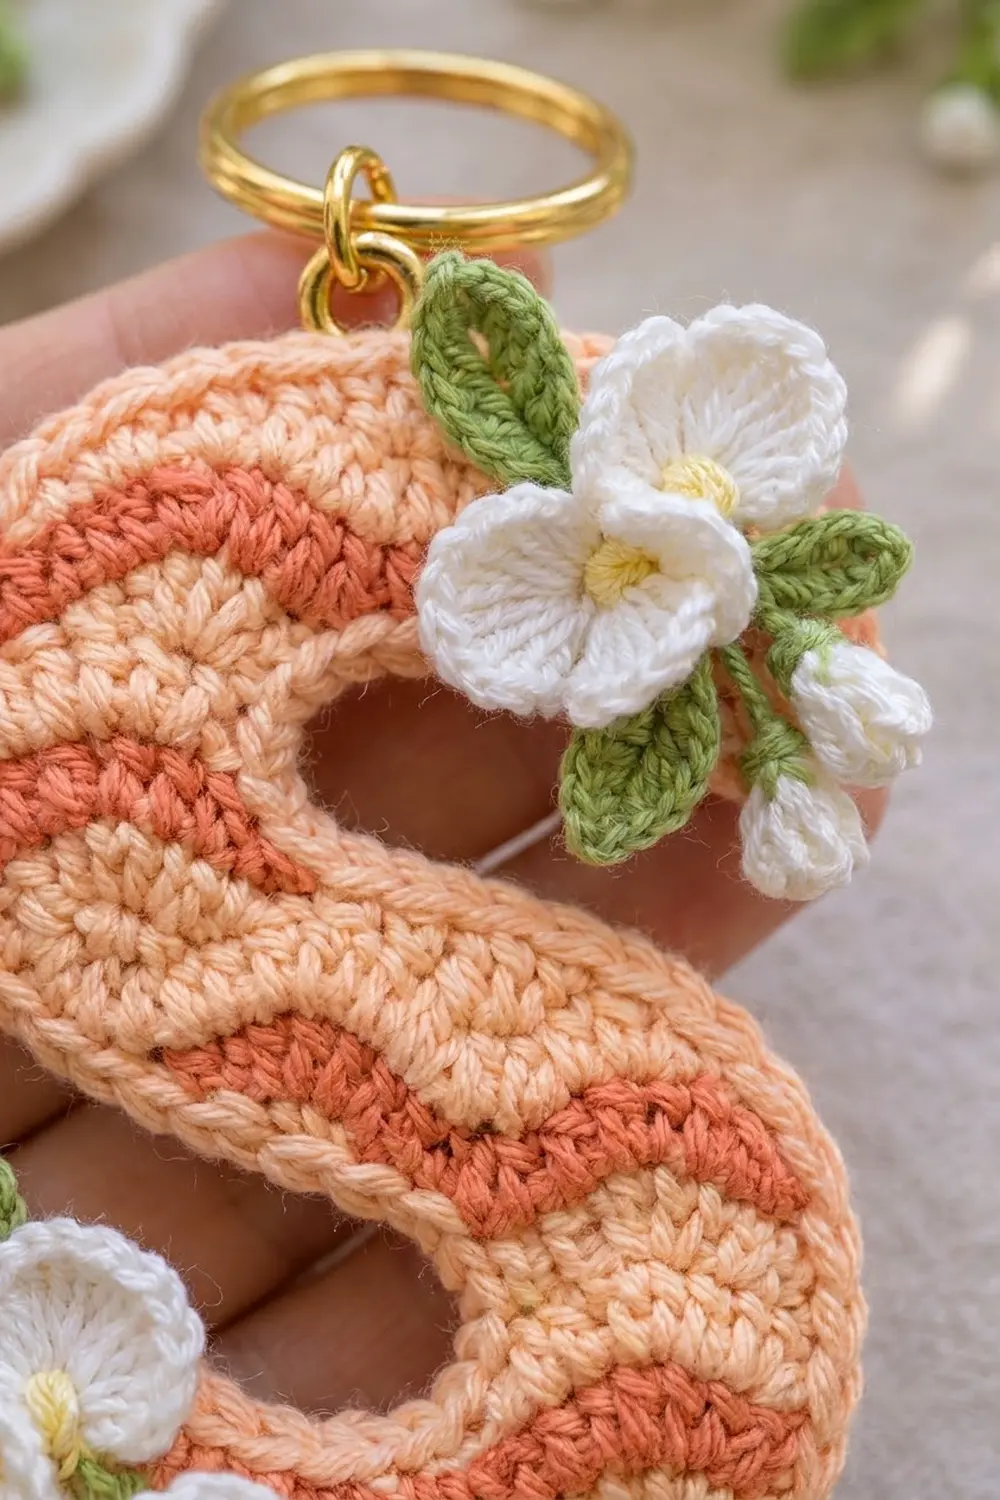
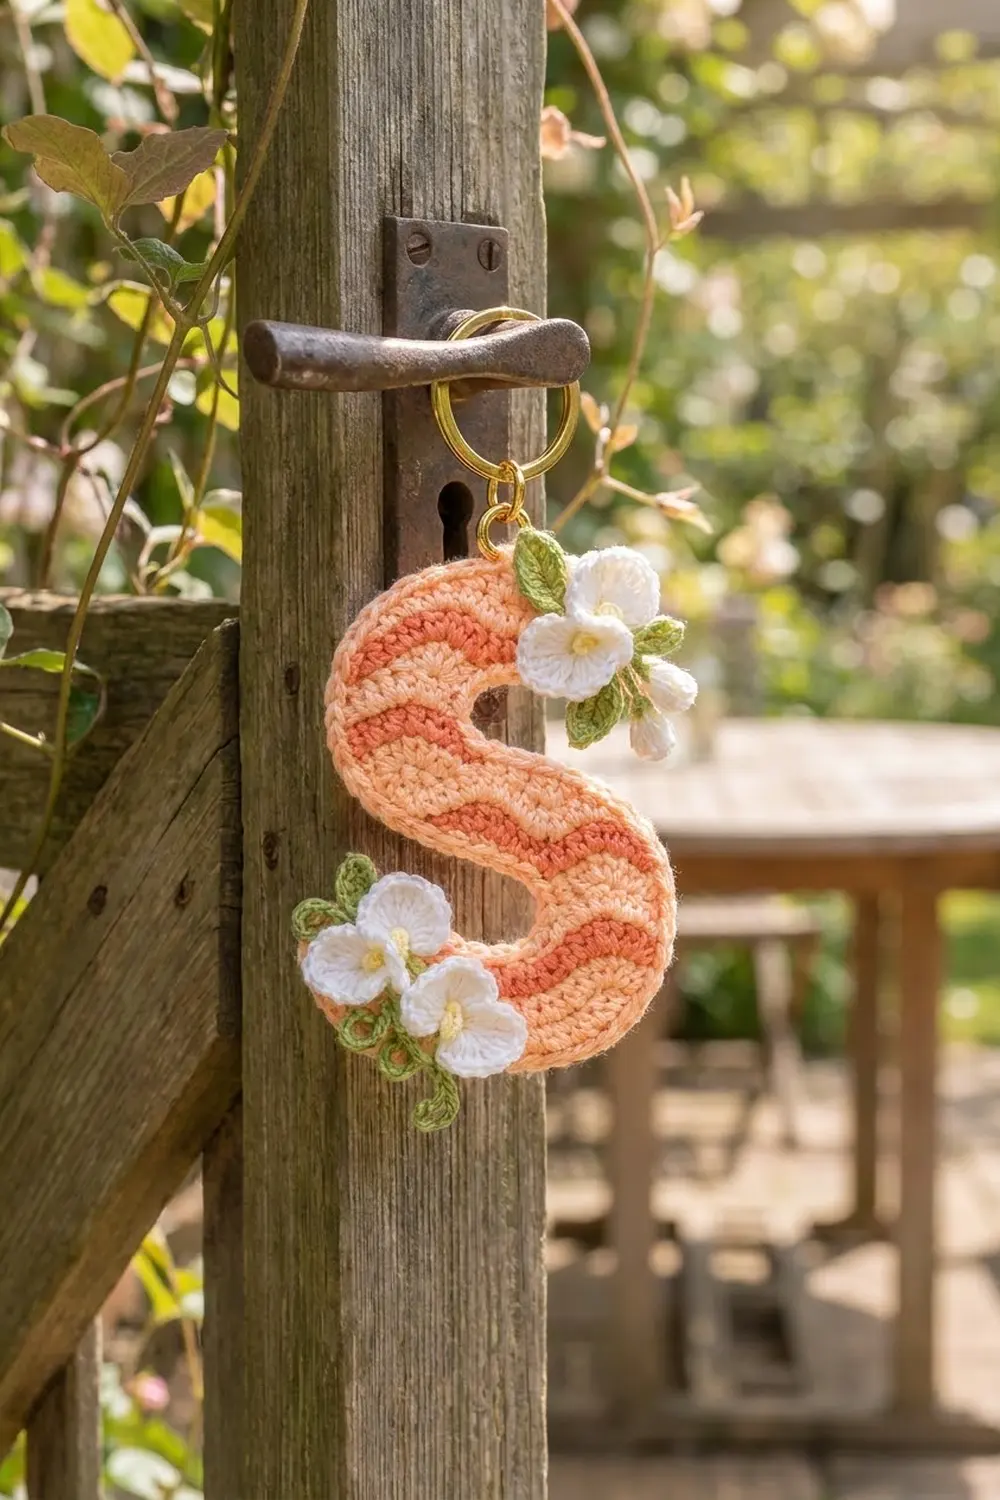
This letter S keychain is a small, flat piece with soft wavy stripes that follow the curves of the letter. A coral wave runs through peach rows, and two small clusters of white blossoms, green leaves, and curly tendrils sit on the top and bottom ends. A gold split ring at the top makes it a keychain, a bag charm, or a door-handle tag.
The colors are peach, coral, white, leaf green, and a touch of buttery yellow for the flower centers.
The pattern uses US crochet terms. The finished letter is 4.5 in (11.4 cm) tall and 3.25 in (8.3 cm) wide, and each stroke of the letter is 1.25 in (3.2 cm) wide.
You crochet one foundation chain along the centerline of the S, then work rounds around both sides of it. Increases on the outer curves and decreases on the inner curves bend the strip into an S. Changing color each round makes the wavy stripes. You finish with a single crochet border, then make and sew on the small flowers, buds, leaves, and tendrils.
Finished Size and Construction
- Finished size: 4.5 in (11.4 cm) tall x 3.25 in (8.3 cm) wide, not counting the ring
- Skill level: Intermediate (simple stitches, careful counting)
- Terminology: US crochet terms
- Yarn weight: Sport (#2) cotton
- Hook: 2.75 mm (C-2)
- Number of pieces: 1 letter piece, plus small sewn-on appliqués
- Layout: Single flat letter S; one blossom cluster at the top end, one at the bottom end
- Stroke width before border: 1 in (2.5 cm)
- Size before border: 4.25 in (10.8 cm) x 3 in (7.6 cm)
- Border depth: 0.125 in (0.3 cm) on each edge
Materials
Pick a smooth, mercerized sport-weight cotton, about 50 g / 155 m per ball. Cotton gives the waves clear edges and keeps the keychain firm.
- Peach (MC): 8 g / 25 m, for Rounds 1, 3, and 4
- Coral (CC1): 4 g / 12 m, for Round 2
- White (CC2): 3 g / 9 m, for the flowers and bud
- Leaf green (CC3): 2 g / 6 m, for the leaves and tendrils
- Pale yellow (CC4): 1 g / 3 m, for the flower centers
These amounts include a small margin for gauge swatches and weaving in.
Tools:
– 2.75 mm (C-2) crochet hook
– Tapestry needle
– 4 locking stitch markers
– Gold split keyring, 1 in (2.5 cm), with an 8 mm jump ring
– Flat-nose pliers
– Blocking mat, rust-proof pins, and a spray bottle
– Paper and pencil for an S template
Abbreviations (US Terms)
- ch – chain
- sl st – slip stitch
- sc – single crochet
- hdc – half double crochet
- dc – double crochet
- sc2tog – single crochet 2 together: [insert hook in next st, yo, pull up a loop] twice, yo, pull through all 3 loops
- hdc2tog – half double crochet 2 together: [yo, insert hook in next st, yo, pull up a loop] twice, yo, pull through all 5 loops
- st(s) – stitch(es)
- Rnd – round
- MC / CC – main color / contrast color
Special stitch – 4-dc cluster: [Yo, insert hook in the indicated st, yo, pull up a loop, yo, pull through 2 loops] 4 times in the same st, yo, pull through all 5 loops on hook.
Gauge and Checkpoints
Gauge: 22 sc and 24 rows = 4 in (10.2 cm) with a 2.75 mm hook.
The letter is only one piece, so treat Round 1 as your test. If it is the wrong length, start again now.
- After Rnd 1: a straight strip 8.5 in (21.6 cm) long and 0.4 in (1.0 cm) wide.
- After Rnd 2: the strip is 0.75 in (1.9 cm) wide and starts to bend in two directions.
- After Rnd 3: the S shape is clear. It measures 4.25 in (10.8 cm) x 3 in (7.6 cm), and the stroke is 1 in (2.5 cm) wide.
- After Rnd 4: 4.5 in (11.4 cm) x 3.25 in (8.3 cm), and the stroke is 1.25 in (3.2 cm) wide.
If the strip is too long, go down a hook size (2.5 mm). If it is too short, go up a hook size (3.0 mm). Do not change the chain count, because the section math depends on it.
Pattern: The Letter S
The S is made from three sections along each side of the center chain:
- Curve A: 20 sts (the top bowl)
- Spine: 6 sts (the diagonal center)
- Curve B: 20 sts (the bottom bowl)
On Side 1, Curve A is on the outside of its curve and Curve B is on the inside. On Side 2 it is the other way around. That reversal is what makes an S.
Cap X is the top end of the letter and Cap Y is the bottom end.
Round 1 (Peach)
Ch 49.
Sc in 2nd ch from hook (Cap X, first st), sc in next 46 ch (Side 1), 3 sc in last ch (Cap Y). Rotate the strip and work along the free loops on the other side of the chain: sc in next 46 ch (Side 2), 2 sc in the same ch as the first sc (Cap X, last 2 sts). Join with sl st to first sc.
(98 sts: 46 per side + 3 per cap.)
Place markers on Side 1 in the 1st st (start of Curve A), 21st st (start of the Spine), and 27th st (start of Curve B). Place one more marker in the 1st st of Side 2 (start of Curve B on that side). Fasten off.
Round 2 (Coral – wave round)
Join coral with sl st in the first st of Side 1. Ch 1 (does not count as a st).
- Side 1, Curve A (outer): [sc in next st, hdc in next st, 2 dc in next st, hdc in next st] 5 times. (20 base sts become 25 sts.)
- Side 1, Spine: sc, hdc, dc, hdc, sc, hdc. (6 sts.)
- Side 1, Curve B (inner): [sc in next st, hdc in next st, dc in next st, hdc2tog] 4 times. (20 base sts become 16 sts.)
- Cap Y: 2 hdc in each of next 3 sts. (6 sts.)
- Side 2, Curve B (outer): [sc, hdc, 2 dc in next st, hdc] 5 times. (25 sts.)
- Side 2, Spine: sc, hdc, dc, hdc, sc, hdc. (6 sts.)
- Side 2, Curve A (inner): [sc, hdc, dc, hdc2tog] 4 times. (16 sts.)
- Cap X: 2 hdc in each of the last 3 sts. (6 sts.)
Join with sl st to first sc. Fasten off.
(106 sts: 47 per side + 6 per cap.)
Each side is 25 + 6 + 16 = 47. The changing stitch heights make the coral wave. Move the markers up to the first st of each section.
Round 3 (Peach – leveling round)
This round puts tall stitches above the low points of the wave and short stitches above the high points, so the edge comes out level.
Join peach with sl st in the first st of Side 1. Ch 1.
- Side 1, Curve A (outer): [2 dc in sc, hdc in hdc, sc in each of next 2 dc, hdc in hdc] 5 times. (25 sts become 30 sts.)
- Side 1, Spine: dc in sc, hdc, sc in dc, hdc, dc in sc, hdc. (6 sts.)
- Side 1, Curve B (inner): [dc in sc, hdc in hdc, sc2tog over the next 2 sts] 4 times. (16 sts become 12 sts.)
- Cap Y: [hdc in next st, 2 hdc in next st] 3 times. (9 sts.)
- Side 2, Curve B (outer): work as Side 1, Curve A. (30 sts.)
- Side 2, Spine: work as Side 1, Spine. (6 sts.)
- Side 2, Curve A (inner): work as Side 1, Curve B. (12 sts.)
- Cap X: [hdc, 2 hdc in next st] 3 times. (9 sts.)
Join with sl st to first st. Do not fasten off.
(114 sts: 48 per side + 9 per cap.)
Each side is 30 + 6 + 12 = 48. Lay the piece flat. If your letter reads backward, flip it over. Both faces are neat, so choose the one that reads as an S for the front.
Border
Round 4 (Peach – single crochet border)
Border gauge: 5.5 sc per 1 in (2.5 cm), the same as the main gauge. Ch 1.
- Side 1, Curve A (outer): [sc in next 9 sts, 2 sc in next st] 3 times. (30 + 3 = 33 sts.)
- Side 1, Spine: sc in each st. (6 + 0 = 6 sts.)
- Side 1, Curve B (inner): sc in next 4 sts, sc2tog, sc in next 4 sts, sc2tog. (12 − 2 = 10 sts.)
- Cap Y: [sc in next 2 sts, 2 sc in next st] 3 times. (9 + 3 = 12 sts.)
- Side 2: work as Side 1. (33 + 6 + 10 = 49 sts.)
- Cap X: [sc in next 2 sts, 2 sc in next st] 3 times. (9 + 3 = 12 sts.)
Join with sl st to first sc. Fasten off.
(122 sts: 49 per side + 12 per cap.)
Why the math works: The trim round works 1 sc into each of the 114 sts. It then adds 6 at the caps and 6 on the outer curves, and takes away 4 on the inner curves: 114 + 6 + 6 − 4 = 122. Each outer edge ends up at 33 sts, which is about 6 in (15.2 cm). Each inner edge is 10 sts, about 1.8 in (4.6 cm). That difference is what lets the curves lie flat without ruffling or cupping. The border adds 0.125 in (0.3 cm) to every edge, which takes the letter from 4.25 in x 3 in (10.8 cm x 7.6 cm) to 4.5 in x 3.25 in (11.4 cm x 8.3 cm).
Flowers, Bud, Leaves, and Tendrils
Four-Petal Flower (make 5, white)
Make a magic ring.
Rnd 1: Ch 1, 8 sc in the ring. Pull the ring closed and join. (8 sts.)
Rnd 2: [(hdc, dc, dc, hdc) in next st, sl st in next st] 4 times. Join. (20 sts: 4 petals of 4 sts + 4 sl sts.)
Fasten off, leaving a 6 in (15.2 cm) tail for sewing. Each flower is about 0.9 in (2.3 cm) across. With yellow, work 3 French knots (2 wraps each) close together in the center.
Bud (make 1, white)
Ch 3. Work a 4-dc cluster in the 3rd ch from hook, ch 2, sl st in the same ch. Fasten off, leaving a tail. The bud is about 0.4 in (1.0 cm) long.
Leaf (make 5, green)
Ch 7.
Sc in 2nd ch from hook, hdc in next ch, dc in next 2 ch, hdc in next ch, sc in last ch. (6 sts.)
Ch 1. Working along the free loops on the other side: sc in the first ch, hdc, dc in next 2 ch, hdc, sc. (6 sts.) Sl st in the tip.
(12 sts.) Each leaf is about 0.75 in (1.9 cm) long.
Tendril (make 2, green)
Ch 10. Work 2 sc in 2nd ch from hook and in each ch across. (18 sc.) The strip twists into a spiral about 1 in (2.5 cm) long.
Assembly
Make the clusters in layers. Sew the leaves down first, then the flowers on top, then the small details.
Top cluster, on Cap X and the start of Curve A:
1. Sew 3 leaves in a fan, with their tips pointing out from the letter.
2. Overlap 2 flowers across the bases of the leaves.
3. Tuck the bud under the edge of the lower flower so that it hangs just past the border.
Bottom cluster, on Cap Y:
1. Sew 2 leaves under the cluster.
2. Overlap 3 flowers in a loose triangle.
3. Tack both tendrils under the lowest flower so that they curl below the letter.
Sew through the back loops of the flowers so the stitches don’t show. Open the jump ring with pliers, pass it through the center of Cap X on Round 4, add the split ring, and close the jump ring.
Final Blocking
- Before you add any appliqués, draw an S 4.5 in (11.4 cm) tall and 3.25 in (8.3 cm) wide with 1.25 in (3.2 cm) strokes.
- Put the paper under a sheet of plastic on the blocking mat.
- Lay the letter on top with the front facing up, and match the outline.
- Pin the outer curves first, then the caps, then the inner curves.
- Mist the letter evenly until it is damp, but not soaked.
- Ease the wave stripes so they look smooth, and press the border flat with your fingers.
- Let it dry completely, at least 6 hours, before you unpin it.
- Block the flowers flat on their own, gently cupping each petal.
Final Quality-Control Checklist
- Round counts are 98, 106, 114, and 122.
- Each side is 46, 47, 48, and 49 sts across the rounds.
- The finished letter is 4.5 in x 3.25 in (11.4 cm x 8.3 cm).
- The stroke is 1.25 in (3.2 cm) wide all the way along.
- The coral wave is visible on both sides of the center peach stripe.
- The border lies flat, with no ruffles on the outer curves.
- All ends are woven in on the back.
- The appliqués are sewn down firmly and the jump ring is fully closed.
Troubleshooting
- Outer curve ruffles: You may have added too many increases. Recount Rnd 3 (30 sts per outer curve).
- Inner curve pulls tight: Your decreases may be too firm. Loosen your tension on sc2tog and hdc2tog.
- Letter looks like a Z: The curves are not bending enough. Check that the outer increases are on Curve A for Side 1 and Curve B for Side 2.
- Wave is faint: Make sure every dc is fully pulled up to its height before you finish it.
- Flowers flop: Add a tacking stitch under each petal.
Care
Hand wash in cool water with mild soap, press out the water in a towel, and dry flat. Keep the metal ring away from bleach.
Final Notes
Everything follows from one measurement chain. At 22 sc to 4 in (10.2 cm), Round 1 makes a strip 8.5 in (21.6 cm) long. Three shaping rounds turn it into a 4.25 in x 3 in (10.8 cm x 7.6 cm) S. The border adds 0.125 in (0.3 cm) on every edge, for a finished size of 4.5 in x 3.25 in (11.4 cm x 8.3 cm).
Happy crocheting!