

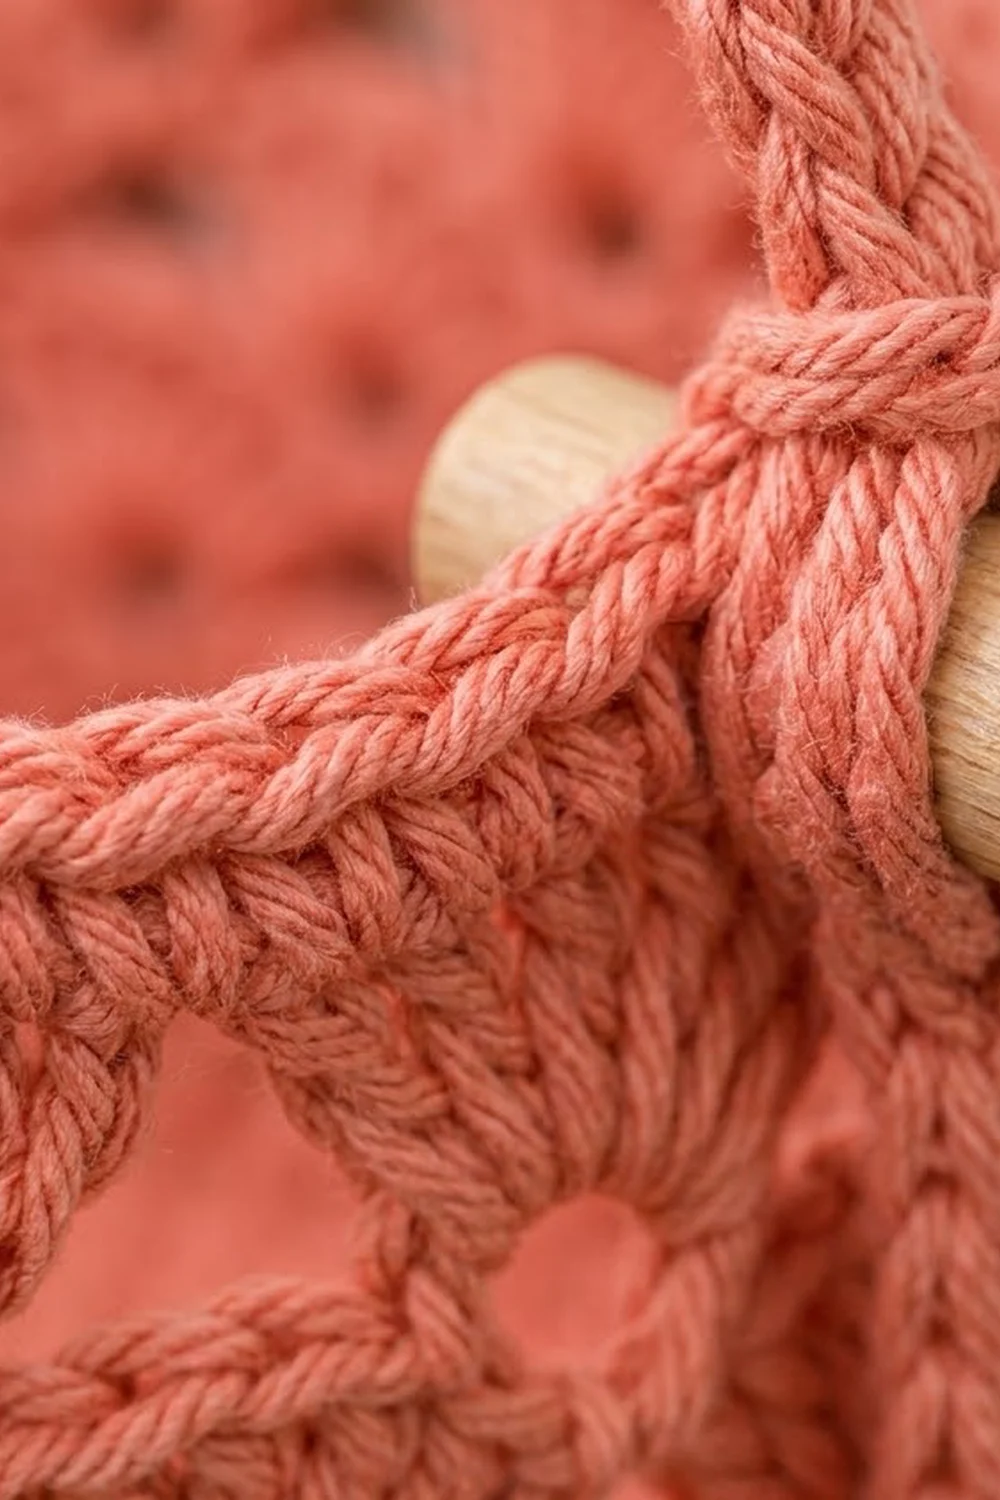
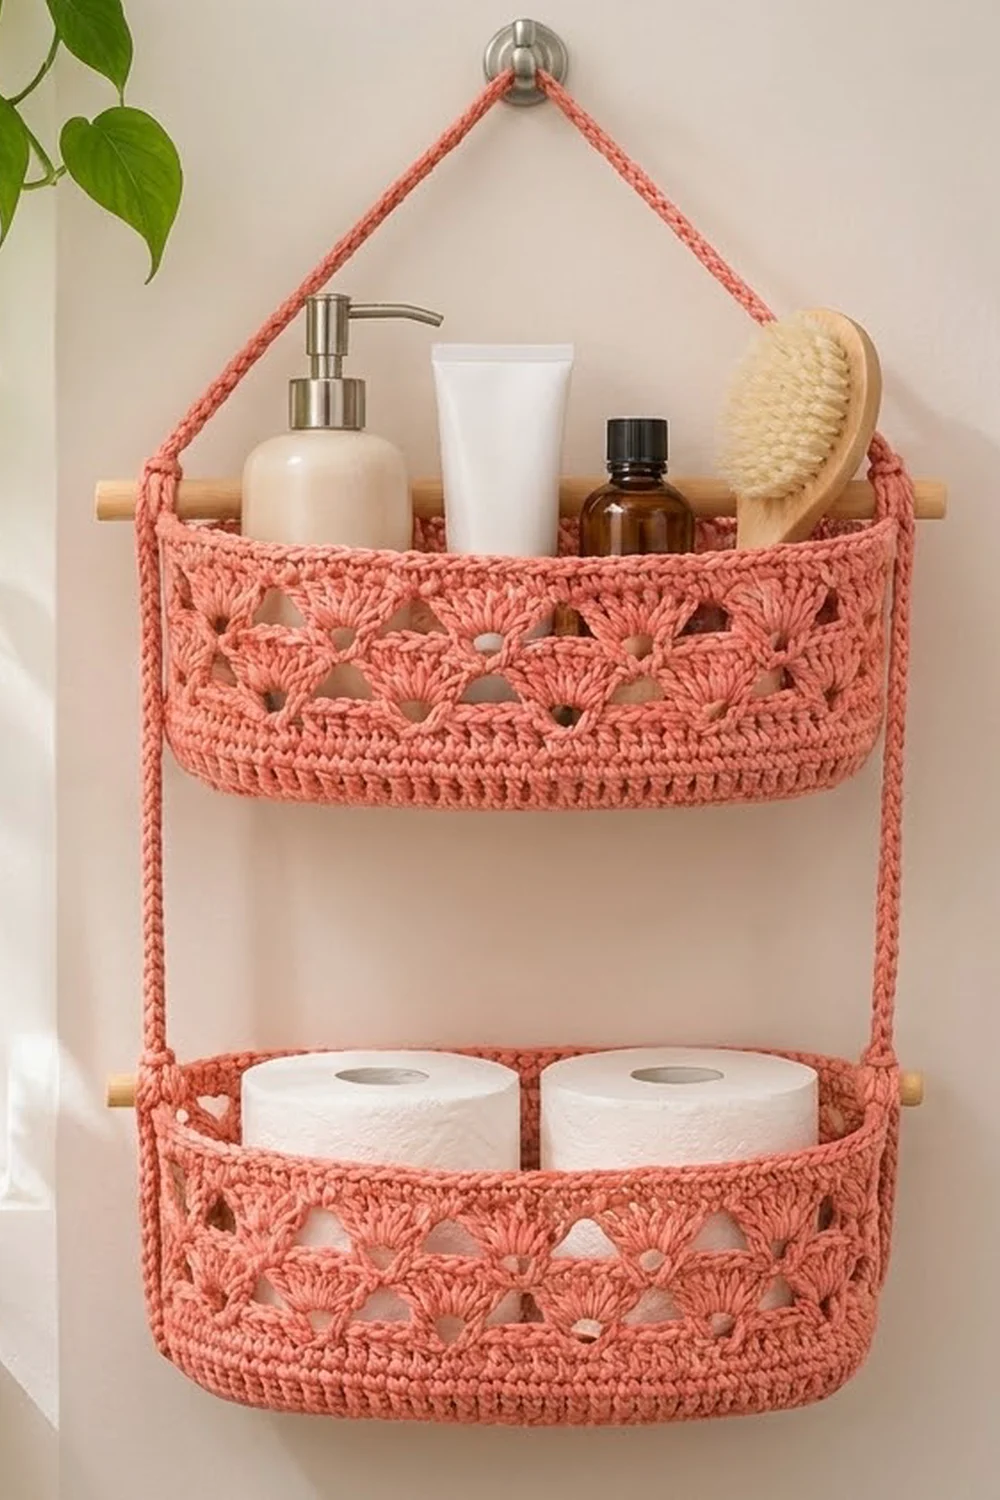
The Coral Cascade organizer is two oval baskets that hang one above the other on soft crocheted cords. Each basket has a solid oval base, a ribbed lower band, a deep band of offset lace fans and a firm rim with a rope edge. A wooden dowel runs along the top back of each basket and carries the weight.
The whole piece uses one warm coral cotton. The fan lace lets light through but still holds its shape, so it suits a bathroom, nursery or craft corner. The lower basket holds two toilet rolls, and the upper one holds bottles, tubes and a brush.
This pattern uses US crochet terms. Each basket measures 9.5 in (24.1 cm) long, 4.5 in (11.4 cm) wide and 4.5 in (11.4 cm) tall. The assembled organizer hangs about 21.5 in (54.6 cm) from the hook to the bottom of the lower basket.
Construction is simple. Crochet the oval base in joined rounds and turn up the wall with a back-loop round. Then add ribbing and four lace rounds, and finish with rim rounds that include two dowel eyelets. Make two baskets and three slip-stitch cords, then tie everything onto the dowels.
Finished Size and Construction
- Basket size: 9.5 in (24.1 cm) long x 4.5 in (11.4 cm) wide x 4.5 in (11.4 cm) tall
- Hanging length: about 21.5 in (54.6 cm), hook to bottom of lower basket
- Skill level: Easy-Intermediate
- Terminology: US
- Yarn weight: Worsted (#4) cotton
- Hook: 5 mm (H-8)
- Number of pieces: 2 baskets, 2 connector cords and 1 hanging cord, plus 2 dowels
- Layout: 2 baskets stacked vertically in 1 column
- Piece size (one basket): 9.5 in x 4.5 in x 4.5 in (24.1 cm x 11.4 cm x 11.4 cm)
- Size before rim (border): 9.5 in x 4.5 in x 3.5 in (24.1 cm x 11.4 cm x 8.9 cm)
- Rim (border) depth: 1 in (2.5 cm)
Materials
Choose a smooth worsted-weight cotton or cotton blend. Cotton holds the basket shape, copes well with bathroom humidity and shows the fan stitches clearly. Avoid very soft acrylic, which lets the walls slump.
- Coral cotton, worsted weight: 280 g, about 475 m (520 yd)
Quantities include a margin of about 10 percent for gauge checks and tails.
Tools:
- 5 mm (H-8) crochet hook
- 2 wooden dowels, 0.375 in (1.0 cm) diameter, 12 in (30.5 cm) long
- 1 sturdy wall hook
- 4 stitch markers
- Tapestry needle
- Scissors and tape measure
- Spray bottle and towels for blocking
Abbreviations (US Terms)
- ch – chain
- sl st – slip stitch
- sc – single crochet
- hdc – half double crochet
- dc – double crochet
- BLO – back loop only
- sp – space
- st(s) – stitch(es)
- rsc – reverse single crochet (crab stitch)
Special stitches:
- Shell: 5 dc in the same stitch.
- Reverse sc (rsc): Work from left to right (if you are right-handed). Insert the hook in the next st to the right, yarn over and pull up a loop, then yarn over and pull through both loops.
- Center dc: the 3rd dc of a 5-dc shell.
Beginning ch-1 and ch-2 do not count as stitches.
Gauge and Checkpoints
- Sc gauge: 14 sts and 16 rounds = 4 in (10.2 cm)
- Hdc: 1 round = 0.375 in (1.0 cm)
- Lace gauge: 2 lace rounds = 1.25 in (3.2 cm); 15 shells around
Make one complete basket before starting the second. It is your real gauge test.
Checkpoints:
- After Rnd 5: base about 2.5 in (6.4 cm) wide and 7.5 in (19.1 cm) long
- After Rnd 9: base 4.5 in (11.4 cm) wide and 9.5 in (24.1 cm) long, 90 sts
- After Rnd 12: wall 1 in (2.5 cm) tall
- After Rnd 16: wall 3.5 in (8.9 cm) tall
- After Rnd 20: wall 4.5 in (11.4 cm) tall; rim circumference about 25.7 in (65.3 cm)
If your base is too big by more than 0.25 in (0.6 cm), go down half a hook size. If it is too small, go up half a size. Do not change the stitch counts, because the 90-stitch total sets the lace repeat.
Basket (Make 2)
Base
Work in joined rounds. Each round has two straight sides of 18 sts and two curved ends.
Rnd 1: Ch 21. Work 3 sc in 2nd ch from hook (end A), sc in next 18 ch, then 3 sc in last ch (end B). Working along the opposite side of the foundation chain, sc in next 18 ch. Join with sl st to first sc. (42 sts: 18 + 18 straight, 3 + 3 at the ends)
Rnd 2: Ch 1, [2 sc in next st] 3 times, sc in next 18 sts, [2 sc in next st] 3 times, sc in next 18 sts. Join. (48 sts; 6 per end)
Rnd 3: Ch 1, [sc in next st, 2 sc in next st] 3 times, sc in next 18 sts, [sc in next st, 2 sc in next st] 3 times, sc in next 18 sts. Join. (54 sts; 9 per end)
Rnds 4–9: Continue the same way. Work each end as [sc in next X sts, 2 sc in next st] 3 times, where X is one more than in the round before. The straight sides stay at 18 sts.
- Rnd 4: X = 2. (60 sts; 12 per end)
- Rnd 5: X = 3. (66 sts; 15 per end)
- Rnd 6: X = 4. (72 sts; 18 per end)
- Rnd 7: X = 5. (78 sts; 21 per end)
- Rnd 8: X = 6. (84 sts; 24 per end)
- Rnd 9: X = 7. (90 sts; 27 per end)
Check: 18 + 27 + 18 + 27 = 90. Each round adds 6 sts, 3 at each end, which keeps the base flat.
Wall
Rnd 10 (turning round): Ch 1, sc in BLO of each st around. Join. (90 sts)
The unused front loops form a crisp ridge, and the wall starts to rise.
Rnds 11–12: Ch 2, hdc in each st around. Join. (90 sts)
These two rounds make the ribbed lower band.
Fan Lace
Each lace repeat uses 6 sts, so 90 / 6 = 15 repeats.
Rnd 13: Ch 1, *sc in next st, ch 2, skip 2 sts, shell in next st, ch 2, skip 2 sts; repeat from * 14 more times. Join to first sc. (15 shells, 15 sc, 30 ch-2 sps)
Rnd 14: Sl st in next ch-2 sp, then sl st in next 3 dc. You are now in the center dc of the first shell. Ch 1 and sc in same st. *Ch 2, skip ch-2 sp, shell in next sc, ch 2, skip ch-2 sp, sc in center dc of next shell; repeat from * 13 more times. Ch 2, shell in next sc, ch 2. Join to first sc. (15 shells, 15 sc, 30 ch-2 sps)
The new shells sit above the previous sc, so the fans stagger like scales. The ch-2 spaces leave triangular openings between them.
Rnds 15–16: Repeat Rnd 14. (15 shells, 15 sc, 30 ch-2 sps each round)
Rim (Border)
The rim brings the lace back to a solid 90-st edge and adds the dowel eyelets.
Rim gauge: 14 sc = 4 in (10.2 cm), so 90 sc measure about 25.7 in (65.3 cm), the same as the base perimeter. This is why the wall stays straight.
Rnd 17 (conversion round): Ch 1, *sc in next sc, sc in next ch-2 sp, skip 1st dc of shell, sc in next 3 dc, skip 5th dc, sc in next ch-2 sp; repeat from * 14 more times. Join.
- Count per repeat: 1 (sc) + 1 (sp) + 3 (dc) + 1 (sp) = 6 sts
- Total: 15 x 6 = 90 sts
Lay the basket flat to read the sides: front 18 + back 18 + two ends of 27 = 90. Choose one long side as the back. On each curved end, place a marker in the end stitch next to the back straight side.
Rnd 18 (eyelet round): Ch 1 and sc around. At each end, work ch 3 and skip the 3 end sts closest to the back corner, including the marked st. Join. (84 sc + 2 ch-3 sps)
Per side: back 18, front 18, and each end 24 sc + 1 ch-3 sp.
Rnd 19: Ch 1, sc in each sc and 3 sc in each ch-3 sp. Join.
- Count: 84 (one per existing sc) + 6 (3 in each sp) = 90 sts
- Per side: 18, 27, 18, 27
Rnd 20: Ch 1, rsc in each st around. Join. (90 rsc)
Fasten off and weave in the ends. The rsc round gives the twisted rope edge on the rim.
Make All Pieces
Baskets: Make 2 in coral, about 115 g (195 m) each.
Connector cords (make 2): Ch 65. Sl st in back bump of 2nd ch from hook and each ch across. (64 sl sts) Length is 16 in (40.6 cm). Fasten off, leaving 8 in (20.3 cm) tails at both ends.
Hanging cord (make 1): Ch 97. Sl st in back bump of 2nd ch from hook and each ch across. (96 sl sts) Length is 24 in (61.0 cm). Leave 8 in (20.3 cm) tails at both ends.
Cord gauge: 4 ch = 1 in (2.5 cm). The three cords use about 25 g (45 m) together.
Layout (front view):
          [ wall hook ]
             /     \
     hanging cord (V shape)
           /         \
 o==[ BASKET 1 (upper) ]==o
 |                        |
 connector          connector
 |                        |
 o==[ BASKET 2 (lower) ]==o
Each “o” is a dowel end with a cord wrapped around it.
Joining
Method: Wrap each cord end around a dowel end and stitch it in place.
- Dowels: From inside each basket, push a dowel through both eyelets. The dowel rests along the inner back rim and sticks out 1.25 in (3.2 cm) beyond each end.
- Connectors, top: Wrap the top 3 in (7.6 cm) of a connector cord tightly around one upper dowel end, between the basket wall and the tip. Sew the tail through each cord stitch the wrap covers, one tail stitch per cord stitch, so the wrap cannot unwind. Repeat on the other side.
- Connectors, bottom: Wrap the bottom 3 in (7.6 cm) of each connector around the matching lower dowel end in the same way. This leaves 10 in (25.4 cm) of free cord between the dowels.
- Hanging cord: Wrap 3 in (7.6 cm) at each end around the outer part of the upper dowel ends, on top of the connector wraps. The free 18 in (45.7 cm) folds into a V with 9 in (22.9 cm) per leg.
- Anchor: Sew each wrap to the nearest rim stitch with two small stitches so the cords stay vertical.
Tension: Pull the wraps snug, but not so tight that they distort the eyelet. Both connectors must have the same free length, or the lower basket will tilt.
Size checkpoint: Hang the organizer empty and check these measurements:
- The upper dowel sits about 7 in (17.8 cm) below the hook.
- The gap between the baskets is about 5.5 in (14.0 cm).
- The total drop is about 21.5 in (54.6 cm).
Final Blocking
- Before attaching the cords, spray each basket until it is damp.
- Stuff it firmly with a rolled towel, or slip it over a box about 9.5 in x 4.5 in (24.1 cm x 11.4 cm).
- Pinch each fan open and line the openings up in straight diagonals.
- Press the rim flat and keep the eyelets open with the dowel in place.
- Let it dry completely, about 24 hours.
- Remove the stuffing, then attach the cords.
Final Quality-Control Checklist
- Base lies flat with no ripples or cupping
- Rnd 10 ridge runs evenly around the base
- Every lace round has 15 shells
- Rnds 17, 19 and 20 each have 90 sts
- Eyelets sit at the two back corners, level with each other
- Both dowels stick out 1.25 in (3.2 cm) on each side
- Both connectors have the same free length of 10 in (25.4 cm)
- All tails are woven in and all wraps are sewn secure
Troubleshooting
- Base cups upward: Your tension is tight in the increase rounds. Go up a hook size for the base only.
- Base ripples: Check that each end has exactly 3 increases per round.
- Fans lean to one side: Make sure each shell goes in the sc, not in a ch-2 sp.
- Wrong shell count: Recount the 90 sts before Rnd 13. One missing st breaks the 6-st repeat.
- Rim flares: You worked extra sts in Rnd 17. Recount 6 sts per repeat.
- Basket sags under weight: Use a stiffer cotton or add a cardboard base insert.
- Basket hangs crooked: Adjust the wraps until both connectors measure the same.
Care
Remove the dowels, then hand wash in cool water. Reshape and dry flat over a rolled towel.
Final Notes
The measurement chain is short and reliable:
- A gauge of 14 sc = 4 in (10.2 cm) gives a 90-st base of 9.5 in x 4.5 in (24.1 cm x 11.4 cm).
- The 90 sts divide into 15 fan repeats and return to 90 sts at the rim.
- The wall reaches 3.5 in (8.9 cm) after the lace and 4.5 in (11.4 cm) after the 1 in (2.5 cm) rim.
- Two baskets, 10 in (25.4 cm) of free connector cord and a 24 in (61.0 cm) hanging cord make a 21.5 in (54.6 cm) organizer.
Happy crocheting!