

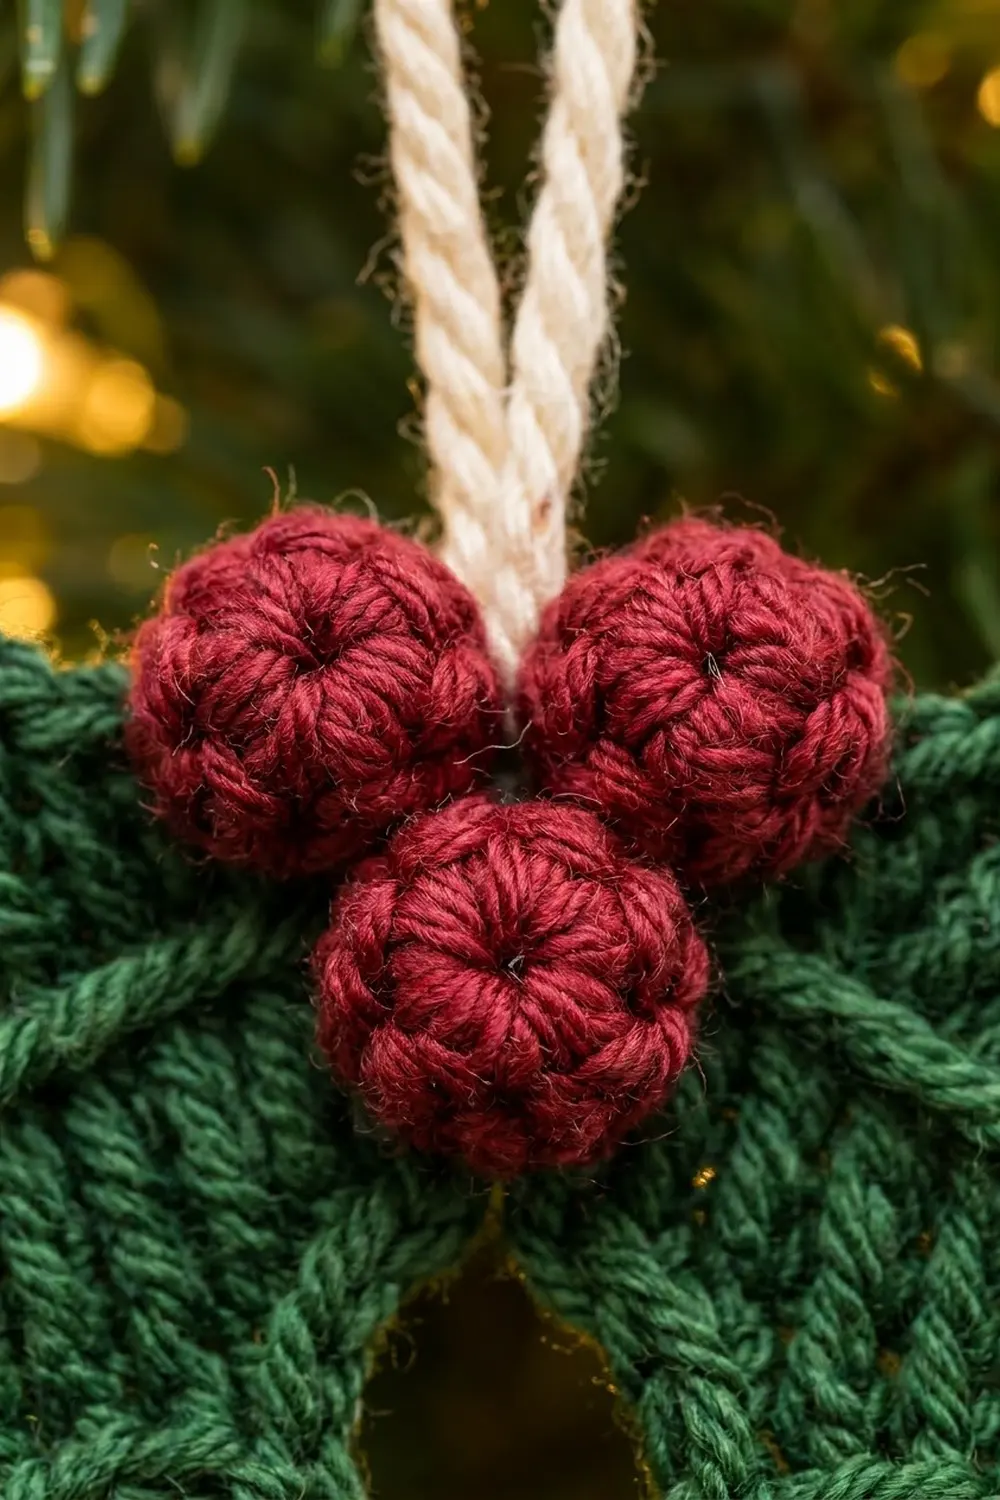
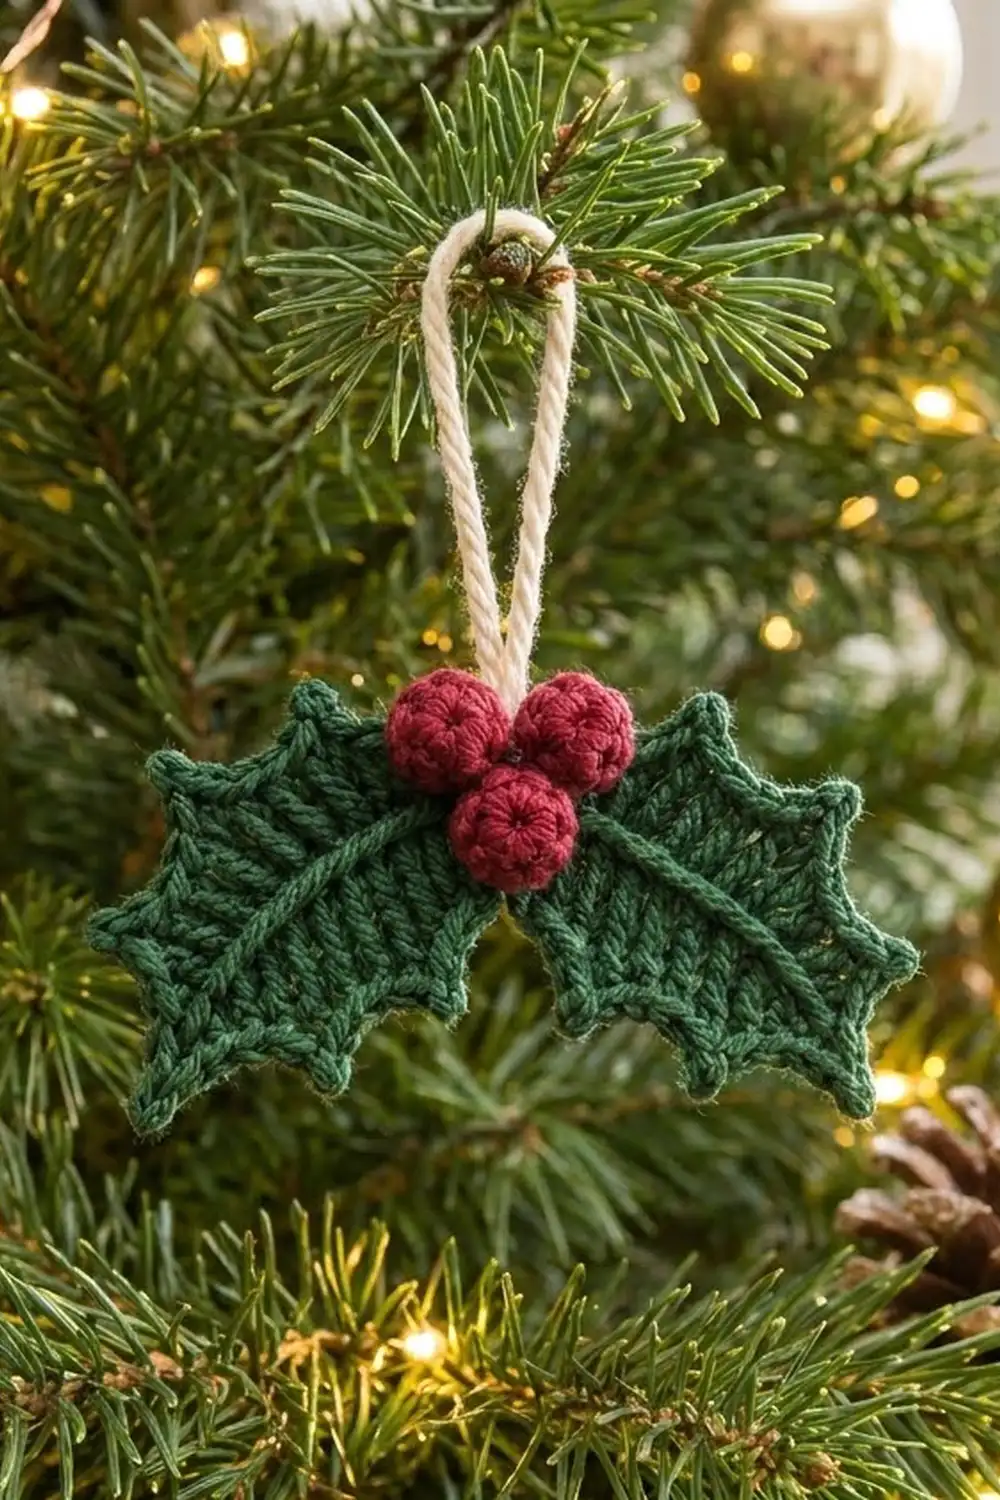
This little holly sprig is a classic Christmas tree ornament. It has two forest-green leaves with picot-tipped points, a cluster of three plump cranberry-red berries, and a soft cream twisted-cord loop. The ribbed texture and curved center vein give the leaves a crisp, finished look.
The palette is forest green, cranberry red, and cream. The style is traditional and tidy, and the berries sit raised on top of the leaves for real dimension.
This pattern uses US crochet terms. The finished ornament measures 4.5 in (11.4 cm) wide x 2.25 in (5.7 cm) tall, plus a 3 in (7.6 cm) loop.
Here’s how it comes together. Each leaf is worked in rounds around both sides of a short foundation chain, textured in the back loops, given a surface-stitched vein, and finished with a holly-point border. Then you sew the two leaves together at their stems, sew the stuffed berries over the join, and attach the loop behind them.
Finished Size and Construction
- Finished ornament: 4.5 in (11.4 cm) wide x 2.25 in (5.7 cm) tall, plus a 3 in (7.6 cm) loop
- Skill level: Advanced beginner
- Terminology: US crochet terms
- Yarn weight: DK / light (#3) cotton
- Hook: 3.25 mm (US D/3)
- Number of pieces: 1 ornament, assembled from 2 leaves, 3 berries, and 1 cord loop
- Layout: The 2 leaves meet stem to stem and angle slightly down. The 3 berries sit over the join, 2 on top and 1 below.
- Piece size (one leaf, finished): 2.5 in (6.4 cm) long x 1.5 in (3.8 cm) wide
- Leaf size before border: 2.3 in (5.8 cm) x 1.2 in (3.0 cm)
- Border depth: about 0.15 in (0.4 cm) per edge
- Berry size: 0.6 in (1.5 cm) diameter
Materials
Use a smooth, tightly plied DK cotton. It holds the points crisply and shows the ribbing well. Avoid fuzzy yarns, which blur the picots.
- Color A, forest green: 8 g / 18 m (2 leaves)
- Color B, cranberry red: 3 g / 7 m (3 berries, including stuffing scraps)
- Color C, cream: 2 g / 4 m (cord loop)
Quantities are for one ornament and include a margin for swatching and weaving in ends.
Tools:
- 3.25 mm (US D/3) hook
- Tapestry needle
- Scissors
- 1 stitch marker
- Rust-proof pins and a blocking mat
- Spray bottle with water
- Optional: fabric stiffener
Abbreviations (US Terms)
- ch – chain
- sl st – slip stitch
- sc – single crochet
- hdc – half double crochet
- dc – double crochet
- sc2tog – single crochet 2 together
- BLO – back loop only
- st(s) – stitch(es)
- sp – space
- MR – magic ring
- ( ) – work all stitches inside the parentheses into the same stitch or space
- [ ] x N – repeat the bracketed sequence N times
Special stitch – Picot: ch 3, sl st in 3rd ch from hook. Picots are not counted as stitches.
Gauge and Checkpoints
Gauge: 20 sc and 22 rows = 4 in (10.2 cm) with a 3.25 mm hook.
Make one complete leaf before anything else. Measure it flat, without stretching, at each stage:
- After Round 1: 2.0 in (5.1 cm) long x 0.8 in (2.0 cm) wide
- After Round 2: 2.3 in (5.8 cm) x 1.2 in (3.0 cm)
- After Border: 2.5 in (6.4 cm) x 1.5 in (3.8 cm), point to point
- Berry: 0.6 in (1.5 cm) across
If your leaf is too big (more than 0.1 in / 0.3 cm over at Round 1), use a 3.0 mm hook. If it is too small, use a 3.5 mm hook. Change the hook for the berries too, so the proportions stay matched.
Leaf (Make 2)
With Color A, ch 11.
Round 1: Sc in 2nd ch from hook, hdc in next ch, dc in next 6 ch, hdc in next ch, 3 sc in last ch (the tip). Rotate and work along the other side of the chain: hdc in next ch, dc in next 6 ch, hdc in next ch, sc in last ch (the same ch as the first sc). Join with sl st to first sc. (21 sts: 9 on Side A, 3 at the tip, 9 on Side B)
You now have a narrow pointed oval: tall dc in the middle, tapering to sc at both ends.
Round 2 (BLO throughout): Ch 1 (does not count as a st).
- Side A: 2 sc in first st, hdc in next st, 2 hdc in next st, dc in next 4 sts, 2 hdc in next st, hdc in next st. (12 sts)
- Tip: sc in next st, (sc, ch 2, sc) in next st, sc in next st. (4 sts + ch-2 sp)
- Side B: hdc in next st, 2 hdc in next st, dc in next 4 sts, 2 hdc in next st, hdc in next st, 2 sc in last st. (12 sts)
Join with sl st to first sc. (28 sts + 1 ch-2 sp)
Working in the back loops gives the stitches their ribbed, knit-like slant. The 4 increases on each side let the leaf lie flat.
Check: 12 + 4 + 12 = 28 sts. Round 2 works into every Round 1 stitch exactly once (9 + 3 + 9 = 21).
Don’t fasten off. Put a stitch marker in the working loop and remove the hook.
Vein (surface slip stitch): Cut a 12 in (30.5 cm) length of Color A and hold it behind the leaf. At the stem end, insert the hook from the front, right beside the foundation chain, and draw up a loop. Work 8 surface sl sts along the chain toward the tip, drifting slightly toward Side A so the vein curves gently. Stop 0.5 in (1.3 cm) short of the tip. Pull the end to the back and secure it.
Put the marked loop back on the hook and go straight on to the Border.
Berry (Make 3)
With Color B, leave a 6 in (15.2 cm) starting tail. Work in continuous spiral rounds without joining.
Round 1: 6 sc in MR. (6 sts)
Round 2: [sc in next st, 2 sc in next st] x 3. (9 sts)
Round 3: Sc in each st around. (9 sts)
Round 4: [sc in next st, sc2tog] x 3. (6 sts)
Stuff the berry firmly with the starting tail and a few scraps of Color B. Fasten off, leaving an 8 in (20.3 cm) tail. Weave the tail through the front loops of the last 6 sts and pull to close. Keep this tail for sewing.
The finished berry is a firm 0.6 in (1.5 cm) ball.
Hanging Loop (Make 1)
Cut a 30 in (76.2 cm) strand of Color C and knot the ends together. Twist the strand until it kinks, then fold it in half and let it twist into a cord about 7 in (17.8 cm) long. Cut a 6 in (15.2 cm) section and fold it in half to make a 3 in (7.6 cm) loop. Stitch the cut ends so they don’t unravel.
Make All Pieces
For each leaf, work Round 1, Round 2, the vein, and then the Border (see the Border section below). Finish every piece before you join anything.
- Color A: 2 bordered leaves
- Color B: 3 berries
- Color C: 1 loop
Layout (front view):
              [ Loop ]
            [Berry][Berry]
 [ Leaf L ]>   [Berry]   <[ Leaf R ]
The leaf tips point outward, about 20 degrees below horizontal.
Joining
Method: Whipstitch with a tapestry needle and a 12 in (30.5 cm) length of Color A.
Stitch-to-stitch logic: At each leaf’s stem end there are 2 Border sl sts side by side, with 1 sc on each side of them. Overlap the stems by 0.25 in (0.6 cm), with the right leaf behind the left. Match those 4 sts on the front leaf to the same 4 sts on the back leaf, and pin them. Whipstitch through both layers into each matched pair, then make 2 more anchoring stitches through the center.
Angle: Before you fasten off, tilt both leaves so their tips sit level with each other, about 20 degrees below horizontal.
Tension: Pull each stitch just snug. Stitches that are too tight pucker the stems. Stitches that are too loose let the leaves flop when the ornament hangs.
Size checkpoint: From tip picot to tip picot, the joined leaves should measure 4.5 in (11.4 cm).
Berries: Use each berry’s tail to sew 2 berries side by side over the top of the join. Sew the third berry centered below them. Stitch the berries to each other where they touch so the cluster stays tight.
Loop: Sew the loop ends to the back of the ornament, behind the upper berries, catching the berry bases so no cream shows on the front. Weave in all ends on the back.
Border: Holly-Point Edging
Work this on each leaf right after the vein and before Joining. It appears here to follow the standard section order.
Border gauge: This round adds about 0.15 in (0.4 cm) per edge, taking the leaf from 2.3 x 1.2 in (5.8 x 3.0 cm) to 2.5 x 1.5 in (6.4 x 3.8 cm).
Round 3 (both loops): Do not ch 1.
- Side A: sl st in same st as join, sc in next st, (hdc, picot, hdc) in next st, sc in next st; [sl st in next st, sc in next st, (hdc, picot, hdc) in next st, sc in next st] x 2. (Uses 12 sts; makes 15 sts + 3 picots)
- Tip: sc in next sc, hdc in next sc, (dc, picot, dc) in ch-2 sp, hdc in next sc, sc in next sc. (Uses 4 sts + ch-2 sp; makes 6 sts + 1 picot)
- Side B: [sc in next st, (hdc, picot, hdc) in next st, sc in next st, sl st in next st] x 3. (Uses 12 sts; makes 15 sts + 3 picots)
Join with sl st to first sl st. Fasten off and weave in ends. (36 sts + 7 picots)
Why the math works:
- Each side of Round 2 has exactly 12 sts, and each point uses 4 of them. That gives 12 ÷ 4 = 3 points per side with nothing left over.
- Counted from the stem, the points land on stitches 3, 7, and 11 on Side A. Side B works in the mirrored order, so its points also land on stitches 3, 7, and 11 from the stem.
- The sl sts pull the edge in between the points, which makes the scalloped holly curve.
- The tip’s ch-2 sp has 2 sc on each side, so the dc point is centered.
- Totals: 15 + 6 + 15 = 36 sts and 3 + 1 + 3 = 7 picots.
Final Blocking
- Mist the ornament until it’s damp, not soaked.
- Lay it face up on a blocking mat.
- Pin the two tip picots 4.5 in (11.4 cm) apart.
- Pin out the 3 side picots on each edge of each leaf, letting the sl st dips curve inward.
- Smooth the vein into an even curve with your fingertip.
- Don’t pin the berries. Roll them gently to round them.
- Optional: brush stiffener onto the backs of the leaves.
- Let it dry completely, at least 6 hours.
Final Quality-Control Checklist
- Each leaf measures 2.5 x 1.5 in (6.4 x 3.8 cm).
- Each leaf has 36 border sts and 7 picots.
- The side points mirror each other.
- The vein curves gently and stops 0.5 in (1.3 cm) from the tip.
- The berries are firm, 0.6 in (1.5 cm), and show no stuffing.
- The ornament measures 4.5 x 2.25 in (11.4 x 5.7 cm).
- Both leaves angle down evenly.
- The 3 in (7.6 cm) loop is centered and its base can’t be seen from the front.
- All ends are woven in.
Troubleshooting
- Leaf cups: Round 2 is tight. Go up one hook size for that round, or block more firmly.
- Leaf ripples: Recount Round 2. Each side should have 12 sts.
- Points are uneven: Each point must use exactly 4 sts. Mark stitch 1 of each side to keep track.
- Floppy picots: Pull each picot sl st snug, or use stiffener.
- Stuffing shows through a berry: Use a 3.0 mm hook for the berries.
- Ornament tilts when hanging: Re-center the loop between the upper berries.
Care
Spot clean with cool water and mild soap, then reshape and dry flat. Store the ornament in a box so the points don’t get crushed.
Final Notes
Here’s the full measurement chain. At a gauge of 20 sc = 4 in (10.2 cm), Round 1 measures 2.0 x 0.8 in (5.1 x 2.0 cm). Round 2 brings each leaf to 2.3 x 1.2 in (5.8 x 3.0 cm), and the border finishes it at 2.5 x 1.5 in (6.4 x 3.8 cm). Two overlapped, angled leaves make a 4.5 x 2.25 in (11.4 x 5.7 cm) ornament, completed by 0.6 in (1.5 cm) berries and a 3 in (7.6 cm) loop. If your first leaf hits its checkpoints, the rest will follow.
Happy crocheting!