

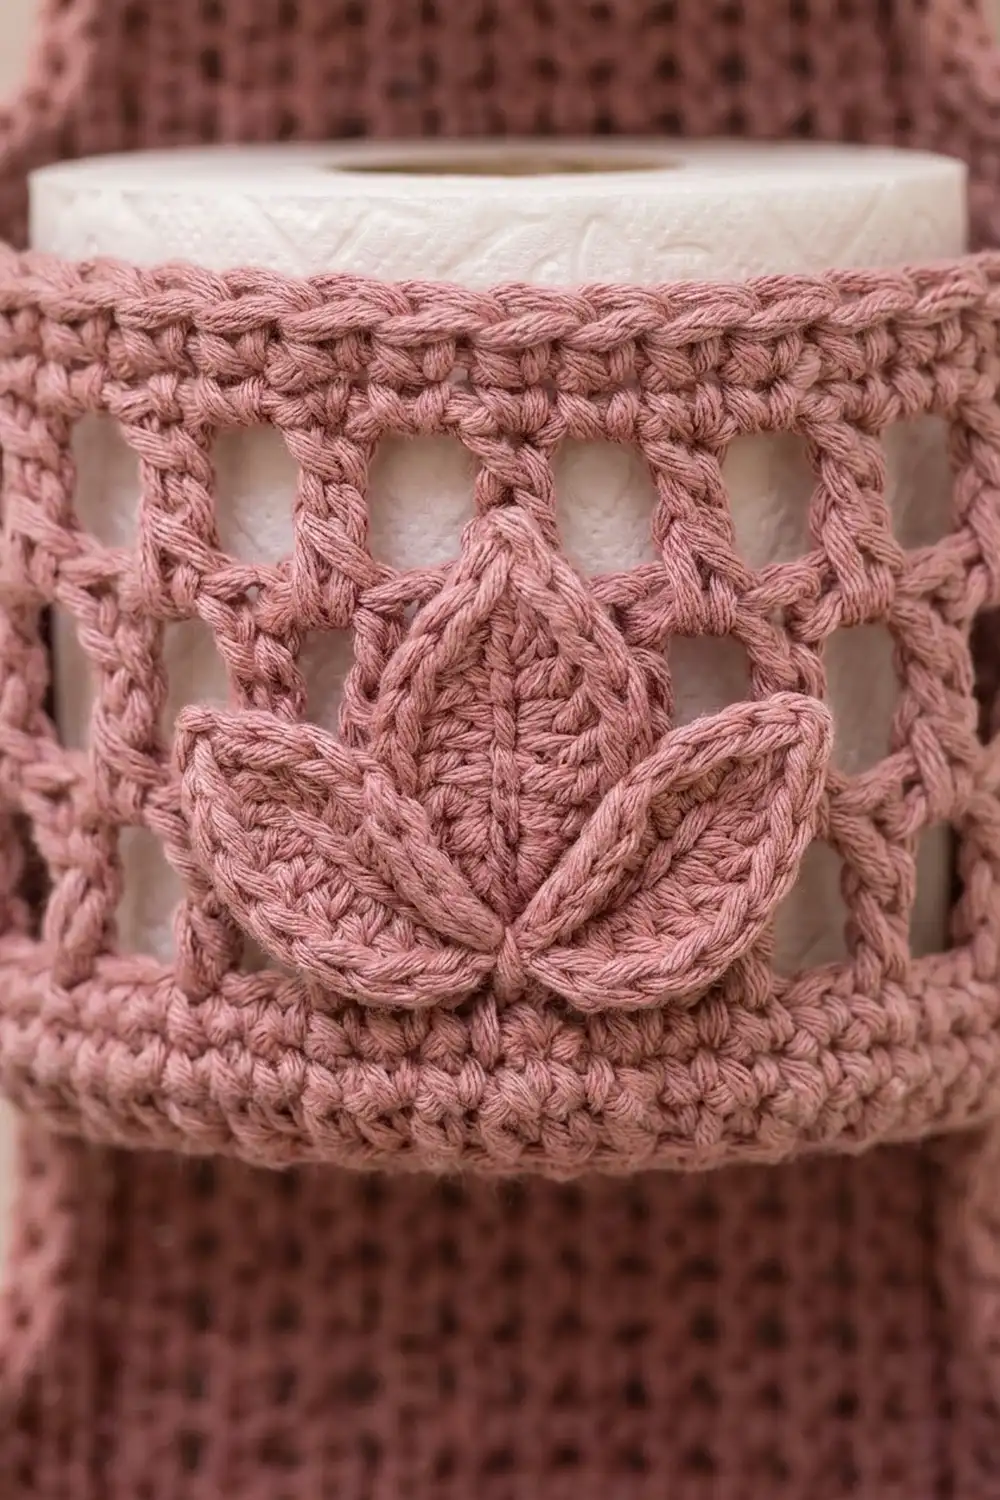
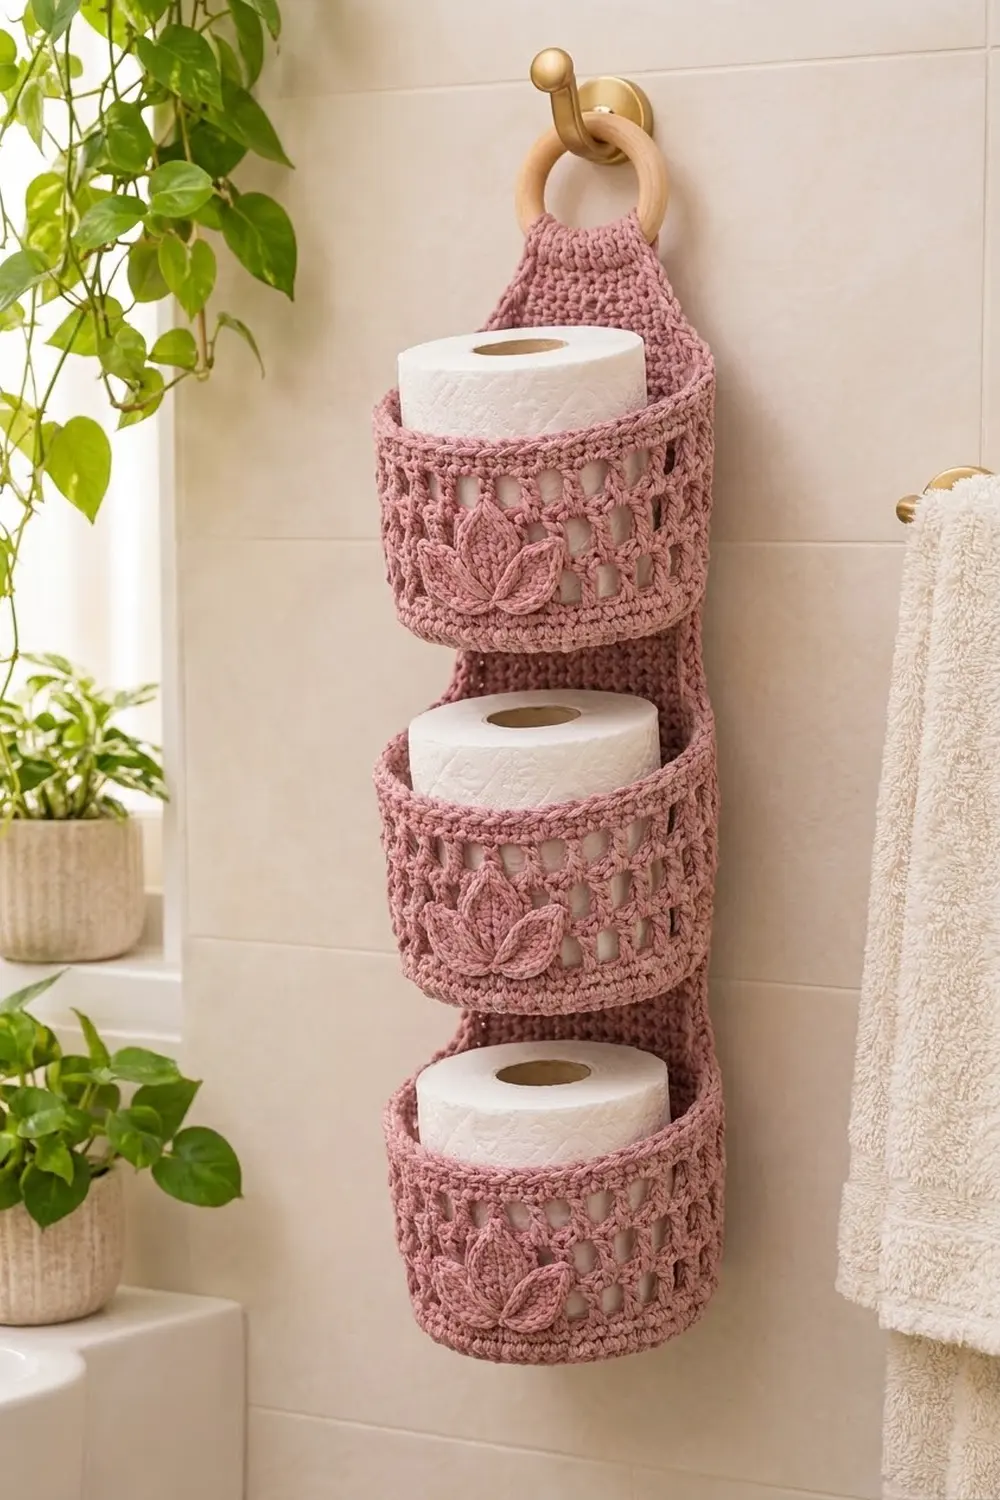
This hanging holder keeps three spare rolls tidy and in sight. A slim backing panel hangs from a wooden ring, and three round pockets sit on its front, each holding one standard roll. A small lotus with five petals decorates the front of every pocket.
The sample uses one dusty rose cotton. Solid single crochet bands frame an open middle band of offset mesh, which gives the pockets a light, basket-like look. The raised vein on each petal adds texture without extra colors.
This pattern uses US crochet terms. The finished panel is 5 in (12.7 cm) wide and 18.25 in (46.4 cm) long. Including the ring, the holder is about 20.5 in (52.1 cm) tall. Each pocket is 4.75 in (12.1 cm) across and 3.25 in (8.3 cm) tall.
Construction overview: you crochet the panel flat in rows. Each pocket is worked in the round, starting with a flat base and then building the wall straight up. Next you sew each pocket’s back to the panel, sew on the lotuses, work one border round around the panel, and fold the tab over the ring.
Finished Size and Construction
- Finished size: 5 × 18.25 in (12.7 × 46.4 cm) panel; about 20.5 in (52.1 cm) including the ring
- Skill level: Easy–Intermediate
- Terminology: US
- Yarn weight: Worsted (#4) cotton
- Hooks: 4.5 mm (US 7) for the main pieces; 4.0 mm (US G-6) for the lotuses
- Number of pieces: 7 (1 panel, 3 pockets, 3 lotuses)
- Layout: 1 column of 3 pockets stacked vertically
- Pocket size: 4.75 in (12.1 cm) across × 3.25 in (8.3 cm) tall
- Panel size before border: 4.5 in (11.4 cm) wide
- Border depth: 0.25 in (0.6 cm)
Materials
Yarn: Use a smooth worsted cotton or cotton blend. Cotton holds its shape under the weight of the rolls and copes well with bathroom humidity. Avoid fuzzy or very stretchy acrylic, because it lets the pockets sag.
- Dusty Rose: 200 g (340 m)
The total breaks down roughly as: panel 50 g, each pocket 40 g, each lotus 4 g, plus yarn for sewing. These quantities already include a margin of about 10%.
Tools:
– 4.5 mm (US 7) and 4.0 mm (US G-6) crochet hooks
– One wooden ring, 2.75 in (7.0 cm) across
– Tapestry needle
– 6 locking stitch markers
– Rustproof pins
– Measuring tape
Abbreviations (US Terms)
- ch – chain
- sl st – slip stitch
- sc – single crochet
- hdc – half double crochet
- dc – double crochet
- dc2tog – double crochet 2 together
- BLO – back loop only
- sp – space
- st(s) – stitch(es)
- RS / WS – right side / wrong side
Special technique: surface sl st vein. Insert the hook from front to back between the two halves of a petal, yarn over at the back, and pull a loop through the loop already on your hook. Repeat down the center line. This makes a raised ridge.
Gauge and Checkpoints
- Dc gauge: 16 sts × 8 rows = 4 in (10.2 cm) with the 4.5 mm hook
- Sc gauge: 16 sts × 18 rounds = 4 in (10.2 cm) with the 4.5 mm hook
Make one pocket before you start the panel. It uses both gauges, so it is the best test piece.
Checkpoints:
– Pocket base after Round 5: 4.75 in (12.1 cm) across, lying flat
– Pocket wall after Round 16: 3.25 in (8.3 cm) tall, measured from the base ridge
– Panel after Row 8: 4.5 in (11.4 cm) wide × 4 in (10.2 cm) tall
– Panel after Row 28: 14 in (35.6 cm) tall
If your piece is too big, go down half a hook size. If it is too small, go up half a hook size. Check both your stitch gauge and your row gauge. A base that is too small will not fit a standard roll, which is about 4.25 in (10.8 cm) across.
Backing Panel
Use the 4.5 mm hook.
Row 1 (RS): Ch 20, dc in 4th ch from hook (the skipped ch count as the first dc), dc in each remaining ch across. (18 dc)
Rows 2–28: Ch 3 (counts as dc throughout), turn, skip the first st, dc in each st across. (18 dc)
Checkpoint: 14 in (35.6 cm) tall.
Shoulders:
Row 29: Ch 2 (does not count as a st), turn, dc2tog, dc in next 14 sts, dc2tog. (16 sts)
Row 30: Ch 2, turn, dc2tog, dc in next 10 sts, dc2tog. (12 sts)
Wait — check: the counts must drop by 2 each row. Corrected Row 30: ch 2, turn, dc2tog, dc in next 12 sts, dc2tog. (14 sts)
Row 31: Ch 2, turn, dc2tog, dc in next 10 sts, dc2tog. (12 sts)
Row 32: Ch 2, turn, dc2tog, dc in next 8 sts, dc2tog. (10 sts)
The shoulders are 2 in (5.1 cm) tall.
Tab:
Rows 33–40: Ch 3, turn, skip the first st, dc in each st across. (10 dc)
Fasten off. The tab is 2.5 in (6.4 cm) wide and 4 in (10.2 cm) long. The whole panel is now 20 in (50.8 cm) long before folding.
Pockets (Make 3)
Use the 4.5 mm hook. Join each round with a sl st to the first st, and do not turn.
Base:
Round 1: Make a magic ring, ch 3 (counts as dc), work 11 dc in the ring, join. (12 dc)
Round 2: Ch 3, dc in the same st, 2 dc in each st around, join. (24 dc)
Round 3: Ch 3, 2 dc in next st, dc in next st, 2 dc in next st; repeat from * around, join. (36 dc)
Round 4: Ch 3, dc in next st, 2 dc in next st, dc in next 2 sts, 2 dc in next st; repeat from * around, join. (48 dc)
Round 5: Ch 3, dc in next 2 sts, 2 dc in next st, dc in next 3 sts, 2 dc in next st; repeat from * around, join. (60 dc)
Checkpoint: the base is 4.75 in (12.1 cm) across.
Lower band:
Round 6: Ch 1, sc in BLO of each st around, join. (60 sc) The unused front loops form a ridge where the wall turns upward.
Rounds 7–9: Ch 1, sc in each st around, join. (60 sc)
Mesh band:
Round 10: Ch 5 (counts as dc + ch 2), skip next 2 sts, dc in next st, ch 2, skip next 2 sts; repeat from * 18 more times, then join to the 3rd ch of the beginning ch-5. (20 dc, 20 ch-2 sps)
Round 11: Sl st into the first ch-2 sp, ch 5 (counts as dc + ch 2), dc in next ch-2 sp, ch 2; repeat from * 18 more times, then join to the 3rd ch of the beginning ch-5. (20 dc, 20 ch-2 sps) Because each dc now sits in a space instead of on top of a dc, the blocks are offset like bricks.
Round 12: Repeat Round 11. (20 dc, 20 ch-2 sps)
Upper band:
Round 13 (conversion round): Ch 1, sc in next dc, 2 sc in next ch-2 sp; repeat from * around, join. (20 sc worked into the dc + 40 sc worked into the spaces = 60 sc)
Rounds 14–16: Ch 1, sc in each st around, join. (60 sc)
Fasten off and leave a 30 in (76.2 cm) tail for sewing.
Checkpoint: the 8 sc rounds measure about 1.75 in (4.4 cm) and the 3 mesh rounds measure 1.5 in (3.8 cm), so the wall is 3.25 in (8.3 cm) tall.
Lotus Appliqué (Make 3)
Use the 4.0 mm hook. All sts are worked into the chain you have just made. Each petal starts and ends at its own base sc.
Base: Ch 2, work 5 sc in 2nd ch from hook. Do not join. Work the petals into these 5 sc as follows.
How to make a petal of “ch N”: Ch N. Working back along the chain from the 2nd ch from hook, work the side sequence, ending at the base. Rotate the work. Now working along the other side of the same chain, toward the tip, work the side sequence again. In the skipped tip ch, work (sc, ch 2, sc). Ch 1, then work a surface sl st vein down the center back to the base. Sl st in the same base sc, then sl st in the next base sc.
Side sequences:
– Small petal (ch 5): sc, hdc, hdc, sc (4 sts per side)
– Medium petal (ch 7): sc, hdc, dc, dc, hdc, sc (6 sts per side)
– Large petal (ch 8): sc, hdc, dc, dc, dc, hdc, sc (7 sts per side)
Work the petals in this order:
– 1st sc: small petal
– 2nd sc: medium petal
– 3rd sc: large petal
– 4th sc: medium petal
– 5th sc: small petal
Fasten off, leaving a 20 in (50.8 cm) tail.
Checkpoint: the lotus is about 2 in (5.1 cm) tall × 3 in (7.6 cm) wide. Gently overlap the edges of the medium petals onto the large center petal, and pin them there.
Make All Pieces
All pieces are Dusty Rose:
– 1 backing panel (about 50 g)
– 3 pockets (about 40 g each, 120 g total)
– 3 lotuses (about 4 g each, 12 g total)
Layout (front view, top to bottom):
      [ ring ]
      [ tab  ]
     /shoulders\
   [ Pocket 3 + lotus ]
   [   gap 1.75 in    ]
   [ Pocket 2 + lotus ]
   [   gap 1.75 in    ]
   [ Pocket 1 + lotus ]
Joining
Method: Whipstitch with the yarn tails, catching one full stitch on the pocket and one full stitch on the panel with each pass.
1. Mark the back of each pocket. The joins of the rounds line up at the back. Count 6 sts on each side of the join, which gives a back section of 12 sts. Mark both ends of this section on the Round 16 rim and on the Round 6 base ridge. This section is 3 in (7.6 cm) long. Once pressed flat, it measures about 2.75 in (7.0 cm) across.
2. Mark the pocket positions on the panel. Measure from the bottom edge, before the border:
– Pocket 1: base ridge at 0.5 in (1.3 cm), at the top of Row 1. Rim at 3.75 in (9.5 cm).
– Pocket 2: base ridge at 5.5 in (14.0 cm), at the top of Row 11. Rim at 8.75 in (22.2 cm).
– Pocket 3: base ridge at 10.5 in (26.7 cm), at the top of Row 21. Rim at 13.75 in (34.9 cm).
Center each pocket so there is about 0.875 in (2.2 cm) of panel showing on each side of the flattened back section.
3. Sew. Work stitch to stitch. Sew the 12 back stitches of the base ridge along a straight horizontal line on the panel. Then sew the 12 back stitches of the rim along a second straight line exactly 3.25 in (8.3 cm) higher. Add a few vertical tacking stitches at each end of the back section.
Tension: Pull each stitch just until it is snug. If you pull harder, the panel puckers and the pocket tilts forward.
4. Attach the lotuses. Fold each pocket flat with the join at the back, then mark the center front stitch, which is stitch 30. Pin the lotus so its base sits 0.25 in (0.6 cm) above the base ridge and is centered on stitch 30. The large petal will reach into the mesh band. Sew around the base and along each vein. Leave the last 0.25 in (0.6 cm) of each petal tip free so the petals lift slightly.
Size checkpoint: The gaps between pockets measure 1.75 in (4.4 cm), and the pockets are 4.75 in (12.1 cm) wide.
Border
Use the 4.5 mm hook.
Border gauge: each dc row-end is 0.5 in (1.3 cm) tall. At 4 sc per in (2.5 cm), that equals 2 sc per row-end. The bottom and top edges get 1 sc per stitch, matching the 16 sts = 4 in (10.2 cm) gauge.
Each side count below includes that side’s corner stitches.
Round 1 (RS): Join the yarn at the bottom right corner. Work around the panel as follows:
– Bottom: 3 sc in the first st, sc in the next 16 sts, 3 sc in the last st. (22 sc)
– Left side (Rows 1–40): 2 sc in each row-end. (80 sc)
– Tab top: 3 sc in the first st, sc in the next 8 sts, 3 sc in the last st. (14 sc)
– Right side: 2 sc in each row-end. (80 sc)
Join with a sl st. (196 sc)
Round 2: Sl st loosely in each sc around. (196 sl st) Fasten off.
Why the math works: Each 0.5 in (1.3 cm) row gets 2 sc, and each stitch along the top and bottom gets 1 sc. The border lies flat because it follows the same 4 sts per in (2.5 cm) as the panel. One round of sc adds 0.25 in (0.6 cm) on each edge, so the width goes from 4.5 in (11.4 cm) to 5 in (12.7 cm).
Attach the ring: Pass the tab through the ring from front to back. Fold Rows 37–40 down onto the WS, so 2 in (5.1 cm) folds back, and whipstitch the tab’s top edge across Row 36. The front of the panel is now 18 in (45.7 cm) long, or 18.25 in (46.4 cm) including the bottom border.
Final Blocking
- Lightly mist the panel and the pockets with water.
- Lay the panel flat and pin it to 5 × 18.25 in (12.7 × 46.4 cm).
- Put a toilet roll in each pocket so the walls dry round.
- Gently smooth the edges of the mesh spaces with your fingers.
- Shape the petals by pinching each tip into a point.
- Let everything dry completely before you hang it.
Final Quality-Control Checklist
- Panel is 5 in (12.7 cm) wide and its edges are straight
- All 3 pockets are 4.75 in (12.1 cm) across and 3.25 in (8.3 cm) tall
- All three mesh bands have 20 offset blocks
- Gaps between pockets are an even 1.75 in (4.4 cm)
- Lotuses are centered and their veins are visible
- Ring seam is secure and all tails are woven in
Troubleshooting
- Base cups or ruffles: Recount Rounds 1–5. Each round should add exactly 12 sts.
- Mesh band slants: Make sure each dc goes into a ch-2 sp in Rounds 11–12, not into a dc.
- Pocket leans forward: Re-sew the rim with more catch points, keeping your tension even.
- Petals curl: Use the 4.0 mm hook and steam-block the petals flat.
- Panel too short: Add dc rows before Row 29, keeping the pocket spacing unchanged.
Care
Hand wash in cool water and dry flat with rolls inside the pockets to keep their shape. Do not tumble dry.
Final Notes
Here is how the measurements build on each other. The 60-stitch base is 4.75 in (12.1 cm) across. Eight sc rounds plus three mesh rounds make the 3.25 in (8.3 cm) wall. The 18-stitch panel is 4.5 in (11.4 cm) wide, and the border brings it to 5 in (12.7 cm). The three pockets with their 1.75 in (4.4 cm) gaps fit inside the 14 in (35.6 cm) body, and the panel is 18.25 in (46.4 cm) long once the tab is folded over the ring. If each checkpoint matches, the finished holder will too.
Happy crocheting!