

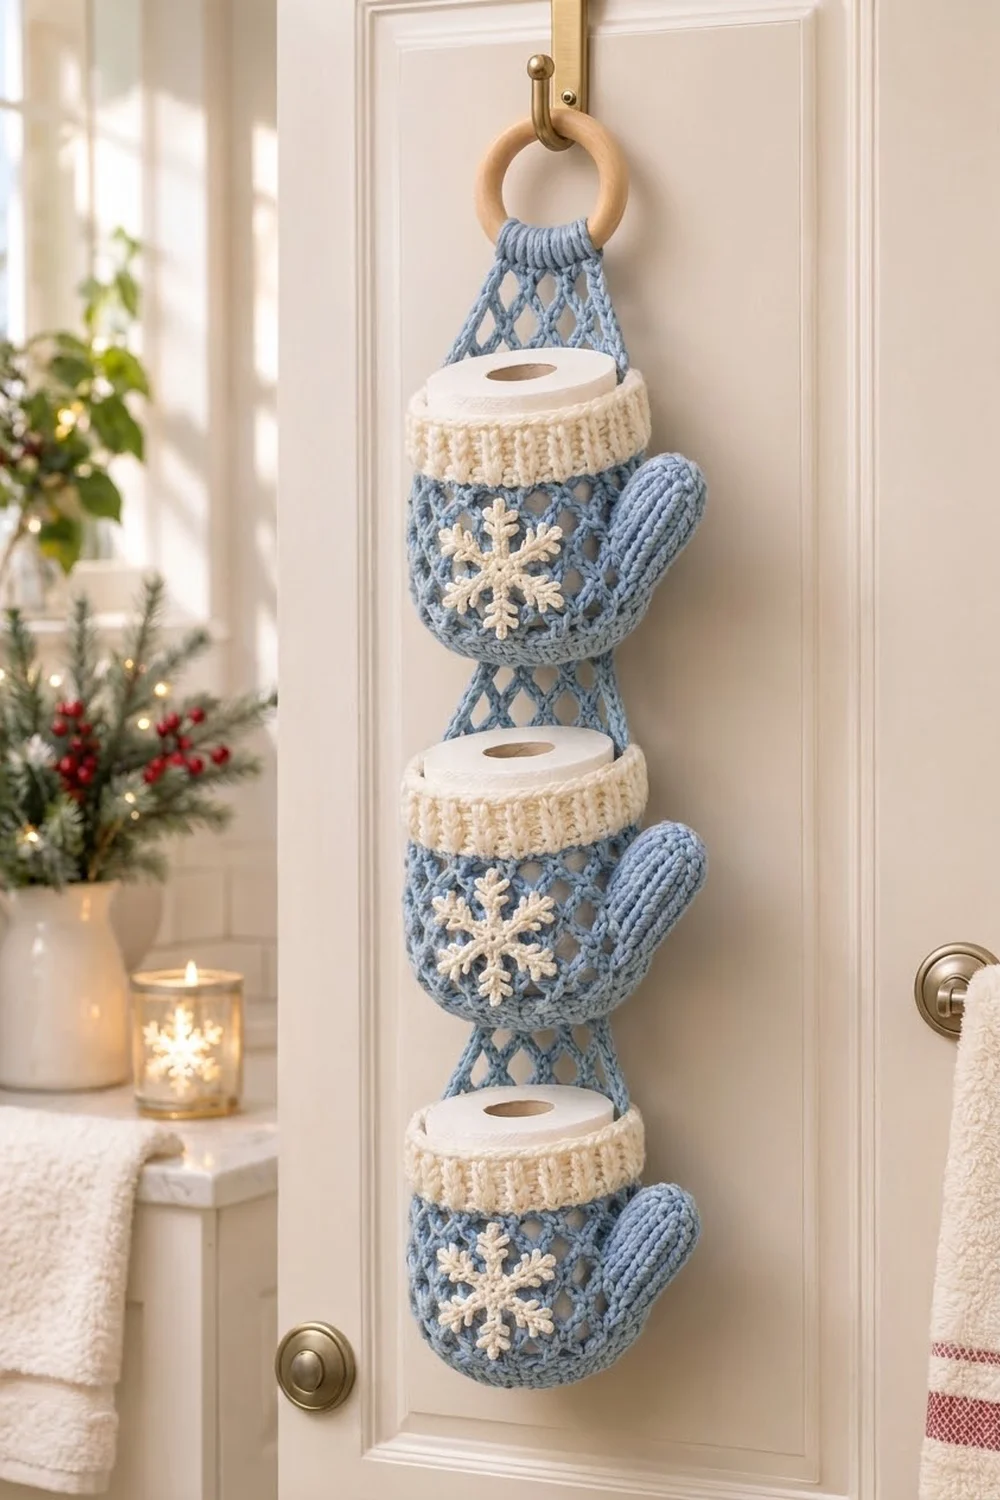
This hanging holder stores three spare rolls in a stack of cozy mittens. Each pocket is an open diamond net in dusty light blue with a cream ribbed cuff on top, a chunky thumb, and a cream snowflake on the front.
The look is soft and wintry without being loud. The mesh lets the white roll show through, the ribbed cuff looks like a real knitted mitten, and the wooden ring adds a natural touch on a door or towel hook.
The pattern uses US crochet terms. The finished holder is about 24 in (61.0 cm) long including a 3 in (7.6 cm) ring. Each mitten pocket is about 6.75 in (17.1 cm) wide when flat (8.25 in / 21.0 cm including the thumb) and 4 in (10.2 cm) tall.
Construction is simple. Each pocket starts as a flat sc circle, grows upward in a net of chain loops, then gets a cream ribbed cuff. You sew on the thumbs and snowflakes, then use three mesh strips (one tapered top strap and two connectors) to join everything into one hanging column.
Finished Size and Construction
- Finished length: about 24 in (61.0 cm) including ring
- Skill level: Intermediate (post stitches, net rounds, seaming)
- Terminology: US crochet terms
- Yarn weight: Worsted (#4), cotton or cotton blend
- Hook: 4.5 mm (US 7)
- Number of pieces: 12 crocheted pieces (3 pockets, 3 thumbs, 3 snowflakes, 1 top strap, 2 connectors) plus 1 wooden ring
- Layout: 1 column of 3 pockets, stacked vertically
- Pocket size: 6.75 in (17.1 cm) wide flat x 4 in (10.2 cm) tall
- Size before border: pocket body (base + net) about 2.5 in (6.4 cm) tall
- Border (cuff) depth: 1.5 in (3.8 cm)
Materials
Choose a smooth worsted-weight cotton. Cotton holds the pocket shape, resists stretching under the weight of a roll, and washes well in a bathroom. Avoid fuzzy acrylics, which blur the mesh.
- Light blue (MC): 90 g, about 155 m (170 yd)
- Cream (CC): 45 g, about 77 m (84 yd)
Quantities include a margin of about 20% for gauge swatching and seaming.
Tools:
– 4.5 mm (US 7) crochet hook
– 1 wooden or metal ring, 3 in (7.6 cm) outer diameter
– Tapestry needle
– 4 locking stitch markers
– Scissors and tape measure
– Rustproof pins and a blocking mat
Abbreviations (US Terms)
- ch – chain
- sl st – slip stitch
- sc – single crochet
- dc – double crochet
- sk – skip
- sp – space
- st(s) – stitch(es)
- MR – magic ring
- inc – 2 sc in the same stitch
- rep – repeat
Special stitches:
– FPdc (front post double crochet): Yo, insert hook from front to back to front around the post of the next stitch, yo and pull up a loop, (yo, pull through 2 loops) twice.
– BPdc (back post double crochet): Yo, insert hook from back to front to back around the post of the next stitch, then finish like a dc.
– Picot: Ch 3, sl st in 3rd ch from hook.
Gauge and Checkpoints
Gauge: 16 sc and 18 rows = 4 in (10.2 cm) in sc with a 4.5 mm hook.
Make one complete pocket first, including the cuff, and test it with a real roll before making the rest.
Checkpoints:
– After Round 9 (base): the circle measures 4 in (10.2 cm) across.
– After Round 13 (net): the pocket body is about 2.5 in (6.4 cm) tall from the base edge.
– After Round 14 (cuff set-up): the circumference is 13.5 in (34.3 cm) and the flattened width is 6.75 in (17.1 cm).
– Finished pocket: 4 in (10.2 cm) tall. A standard roll (about 4 in / 10.2 cm across, 4.5 in / 11.4 cm tall) should slide in snugly with about 2 in (5.1 cm) showing above the cuff.
If your base is too big, go down a hook size (4.0 mm). If it is too small, go up to 5.0 mm. Do not add or remove rounds, because the cuff math depends on 54 stitches.
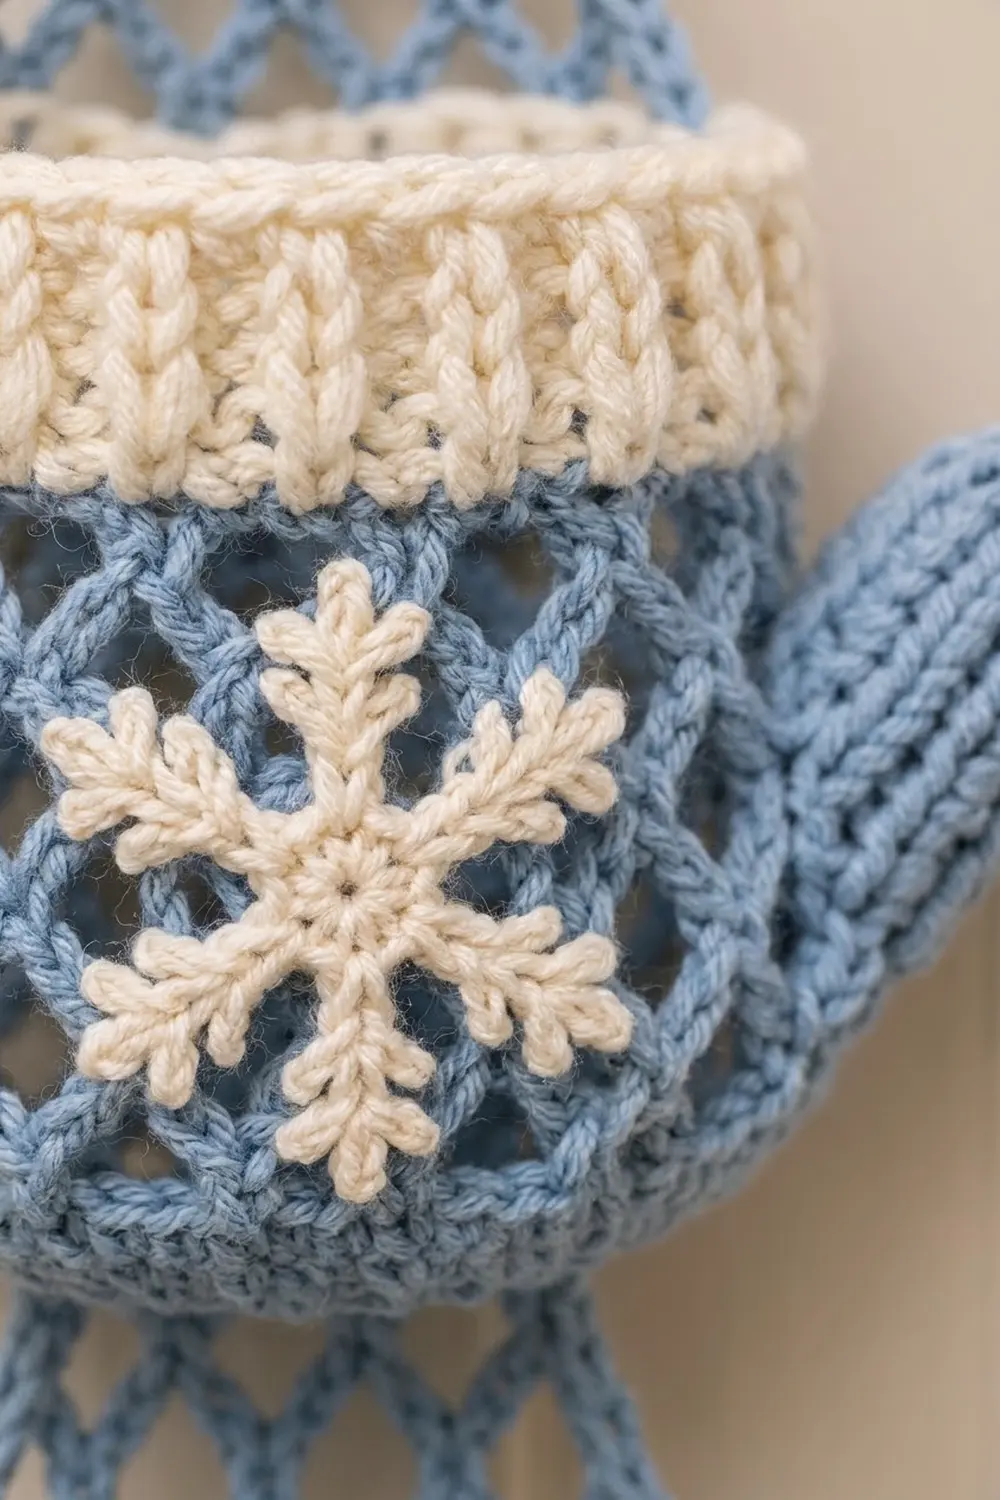
Mitten Pocket (make 3, MC and CC)
Work in joined rounds, not a spiral. Join each round with a sl st to the first sc. The ch 1 at the start of each sc round does not count as a stitch.
Base (MC)
Round 1: In MR, 6 sc. Join. (6 sts)
Round 2: Inc in each st around. (12 sts)
Round 3: (Sc in next st, inc) 6 times. (18 sts)
Round 4: (Sc in next 2 sts, inc) 6 times. (24 sts)
Round 5: (Sc in next 3 sts, inc) 6 times. (30 sts)
Round 6: (Sc in next 4 sts, inc) 6 times. (36 sts)
Round 7: (Sc in next 5 sts, inc) 6 times. (42 sts)
Round 8: (Sc in next 6 sts, inc) 6 times. (48 sts)
Round 9: (Sc in next 7 sts, inc) 6 times. (54 sts)
Checkpoint: 4 in (10.2 cm) across, lying flat.
Diamond Net Body (MC)
Round 10 (net set-up): Ch 1, sc in first st, *ch 5, sk 2 sts, sc in next st; rep from * 16 more times, ch 2, sk 2 sts, dc in first sc. (18 ch-5 loops. The ch 2 + dc closes the 18th loop and leaves your hook at its center.)
As the loops pull in, the base edge turns upward and forms the round bottom of the mitten.
Rounds 11–13: Ch 1, sc around the joining dc, *ch 5, sc in next ch-5 loop; rep from * 16 more times, ch 2, dc in first sc. (18 loops per round)
Each loop sits between two loops of the round below, which creates the diamonds. Fasten off MC after Round 13.
Checkpoint: the body is about 2.5 in (6.4 cm) tall.
Before moving on, work the cream cuff (Rounds 14–17) from the Border section below on this pocket. The cuff must be finished before joining.
Thumb (make 3, MC)
Work in a continuous spiral and mark the first st.
Round 1: In MR, 6 sc. (6 sts)
Round 2: Inc in each st around. (12 sts)
Rounds 3–10: Sc in each st around. (12 sts per round)
Sl st in next st and fasten off, leaving a 12 in (30.5 cm) tail. Do not stuff. Flatten the tube so the open end has 6 sts per layer. The thumb is 1.5 in (3.8 cm) wide and 2.25 in (5.7 cm) long.
Snowflake (make 3, CC)
Round 1: In MR, 12 sc. Join. (12 sts)
Round 2 (arms): *Ch 8, sl st in 3rd ch from hook (tip loop), sc in next 2 ch, picot, picot, sc in next 3 ch, sk next sc of Round 1, sl st in next sc; rep from * 5 more times. (6 arms)
The two picots sit at the same point on the arm and spread to each side, forming the V-shaped branches. Fasten off with a 12 in (30.5 cm) tail. The snowflake is about 2.5 in (6.4 cm) across.
Top Strap (make 1, MC)
Row 1: Ch 20, sc in 2nd ch from hook and in each ch across. Turn. (19 sc)
Row 2: Ch 1, sc in first st, *ch 5, sk 2 sts, sc in next st; rep from * 5 more times. Turn. (6 loops; 1 + 6 x 3 = 19 sts used)
Row 3: Sl st in first 3 ch of first loop, ch 1, sc in same loop, *ch 5, sc in next loop; rep from * 4 more times. Turn. (5 loops)
Rows 4–7: Rep Row 3, making 1 loop fewer in each row. (4, 3, 2, 1 loops)
Row 8: Ch 1, 7 sc in the single ch-5 loop. Turn. (7 sc)
Rows 9–19: Ch 1, sc in each st across. Turn. (7 sc per row)
Fasten off with a 12 in (30.5 cm) tail. The band is 1.75 in (4.4 cm) wide. Once the band is wrapped around the ring, the visible strap is about 5 in (12.7 cm) long.
Connector (make 2, MC)
Row 1: Ch 20, sc in 2nd ch from hook and in each ch across. Turn. (19 sc)
Row 2: Ch 1, sc in first st, *ch 5, sk 2 sts, sc in next st; rep from * 5 more times. Turn. (6 loops)
Row 3: Ch 5 (counts as dc + ch 2), sc in first loop, *ch 5, sc in next loop; rep from * 4 more times, ch 2, dc in last sc. Turn. (5 full loops + 2 half loops)
Row 4: Ch 1, sc in first dc, *ch 5, sc in next loop; rep from * 4 more times, ch 5, sc in 3rd ch of turning ch. Turn. (6 loops)
Row 5 (conversion): Ch 1, sc in first sc, *2 sc in next loop, sc in next sc; rep from * 5 more times. (7 sc worked into existing sc + 12 sc worked into loops = 19 sc)
Fasten off with a 15 in (38.1 cm) tail. Each connector is 4.75 in (12.1 cm) wide and 2 in (5.1 cm) long.
Make All Pieces
MC (light blue): 3 pocket bodies, 3 thumbs, 1 top strap, 2 connectors.
CC (cream): 3 cuffs, 3 snowflakes.
Layout (top to bottom):
      [ Ring ]
   [ Top strap ]
   [ Pocket 1 ]
   [Connector A]
   [ Pocket 2 ]
   [Connector B]
   [ Pocket 3 ]
Joining
Prepare each pocket. Flatten the pocket with the start of the rounds at the left fold. Round 17 now has 27 sts on the front half and 27 sts on the back half. Mark the center 19 sts of the back half, leaving 4 sts at each fold. Mark the matching 19 sts of Round 9 on the back of the base.
Sew the appliqués first. Whipstitch a snowflake to the center front over Rounds 10–13, sewing through the center of each arm and its tip. Sew the thumb’s flattened open end (6 sts per layer) to the right fold over Rounds 11–13. Angle it so the tip points up and out and ends just below the cuff.
Stitch-to-stitch logic. Every strip edge has 19 sts and every target has 19 marked sts, so you sew 1 strip st to 1 pocket st with no easing:
- Top strap Row 1 → back of Pocket 1 cuff, Round 17 (19 to 19).
- Connector A Row 1 → back of Pocket 1 base, Round 9 (19 to 19).
- Connector A Row 5 → back of Pocket 2 cuff, Round 17 (19 to 19).
- Connector B Row 1 → back of Pocket 2 base, Round 9; Row 5 → back of Pocket 3 cuff, Round 17.
At each cuff, place the strip on the inside back so it overlaps the cuff by 1 row, then whipstitch through both layers with MC.
Ring. Wrap the top strap band (Rows 9–19) over the ring toward the back and sew the last row to the back of Row 8.
Tension. Pull each whipstitch snug, but stop before the cuff ripples. The seams carry the full weight of three rolls, so go over each seam twice.
Size checkpoint: Hang the holder empty. It should measure about 24 in (61.0 cm) from the top of the ring to the bottom of Pocket 3: 3 in ring + 5 in strap + (3 x 4 in pockets) + (2 x 2 in connectors) = 24 in. In cm: 7.6 + 12.7 + 30.5 + 10.2 = 61.0 cm.
Border: Cream Ribbed Cuff
Work this cuff on each pocket right after Round 13.
Border gauge: 16 dc and 9 rounds = 4 in (10.2 cm). The cuff is 1.5 in (3.8 cm) deep.
Round 14 (conversion, CC): Join CC in any ch-5 loop. Ch 1, 3 sc in each loop around. Join. (18 loops x 3 sc = 54 sc; 27 per flattened side)
Round 15: Ch 2 (does not count), dc in each st around. Join. (54 dc; 27 per side)
Rounds 16–17: Ch 2 (does not count), *FPdc around next st, BPdc around next st; rep from * 26 more times. Join. (54 sts: 27 FPdc + 27 BPdc; 27 per side)
Fasten off and weave in.
Why the math works: The base ends with 54 sts. Round 10 uses 3 sts per loop, so 54 ÷ 3 = 18 loops. The net keeps 18 loops, and Round 14 puts 3 sc in each loop, which brings you back to exactly 54. Because 54 is even, the FPdc/BPdc ribbing alternates evenly with no broken rib at the join. Each flattened side has 27 sts, and the center 19 leave 4 at each fold for the strap seams.
Final Blocking
- Weave in all remaining tails, hiding them in solid sc areas rather than the net.
- Lightly mist the whole holder with cool water.
- Shape each pocket into a cylinder: slide in an empty cardboard tube wrapped in a towel, or a roll sealed in a plastic bag.
- Lay the holder flat on a blocking mat. Pin each net diamond open and pin the snowflake arms straight.
- Pin the thumbs at an upward angle.
- Let it dry completely, then remove the forms and hang.
Final Quality-Control Checklist
- Each pocket base is 4 in (10.2 cm) across and lies flat.
- Every net round has 18 loops.
- Each cuff has 54 sts and unbroken ribs.
- Each pocket measures 6.75 in (17.1 cm) wide flat and 4 in (10.2 cm) tall.
- Snowflakes are centered on the front, and all thumbs point the same direction.
- All strip seams are 19 to 19 and sewn twice.
- Total length is about 24 in (61.0 cm).
- A roll fits each pocket with about 2 in (5.1 cm) showing.
Troubleshooting
Base cups or ruffles: Check your increase spacing. A cupping base usually means tight tension, so go up a hook size.
Net looks lopsided: Make sure every sc goes into the center of a loop, not into a chain.
Cuff flares: Work Round 15 with a hook 0.5 mm smaller.
Ribs break at the join: Recount Round 14. You need exactly 54 sc.
Pocket sags under a roll: Use cotton, not acrylic, and sew the strap seams twice.
Snowflake curls: Steam-block it flat before sewing it on.
Care
Hand wash in cool water with mild soap, roll in a towel to remove water, and dry flat with the pockets reshaped. Do not tumble dry.
Final Notes
The whole design rests on one measurement chain. A 54-st base at 4 in (10.2 cm) across gives 18 net loops. Those loops convert back to 54 sts for a 13.5 in (34.3 cm) cuff that holds a standard roll. Each flattened side has 27 sts, and the center 19 match every 19-st strip edge exactly. Three 4 in (10.2 cm) pockets, two 2 in (5.1 cm) connectors, a 5 in (12.7 cm) strap, and a 3 in (7.6 cm) ring add up to 24 in (61.0 cm). Check your gauge once, and every piece will fit.
Happy crocheting!