

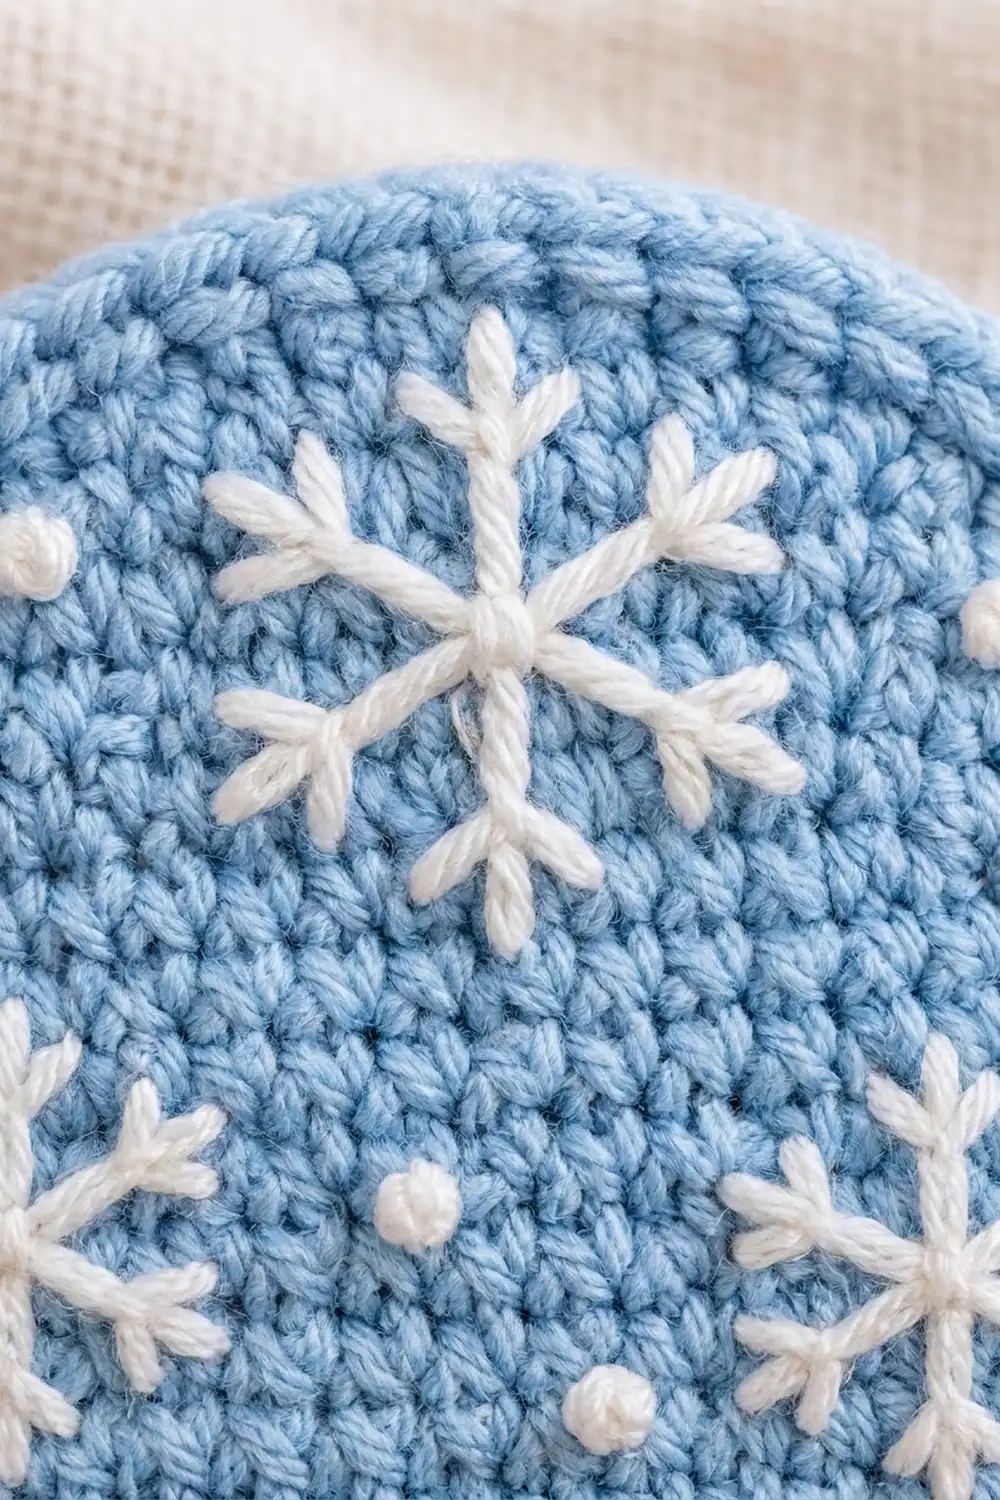
This little snow globe is a flat crochet appliqué with a rounded light blue dome, a sturdy red base and three embroidered white snowflakes surrounded by tiny snow dots. It works as an ornament, a coaster, a card topper or a gift-tag patch.
The style is clean and graphic. Single crochet gives a dense, even fabric that shows embroidery well. The finished piece measures 5.0 in (12.7 cm) wide by 5.4 in (13.7 cm) tall. The pattern uses US crochet terms throughout.
You make it in one piece, from the bottom up. First you work the red base in rows, narrowing it into a trapezoid. Then you switch to blue and shape the dome with increases and decreases. You edge the base in red and the dome in blue, embroider the snowflakes and dots in white, and finally block the piece.
Finished Size and Construction
- Finished size: 5.0 in (12.7 cm) wide x 5.4 in (13.7 cm) tall
- Skill level: Easy / advanced beginner
- Terminology: US crochet terms
- Yarn weight: Worsted (#4)
- Hook: 4.0 mm (G-6)
- Number of pieces: 1
- Layout: Single stand-alone motif, no joining
- Piece size before border: 4.5 in (11.4 cm) wide x 4.9 in (12.4 cm) tall
- Border depth: 1 round of sc, about 0.25 in (0.6 cm) on each edged side
Materials
Use a smooth worsted-weight acrylic or cotton-acrylic blend. A slightly fuzzy yarn will soften the snowflakes, so choose a crisp, plied yarn for the clearest embroidery.
- Light blue (globe): 15 g, about 30 m
- Dark red (base): 8 g, about 16 m
- White (snowflakes and dots): 3 g, about 6 m
These quantities include a margin for swatching and weaving in ends.
Tools:
– 4.0 mm (G-6) crochet hook
– Tapestry needle
– Scissors
– 2 stitch markers
– Rust-proof pins and a blocking mat
– Spray bottle
– Water-soluble fabric marker (optional, for marking the snowflake positions)
Abbreviations (US Terms)
- ch – chain
- sc – single crochet
- sc2tog – single crochet 2 together
- st(s) – stitch(es)
- sl st – slip stitch
- RS – right side
Special stitch – sc2tog: Insert the hook in the next st, yarn over and pull up a loop. Insert the hook in the following st, yarn over and pull up a loop. Yarn over and draw through all 3 loops on the hook. This turns 2 sts into 1.
Color change: Work the last sc of the row until 2 loops remain on the hook. Drop the old color, yarn over with the new color and pull it through both loops.
Gauge and Checkpoints
Gauge: 16 sc and 18 rows = 4 in (10.2 cm). That works out to 4 sts and 4.5 rows per inch (2.5 cm).
Make a 20-st, 20-row sc swatch and measure the center 4 in (10.2 cm). Every size in this pattern depends on this gauge.
Checkpoints:
– After base Row 1: the bottom edge measures 4.0 in (10.2 cm), which is 16 sts.
– After base Row 7: the base is 1.6 in (4.1 cm) tall and its top edge measures 3.0 in (7.6 cm), which is 12 sts.
– After globe Row 9: the globe is at its widest, 4.5 in (11.4 cm), which is 18 sts. Total height is 3.6 in (9.1 cm), which is 16 rows.
– After globe Row 15: total height is 4.9 in (12.4 cm), which is 22 rows.
– After the border: the piece measures 5.0 in (12.7 cm) wide x 5.4 in (13.7 cm) tall.
If your piece is too big, go down to a 3.75 mm (F-5) hook. If it is too small, go up to a 4.5 mm (7) hook. Change the hook, not the stitch counts. The shaping depends on the exact counts.
Base (Dark Red)
Ch 1 at the start of each row does not count as a stitch. Turn at the end of every row.
Foundation: With red, ch 17.
Row 1 (RS): Sc in the 2nd ch from the hook and in each ch across. Ch 1, turn. (16 sts)
Row 2: Sc in each st across. Ch 1, turn. (16 sts)
Row 3: Sc2tog, sc in the next 12 sts, sc2tog. Ch 1, turn. (14 sts)
Rows 4–5: Sc in each st across. Ch 1, turn. (14 sts each row)
Row 6: Sc2tog, sc in the next 10 sts, sc2tog. Ch 1, turn. (12 sts)
Row 7: Sc in each st across. Change to light blue in the last st. Cut red, leaving a 4 in (10.2 cm) tail. Ch 1, turn. (12 sts)
The decreases in Rows 3 and 6 pull both sides inward by 1 st each time. That turns the base into a trapezoid that is 4 sts narrower at the top than at the bottom.
Globe (Light Blue)
Row 1: 2 sc in the first st, sc in the next 10 sts, 2 sc in the last st. Ch 1, turn. (14 sts)
Row 2: 2 sc in the first st, sc in the next 12 sts, 2 sc in the last st. Ch 1, turn. (16 sts)
Row 3: 2 sc in the first st, sc in the next 14 sts, 2 sc in the last st. Ch 1, turn. (18 sts)
Rows 4–9: Sc in each st across. Ch 1, turn. (18 sts each row)
These quick increases push the globe out past the base on both sides, which gives the snow globe its rounded “shoulders” where it meets the stand.
Row 10: Sc2tog, sc in the next 14 sts, sc2tog. Ch 1, turn. (16 sts)
Row 11: Sc in each st across. Ch 1, turn. (16 sts)
Row 12: Sc2tog, sc in the next 12 sts, sc2tog. Ch 1, turn. (14 sts)
Row 13: Sc2tog, sc in the next 10 sts, sc2tog. Ch 1, turn. (12 sts)
Row 14: Sc2tog, sc in the next 8 sts, sc2tog. Ch 1, turn. (10 sts)
Row 15: Sc2tog twice, sc in the next 2 sts, sc2tog twice. (6 sts) Fasten off.
The decreases come slowly at first and then faster toward the top, so the dome follows a circle instead of a point. The border will smooth out the small steps at the row ends.
Check your piece now. It should measure 4.5 in (11.4 cm) at its widest and 4.9 in (12.4 cm) tall.
Border
Border gauge: 4 sc per inch (2.5 cm) along the edges, which matches your main gauge. Work with the RS facing. Each border is a single pass of sc, not a closed round.
Base Edge (Dark Red)
Attach red with a sl st to the right-hand end of base Row 7, where the base meets the globe.
- Right side: Work 1 sc in each row end down to Row 1. (7 sc)
- Bottom: Work across the remaining loops of the foundation chain: 3 sc in the first loop (corner), sc in the next 14 loops, 3 sc in the last loop (corner). (20 sc)
- Left side: Work 1 sc in each row end up to Row 7. (7 sc)
Total: 34 sc. Fasten off.
The 20 bottom stitches include both 3-sc corner groups. The side counts of 7 do not include corners, so no stitch is counted twice.
Globe Edge (Light Blue)
Attach light blue with a sl st to the left-hand row end of globe Row 1, just above the red edge.
- Left side: Work 1 sc in each row end of Rows 1–15, with 2 sc in the row ends of Rows 10, 13 and 15. (18 sc)
- Top: 2 sc in the first st of Row 15, sc in the next 4 sts, 2 sc in the last st. (8 sc)
- Right side: Work down the row ends of Rows 15–1, with 2 sc in the row ends of Rows 15, 13 and 10 and 1 sc in every other row end. (18 sc)
Total: 44 sc. Fasten off at the right-hand end of Row 1.
Why the math works: Each side of the dome has 15 row ends. Twelve of them get 1 sc and three of them get 2 sc: 12 + (3 x 2) = 18. The extra sts sit at the points where the edge curves most sharply, so the curve lies flat without rippling. Each side of the dome measures about 4.4 in (11.2 cm) along the edge, and 18 sc at 4 sc per inch covers 4.5 in (11.4 cm). That small extra length is just enough for the outside of the curve. On the base, 7 sc over 7 rows keeps the straight sides firm, and the 3-sc corner groups turn the bottom corners neatly.
Each side of the border adds 0.25 in (0.6 cm). The width becomes 4.5 + 0.25 + 0.25 = 5.0 in (12.7 cm). The height becomes 4.9 + 0.25 + 0.25, which is 5.4 in (13.7 cm) after rounding.
Embroidery (White)
Use the tapestry needle and a single strand of white. Work from the RS and keep the stitches snug but not tight.
Large snowflake: Center it on globe Row 11, between the middle 2 sts. Make 3 straight stitches, each 1.25 in (3.2 cm) long, that cross at the center to form 6 arms (vertical, plus two diagonals). Near the tip of each arm, add a small V of two 0.25 in (0.6 cm) stitches angled outward.
Small snowflakes: Center one on globe Row 5, 4 sts in from the left edge. Center another on globe Row 5, 4 sts in from the right edge. Make each the same way as the large snowflake, using 1 in (2.5 cm) straight stitches and 0.2 in (0.5 cm) V tips.
Snow dots: Make 8 French knots, wrapping the yarn twice around the needle for each one. Scatter them in the open spaces: 2 beside the top of the large snowflake, 2 on either side of its center, 2 between the small snowflakes, and 2 just above each small snowflake.
Weave all ends into the back of matching colors.
Final Blocking
- Lightly mist the piece with water until it is damp but not soaked.
- Lay it RS up on the blocking mat.
- Pin the bottom edge straight to 4.5 in (11.4 cm), including the red border.
- Pin the widest part of the globe to 5.0 in (12.7 cm).
- Pin the top of the dome so the total height is 5.4 in (13.7 cm).
- Shape the dome into a smooth curve with pins about every 0.5 in (1.3 cm).
- Make sure the snowflake arms lie straight and the knots sit on top of the fabric.
- Let the piece dry completely before you unpin it.
Final Quality-Control Checklist
- The base has 16 sts at the bottom and 12 sts at the top, and both sides slope evenly.
- The globe reaches 18 sts at Rows 3–9 and ends with 6 sts at Row 15.
- The red edge has 34 sc and the blue edge has 44 sc.
- The color change between the base and the globe is clean, with no red showing in the blue.
- The snowflakes are centered and symmetrical, and all 8 knots are secure.
- The finished piece measures 5.0 in (12.7 cm) x 5.4 in (13.7 cm).
- All ends are woven in and none show on the front.
Troubleshooting
The dome looks pointed. You probably decreased too fast. Check that Row 11 is a plain row with 16 sts.
The globe edge ruffles. You added too many 2-sc row ends. Work the extra sc only in Rows 10, 13 and 15.
The globe edge cups or pulls. Your border is too tight. Loosen your tension or work the border with a hook one size larger.
The base sides are uneven. Make sure both sc2tog decreases in Rows 3 and 6 are at the very ends of the row.
The embroidery puckers. You pulled the stitches too tight. Remove them and redo them with gentler tension.
The colors bleed. Pre-wash red cotton yarn or use acrylic.
Care
Hand wash in cool water with mild soap, press out the water gently and dry flat. Avoid wringing it, because that can distort the dome and the snowflake stitches.

Final Notes
Every size in this pattern follows from one gauge: 16 sc and 18 rows = 4 in (10.2 cm). The 7-row base measures 1.6 in (4.1 cm) tall. The globe reaches 4.5 in (11.4 cm) wide at 18 sts, and all 22 rows together measure 4.9 in (12.4 cm). The one-stitch border adds 0.25 in (0.6 cm) per edge, which brings the finished piece to 5.0 in (12.7 cm) x 5.4 in (13.7 cm). Check each stage as you go and your snow globe will come out right.
Happy crocheting!