

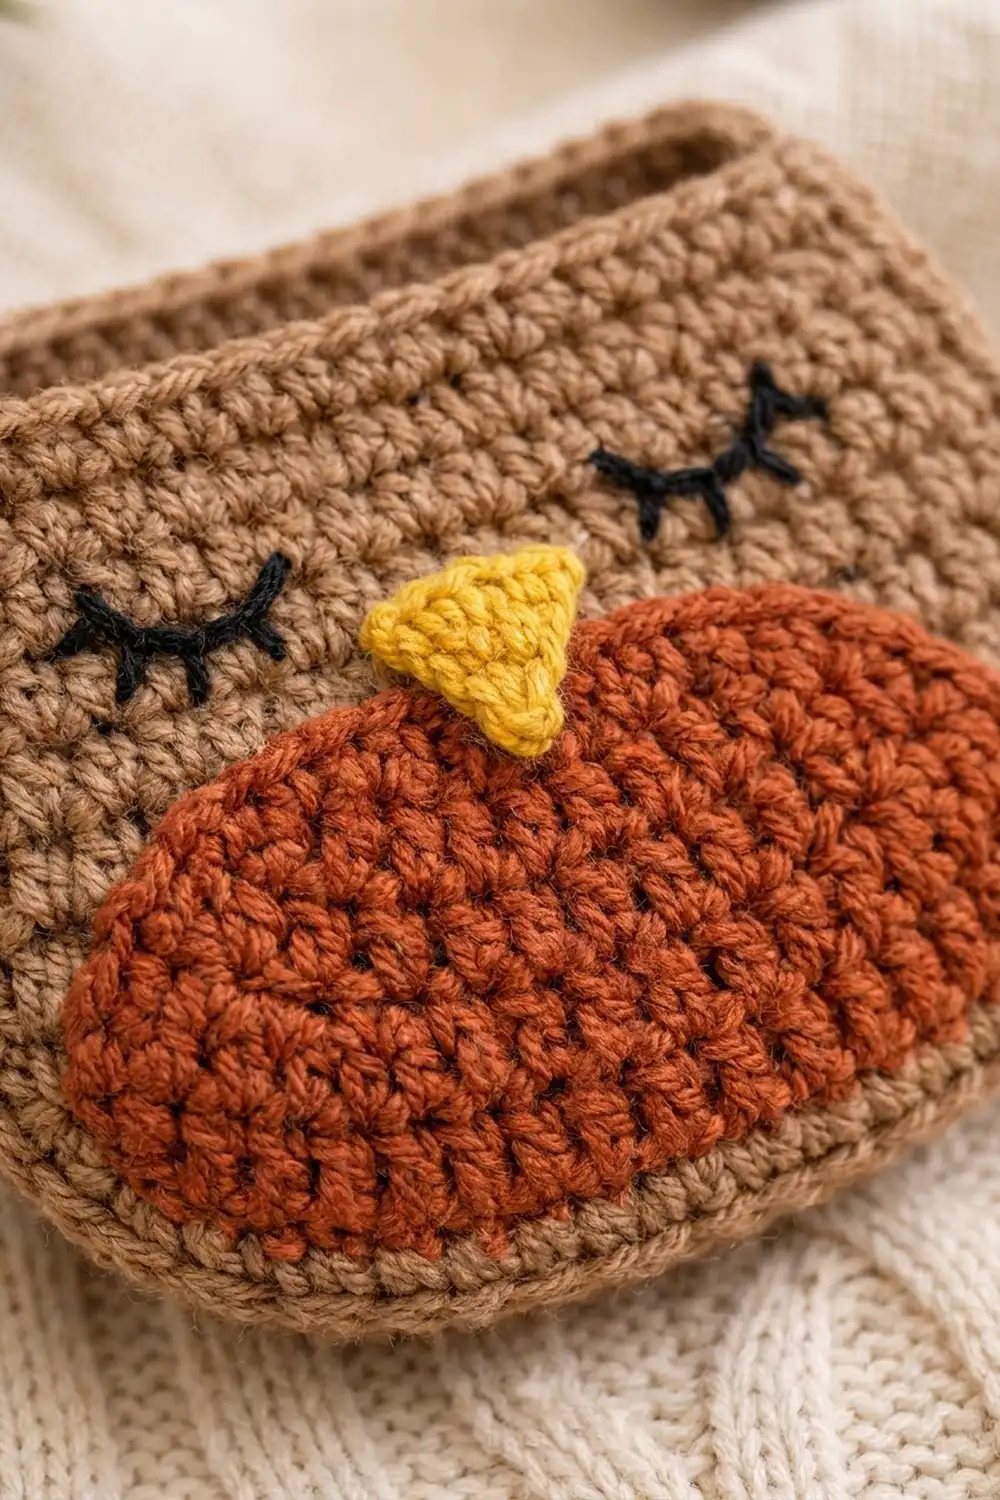
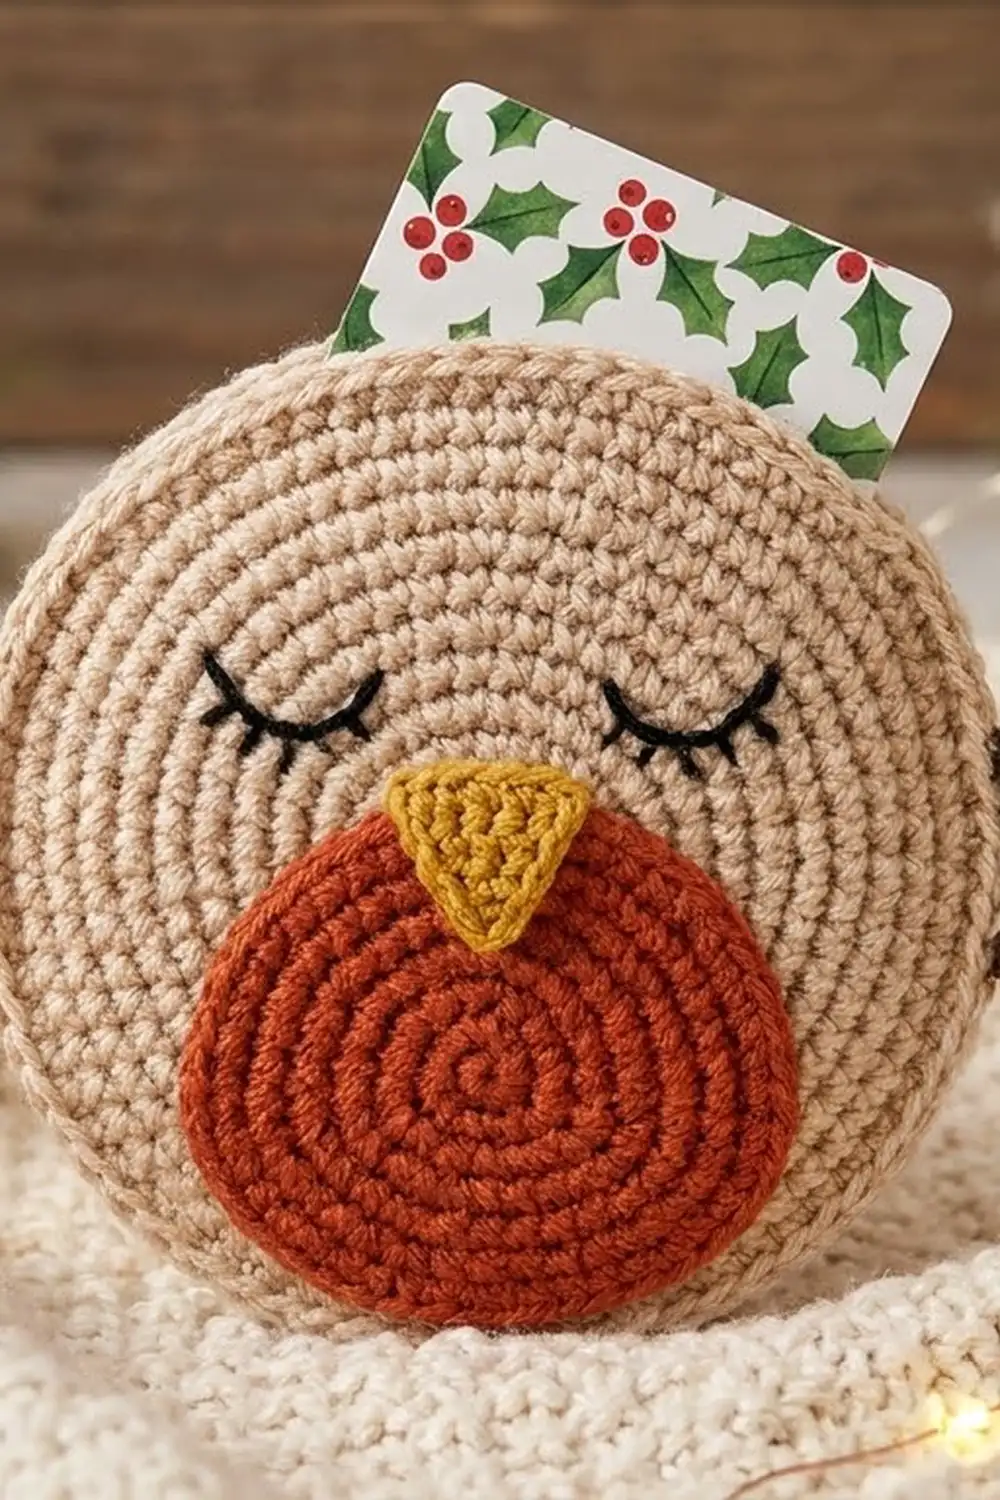
This little robin is a pocket with a job to do: it holds a gift card or a small tag card. Its eyes are closed and its rust belly is puffed out, so it looks like it’s dozing over the present.
The body is a warm light tan. The belly is rust orange, the beak is mustard yellow, the tail is dark chocolate brown and the closed eyes are stitched in black. The style is flat and graphic, with no stuffing. In DK yarn it looks neat and holds its shape.
This pattern uses US crochet terms. The finished holder is 4.7 in (11.9 cm) wide at its widest point and 3.4 in (8.6 cm) tall. The opening is about 3.8 in (9.7 cm) wide inside, so a standard 3.375 x 2.125 in (8.6 x 5.4 cm) gift card drops straight in.
Here’s how it’s built:
– Crochet two matching body panels in double crochet rows.
– Edge each panel with one round of single crochet.
– Sew the appliqués onto the front panel.
– Join the panels with slip stitches along the sides and bottom, leaving the top open.
Finished Size and Construction
- Finished size: 4.7 in (11.9 cm) wide x 3.4 in (8.6 cm) tall
- Skill level: Easy / advanced beginner
- Terminology: US crochet terms
- Yarn weight: DK (#3 light)
- Hook: 3.5 mm (E-4)
- Number of pieces: 1 finished holder, made from 2 body panels, 1 belly, 1 beak and 1 tail, plus embroidered eyes
- Layout: Front and back panels placed wrong sides together. Belly, beak and eyes go on the front. The tail goes on the right side seam.
- Panel size before edging: 4.2 in (10.7 cm) wide x 2.9 in (7.4 cm) tall
- Edging depth: 1/4 in (0.6 cm) on every edge
- Belly appliqué: oval, 3.6 in (9.1 cm) x 1.8 in (4.6 cm)
Materials
Pick a smooth DK yarn that shows the stitches clearly. Cotton or a cotton blend gives crisp edges and a firm pocket. Acrylic DK also works and feels a little softer. The amounts below assume about 225 m per 100 g.
- Light tan (body): 20 g / 45 m
- Rust orange (belly): 5 g / 11 m
- Mustard yellow (beak): 2 g / 5 m
- Dark chocolate brown (tail): 2 g / 5 m
- Black (eyes): 1 g / 2 m
These amounts include a small extra margin for swatching and sewing tails.
Tools:
– 3.5 mm (E-4) crochet hook
– Tapestry needle
– Stitch markers (4)
– Scissors and pins
– Ruler or tape measure
– Spray bottle and blocking mat
Abbreviations (US Terms)
- ch – chain
- sl st – slip stitch
- sc – single crochet
- dc – double crochet
- st(s) – stitch(es)
- RS / WS – right side / wrong side
- sc2tog – single crochet 2 together: (insert hook in next st, yarn over, pull up a loop) twice, yarn over, pull through all 3 loops
- dc2tog – double crochet 2 together: (yarn over, insert hook in next st, yarn over, pull up a loop, yarn over, pull through 2 loops) twice, yarn over, pull through all 3 loops
Special note: In the body panels, the ch-3 at the start of each row counts as 1 dc.
Gauge and Checkpoints
Gauge: 20 dc x 11 rows = 4 in (10.2 cm) with a 3.5 mm hook.
Make one full body panel first. It works as your gauge swatch, and you’ll use it in the finished holder. Check it at each stage:
| Stage | Stitches | Width | Height |
|---|---|---|---|
| After Row 1 | 15 | 3 in (7.6 cm) | — |
| After Row 4 | 21 | 4.2 in (10.7 cm) | about 1.5 in (3.8 cm) |
| After Row 8 | 19 across the top | 4.2 in (10.7 cm) at the widest point | 2.9 in (7.4 cm) |
| After the edging | 70 | 4.7 in (11.9 cm) | 3.4 in (8.6 cm) |
If the panel is too big: switch to a 3.25 mm hook. Even 0.3 in (0.8 cm) of extra width makes the holder look baggy.
If the panel is too small: switch to a 3.75 mm hook. The opening has to stay at least 3.5 in (8.9 cm) wide inside, or a gift card won’t fit.
Body Panels (Make 2)
Use light tan. You work each panel from the bottom up. The increases in Rows 2–4 round the lower corners and make the sides bulge. The decreases in Row 7 narrow the head a little.
Row 1 (RS): Ch 17. Dc in 4th ch from hook (the 3 skipped ch count as 1 dc) and in each ch across. Turn. (15 sts)
Row 2: Ch 3 (counts as dc), dc in same st, dc in each st across to last st, 2 dc in last st. Turn. (17 sts)
Row 3: Ch 3, dc in same st, dc in each st across to last st, 2 dc in last st. Turn. (19 sts)
Row 4: Ch 3, dc in same st, dc in each st across to last st, 2 dc in last st. Turn. (21 sts)
Rows 5–6: Ch 3, dc in each st across. Turn. (21 sts per row)
Row 7: Ch 3, dc2tog over next 2 sts, dc in next 15 sts, dc2tog over next 2 sts, dc in last st. Turn. (19 sts)
Row 8: Ch 3, dc in each st across. Don’t fasten off. (19 sts)
Checkpoint: 4.2 in (10.7 cm) wide across Rows 4–6, 3.8 in (9.7 cm) across the top and 2.9 in (7.4 cm) tall. Go straight on to the edging round in the Border section.
Belly Appliqué (Make 1)
Use rust orange. The belly is a flat oval worked in rounds around both sides of a foundation chain. At the end of each round, sl st to the first sc to join, then ch 1. The ch 1 doesn’t count as a stitch.
Rnd 1: Ch 13. Sc in 2nd ch from hook, sc in next 10 ch, 3 sc in last ch. Turn the piece and work along the underside of the chain: sc in next 10 ch, 2 sc in last ch (the same ch as the first sc). Join. (26 sts)
Rnd 2: 2 sc in first st, sc in next 10 sts, 2 sc in each of next 3 sts, sc in next 10 sts, 2 sc in each of last 2 sts. Join. (32 sts)
Rnd 3: Sc in first st, 2 sc in next st, sc in next 10 sts, [sc in next st, 2 sc in next st] 3 times, sc in next 10 sts, [sc in next st, 2 sc in next st] 2 times. Join. (38 sts)
Rnd 4: Sc in next 2 sts, 2 sc in next st, sc in next 10 sts, [sc in next 2 sts, 2 sc in next st] 3 times, sc in next 10 sts, [sc in next 2 sts, 2 sc in next st] 2 times. Join. (44 sts)
Fasten off and leave a 12 in (30.5 cm) tail for sewing.
Checkpoint: 3.6 in (9.1 cm) x 1.8 in (4.6 cm).
Beak (Make 1)
Use mustard yellow.
Row 1: Ch 5. Sc in 2nd ch from hook and in each ch across. Turn. (4 sts)
Row 2: Ch 1, sc2tog twice. Turn. (2 sts)
Row 3: Ch 1, sc2tog. (1 st)
Fasten off and leave an 8 in (20.3 cm) tail. You’ll have a small pointed triangle, 0.8 in (2.0 cm) wide x 0.6 in (1.5 cm) tall.
Tail (Make 1)
Use dark chocolate brown.
Ring: Ch 4 and sl st to the first ch to make a ring.
Lobes: [Ch 3, 2 dc in ring, ch 3, sl st in ring] 3 times. (3 lobes, each with 2 dc)
Stem: Ch 3. Fasten off and leave an 8 in (20.3 cm) tail.
Checkpoint: About 0.9 in (2.3 cm) wide x 0.8 in (2.0 cm) tall with the lobes spread into a fan.
Front Panel Details
Sew everything onto one panel before joining, so no stitching shows inside the pocket. Lay that panel RS up with Row 8 at the top.
- Belly: Center the oval from side to side. Set its lower edge just above the bottom edging so it covers Rows 1–5. Pin it, then whipstitch all the way around through the outer loops of Rnd 4.
- Beak: Center it on Row 6 with the flat Row 1 edge at the top. Let the point overlap the top of the belly by about 0.2 in (0.5 cm). Whipstitch all three sides.
- Eyes: Split the black yarn to 2 plies. On Row 7, backstitch a downward curve 0.6 in (1.5 cm) long for each eye, with the eye centers 2 in (5.1 cm) apart. Under each curve, add 4 straight lashes about 0.1 in (0.3 cm) long.
Weave in all ends on the WS.
Border
The border is worked in two steps. First, each panel gets its own edging round. Then a joining round closes the pocket.
Border gauge: 1 sc round is 1/4 in (0.6 cm) deep. It adds 0.5 in (1.3 cm) to both the total width and the total height.
Edging Round (Each Panel)
Pick up straight after Row 8. Ch 1 and turn so the RS faces you. You’re now at a top corner.
Edging Rnd:
– Top edge: 3 sc in first st (corner), sc in next 17 sts, 3 sc in last st (corner). (23 sts)
– First side: Working into the row ends, 2 sc around the post of each of the 8 rows. (16 sts)
– Bottom edge: Sc in the base of each of the 15 Row 1 sts. (15 sts)
– Second side: 2 sc around the post of each of the 8 rows. (16 sts)
Sl st to the first sc to join. (70 sts: 23 + 16 + 15 + 16) Fasten off.
The top count of 23 already includes both corner groups. The bottom corners don’t get corner groups because the increases in Rows 2–4 have already rounded them.
Why the math works:
– One dc row is about as tall as 2 sc, so working 2 sc per row end keeps the sides flat.
– Along the top, 2 + 17 sc + 2 + … works out like this: the 19 sts of Row 8 each get 1 sc, and the two corner sts each get 2 extra, for 23.
– Along the bottom, each of the 15 Row 1 sts gets 1 sc.
Joining Round
- Place the panels WS together with the decorated front facing you.
- Match the stitches: 16 to 16 on each side and 15 to 15 along the bottom.
- Join light tan through both layers in the first side sc, right after the top corner group.
- Working through the outer loops of both panels, sl st in each of the 16 side sts, the 15 bottom sts and the 16 sts on the other side. (47 sl sts)
- Fasten off. The 23 top stitches on each panel stay unjoined, and this is the opening.
Tension: Keep each sl st the same length as the sc underneath it. If your slip stitches are tight, they’ll pull the bottom edge into a frown. If that happens, use a 4.0 mm hook for this round only.
Tail: Sew the tail stem to the right seam over side sts 7–10, which line up with Rows 4–5. Stitch through both layers so the lobes fan outward.
Size checkpoint: 4.7 in (11.9 cm) x 3.4 in (8.6 cm), not counting the tail.
Final Blocking
- Weave in any remaining ends inside the pocket.
- Slide a 3.5 x 2.25 in (8.9 x 5.7 cm) piece of card into the pocket to hold its shape.
- Lay the holder front side up on the blocking mat.
- Pin it to 4.7 in (11.9 cm) x 3.4 in (8.6 cm), following the rounded bottom edge.
- Mist it lightly with water. Don’t soak it, or the appliqués may shift.
- Fan out the tail lobes and pin each one.
- Let it dry completely, then remove the pins and the card.
Final Quality-Control Checklist
- Each panel has 19 sts in Row 8 and 70 sts in the edging round.
- Front and back match in size to within 0.1 in (0.3 cm).
- The belly is centered, with an even strip of tan showing below it.
- The beak overlaps the belly and points straight down.
- The eyes are level and 2 in (5.1 cm) apart, with the lashes pointing down.
- All 47 joining sl sts lie flat, with no gaps at the bottom corners.
- A gift card slides in easily through the open top.
- The tail is firmly attached and fans outward.
Troubleshooting
Wavy sides: There are too many edging stitches along the sides. Use exactly 2 sc per row end, for 16 per side.
Sides pulling in: Your sc are too tight. Use a hook 0.25 mm larger for the edging round.
Belly cupping: Your increases are tight. Go up one hook size for the belly, or block it flat before sewing it on.
Belly ruffling: Check your counts for Rnd 3 (38) and Rnd 4 (44). Extra increases at the ends cause ruffles.
Card won’t fit: Your gauge is tight. The inside of the opening needs to be at least 3.5 in (8.9 cm) wide.
Bulky seam: Work the joining round through the outer loops only.
Care
Hand wash in cool water and lay flat to dry, reshaping the tail while it’s damp. Don’t tumble dry.
Final Notes
Each measurement leads to the next. A gauge of 20 dc x 11 rows = 4 in (10.2 cm) gives a panel 4.2 in (10.7 cm) wide x 2.9 in (7.4 cm) tall. The 70-stitch edging adds 1/4 in (0.6 cm) on every edge, bringing the panel to 4.7 in (11.9 cm) x 3.4 in (8.6 cm). The 47-stitch joining round closes the sides and bottom and leaves the 3.8 in (9.7 cm) opening free. If you check each stage as you go, the belly, beak and sleepy eyes will sit right where they belong.
Happy crocheting!