
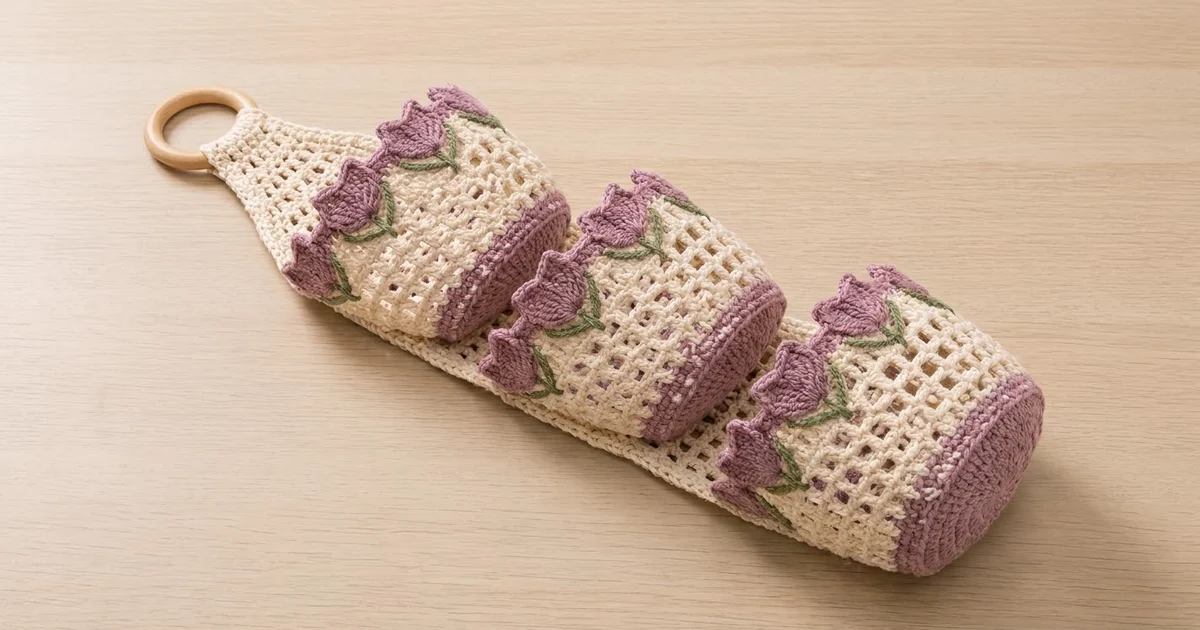
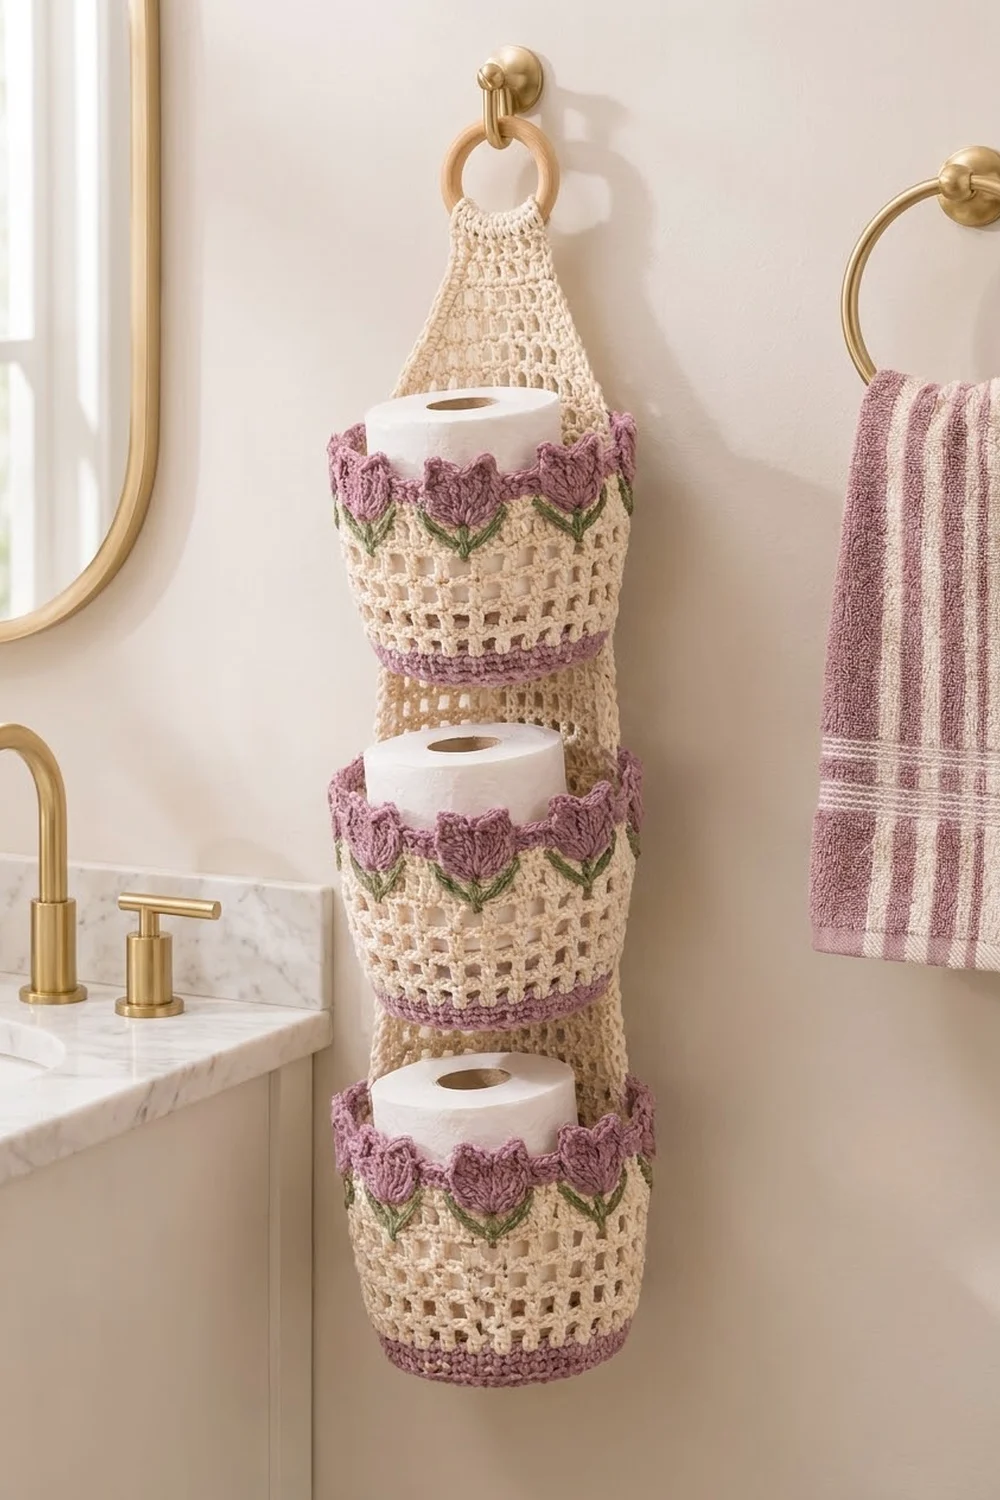
This hanging holder stores three spare toilet rolls in a column of crocheted pockets. A long cream mesh back panel narrows at the top into a strap that loops over a wooden ring. Three round pockets are sewn down the front, one above the other.
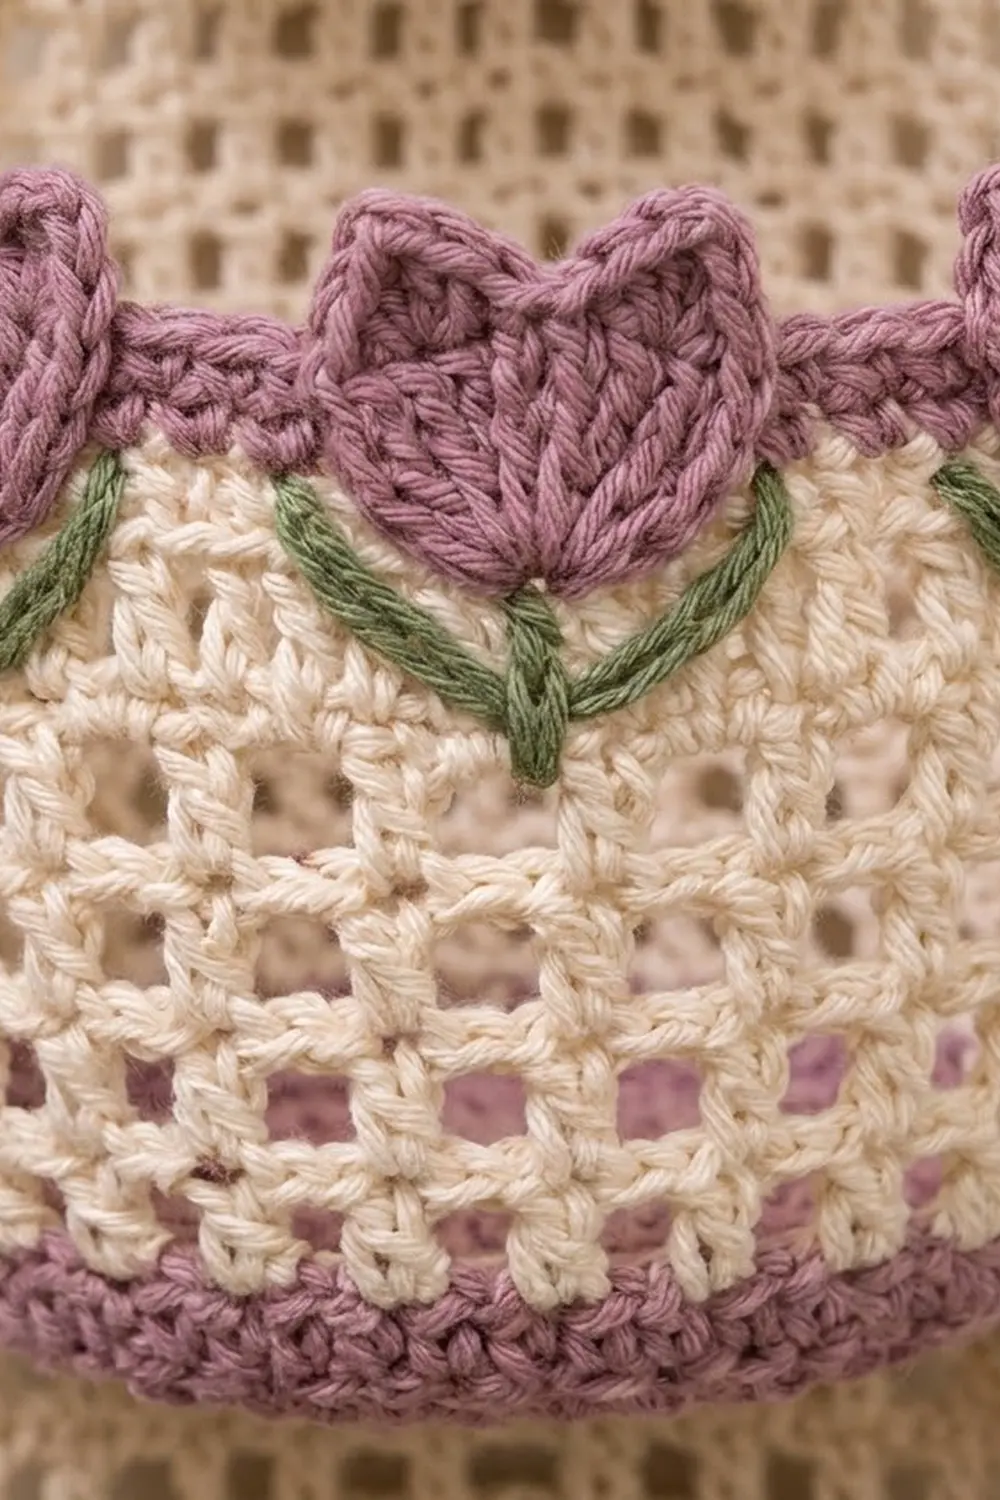
Each pocket has a solid mauve base and a mauve band at the bottom. Above that is a cream open mesh body, then a band of mauve tulips with green embroidered stems. The tulip tops meet to form a scalloped mauve rim. The soft cream, dusty mauve, and sage green give it a calm, cottage-style look.
This pattern uses US crochet terms. The finished holder is about 7.15 in (18.2 cm) wide and about 25 in (63.5 cm) long, measured from the bottom edge to the top of the strap loop. Each pocket stands 5.8 in (14.7 cm) tall and sticks out about 4.5 in (11.4 cm) from the panel.
Here is how it goes together. You crochet the back panel flat in filet mesh rows, then decrease it into a solid taper and finish with a single crochet strap. You work each pocket in joined rounds, starting from a flat base. Then you add a border to the panel, embroider the stems, and whipstitch the pockets in place.
Finished Size and Construction
- Finished size: about 7.15 in (18.2 cm) x 25 in (63.5 cm), not counting the ring
- Skill level: Intermediate
- Terminology: US
- Yarn weight: Worsted (#4) cotton
- Hook: 5 mm (H-8)
- Number of pieces: 4 (1 back panel, 3 pockets)
- Layout: 3 pockets stacked in one column on the panel
- Panel size before border: 6.25 in (15.9 cm) x 20 in (50.8 cm) of mesh, plus a 2.5 in (6.4 cm) taper and the strap
- Pocket size: 18 in (45.7 cm) around, 5.8 in (14.7 cm) tall
- Border depth: about 0.45 in (1.1 cm), on the panel’s sides and bottom
Materials
Choose a smooth, firm worsted-weight cotton or cotton blend. Cotton holds the pocket shape better than acrylic and copes better with bathroom damp. The amounts below assume about 85 m per 50 g.
- Cream (main color): 90 g, about 153 m
- Mauve (base, bands, tulips): 60 g, about 102 m
- Sage green (stems and leaves): 10 g, about 17 m
Tools:
– 5 mm (H-8) crochet hook
– Wooden ring, 2.5 in (6.4 cm) outside diameter
– Tapestry needle
– 4 stitch markers
– Blocking mats and rust-proof pins
– Measuring tape
These quantities include about a 20% margin for the test pocket and for differences in tension.
Abbreviations (US Terms)
- ch – chain
- sl st – slip stitch
- sc – single crochet
- dc – double crochet
- tr – treble crochet
- BLO – back loop only
- inc – 2 sc in the same stitch
- dc2tog / dc3tog – double crochet 2 (or 3) together
- sp – space
- MR – magic ring
- RS – right side
Special stitch – Tulip shell: 7 tr in the same stitch.
Gauge and Checkpoints
- Single crochet: 16 sc and 18 rows = 4 in (10.2 cm)
- Mesh: 8 squares (16 sts) and 8 rows = 4 in (10.2 cm). Each square is 0.5 in (1.3 cm) wide and 0.5 in (1.3 cm) tall.
Make one pocket first. It uses every stitch in the project, so it works as your gauge test.
Checkpoints:
– Base after Rnd 12: 5.5–5.7 in (14.0–14.5 cm) across, lying flat or very slightly domed
– Pocket after Rnd 21: the wall is about 3.7 in (9.4 cm) tall, measured from the base edge
– Finished pocket: 5.8 in (14.7 cm) tall, measured to the tulip tips
– Panel after Row 8: 6.25 in (15.9 cm) wide x 4 in (10.2 cm) tall
If the base is bigger than 5.7 in (14.5 cm), switch to a 4.5 mm hook. If it is smaller than 5.5 in (14.0 cm), switch to a 5.5 mm hook. If the base ruffles, make your stitches a little taller. If it cups strongly, go up one hook size.
Pocket (make 3)
Work in joined rounds and do not turn. The join marks the center back of the pocket, so keep each round’s join lined up with the one below it.
Base (mauve)
Rnd 1: 6 sc in MR, sl st to first sc. (6 sts)
Rnd 2: Ch 1, inc in each st around, join. (12 sts)
Rnd 3: Ch 1, sc in next st, inc 6 times, join. (18 sts)
Rnds 4–12: Ch 1, sc in next N sts, inc 6 times, join. N is the round number minus 2. For example, in Rnd 4 you work sc in next 2 sts, inc.
Each round’s total: Rnd 4 = 24, Rnd 5 = 30, Rnd 6 = 36, Rnd 7 = 42, Rnd 8 = 48, Rnd 9 = 54, Rnd 10 = 60, Rnd 11 = 66, Rnd 12 = 72.
Lower Band (mauve)
Rnd 13: Ch 1, sc in BLO of each st around, join. (72 sts) This makes a ridge where the wall turns up from the base.
Rnds 14–15: Ch 1, sc in each st around, join. (72 sts) Fasten off. The band is about 0.67 in (1.7 cm) tall.
Mesh Body (cream)
Rnd 16: Join cream at center back. Ch 4 (counts as dc + ch 1), skip next st, dc in next st, ch 1, skip next st around, sl st to 3rd ch of beginning ch-4. (36 dc + 36 ch-1 sps = 72 sts, 36 squares)
Rnds 17–21: Ch 4 (counts as dc + ch 1), dc in next dc, ch 1 around, join to 3rd ch of ch-4. (72 sts)
Check the circumference now: 18 in (45.7 cm).
Tulip Background (cream)
Rnd 22 (conversion): Ch 1, sc in each dc and in each ch-1 sp around, join. (36 sc in the dc + 36 sc in the sps + 0 added = 72 sts)
Rnds 23–25: Ch 1, sc in each st around, join. (72 sts) Fasten off. The wall should now measure about 4.6 in (11.7 cm).
Tulip Heads (mauve)
Rnd 26: Join mauve in the center-back st. Ch 1, sc in next st, skip 3 sts, Tulip shell in next st, skip 3 sts 9 times, sl st to first sc. (9 sc + 63 tr = 72 sts, 9 tulips)
Each repeat uses 8 stitches, and 9 x 8 = 72. The shells flare outward, so cream shows between the narrow tulip bases.
Rnd 27 (petal edge): Ch 1, sl st in sc, sc in 1st tr, (sc, ch 2, sc) in 2nd tr, sc in 3rd tr, (sc, ch 3, sc) in 4th tr, sc in 5th tr, (sc, ch 2, sc) in 6th tr, sc in 7th tr 9 times, join. (9 sl sts + 90 sc + 27 ch-sps)
This gives each tulip two side petals and a taller center petal. Next-door shells touch at the top, which forms the continuous scalloped rim. Fasten off and weave in the ends.
Stems and Leaves (green)
Use a single strand of green to chain-stitch a stem straight down from the base of each front tulip, through Rnds 25 to 22. Each stem is about 0.9 in (2.3 cm) long. On Rnd 23, add one lazy-daisy leaf on each side of the stem, angled upward.
Embroider only the 7 front tulips. The 2 tulips at center back sit against the panel, so their stems wouldn’t show.
Back Panel (cream)
Mesh Body
Row 1 (RS): Ch 28, dc in 6th ch from hook (the skipped chs count as dc + ch 1), ch 1, skip 1 ch, dc in next ch across. (13 dc + 12 ch-1 sps = 25 sts)
Rows 2–40: Ch 4 (counts as dc + ch 1), turn, dc in next dc, ch 1, dc in next dc across, working the last dc into the top of the turning ch. (25 sts)
Checkpoints: the panel is 10 in (25.4 cm) tall at Row 20 and 20 in (50.8 cm) tall at Row 40. The width stays 6.25 in (15.9 cm) throughout.
Taper (solid dc)
In these rows, the ch 2 does not count as a stitch.
Row 41 (conversion + decrease): Ch 2, turn, dc3tog, dc in next 19 sts, dc3tog. (25 sts worked one to one: 3 + 19 + 3, giving 21 sts)
Row 42: Ch 2, turn, dc3tog, dc in next 15 sts, dc3tog. (17 sts)
Row 43: Ch 2, turn, dc3tog, dc in next 11 sts, dc3tog. (13 sts)
Row 44: Ch 2, turn, dc3tog, dc in next 7 sts, dc3tog. (9 sts)
Row 45: Ch 2, turn, dc2tog, dc in next 5 sts, dc2tog. (7 sts)
The taper is 2.5 in (6.4 cm) tall.
Strap
Rows 46–65: Ch 1, turn, sc in each st across. (7 sts)
The strap is 1.75 in (4.4 cm) wide and about 4.4 in (11.2 cm) long. Leave a 12 in (30.5 cm) tail.
Pass the strap through the ring from front to back and fold it down. Whipstitch Row 65 to the back of Row 45, one stitch to one stitch (7 to 7). This forms a loop about 2 in (5.1 cm) tall.
Border (cream, panel sides and bottom)
Border gauge: 2 sc per mesh row-end and 1 sc per bottom stitch. In Row 1, the corner ch-1 spaces are not counted as stitches.
Row 1: With RS facing, join at the top of the right side edge, where Row 40 meets Row 41. Ch 1, then work 2 sc in each row-end down the side (80 sc). Ch 1 for the corner. Across the bottom, sc in the base of each of the 13 dc and in each of the 12 ch-1 sps (25 sc). Ch 1 for the corner. Work 2 sc in each row-end up the left side (80 sc). (185 sc + 2 corner sps)
Row 2: Ch 1, turn. Sc in each sc, working (sc, ch 1, sc) in each corner sp. Each corner sc counts toward the edge it sits on: side 81, bottom 27, side 81. (189 sc) Fasten off.
Why the math works: Each mesh row is 0.5 in (1.3 cm) tall. At 4 sc per inch, 2 sc also measure 0.5 in (1.3 cm). So 40 rows x 2 = 80 sc covers exactly 20 in (50.8 cm), with no stretching or ruffling. Across the bottom, 25 sts take 25 sc, or 6.25 in (15.9 cm). The two border rows add about 0.45 in (1.1 cm) to each side, so the width becomes 7.15 in (18.2 cm).
Joining (Pockets to Panel)
Method: Whipstitch with cream. Go through both loops of each pocket stitch and one strand of the matching panel stitch.
Stitch-to-stitch logic: On each pocket, mark 17 sts on Rnd 14 and 17 sts on Rnd 25: the center-back st plus 8 on each side. On the panel, mark sts 5–21 of the matching row, leaving 4 sts free at each edge. Sew 1 pocket st to 1 panel st. Both pieces have 4 sts per inch, so each seam is 4.25 in (10.8 cm) long on both pieces.
Placement:
– Bottom pocket: Rnd 14 to Row 1, and Rnd 25 to Row 10.
– Middle pocket: Rnd 14 to Row 14, and Rnd 25 to Row 23.
– Top pocket: Rnd 14 to Row 27, and Rnd 25 to Row 36.
The 9 rows between seams equal 4.5 in (11.4 cm). That matches the pocket’s height from Rnd 14 to Rnd 25. Pockets start 6.5 in (16.5 cm) apart, so there’s a 0.7 in (1.8 cm) gap between each tulip rim and the next pocket’s base.
Tension: Pull each stitch snug, but not so tight that the mesh puckers.
Size checkpoint: The top pocket’s tulip tips should sit about 18.8 in (47.8 cm) above the bottom of the panel, below the taper.
Final Blocking
- Soak the holder in cool water for 10 minutes, then press out the water without wringing.
- Roll it in a towel to remove more water.
- Pin the panel to 7.15 in (18.2 cm) x 20.45 in (51.9 cm), measuring from the bottom edge to the start of the taper.
- Stuff each pocket with a dry roll or a rolled towel.
- Pin out the three points of each tulip.
- Let it dry completely, about 24 hours, before hanging.
Final Quality-Control Checklist
- Every pocket has 72 sts in Rnds 12–26 and 9 tulips of the same size.
- 7 tulips per pocket have stems and leaves.
- The panel is 25 sts wide with 40 mesh rows.
- Border edge counts are 81 / 27 / 81, and the corners are square.
- The strap is sewn 7 to 7 and holds firm.
- Each seam is 17 sts long, level, and centered.
- A 4.3 in (10.9 cm) roll slides easily into each pocket.
- All ends are woven in on the wrong side.
Troubleshooting
- Pockets droop: Your mesh is too loose. Go down half a hook size, or add a third seam on Rnd 21.
- Base won’t lie flat: Make sure each round adds exactly 6 sts.
- Tulips curl backward: Block them over a stuffed pocket with the petals pinned forward.
- Panel edge ripples or pulls tight: You didn’t work exactly 2 sc per row-end. Redo the border with 80 sc per side.
- Holder leans to one side: A seam is off-center. Re-sew it on panel sts 5–21.
Care
Hand wash in cool water with mild soap. Dry flat with the pockets stuffed, and don’t tumble dry.
Final Notes
Each measurement depends on the one before it. A 16-sc gauge gives a 72-st base 5.5–5.7 in (14.0–14.5 cm) across. That base makes a pocket 18 in (45.7 cm) around and 5.8 in (14.7 cm) tall. The 25-st panel measures 6.25 in (15.9 cm) x 20 in (50.8 cm). The border brings it to 7.15 in (18.2 cm) wide, and the strap loop finishes the holder at about 25 in (63.5 cm) long. Check each stage as you go.
Happy crocheting!