
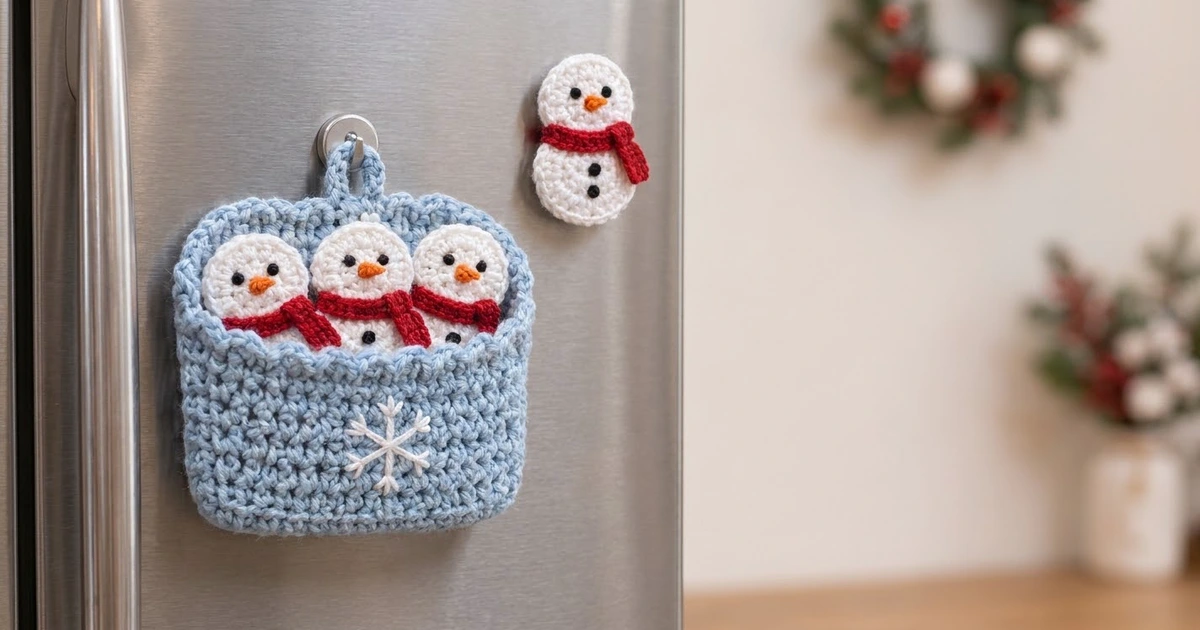
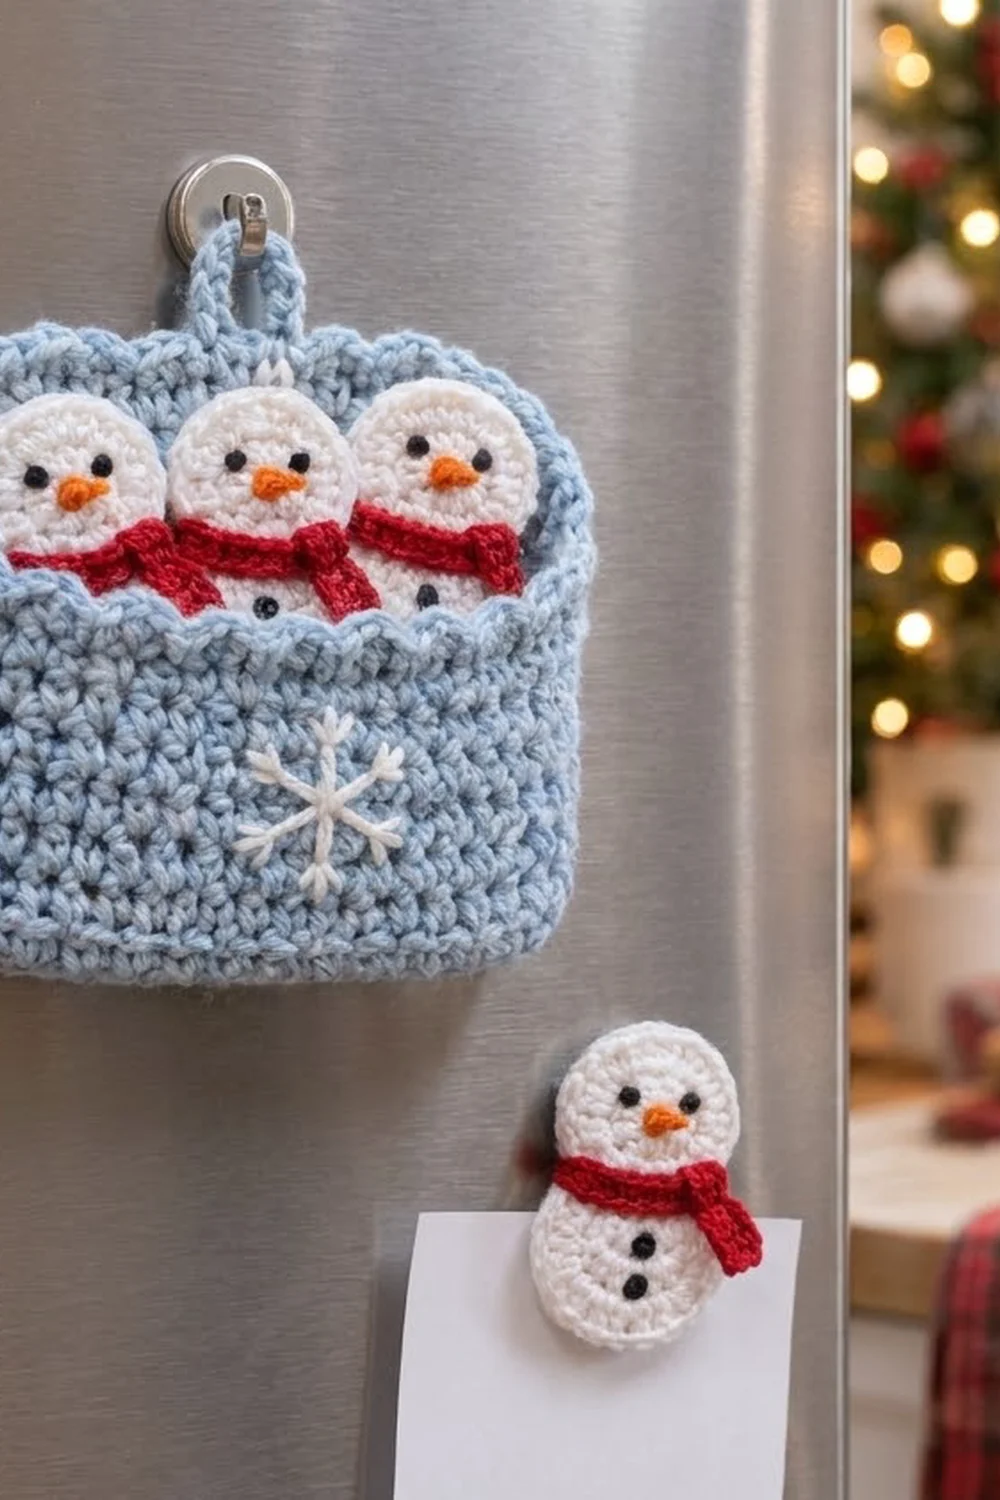
This small holiday set is one light blue pocket that hangs from a hook on your fridge, with three snowman magnets that tuck inside. Pull a snowman out to hold a note on the door, then pop it back in when you’re done. The pocket has a small scalloped rim, a hanging loop, and a white snowflake embroidered on the front.
The color palette is simple: light blue for the pocket, white for the snowmen and the snowflake, red for the scarves, plus a little orange and black for faces and buttons. Everything is worked in single crochet, so the fabric is firm and the snowmen lie flat.
The pattern uses US crochet terms. The pocket measures 6 in (15.2 cm) wide and 3 in (7.6 cm) tall, not counting the loop. Each snowman is 2.25 in (5.7 cm) wide and 3.75 in (9.5 cm) tall.
The pocket is worked in joined rounds around a foundation chain, so it comes off the hook as a closed-bottom pouch with no seams. One scallop round finishes the rim, and the loop goes on last. Each snowman is made from four flat circles (a front and back head, a front and back body) sewn together around a magnet.
Finished Size and Construction
- Pocket size: 6 in (15.2 cm) wide x 3 in (7.6 cm) tall, plus a 1 in (2.5 cm) loop
- Snowman size: 2.25 in (5.7 cm) wide x 3.75 in (9.5 cm) tall
- Skill level: Easy
- Terminology: US
- Yarn weight: Worsted (#4)
- Hook: 4.0 mm (G-6)
- Number of pieces: 1 pocket and 3 snowmen. Each snowman has 4 circles, a scarf, and a nose
- Layout: Snowmen stand side by side in the pocket, overlapping a little
- Pocket body before rim: 6 in (15.2 cm) wide x 2.5 in (6.4 cm) tall
- Rim (border) depth: 0.5 in (1.3 cm)
Materials
Worsted-weight cotton or a cotton blend gives the best shape. Cotton holds the scallops crisply and does not stretch as the pocket fills up. Smooth acrylic works too, but don’t use fuzzy or brushed yarn, since it hides the stitch texture and the embroidery. Amounts below assume about 180 m per 100 g.
- Light blue: 25 g (45 m) for the pocket and loop
- White: 30 g (54 m) for the 12 snowman circles, the whipstitching, and the snowflake
- Red: 5 g (9 m) for 3 scarves
- Orange: 2 g (4 m) for 3 noses
- Black: 2 g (4 m) for eyes and buttons
All quantities include a margin of about 20 percent.
Tools:
– 4.0 mm (G-6) crochet hook
– Tapestry needle
– 2 stitch markers
– Three round magnets, 1 in (2.5 cm) across and no thicker than 0.125 in (0.3 cm)
– One small adhesive wall hook for hanging the pocket
– Scissors and a ruler
Abbreviations (US Terms)
- ch – chain
- sl st – slip stitch
- sc – single crochet
- dc – double crochet
- sk – skip
- st(s) – stitch(es)
- MR – magic ring
- rnd – round
Special stitch: Small scallop. Sc in next st, sk 1 st, 3 dc in next st, sk 1 st. Each scallop uses 4 sts of the round below and makes 4 sts (1 sc + 3 dc).
Gauge and Checkpoints
Gauge: 16 sc and 18 rnds = 4 in (10.2 cm) in single crochet. That works out to 4 sc and 4.5 rnds per inch.
Make one snowman body circle first, since it’s the quickest test. After Rnd 5 it should measure 2.25 in (5.7 cm) across while lying flat. If it measures 2.5 in (6.4 cm) or more, go down to a 3.75 mm hook. If it measures 2 in (5.1 cm) or less, go up to a 4.5 mm hook.
Checkpoints:
– Pocket Rnd 1, flattened: 6 in (15.2 cm) wide
– Pocket after Rnd 6: about 1.25 in (3.2 cm) tall
– Pocket after Rnd 11: 2.5 in (6.4 cm) tall
– Pocket after rim: 3 in (7.6 cm) tall
– Head circle: 1.75 in (4.4 cm) across
– Body circle: 2.25 in (5.7 cm) across
– Assembled snowman: 3.75 in (9.5 cm) tall
If the pocket is too wide, your sc gauge is loose. Changing hooks fixes this better than removing stitches, because the rim math needs 48 sts. If the pocket is too short after Rnd 11, add one more sc rnd before the rim. If it is too tall, leave out one rnd.
The pocket is worked in joined rounds. Join each rnd with a sl st to the first sc. The ch 1 at the start of a rnd does not count as a st. Joined rounds keep the seam lined up at the right-hand side fold, and the rim needs that.
With light blue, ch 24.
Rnd 1: Sc in 2nd ch from hook and in next 21 ch (22 sc). Work 3 sc in last ch. Rotate to work along the opposite side of the foundation chain. Sc in next 21 ch, then 2 sc in last ch (the same ch as the first sc). Join. (48 sts)
Here’s how Rnd 1 breaks down: 22 + 3 + 21 + 2 = 48. The 3-sc and 2-sc groups are the two side folds. Put a marker in the middle sc of the 3-sc group (st 24) to show the left fold. The join marks the right fold.
Rnds 2–11: Ch 1, sc in each st around. Join. (48 sts each rnd)
There are no increases after Rnd 1. The end groups fold flat to make the gently rounded bottom corners, and the walls rise straight. Each face of the flattened pocket has 24 sts. Check that the pocket is 2.5 in (6.4 cm) tall and 6 in (15.2 cm) wide. Don’t fasten off. The rim comes next.
Make All Pieces
Make the snowman pieces next. Every circle uses the same increase sequence. Heads stop after Rnd 4 and bodies after Rnd 5. Work in continuous rnds and use a marker.
Circle (white):
– Rnd 1: 6 sc in MR. (6 sts)
– Rnd 2: 2 sc in each st. (12 sts)
– Rnd 3: (Sc in next st, 2 sc in next st) 6 times. (18 sts)
– Rnd 4: (Sc in next 2 sts, 2 sc in next st) 6 times. (24 sts) For a head, sl st in next st and fasten off. The circle should be 1.75 in (4.4 cm) across.
– Rnd 5 (bodies only): (Sc in next 3 sts, 2 sc in next st) 6 times. (30 sts) Sl st in next st and fasten off. The circle should be 2.25 in (5.7 cm) across.
For each body circle you’ll use to join a snowman, leave a 20 in (50.8 cm) tail. Leave short tails on the other circles.
Scarf (red): Ch 16. Row 1: Sc in 2nd ch from hook and in each ch across. (15 sts) Fasten off and leave an 8 in (20.3 cm) tail. The scarf is 3.75 in (9.5 cm) long.
Nose (orange): Ch 3. Sc in 2nd ch from hook, sl st in last ch. (2 sts) This makes a small tapered carrot about 0.3 in (0.8 cm) long. Fasten off with a 6 in (15.2 cm) tail.
Quantities per color:
– Light blue: 1 pocket
– White: 6 heads (3 front, 3 back) and 6 bodies (3 front, 3 back)
– Red: 3 scarves
– Orange: 3 noses
– Black: embroidery only
Layout (pieces per snowman):
Snowman 1:  [Head F] [Head B]   [Body F] [Body B]   [Scarf] [Nose]
Snowman 2:  [Head F] [Head B]   [Body F] [Body B]   [Scarf] [Nose]
Snowman 3:  [Head F] [Head B]   [Body F] [Body B]   [Scarf] [Nose]
Pocket:     [Light blue pouch + rim + loop]
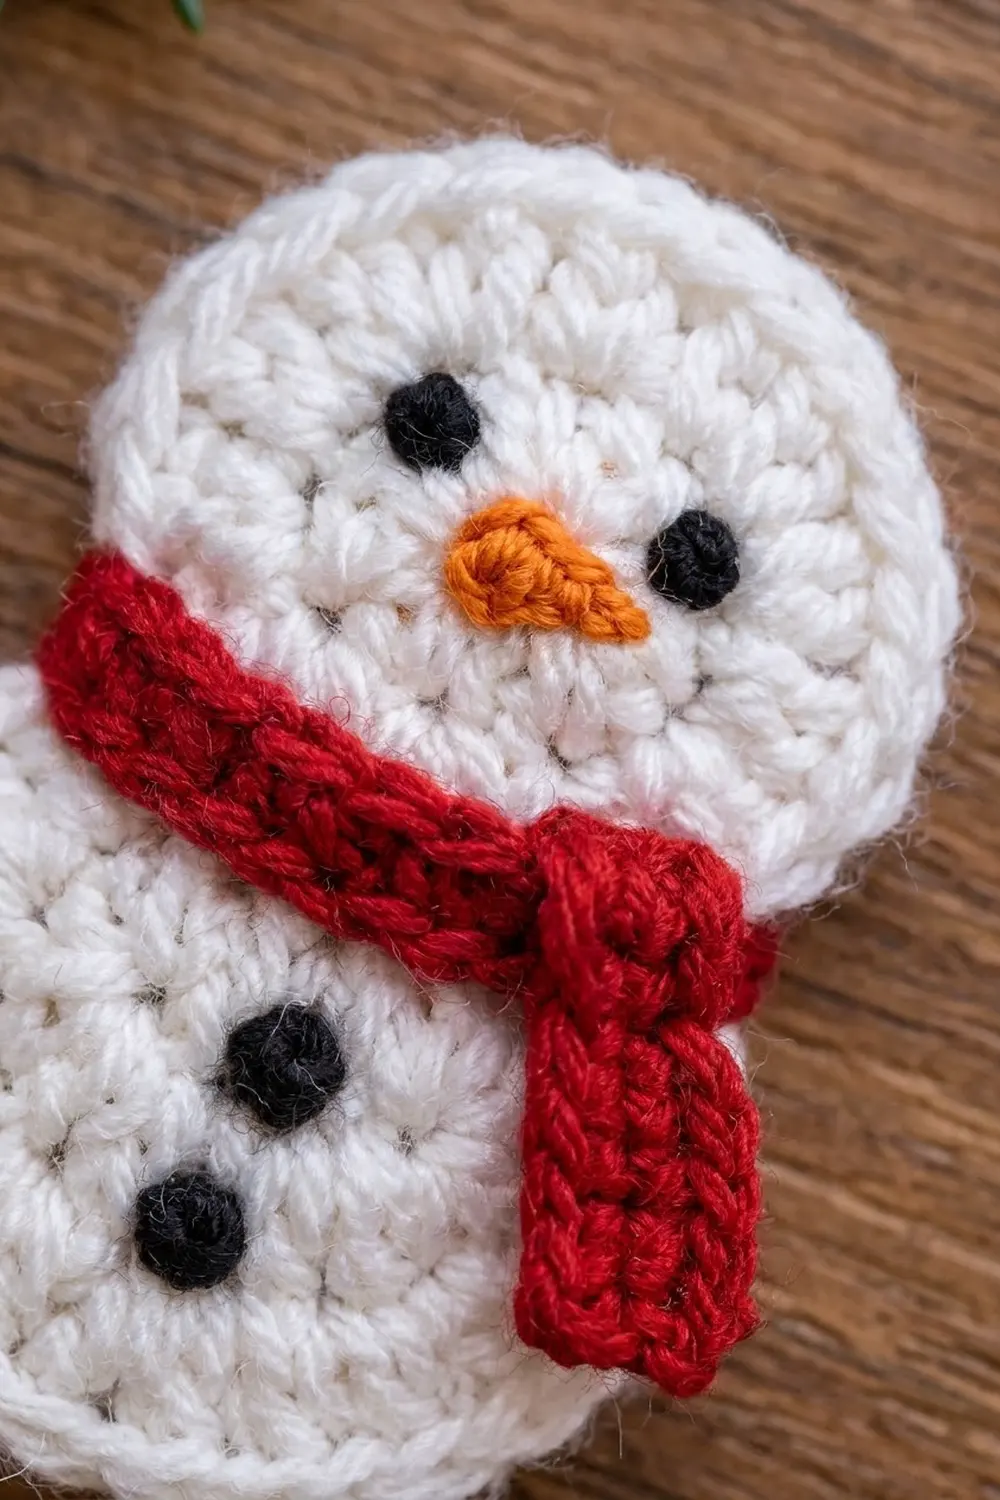
Faces (front pieces only): Use black yarn to work two French knots on the front head, each wrapped twice. Place them between Rnds 2 and 3, 0.5 in (1.3 cm) apart. Sew the nose centered just below the eyes and angle it slightly to the right. On the front body, work two French knots in a vertical line down the center, 0.5 in (1.3 cm) apart. The upper knot sits 0.75 in (1.9 cm) below the top of the body.
Joining
You’ll join the snowmen here. The pocket doesn’t need any joining.
1. Head to body. Lay the front head over the top of the front body so they overlap by 0.25 in (0.6 cm). Whipstitch the lower edge of the head to the body along the overlap with white. Catch 1 head st for every 1 body st beneath it, which is about 6 sts. Join the back head and back body the same way, but as a mirror image, so the outlines line up when you place the back behind the front.
2. Stack the layers. Place the back layer face down and the front layer face up on top of it, with the wrong sides together. Match the edges stitch for stitch. The 30 body edge sts line up with each other, and so do the exposed head sts.
3. Sew around the magnet. Use the long body tail to whipstitch through the back loops of both layers. Start at the neck on one side and work down around the body. When about 1.5 in (3.8 cm) of the edge is still open, slide the magnet between the body layers so it sits in the center. Close the body, then keep going up and around the head, and finish back at the neck.
Tension: Pull each whipstitch just snug enough that the edges meet, and no tighter. If you pull hard, the outline puckers and the snowman curls, so it won’t lie flat on the fridge.
4. Scarf. Wrap the scarf across the neck where the head and body overlap. Tack the left end 0.5 in (1.3 cm) around to the back. Bring the scarf across the front, and at the right edge fold it straight down so that 1.5 in (3.8 cm) hangs over the body. Tack it at the fold and at the neck.
Size checkpoint: Each snowman should measure 3.75 in (9.5 cm) tall and 2.25 in (5.7 cm) wide, and it should hold firmly to a fridge door.
Border
The border is the scalloped rim on the pocket. You work it straight into the top of Rnd 11.
Border gauge: One scallop uses 4 sts and is 1 in (2.5 cm) wide and 0.5 in (1.3 cm) tall.
Rnd 12 (rim): Ch 1. Work a small scallop over the next 4 sts (sc in first st, sk 1, 3 dc in next, sk 1). Repeat the scallop 11 more times. Join with a sl st to the first sc. (12 scallops, 48 sts: 12 sc + 36 dc)
Counts per side: Each face starts with 24 sts. That gives each face 6 scallops, which is 6 sc + 18 dc = 24 sts. The front face goes from the join to the marker at st 24. The back face goes from the marker back to the join.
Why the math works: 48 sts ÷ 4 sts per scallop = 12 scallops, with nothing left over. Each scallop makes exactly 4 sts from 4 sts, so the rim doesn’t flare or pull in, and it stays 6 in (15.2 cm) wide. Because the rnd starts at the right fold, a scallop boundary lands on each fold. That means both faces show 6 complete scallops.
Hanging loop: Flatten the pocket with the back face up. Count to the 3rd scallop of the back face and sl st into the sc right after it. This sc is the center of the back face, between scallops 3 and 4. Ch 10, then sl st in the same sc to form a ring. Work 14 sc into the ch-10 ring, then sl st into the base sc. Fasten off. The loop stands 1 in (2.5 cm) above the rim.
Snowflake: Use a 24 in (61.0 cm) length of white yarn. Mark the center of the front face. It should be 1.25 in (3.2 cm) up from the bottom fold and 3 in (7.6 cm) in from each side. Make 3 straight stitches that cross at that center point: one vertical and two diagonal at 60 degrees. Each stitch is 1.25 in (3.2 cm) long, so you get 6 spokes of 0.6 in (1.5 cm) each. Add a small V of 2 straight stitches, each 0.25 in (0.6 cm), about 0.25 in (0.6 cm) in from the tip of each spoke. Then work one French knot at the center.
Final Blocking
- Weave in all ends except the loop tail. Weave that one in last, after you check the loop height.
- Mist the pocket and the snowmen lightly with water. Don’t soak the snowmen, because the magnets are already inside them.
- Slide a 6 in x 2.5 in (15.2 cm x 6.4 cm) piece of cardboard into the pocket so the walls are square.
- Pin each scallop on the front and back so the dc fan out evenly.
- Press the snowmen flat under a book on a towel, with the front side up.
- Let everything dry completely, for about 12 hours. Then remove the cardboard.
Final Quality-Control Checklist
- Pocket is 6 in (15.2 cm) wide and 3 in (7.6 cm) tall
- Each face has 6 complete scallops
- The loop is centered on the back and stands 1 in (2.5 cm) tall
- The snowflake is centered and has 6 even spokes
- Each snowman is 3.75 in (9.5 cm) tall with a flat, unpuckered outline
- Magnets are centered in the bodies and hold through the crochet
- Scarf tails hang on the right side of all three snowmen
- All three snowmen fit side by side, and their heads and scarves peek over the rim
Troubleshooting
Rim ruffles: You probably worked a scallop into the wrong st, or worked 4 dc instead of 3. Recount to 48 sts before Rnd 12.
Rim pulls in: Your dc are too tight. Work the rim with a 4.5 mm hook.
Pocket twists sideways: The joins drifted. Join into the first sc of each rnd, never into the ch 1.
Circles cup: Your tension is too tight on the increase rnds. Go up a hook size for the circles only.
Circles ruffle: You’ve added extra increases. Check that the counts are 6, 12, 18, 24, 30.
Magnet too weak: The crochet is too thick for it. Use a thinner, stronger disc magnet.
Snowmen sink below the rim: The pocket is too tall. Remove 1 rnd before the rim.
Care
Wipe the pocket clean, or hand wash it in cool water and dry it flat. Spot clean the snowmen only, so the magnets stay dry.
Final Notes
The measurement chain is short. A gauge of 16 sc = 4 in (10.2 cm) gives 24 sts per face and a 6 in (15.2 cm) wide pocket. Eleven rnds make it 2.5 in (6.4 cm) tall, and the rim adds 0.5 in (1.3 cm), for 3 in (7.6 cm) total. The rim’s 48 sts divide into 12 even scallops. Snowman circles grow by 6 sts per rnd, to 1.75 in (4.4 cm) heads and 2.25 in (5.7 cm) bodies. With a 0.25 in (0.6 cm) overlap, each snowman is 3.75 in (9.5 cm) tall. Hit gauge first and the rest of the numbers will fall into place.
Happy crocheting!