

This little cream letter Y is a soft, textured keychain with a sweet floral touch. A single column of puff stitches runs up the stem and splits into both arms, so the letter looks almost quilted. A smooth single crochet edge frames the shape, and a small cluster of flowers sits at the lower left corner.
The colors are calm and gentle: a warm cream body, a medium-pink flower, a pale-pink flower, cream flower centers and one sage-green leaf. A gold key ring and jump ring finish it off. It makes a lovely monogram gift, bag charm or suitcase tag.
This pattern uses US crochet terms. The finished letter measures about 3.4 in (8.6 cm) wide and 4.1 in (10.4 cm) tall, not counting the hardware.
You work the letter flat in rows from the bottom of the stem up. The stem widens over four rows, then splits into two arms. The arms lean outward because each one gains a stitch on one edge and loses a stitch on the other. One round of single crochet border outlines the whole shape. The leaf and two flowers are made separately and sewn on.
Finished Size and Construction
- Finished size: 3.4 in (8.6 cm) wide x 4.1 in (10.4 cm) tall
- Skill level: Easy to intermediate
- Terminology: US crochet terms
- Yarn weight: DK (light worsted, category 3)
- Hook: 3.5 mm (E-4)
- Number of pieces: 1 letter, plus 3 small appliqués (1 leaf, 2 flowers)
- Layout: Single letter, with the appliqués layered at the lower left of the stem
- Stem width before border: 1 in (2.5 cm)
- Size before border: 3.0 in (7.6 cm) wide x 3.7 in (9.4 cm) tall
- Border depth: 1 round of single crochet, about 0.2 in (0.5 cm) per side
Materials
Choose a smooth DK cotton or cotton blend. Cotton shows puff stitches clearly, holds its shape on a keychain and doesn’t pill much with handling. Avoid fuzzy or very splitty yarns, because puffs need clean loops.
- Cream (letter and flower centers): 12 g, about 28 m
- Medium pink (large flower): 3 g, about 7 m
- Pale pink (small flower): 2 g, about 5 m
- Sage green (leaf): 2 g, about 5 m
These amounts include a comfortable margin for checking gauge and for sewing tails.
Tools:
- 3.5 mm (E-4) crochet hook
- Tapestry needle
- Stitch markers (2)
- Gold split key ring, about 1 in (2.5 cm) across
- Gold jump ring, 8 mm, and two pairs of flat-nose pliers
- Blocking board and rust-proof pins
- Scissors
- Optional: a dab of clear fabric glue for the appliqués
Abbreviations (US Terms)
- ch – chain
- sl st – slip stitch
- sc – single crochet
- hdc – half double crochet
- dc – double crochet
- sc2tog – single crochet 2 together (one decrease)
- st(s) – stitch(es)
- RS / WS – right side / wrong side
- MR – magic ring
Puff stitch (puff): (Yarn over, insert hook in the stitch, yarn over and pull up a loop to about 1/4 in (0.6 cm)) 4 times. You now have 9 loops on the hook. Yarn over and pull through all 9 loops, then ch 1 to close. The closing ch 1 does not count as a stitch. Each puff counts as 1 st. On the next row, work your sc into the top of the puff, not into the closing ch.
Gauge and Checkpoints
Gauge: 10 sc and 12 rows = 2 in (5.1 cm) in sc worked flat. That is 5 sts and 6 rows per 1 in (2.5 cm).
The letter itself is your test piece. Measure at each checkpoint below before you move on. A small error early on grows into a large one by the arm tops.
- After Row 12 (stem): 1 in (2.5 cm) wide x 2 in (5.1 cm) tall
- After Row 16 (junction): 2.2 in (5.6 cm) wide x 2.7 in (6.9 cm) tall
- After the arms (Row 22): 3.0 in (7.6 cm) across the arm tops x 3.7 in (9.4 cm) tall
- After the border: 3.4 in (8.6 cm) x 4.1 in (10.4 cm)
Puff rows are slightly wider than plain rows, so measure width on a plain sc row.
If your piece is too big, go down to a 3.25 mm or 3 mm hook. If it is too small, go up to a 3.75 mm hook. A difference of 1/4 in (0.6 cm) at the stem checkpoint is worth fixing.
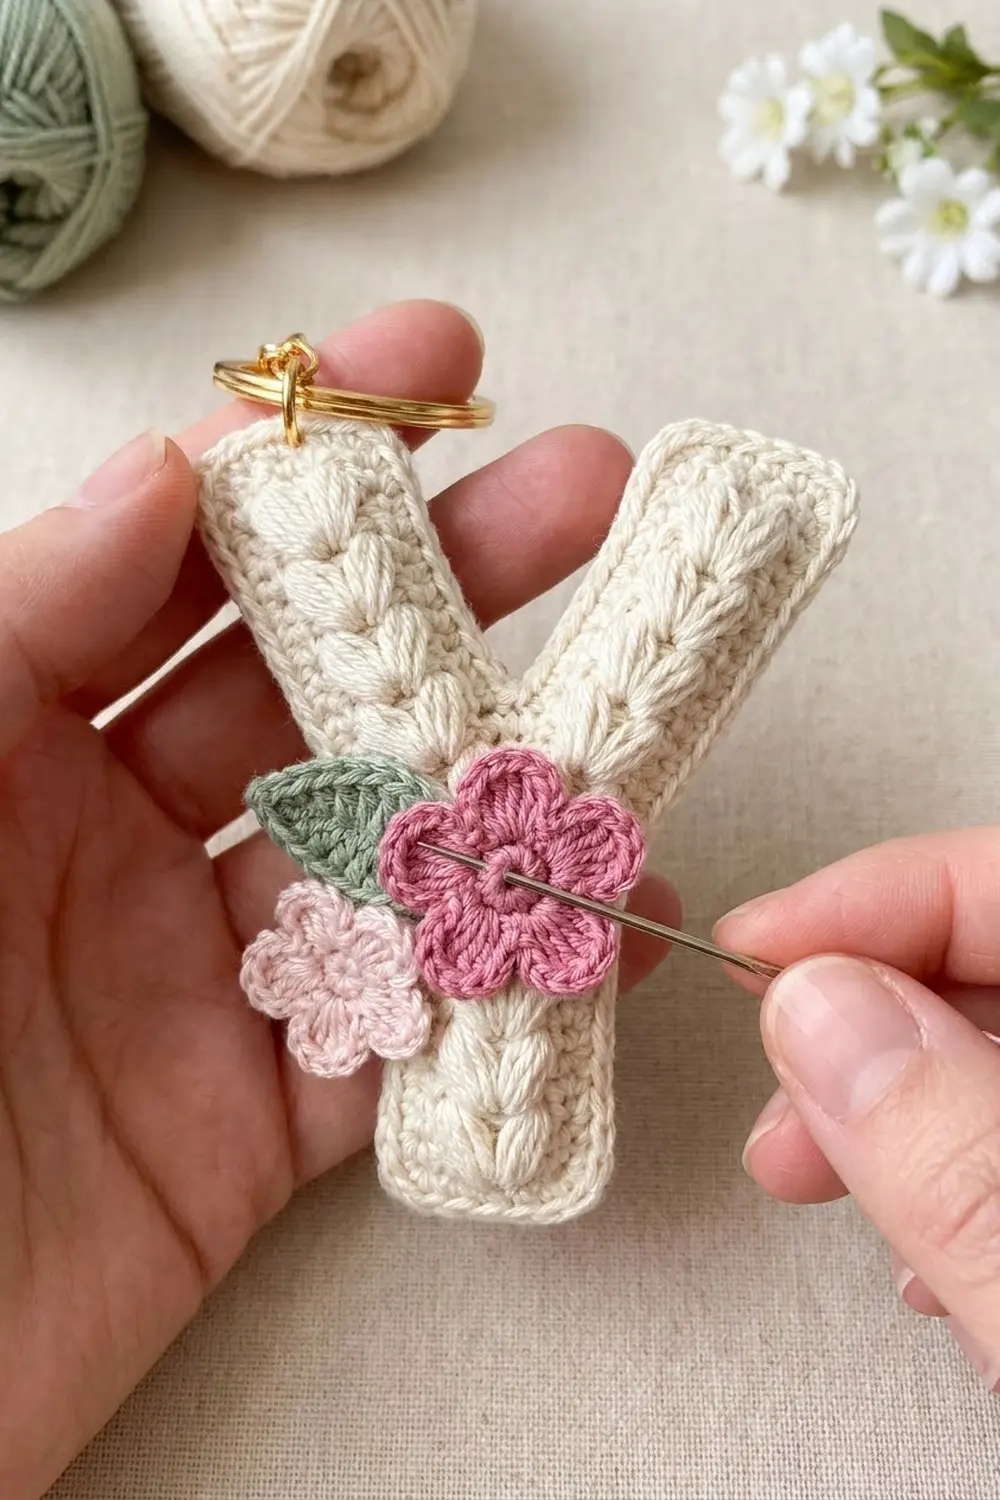
Letter
Use cream throughout. Turn at the end of every row. The ch 1 at the start of a row never counts as a stitch. Row 1 is the RS. All puffs are worked on RS rows so they sit on the front.
Stem
Foundation: Ch 6.
Row 1 (RS): Sc in 2nd ch from hook and in each ch across. Turn. (5 sts)
Row 2 (WS): Ch 1, sc in each st across. Turn. (5 sts)
Row 3 (RS): Ch 1, sc in next 2 sts, puff in next st, sc in next 2 sts. Turn. (5 sts: 4 sc + 1 puff)
Row 4 (WS): Ch 1, sc in each st across, working into the top of the puff. Turn. (5 sts)
Rows 5–12: Repeat Rows 3–4 four more times. (5 sts)
You now have 5 puffs stacked in the center column. Checkpoint: 1 in (2.5 cm) wide x 2 in (5.1 cm) tall.
Junction
These rows widen the stem so it can split into two arms.
Row 13 (RS): Ch 1, 2 sc in first st, sc in next st, puff in next st, sc in next st, 2 sc in last st. Turn. (7 sts: 6 sc + 1 puff)
This is the sixth puff, right where the letter begins to open.
Row 14 (WS): Ch 1, 2 sc in first st, sc in next 5 sts, 2 sc in last st. Turn. (9 sts)
Row 15 (RS): Ch 1, 2 sc in first st, sc in next 7 sts, 2 sc in last st. Turn. (11 sts)
Row 16 (WS): Ch 1, sc in each st across. Turn. (11 sts)
Number the Row 16 sts 1 to 11 in the order you will work them on Row 17:
- Sts 1–5 become the first arm.
- St 6 is the crotch of the Y. Place a marker in it.
- Sts 7–11 become the second arm.
Checkpoint: 2.2 in (5.6 cm) wide x 2.7 in (6.9 cm) tall.
First Arm
Work over sts 1–5 only.
Row 17 (RS): Ch 1, sc in next 2 sts, puff in next st, sc in next 2 sts. Leave sts 6–11 unworked. Turn. (5 sts)
Row 18 (WS): Ch 1, sc2tog over the first 2 sts (inner edge), sc in next 2 sts, 2 sc in last st (outer edge). Turn. (5 sts)
The decrease at the inner edge and the increase at the outer edge keep the count at 5. Together they shift the arm 1 st outward, which makes it lean.
Row 19 (RS): Ch 1, sc in next 2 sts, puff in next st, sc in next 2 sts. Turn. (5 sts)
Row 20 (WS): Repeat Row 18. (5 sts)
Row 21 (RS): Repeat Row 19. (5 sts)
Row 22 (WS): Ch 1, sc in each st across. (5 sts)
Fasten off with a 6 in (15.2 cm) tail.
Second Arm
With RS facing, skip the marked st 6 and join cream in st 7.
Row 17 (RS): Ch 1, sc in st 7 and in the next st, puff in next st, sc in next 2 sts. Turn. (5 sts)
Row 18 (WS): Ch 1, 2 sc in first st (outer edge), sc in next 2 sts, sc2tog over last 2 sts (inner edge). Turn. (5 sts)
Row 19 (RS): Ch 1, sc in next 2 sts, puff in next st, sc in next 2 sts. Turn. (5 sts)
Row 20 (WS): Repeat Row 18. (5 sts)
Row 21 (RS): Repeat Row 19. (5 sts)
Row 22 (WS): Ch 1, sc in each st across. (5 sts)
Fasten off. Each arm has 3 puffs, and each arm has shifted outward by 2 sts.
Checkpoint: 3.0 in (7.6 cm) across the arm tops x 3.7 in (9.4 cm) tall. The top width is 11 sts + 2 + 2 = 15 sts, and 15 ÷ 5 = 3.0 in.
Weave in the arm tails on the WS.
Border
Border gauge: Work 1 sc in each st along the bottom and the arm tops, and 1 sc in each row end along every side. Your rows (6 per inch) are close to your stitch width (5 per inch), so one sc per row end lies flat without ruffling or pulling.
Corner rule: Each outer corner gets 3 sc in the corner stitch. These corner groups are counted in the bottom and arm-top counts below. The side counts are row-end stitches only, so no corner stitch is counted twice.
Round 1 (RS): With RS facing, join cream in the first foundation loop at one bottom corner.
- Bottom edge: 3 sc in the first foundation loop, sc in next 3 loops, 3 sc in last loop. (9 sts)
- First outer side: 1 sc in each row end from Row 1 to Row 22. That is 12 along the stem, 4 along the junction and 6 along the arm. (22 sts)
- First arm top: 3 sc in first st, sc in next 3 sts, 3 sc in last st. (9 sts)
- Inner edges and crotch: 6 sc down the inner edge of this arm (1 per row end), 1 sc in the skipped st 6, then 6 sc up the inner edge of the other arm. (13 sts)
- Second arm top: 3 sc in first st, sc in next 3 sts, 3 sc in last st. (9 sts)
- Second outer side: 1 sc in each row end from Row 22 down to Row 1. (22 sts)
Sl st to the first sc. (84 sts total)
Why the math works: 9 + 22 + 9 + 13 + 9 + 22 = 84. The 3-sc groups turn each outer corner neatly. The crotch gets a single sc with no increase, so the inside of the V stays sharp instead of puckering.
The border adds about 0.2 in (0.5 cm) per side. The width grows from 3.0 in (7.6 cm) to 3.4 in (8.6 cm), and the height grows from 3.7 in (9.4 cm) to 4.1 in (10.4 cm).
Fasten off and weave in the tail.
Appliqués
Leaf (make 1, sage green)
Ch 7.
Round 1: Sc in 2nd ch from hook, hdc in next ch, dc in next 2 ch, hdc in next ch, 3 sc in last ch. Now work along the other side of the foundation chain: hdc in next ch, dc in next 2 ch, hdc in next ch, sc in last ch. (13 sts)
Tip: Ch 2, sl st in 2nd ch from hook, then sl st into the first sc. Fasten off with an 8 in (20.3 cm) tail.
The leaf is about 1 in (2.5 cm) long. The foundation chain forms a natural center vein.
Large Flower (make 1)
Round 1 (cream): Make a MR, work 5 sc in the ring, pull it closed, sl st to first sc. (5 sts) Fasten off cream.
Round 2 (medium pink): Join pink in any st. In each st around: (sc, hdc, 2 dc, hdc, sc). Sl st to the first sc. (30 sts, 5 petals of 6 sts)
Fasten off with an 8 in (20.3 cm) tail. The flower is about 1.2 in (3.0 cm) across.
Small Flower (make 1)
Round 1 (cream): Make a MR, work 5 sc in the ring, pull it closed, sl st to first sc. (5 sts) Fasten off cream.
Round 2 (pale pink): Join pale pink in any st. In each st around: (sc, 2 hdc, sc). Sl st to the first sc. (20 sts, 5 petals of 4 sts)
Fasten off with an 8 in (20.3 cm) tail. The flower is about 0.8 in (2.0 cm) across.
Center detail (both flowers): With a cream tail, work 3 tiny French knots in the center of each flower for the dotted look.
Assembly
- Lay the letter RS up with the stem at the bottom.
- Place the leaf at the lower left of the stem. Tuck its base toward the stem and point the tip up and out to the left, so about half the leaf sticks out past the border.
- Place the large flower over the base of the leaf. Center it on the left border about 0.4 in (1.0 cm) above the bottom corner.
- Place the small flower to the lower right of the large flower. It should overlap the large flower’s petals slightly and sit over the stem.
- Sew the leaf first, then the large flower, then the small flower. Use small stitches through the back loops only, so nothing shows on the back of the letter. Weave all tails in on the WS.
Hardware
- Open the 8 mm jump ring sideways with two pairs of pliers.
- Pass it through the border sc at the crotch and through st 6 below it, so it catches two layers of stitches.
- Add the split key ring and close the jump ring fully.
Final Blocking
- If you haven’t attached the hardware yet, block before you do. Lightly mist the letter until it is damp, not soaking.
- Pin it flat on the blocking board to 3.4 in (8.6 cm) x 4.1 in (10.4 cm).
- Pin each arm top corner and each bottom corner first. Then pin the crotch to keep the V sharp.
- Add pins along each long side so the edges are straight.
- Gently press each puff from the back with a fingertip so it stands up on the front.
- Let it dry completely, at least a few hours, before unpinning.
- Lightly steam the appliqués from above, without pressing the flowers flat.
Final Quality-Control Checklist
- The stem shows 5 puffs, plus 1 at the junction, all in one straight column.
- Each arm has 3 puffs that lean outward with the arm.
- The border round has 84 sts, with 3-sc corners at the 2 bottom corners and the 4 arm-top corners.
- The crotch V is sharp, with no hole and no ruffle.
- The leaf, large flower and small flower are layered in that order at the lower left.
- The jump ring is fully closed and caught through two layers.
- The finished size is 3.4 in (8.6 cm) x 4.1 in (10.4 cm).
Troubleshooting
Puffs sink to the back: Make sure every puff is on an RS (odd) row. Push the puffs forward from the WS while blocking.
Stem is wider than 1 in (2.5 cm): Keep the puff loops to 1/4 in (0.6 cm), or go down a hook size.
Arms don’t lean: On Rows 18 and 20, check that the sc2tog is at the inner edge and the 2-sc increase is at the outer edge.
Border ruffles along the sides: You probably added extra sc in some row ends. Recount to 22 per outer side.
Hole at the crotch: Work the crotch sc through the skipped st 6, not around it. Close any small gap with your tail.
Flowers curl: Block them with steam and a little weight, then sew them on while they are flat.
Care
Hand wash in cool water with mild soap and lay flat to dry, reshaping the puffs. Remove or protect the metal rings if they aren’t tarnish-resistant.
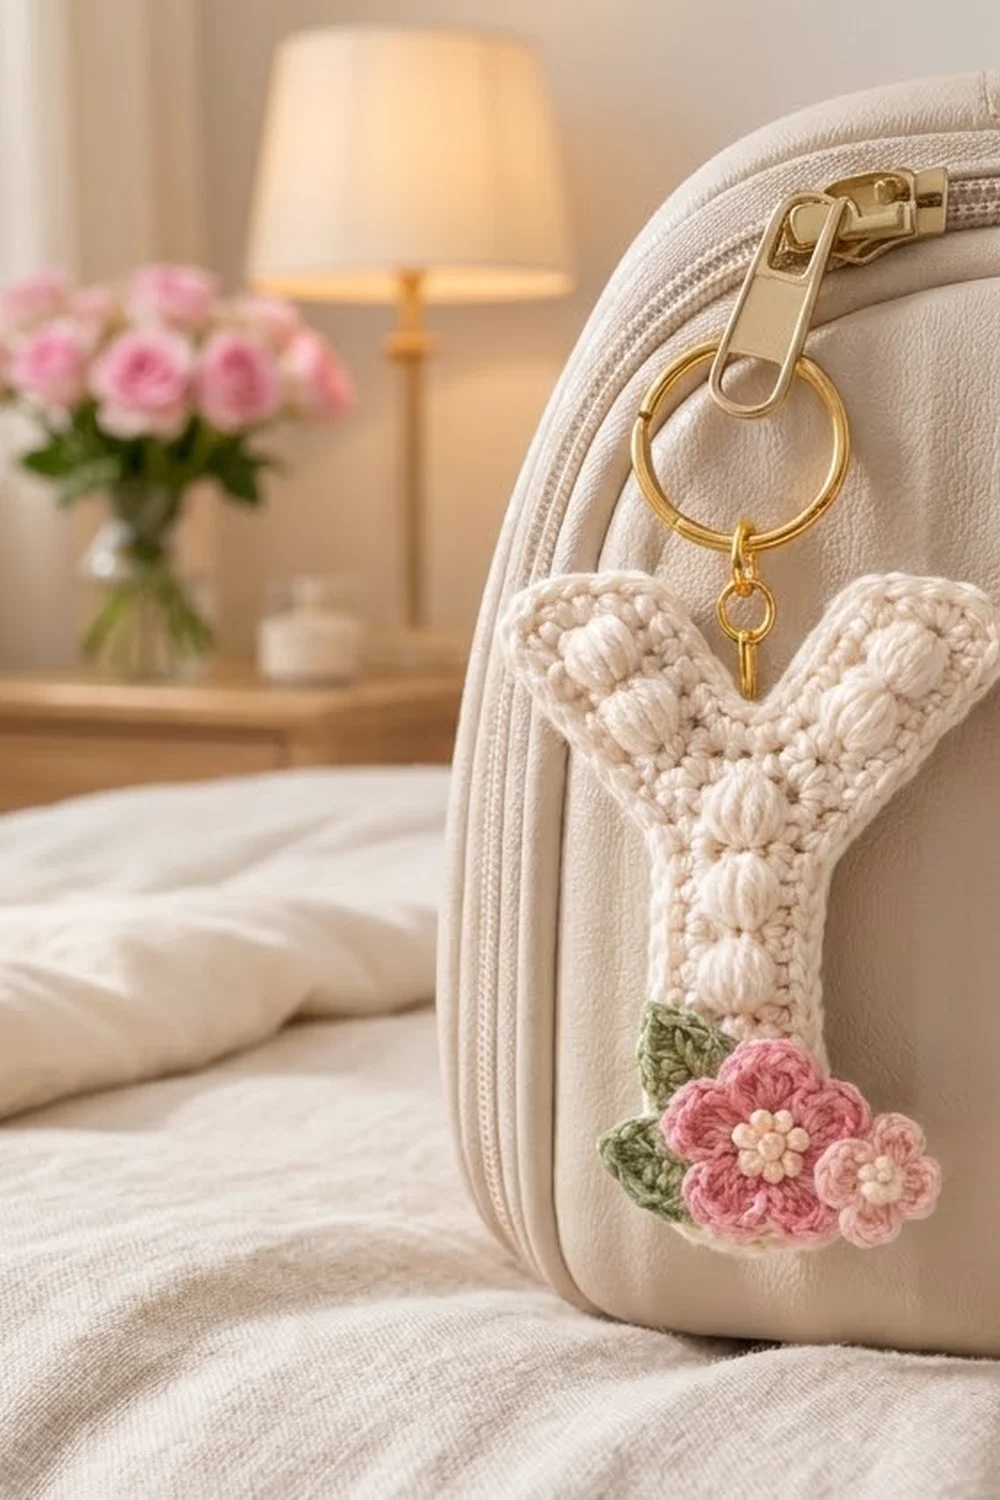
Final Notes
The whole design rests on one simple measurement chain. At 5 stitches and 6 rows per inch, the stem is 1 in (2.5 cm) wide and 2 in (5.1 cm) tall after Row 12. The junction widens it to 11 sts, or 2.2 in (5.6 cm). The leaning arms bring the top to 15 sts, or 3.0 in (7.6 cm), with the letter 3.7 in (9.4 cm) tall. One 84-stitch border round adds 0.2 in (0.5 cm) per side, for a finished letter of 3.4 in (8.6 cm) x 4.1 in (10.4 cm).
Check your gauge at each stage and keep your puffs even, and your little Y will come out neat, flat and ready to travel.
Happy crocheting!