

This little letter C keychain is soft butter yellow, covered in rounded bobbles, and finished with a small cluster of white daisies and sage-green leaves. It’s quick to make, it’s personal, and it looks lovely clipped to a bag handle, a set of keys, or a gift.
The main letter is one flat piece. Two curved rows of bobbles follow the shape of the C, with smooth single-crochet rows between them, and a single-crochet edging gives the outline a neat finish. Three small white flowers with golden centers and four pointed leaves are sewn onto the lower-left curve.
The pattern uses US crochet terms. The finished letter measures about 3.8 in (9.7 cm) tall and 3.3 in (8.4 cm) wide. The band is about 1.3 in (3.3 cm) wide.
You’ll start with a short foundation chain that becomes the inner curve of the C. Next you work 4 rows outward, with increases that bend the strip into a three-quarter circle. Then you work an edging round, make the small appliqués and sew them on, and finish by attaching the key ring.
Finished Size and Construction
- Finished size: about 3.8 in (9.7 cm) tall × 3.3 in (8.4 cm) wide
- Skill level: Easy+ (you’ll need to be comfortable with bobbles and increases)
- Terminology: US crochet terms
- Yarn weight: DK / light (#3) cotton or cotton blend
- Hook: 2.75 mm (US C/2)
- Number of pieces: 1 main letter, plus 3 flower appliqués and 4 leaf appliqués
- Layout: a single C shape, opening to the right, with the appliqués on the lower-left curve
- Band width before edging: 1 in (2.5 cm)
- Size before edging: about 3.5 in (8.9 cm) tall × 3.0 in (7.6 cm) wide
- Edging depth: 1 round of sc, about 0.17 in (0.4 cm) on every edge
Materials
Use a smooth, tightly plied cotton. Cotton gives crisp bobbles and holds its shape on a keychain that gets handled a lot. Soft acrylics also work, but the bobbles will look rounder and less defined.
- Butter yellow (main letter): 8 g, about 20 m
- White (flower petals): 2 g, about 5 m
- Golden yellow (flower centers): 1 g, about 2 m
- Sage green (leaves): 2 g, about 5 m
Tools:
– 2.75 mm (US C/2) crochet hook
– Tapestry needle
– Gold split key ring, 1 in (2.5 cm), with a short chain about 0.75 in (1.9 cm) long and a jump ring
– Two pairs of small pliers, or one pair plus your fingernails
– Pins, a blocking mat, and a spray bottle
– Scissors and a stitch marker
All yarn amounts include a small margin for gauge swatching and weaving in ends.
Abbreviations (US Terms)
- ch – chain
- sl st – slip stitch
- sc – single crochet
- hdc – half double crochet
- dc – double crochet
- sc2tog – single crochet 2 together
- st(s) – stitch(es)
- yo – yarn over
- RS / WS – right side / wrong side
Special stitch: Bobble. [Yo, insert hook in the indicated st, yo and pull up a loop, yo and draw through 2 loops] 5 times. You now have 6 loops on the hook. Yo and draw through all 6 loops. A bobble counts as 1 stitch.
Bobbles are always worked on WS rows so that they push out toward the RS. When you work into a bobble on the next row, put 1 sc into the closing loop at its top.
Gauge and Checkpoints
Gauge: 24 sc and 24 rows = 4 in (10.2 cm), which is 6 sc and 6 rows per 1 in (2.5 cm). One bobble row is about as tall as 2 sc rows, about 0.33 in (0.8 cm).
The finished keychain is small, so the letter itself works as your test piece. Work Rows 1–2 and then check your size before going further.
Checkpoints:
– After Row 1: the strip is 0.17 in (0.4 cm) wide and starts to curve slightly.
– After Row 2: the band is about 0.5 in (1.3 cm) wide. The outer edge, measured along the curve, is about 6 in (15.2 cm).
– After Row 4: the band is 1 in (2.5 cm) wide. The C measures about 3.5 in (8.9 cm) tall, and the outer curve is about 8.5 in (21.6 cm) long.
– After the edging: about 3.8 in (9.7 cm) tall × 3.3 in (8.4 cm) wide.
If your piece is too big, or the outer edge ruffles, go down to a 2.5 mm hook. If it’s too small, or the piece cups instead of lying flat, go up to a 3.0 mm hook. If only the curve is wrong, check your increase counts before you change hooks.
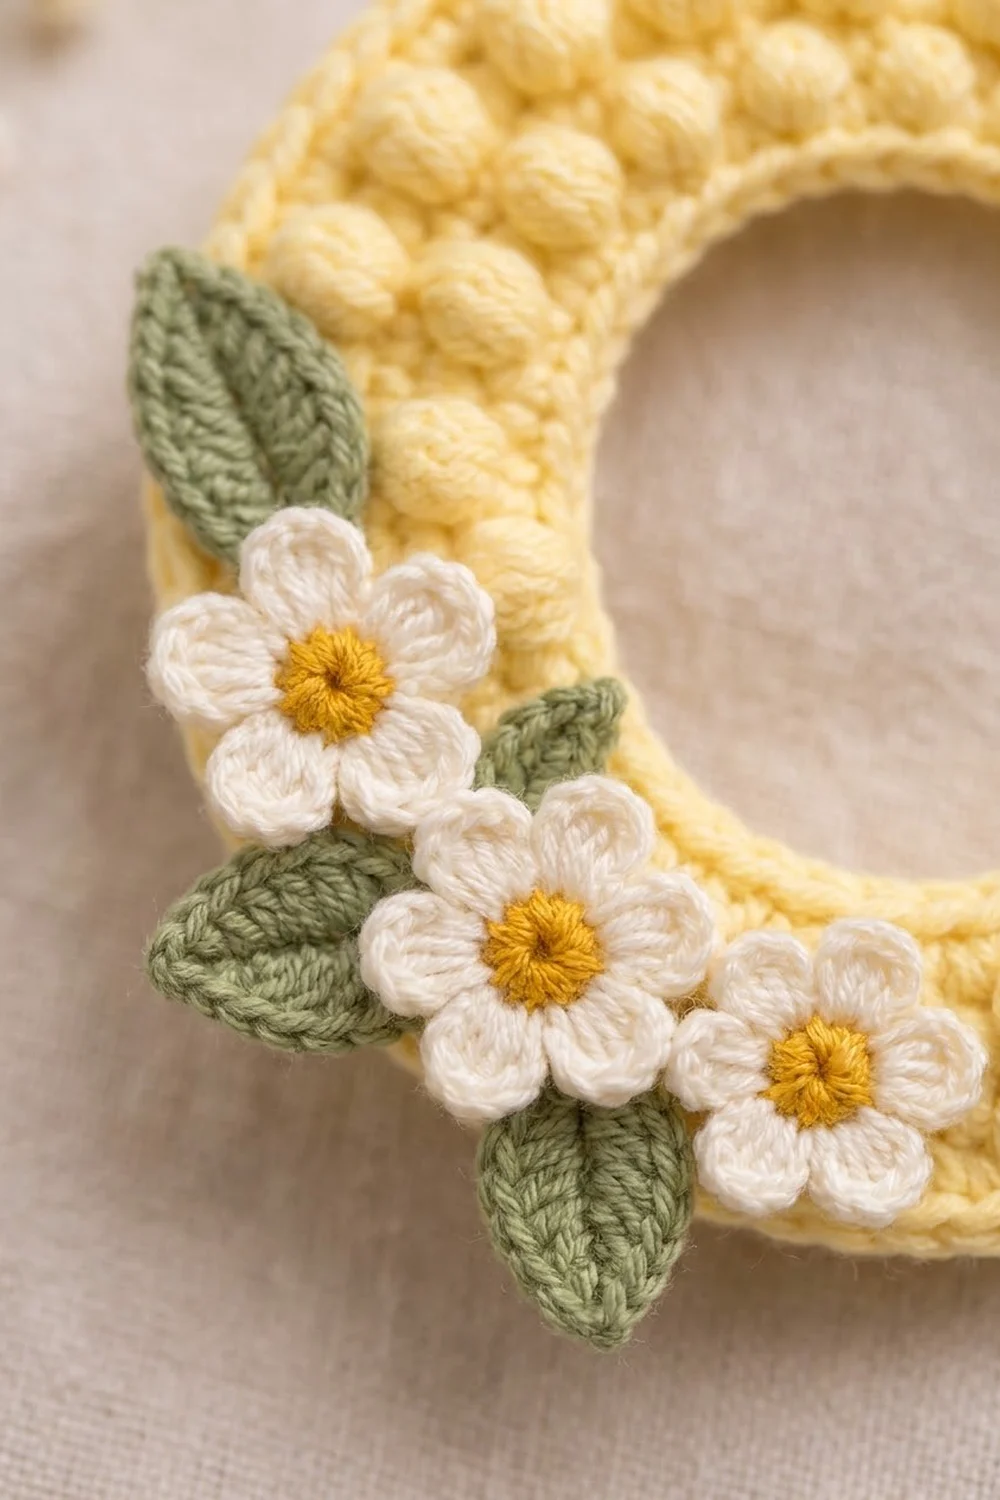
Main Letter C
Use butter yellow throughout.
Foundation: Ch 21. This chain becomes the inner curve of the C. Keep it relaxed, about 3.3 in (8.4 cm) long.
Row 1 (RS): Sc in 2nd ch from hook, sc in next ch, [2 sc in next ch, sc in next 3 ch] 4 times, 2 sc in next ch, sc in last ch. (25 sc)
All 20 chains are used: 2 + 16 + 2 = 20.
Row 2 (WS, bobble row): Ch 1, turn. Sc in first st, [bobble in next st, 2 sc in next st] 11 times, bobble in next st, sc in last st. (36 sts: 12 bobbles + 24 sc)
Stitches used: 1 + 22 + 1 + 1 = 25. Stitches made: 1 + 33 + 1 + 1 = 36.
Row 3 (RS): Ch 1, turn. [Sc in next 11 sts, 2 sc in next st] 3 times. (39 sc)
Stitches used: 36. Stitches made: 3 × 13 = 39.
Row 4 (WS, bobble row): Ch 1, turn. Sc in first st, [bobble in next st, 2 sc in next st, sc in next st] 12 times, sc in last 2 sts. (51 sts: 12 bobbles + 39 sc)
Stitches used: 1 + 36 + 2 = 39. Stitches made: 1 + 48 + 2 = 51.
Both bobble rows have 12 bobbles. In Row 4 they sit 3 stitches apart instead of 2, so they spread out along the longer outer curve, just as they do in the finished piece.
Don’t fasten off. Check that the band is 1 in (2.5 cm) wide and the C is about 3.5 in (8.9 cm) tall.
Edging
Edging gauge: 6 sc per 1 in (2.5 cm), the same as the body.
Edging Round (RS): Ch 1, turn so the RS faces you. Work around all 4 edges as follows.
- Outer edge: 3 sc in first st (corner), [sc in next 15 sts, 2 sc in next st] 3 times, sc in next st, 3 sc in last st (corner). (58 sc, including both 3-sc corners)
Stitches used: 1 + 48 + 1 + 1 = 51. Stitches made: 3 + 51 + 1 + 3 = 58. - End A (row ends): 2 sc in the end of Row 4, 1 sc in the end of Row 3, 2 sc in the end of Row 2, 1 sc in the end of Row 1. (6 sc)
- Inner edge (into the free loops of the foundation chain): 3 sc in first ch (corner), [sc in next 4 ch, sc2tog over next 2 ch] 3 times, 3 sc in last ch (corner). (21 sc, including both 3-sc corners)
Chains used: 1 + 18 + 1 = 20. Stitches made: 3 + 15 + 3 = 21. - End B (row ends): work 6 sc as for End A. (6 sc)
Sl st to the first sc to join. Total: 58 + 6 + 21 + 6 = 91 sc. Fasten off and weave in the ends.
Why the math works: After Row 4, the outer edge sits about 1.75 in (4.4 cm) from the center of the C. The edging moves it out to about 1.92 in (4.9 cm). Three-quarters of a circle at that radius is about 9.0 in (22.9 cm), which needs about 54 stitches at 6 sc per inch. Your 52 outer stitches plus the rounded corners cover that length with no ruffling.
The inner edge works the other way. It shrinks to a radius of about 0.58 in (1.5 cm), which gives an arc of about 2.75 in (7.0 cm), or roughly 16 stitches. The 3 sc2tog bring the 18 middle chains down to 15 sc, so the inner curve stays smooth and doesn’t buckle. The 3-sc corners and the 6-sc ends round off both tips of the C.
Flowers (Make 3)
Round 1: With golden yellow, make a magic ring. Work 5 sc in the ring, pull the ring closed, and sl st to the first sc. (5 sc) Fasten off.
Round 2: Join white with a sl st in any sc. In the same st, work (ch 2, 2 dc, ch 2, sl st). In the next sc, work (sl st, ch 2, 2 dc, ch 2, sl st). Repeat from * to * 3 more times. (5 petals)
Fasten off, leaving a 6 in (15.2 cm) tail for sewing. Each flower measures about 0.8 in (2.0 cm) across.
Leaves (Make 4)
With sage green, ch 6.
Round 1: Sc in 2nd ch from hook, hdc in next ch, dc in next ch, hdc in next ch. In the last ch, work (sc, ch 1, sc). This makes the pointed tip. Turn the piece and work along the other side of the chain: hdc in next ch, dc in next ch, hdc in next ch, sc in next ch. Sl st to the first sc. (10 sts plus the ch-1 tip)
Fasten off, leaving a 6 in (15.2 cm) tail. Each leaf is about 0.75 in (1.9 cm) long.
Assembly
- Lay the C RS up with the opening facing right.
- Leaves first: Place one leaf at about 9 o’clock with its tip pointing up and out past the edging. Place one leaf at about 7 o’clock and one at about 6 o’clock pointing down. Place the fourth leaf just right of 6 o’clock, pointing toward the lower opening. Sew each leaf down along its center line only, so the edges can lift slightly.
- Flowers on top: Sew the three flowers in a diagonal cluster from about 8 o’clock down to 5 o’clock. Let the petals overlap each other slightly and cover the base of each leaf. Make a few small stitches through the center and one stitch near each petal tip.
- Hardware: Open the jump ring by twisting it sideways, not pulling it apart. Thread it through the edging at the very top of the upper end of the C, about 2 sts in from the rounded tip. Hook the chain onto it and close the ring. Make sure the split ring is attached to the other end of the chain.
Final Blocking
- Mist the letter until it’s damp, but not soaked. Do this before you sew on the appliqués, or keep the flowers dry.
- Lay the letter RS up on a blocking mat.
- Pin the outer curve to 3.8 in (9.7 cm) tall, placing a pin about every 0.75 in (1.9 cm).
- Pin both rounded ends, and check that the band is 1.3 in (3.3 cm) wide all the way around.
- Pin the inner curve so the opening is about 1.2 in (3.0 cm) across.
- Don’t press the bobbles flat. Pin only through the edging.
- Let it dry completely, then remove the pins and do the assembly.
Final Quality-Control Checklist
- The C measures 3.8 in (9.7 cm) × 3.3 in (8.4 cm) and lies flat.
- There are 12 bobbles in each bobble row, and all of them pop to the RS.
- The edging total is 91 sc, with no gaps at the four corners.
- The flowers are firmly stitched and the leaves are tucked neatly under them.
- The jump ring is fully closed and can’t slip through a stitch.
- All ends are woven in on the WS.
Troubleshooting
The bobbles are popping out on the wrong side. Bobble rows must be WS rows. Count your rows from Row 1 (RS).
The C cups like a bowl. The outer edge is too short. Make sure you worked every increase in Rows 2–4, or go up a hook size.
The outer edge ruffles. Your gauge is too loose, or you added extra increases. Recount Row 4 (51 sts) and check the outer edge of the edging (58 sc).
The inner curve puckers. Your foundation chain is too tight. Redo it with a hook one size larger and switch back for Row 1.
The flower centers have a hole. Pull the magic ring tighter and secure the tail with a stitch on the back.
Care
Hand wash in cool water, press out the water in a towel, and dry flat. Keep metal hardware dry where possible so it doesn’t tarnish.
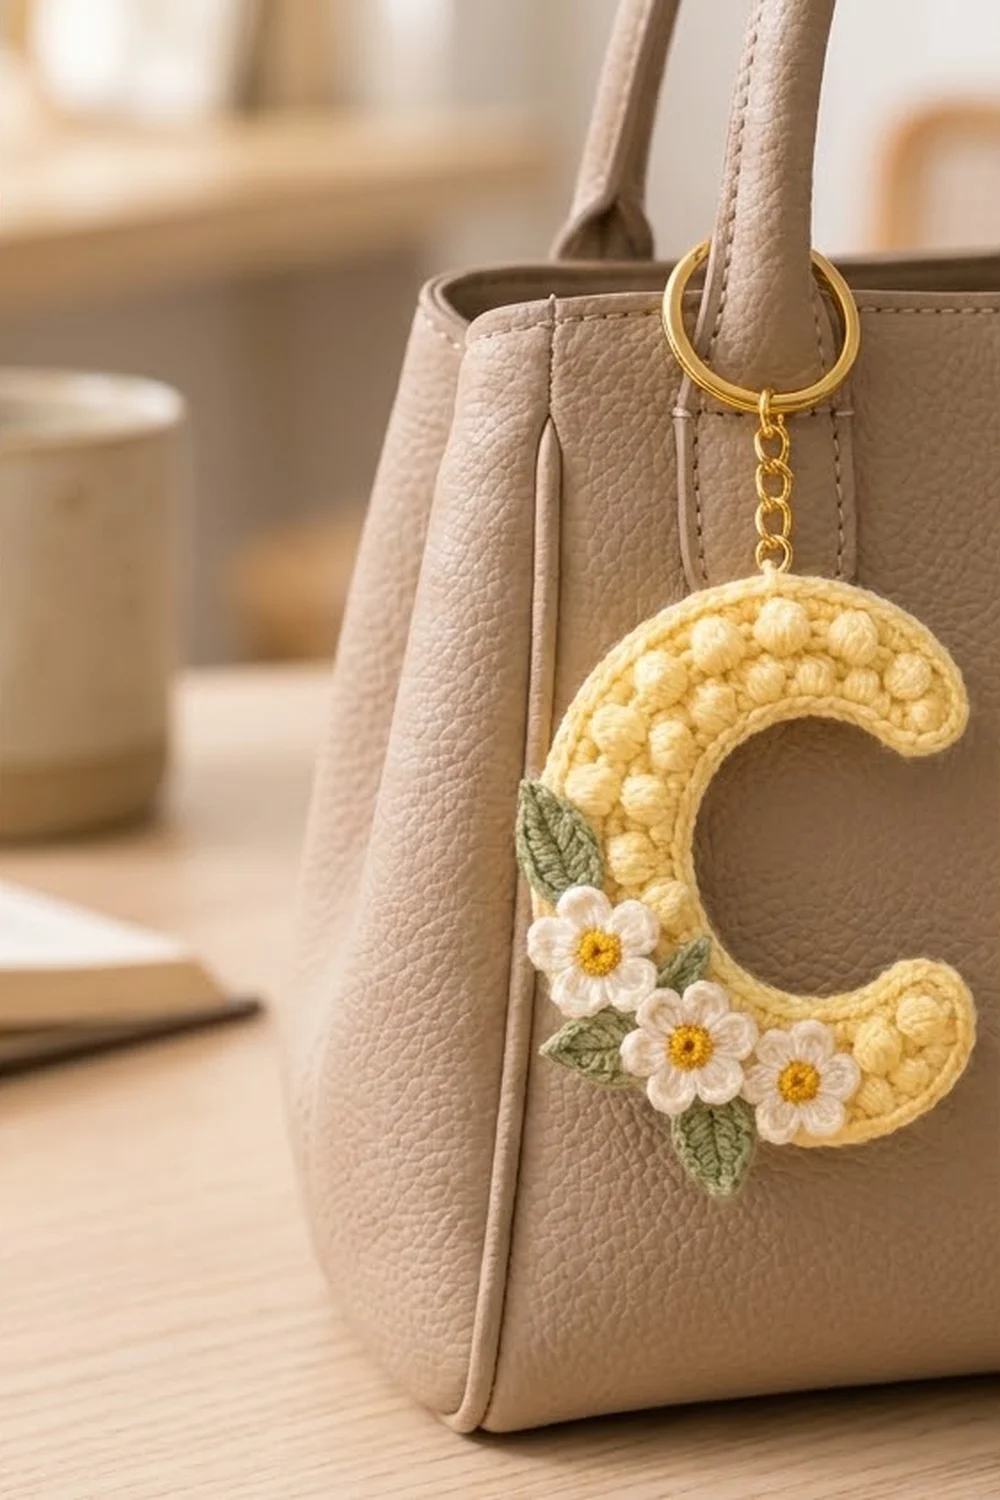
Final Notes
Here’s the measurement chain in one place. A gauge of 6 sc and 6 rows per 1 in (2.5 cm) gives a 1 in (2.5 cm) band after Row 4, with the C about 3.5 in (8.9 cm) tall. One edging round of 91 sc adds 0.17 in (0.4 cm) on every edge, bringing the letter to 3.8 in (9.7 cm) × 3.3 in (8.4 cm). Hit those checkpoints, and your daisies will have a well-shaped C to sit on.
Happy crocheting!