

The Plum Starlight Lace Panel is made of eight lacy star motifs joined into a small rectangle. Each motif has a deep plum eight-pointed star in the middle and a cream outline around it. Light cream chain arches join each motif to the next one, point to point. Where four motifs meet, the arches leave open diamond-shaped windows, so the panel looks light and lacy.
The palette uses only two colors: a rich plum (wine-purple) and a soft cream. Plum fills each star and cream does all the outlining, joining, and edging. That high contrast makes every star stand out clearly, even from across a room.
This pattern uses US crochet terms. The finished panel measures about 10 x 19 in (25.4 x 48.3 cm) after blocking, with 2 motifs across and 4 motifs down.
You work each motif in the round. Rounds 1–3 make the plum star and Rounds 4–5 add the cream outline and arches. Motif 1 is made in full. Motifs 2–8 are joined as you go on Round 5. A two-round cream border then neatens the outer edge without hiding the star points.
Finished Size and Construction
- Finished size: 10 x 19 in (25.4 x 48.3 cm)
- Skill level: Intermediate
- Terminology: US crochet terms
- Yarn weight: DK (#3), cotton or cotton blend
- Hook: 4.0 mm (G-6)
- Number of pieces: 8 identical motifs, already joined into one panel
- Layout: 2 motifs across x 4 motifs down
- Motif size: 4.5 in (11.4 cm) side to side, measured point tip to point tip
- Size before border: 9 x 18 in (22.9 x 45.7 cm)
- Border depth: 0.5 in (1.3 cm) on each side
Materials
Use a smooth, mercerized cotton or cotton blend in DK weight. Cotton shows the star points crisply and blocks flat. Avoid fuzzy yarns, because they blur the lace openings.
- Color A, Plum: 50 g / 115 m (about 126 yd)
- Color B, Cream: 60 g / 140 m (about 153 yd)
These quantities include a margin of roughly 25% for your gauge swatch, yarn tails, and any frogging.
Tools:
- 4.0 mm (G-6) crochet hook
- Tapestry needle
- Scissors
- 8 locking stitch markers
- Ruler or measuring tape
- Blocking mat and rust-proof pins
- Spray bottle with clean water
Abbreviations (US Terms)
- ch – chain
- sl st – slip stitch
- sc – single crochet
- hdc – half double crochet
- dc – double crochet
- st(s) – stitch(es)
- sp – space
- rep – repeat
- rnd(s) – round(s)
Special stitch – Joining point (JP): In the ch-3 loop, work sc, ch 2. Remove the hook and insert it from front to back through the matching ch-5 loop of the finished neighbor motif. Pick up the dropped loop and pull it through, then ch 2 and sc in the same ch-3 loop. This takes the place of a regular (sc, ch 5, sc) point.
Gauge and Checkpoints
Make one complete motif first, before starting the rest. Gauge controls everything that follows.
- After Rnd 2: the plum circle measures 2 in (5.1 cm) across.
- After Rnd 3: the plum star measures 3.5 in (8.9 cm) side to side, tip to tip.
- After Rnd 4: the outlined star measures 3.75 in (9.5 cm).
- After Rnd 5: the motif measures 4.5 in (11.4 cm) side to side, from the tips of the two point loops on one side to the tips on the opposite side.
Border gauge: 18 sc = 4 in (10.2 cm) worked in rows.
If your motif is too big, go down a hook size (3.75 mm). If it’s too small, go up a hook size (4.5 mm). Even an extra 0.25 in (0.6 cm) on each motif adds 1 in (2.5 cm) to the panel length, so it’s worth checking.
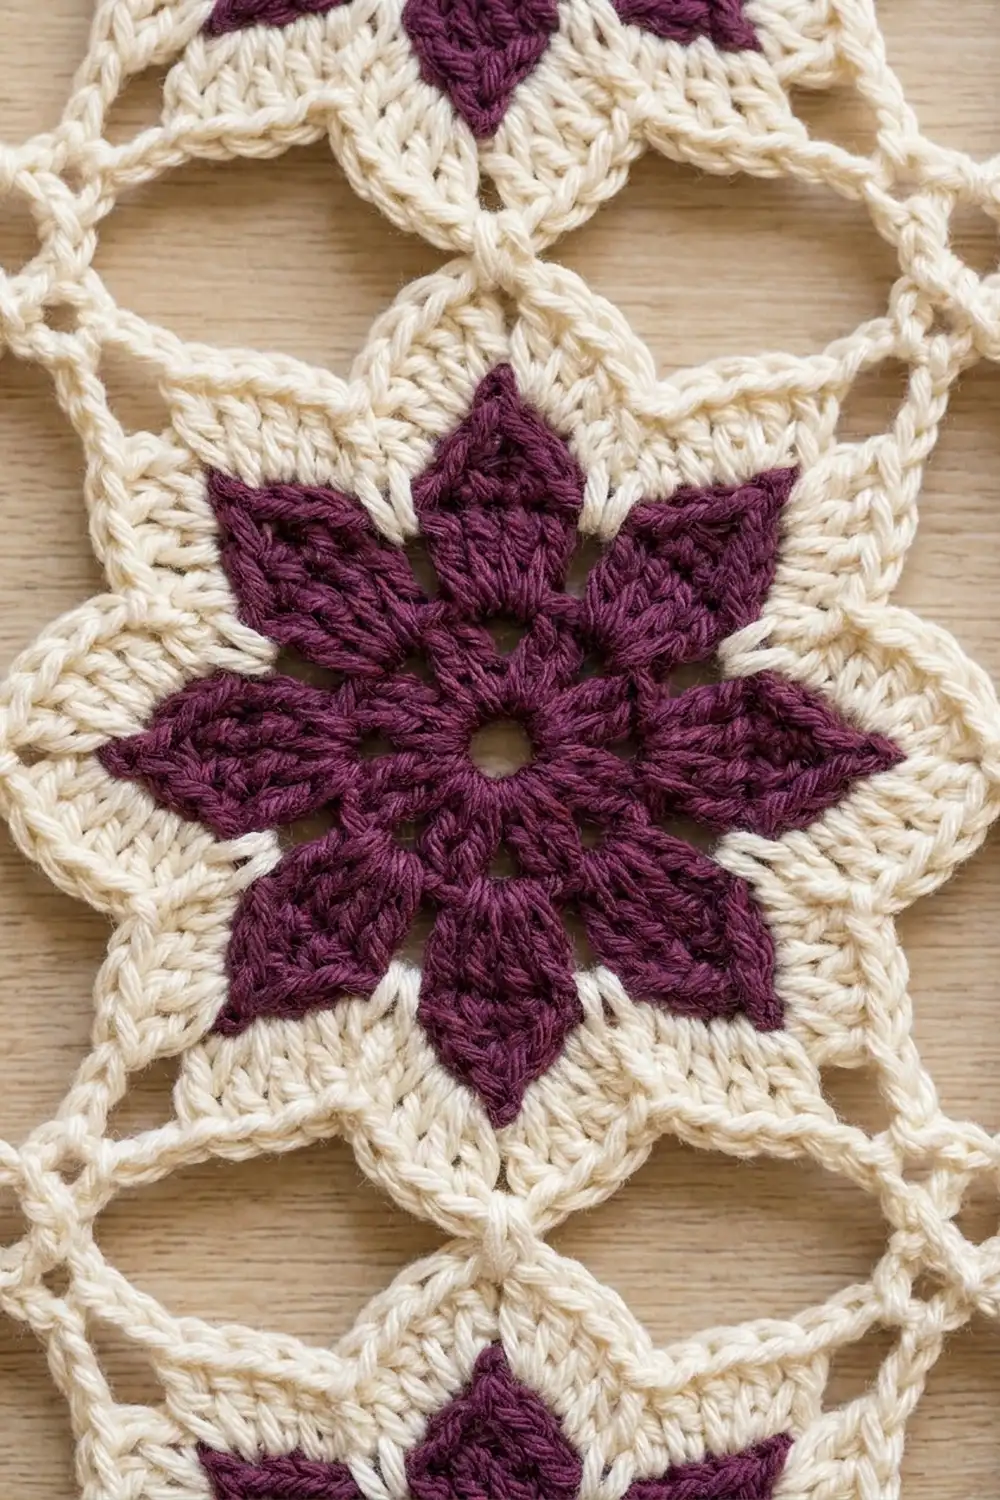
Motif (Make 8)
Orientation note: Lay the motif with two points along each side, not with a single point straight up. That way each side has 2 points for joining, and there are 4 sides x 2 points = 8 points.
Rnd 1 (Plum)
With Color A, make a magic ring. Ch 3 (counts as dc), 15 dc in ring. Sl st to the top of the beginning ch-3. Pull the ring closed, leaving a small center hole. (16 dc)
Rnd 2 (Plum)
Ch 3 (counts as dc), dc in same st, 2 dc in each st around. Sl st to the top of the beginning ch-3. (32 dc)
Checkpoint: 2 in (5.1 cm) across.
Rnd 3 (Plum Star Points)
Ch 1. *Sc in next st, (hdc, dc) in next st, (dc, ch 2, dc) in next st, (dc, hdc) in next st; rep from * 7 more times. Sl st to first sc. Fasten off Color A.
(56 sts: 8 points of 7 sts each, plus 8 ch-2 sps)
Each point reads sc, hdc, dc, dc, ch-2, dc, dc, hdc. The sc is the valley between points, and the ch-2 is the sharp tip.
Rnd 4 (Cream Outline)
Join Color B in any ch-2 sp. Ch 1, (sc, ch 3, sc) in same sp. *Sc in each of next 7 sts, (sc, ch 3, sc) in next ch-2 sp; rep from * 6 more times. Sc in each of next 7 sts. Sl st to first sc.
(72 sc and 8 ch-3 loops)
Each repeat has 2 sc at the tip plus 7 sc along the sides, for 9 sc per point. 8 x 9 = 72. The 7 sc cover dc, dc, hdc, valley sc, hdc, dc, dc, so the 4th of them sits right above the valley sc.
Rnd 5 (Cream Arches) – Motif 1 Only
Sl st into the first ch-3 loop. Ch 1. *(Sc, ch 5, sc) in ch-3 loop, ch 4, skip next 4 sc, sc in next sc (the valley sc), ch 4, skip next 4 sc; rep from * 7 more times. Sl st to first sc. Fasten off.
(24 sc, 8 ch-5 point loops, 16 ch-4 arches)
Stitch check: from one loop to the next there are 9 sc. You skip 4, work 1 in the valley sc, and skip 4. 4 + 1 + 4 = 9.
Checkpoint: 4.5 in (11.4 cm) side to side.
For Motifs 2–8, follow Rnds 1–4 exactly, then work Rnd 5 with joins as described in the Joining section.
Make All Pieces
- Rnds 1–3 in Plum: 8 motifs
- Rnd 4 in Cream: 8 motifs
- Rnd 5 in Cream: Motif 1 on its own, then Motifs 2–8 joined as you go
Layout grid (2 across x 4 down):
Row 1:  M1  M2
Row 2:  M3  M4
Row 3:  M5  M6
Row 4:  M7  M8
To save time, work Rnds 1–4 on all eight motifs first. Then press them lightly and check that each one measures 3.75 in (9.5 cm) before you start joining.
Joining (Join-As-You-Go on Rnd 5)
Method: Work Rnd 5 as written. When you reach a point that faces a finished neighbor, work a Joining point (JP) in place of (sc, ch 5, sc). Join each pair of facing points: 2 joins per shared side.
Stitch-to-stitch logic: A JP has ch 2, the join, and ch 2. That matches the ch 5 of a free point loop, so joined points sit just as far from the motif center as free ones. Motif centers end up exactly 4.5 in (11.4 cm) apart.
Join order:
- M2: 2 left-side points to M1’s 2 right-side points.
- M3: 2 top points to M1’s 2 bottom points.
- M4: 2 left points to M3, 2 top points to M2.
- M5: 2 top points to M3.
- M6: 2 left points to M5, 2 top points to M4.
- M7: 2 top points to M5.
- M8: 2 left points to M7, 2 top points to M6.
That makes 20 point joins in total: 4 horizontal seams x 2 = 8, plus 6 vertical seams x 2 = 12.
The diagonal arches (ch 4, valley sc, ch 4) where four motifs meet are never joined. They frame open diamond windows, which are the lacy holes you see in the finished panel.
Tension advice: Keep the ch 2 on both sides of each join the same height as your ch 5 loops. If the join pulls tight, the seam will pucker. If it’s loose, the seam gapes. Use a marker to mark the neighbor’s loop before you start each joining motif.
Size checkpoint: The joined panel measures 9 x 18 in (22.9 x 45.7 cm), measured from point tip to point tip.
Border
Border gauge: 18 sc = 4 in (10.2 cm). Each ch-4 arch spans about 0.9 in (2.3 cm), and 4 sc at this gauge covers 0.89 in (2.3 cm), so the border lies flat.
Edge elements, for one motif’s outer side:
- 2 free point loops (ch-5)
- 1 side valley sc between them, with a ch-4 arch on each side of it
- 1 ch-4 arch from each point out toward a diagonal valley sc
- At each end, either a piece corner or a seam notch between two motifs
Border Rnd 1 (Cream)
Join Color B in any free point loop. Ch 1, then work around as follows:
- Each free point loop: (2 sc, ch 3, 2 sc) = 4 sc plus a ch-3 picot.
- Each ch-4 arch between a point and a valley: 4 sc.
- Each valley sc (side or diagonal): 1 sc.
- Each seam notch: after the sc in the diagonal valley of the first motif, ch 4, skip the two arches and the joined points in the notch, then sc in the diagonal valley of the next motif.
- Each piece corner (the corner valley sc of M1, M2, M7, M8): work 5 sc in the arch before it, (2 sc, ch 3, 2 sc) in the corner valley sc, and 5 sc in the arch after it.
Sl st to first sc.
Count per motif, per side (31 sts): end 7 + middle 17 + end 7.
- Middle: point 4 + arch 4 + valley 1 + arch 4 + point 4 = 17.
- Seam end: 2 ch (half of the ch-4 bridge) + diagonal valley 1 + arch 4 = 7.
- Corner end: 2 corner sc + corner arch 5 = 7.
Side totals:
- Top and bottom: 2 motifs x 31 = 62 sts each
- Left and right: 4 motifs x 31 = 124 sts each
- Round total: 62 + 62 + 124 + 124 = 372 sts, plus 24 picots and 4 corner ch-3 sps
Each side’s count already includes its 2 corner sc at each end. Seam stitches are not extra: each ch-4 bridge is split 2 + 2 between the motifs on either side of it.
Border Rnd 2 (Cream)
Ch 1. Sc in each sc and in each bridge ch. Work (sc, ch 3, sc) in each picot and in each corner ch-3 sp. Sl st to first sc. Fasten off.
Count: 372 sts worked 1 per existing st + 48 sc added in picots + 8 sc added in corners = 428 sc.
- Top and bottom: 1 corner sc + 62 + 8 picot sc + 1 corner sc = 72 sc each
- Left and right: 1 + 124 + 16 + 1 = 142 sc each
- Check: 72 + 72 + 142 + 142 = 428
Why the math works: Every arch gets one sc for each chain, and the ch-4 bridges pull the notches only slightly toward a straight line. Corner arches get 1 extra sc to turn the corner smoothly. The two rounds add 0.5 in (1.3 cm) on each side, so the 9 x 18 in (22.9 x 45.7 cm) panel finishes at 10 x 19 in (25.4 x 48.3 cm).
Final Blocking
- Weave in all tails securely, following the stitch path, then trim.
- Lay the panel right side up on a blocking mat.
- Pin the four corners to a 10 x 19 in (25.4 x 48.3 cm) rectangle.
- Pin every point picot outward so each star tip is sharp.
- Open each diamond window by gently stretching the diagonal arches.
- Mist the panel evenly until damp, without soaking it.
- Let it dry completely, usually 12–24 hours, before unpinning.
Final Quality-Control Checklist
- All 8 stars have 8 sharp points and a closed center ring.
- Rnd 3 count is 56 sts, Rnd 4 is 72 sc, and Rnd 5 is 24 sc on every motif.
- All 20 point joins are present, and none are twisted.
- The 3 interior diamond windows (between rows) lie open and flat.
- Border Rnd 2 counts are 72, 142, 72, and 142 sc.
- The panel measures 10 x 19 in (25.4 x 48.3 cm).
- No tails show on the right side.
Troubleshooting
- Star points curl or cup: Rnd 3 is too tight. Go up half a hook size for Rnd 3 only.
- Rnd 4 ruffles: You may have worked 2 sc into a valley. Check that you have 7 sc between tips.
- Joins pucker: Your ch 2 are too short. Loosen them to match the ch-5 loops.
- Diamond windows are skewed: A join went to the wrong loop. Recount the points on each side.
- Border waves: You have too many sc in the arches. Use 4 per arch, or 5 only at corners.
- Border pulls in: Make the ch-4 bridges looser rather than adding stitches.
Care
Hand wash in cool water with mild soap, roll it in a towel to remove water, and dry flat. Re-pin the points if they soften over time.
Final Notes
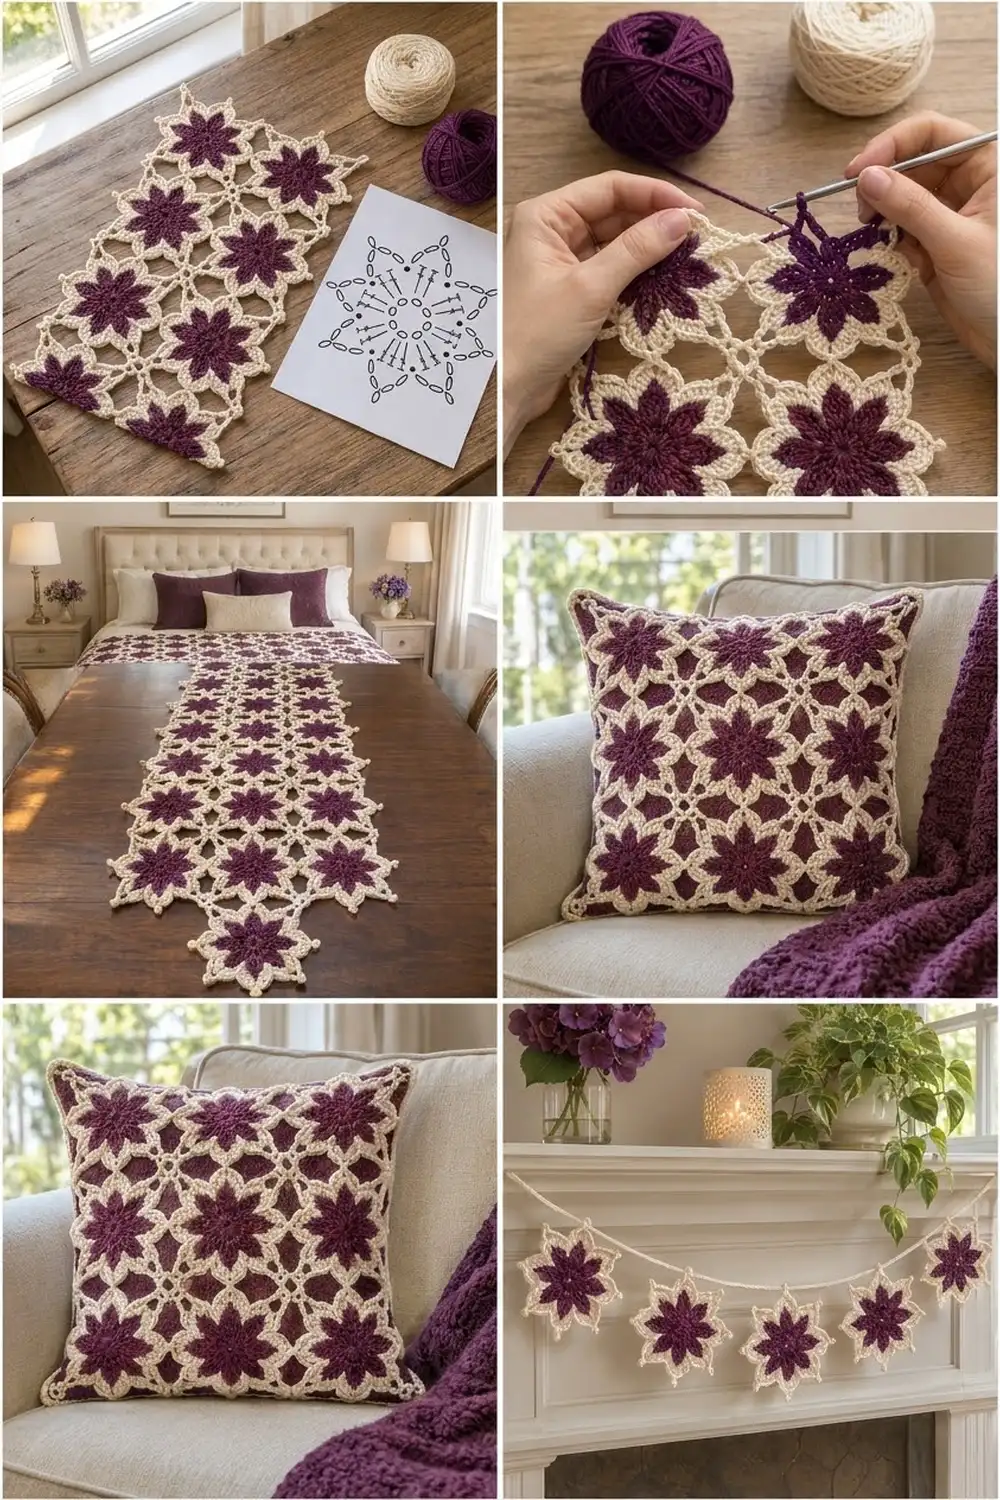
Your measurement chain is: Rnd 2 at 2 in (5.1 cm), Rnd 3 at 3.5 in (8.9 cm), Rnd 4 at 3.75 in (9.5 cm), and a finished motif at 4.5 in (11.4 cm). Joined, the panel is 9 x 18 in (22.9 x 45.7 cm). The 0.5 in (1.3 cm) border brings it to 10 x 19 in (25.4 x 48.3 cm). If each checkpoint matches, the panel will lie flat with sharp, even stars.
Happy crocheting!