

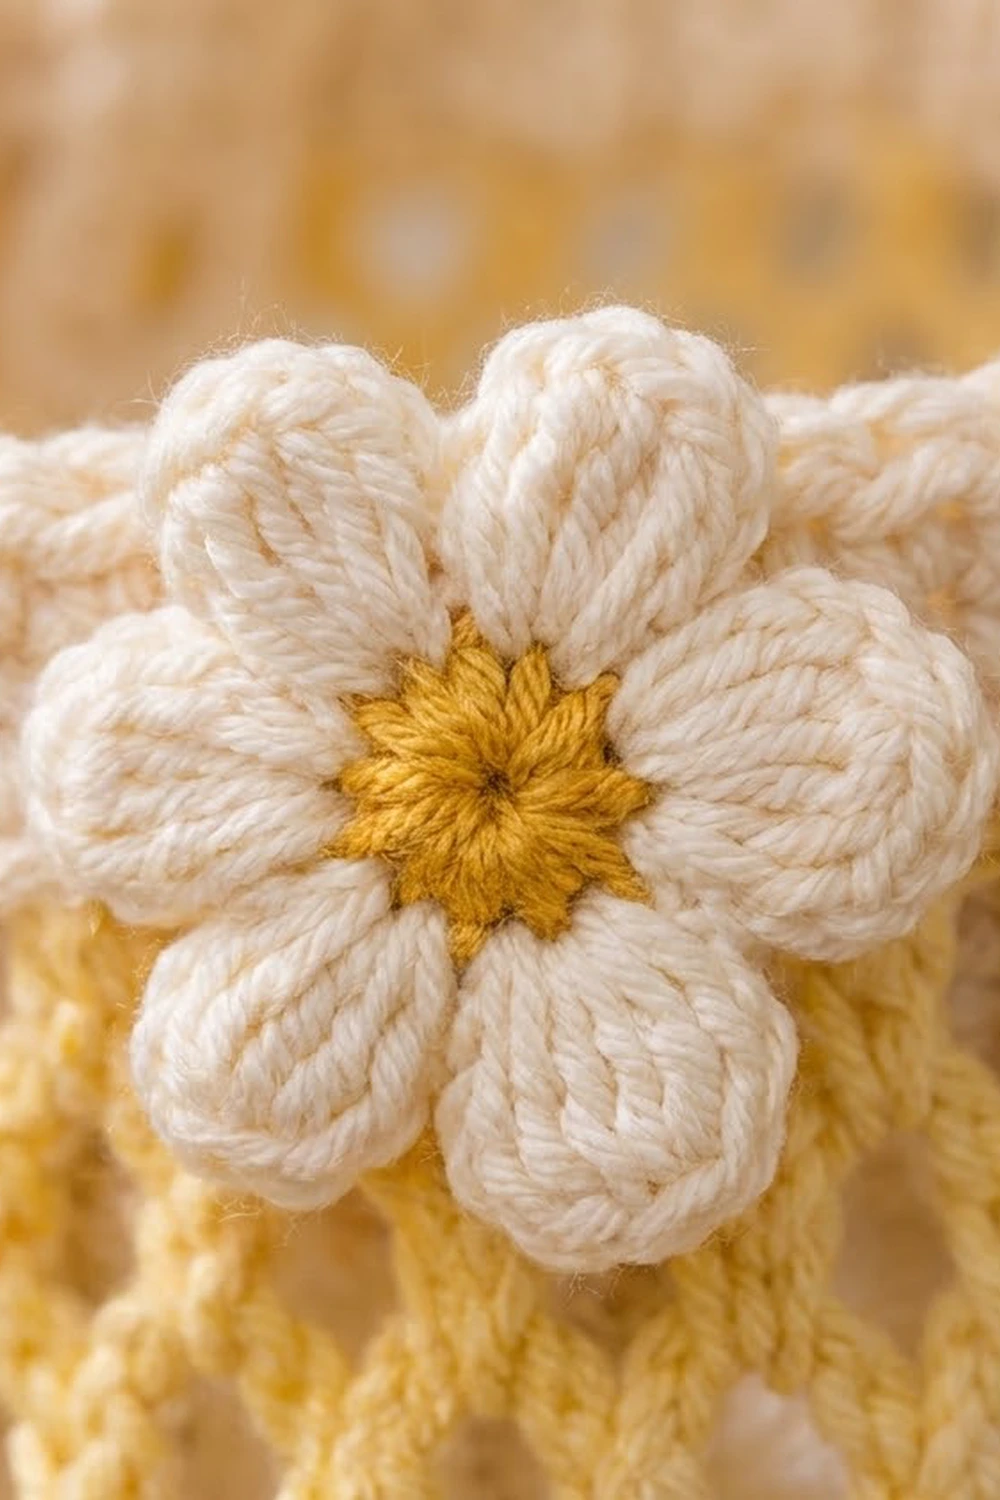
This bag dispenser gives you somewhere to keep plastic grocery bags. The body is a teardrop of open diamond mesh in soft butter yellow. A cream rim, a cream cuff and a single daisy finish it off. You push bags in through the top and pull them out one at a time through the cinched bottom.
The palette is warm: pale yellow mesh, cream trim, an eight-petal daisy with a golden center, and a cream button on the hanging strap. It suits a farmhouse or cottage kitchen and works well as a quick gift.
This pattern uses US crochet terms. The finished body is about 14.9 in (37.8 cm) long from cuff to rim. The mesh opens to about 11.25 in (28.6 cm) wide when laid flat at its widest point. The rim is 7.5 in (19.1 cm) wide when laid flat.
You work the body from the bottom up in one piece: a cream cuff, then the yellow mesh, then the cream rim. After that you make the strap and the daisy, sew them on, and thread a drawstring through the cuff.
Finished Size and Construction
- Finished size: 14.9 in (37.8 cm) long, plus the strap loop
- Skill level: Easy / advanced beginner
- Terminology: US crochet terms
- Yarn weight: Worsted (#4) cotton
- Hook: 5.0 mm (H-8)
- Number of pieces: 1 body, plus 1 strap, 1 daisy and 1 cord
- Layout: A single seamless tube, worked in joined rounds
- Piece size: Cuff 7.5 in (19.1 cm) around; mesh 22.5 in (57.2 cm) around at its widest
- Size before border: 13.6 in (34.5 cm) long (cuff plus mesh)
- Border depth: The top rim adds 1.3 in (3.3 cm)
Materials
Use a smooth, mercerized or combed worsted cotton. Cotton holds the mesh shape and won’t stretch out under the weight of the bags. Avoid splitty or very fuzzy yarn, because it hides the diamond pattern.
- Butter yellow (main color, MC): 80 g / 152 m
- Cream (contrast color, CC): 40 g / 76 m
- Golden yellow (daisy center): 2 g / 4 m
All quantities include a margin of about 15%.
Tools:
– 5.0 mm (H-8) crochet hook
– Tapestry needle
– Stitch marker
– 1 cream button, 0.75 in (1.9 cm)
– 1 plastic cord lock (spring toggle)
– Scissors and a tape measure
– Sewing thread and a needle for the button
Abbreviations (US Terms)
- ch – chain
- sl st – slip stitch
- sc – single crochet
- hdc – half double crochet
- dc – double crochet
- sk – skip
- sp – space
- MR – magic ring
- rev sc – reverse single crochet (crab stitch): work sc from left to right
- rep – repeat
Puff stitch: (Yarn over, insert hook in stitch, pull up a loop to 0.5 in / 1.3 cm) 3 times. Yarn over and pull through all 7 loops. Ch 1 to close the puff. The closing ch does not count as a stitch.
Mesh round closures: Each mesh round ends with a short chain plus a taller stitch worked into the first sc of the round. This closing loop counts as the last loop of the round. It also leaves your hook at the top of the first loop, ready for the next round.
– ch 2, dc = one ch-5 loop
– ch 1, dc = one ch-4 loop
– ch 1, hdc = one ch-3 loop
Gauge and Checkpoints
- Sc gauge: 16 sc × 18 rounds = 4 in (10.2 cm)
- Mesh gauge: 4 rounds of ch-5 mesh = 3 in (7.6 cm) tall. One ch-5 loop opens to about 0.75 in (1.9 cm) wide.
Make the cuff first and use it as your gauge swatch. Flattened, the cuff should measure 3.75 in (9.5 cm) across, which is 7.5 in (19.1 cm) around. If it’s wider, change to a 4.5 mm hook. If it’s narrower, change to a 5.5 mm hook.
Checkpoints:
– After the cuff: 0.9 in (2.3 cm) tall
– After M8: The mesh measures 6 in (15.2 cm) tall
– After M14: The mesh measures 10.5 in (26.7 cm) tall
– After M18: The mesh measures 12.7 in (32.3 cm) tall
– After the rim: 7.5 in (19.1 cm) across when laid flat
If your mesh comes out too long, leave out one round from M5–M14. If it’s too short, add one. Each ch-5 round adds 0.75 in (1.9 cm).
Bottom Cuff (CC)
Foundation: Ch 30 and join with a sl st into the first ch. Make sure the chain isn’t twisted.
Rnd 1: Ch 1, sc in each ch around, then join. (30 sc)
Rnd 2 (eyelet round): Ch 1, sc in next st, ch 1, sk 1. Rep around and join. (15 sc + 15 ch-1 sps = 30 sts)
Rnd 3: Ch 1, sc in each sc and in each ch-1 sp, then join. (30 sc)
Rnd 4 (puff round): Ch 1, sc in next st, puff in next st. Rep around and join. (15 sc + 15 puffs = 30 sts) Fasten off.
The eyelets in Rnd 2 hold the drawstring. The puffs give the cuff its bumpy texture.
Mesh Body (MC)
M1: Join MC with a sc in any sc of Rnd 4. Ch 5, sk the puff, sc in next sc. Rep 13 more times. Ch 2, dc in the first sc. (15 loops)
M2 (growth): Each repeat covers 3 loops of the previous round and makes 4 new loops. (Ch 5, sc in next loop) twice, ch 5, sc in the same loop again. Work 5 repeats in total. Close the round with ch 2, dc. (20 loops)
M3 (growth): Each repeat covers 4 old loops and makes 5 new loops. (Ch 5, sc in next loop) 3 times, ch 5, sc in the same loop. Work 5 repeats. Close with ch 2, dc. (25 loops)
M4 (growth): Each repeat covers 5 old loops and makes 6 new loops. (Ch 5, sc in next loop) 4 times, ch 5, sc in the same loop. Work 5 repeats. Close with ch 2, dc. (30 loops)
Spread the extra loops out evenly in each growth round. If you stack them in the same place, the teardrop will lean to one side.
M5–M14: Ch 5, sc in next loop. Rep around and close with ch 2, dc. (30 loops each round, 10 rounds)
These rounds form the wide belly of the teardrop, about 22.5 in (57.2 cm) around.
M15–M16: Ch 4, sc in next loop. Rep around and close with ch 1, dc. (30 loops each round)
M17–M18: Ch 3, sc in next loop. Rep around and close with ch 1, hdc. (30 loops each round) Fasten off MC.
Shortening the loops narrows the top of the bag without changing the loop count. Thirty ch-3 loops at about 0.5 in (1.3 cm) each make roughly 15 in (38.1 cm) around, which matches the rim.
Top Rim (Border, CC)
Border gauge: 16 sc = 4 in (10.2 cm). At this gauge, 60 stitches give a circumference of 15 in (38.1 cm), or 7.5 in (19.1 cm) across when flat. Each flat side holds 30 stitches.
R1: Join CC in any ch-3 loop. Ch 1, then work 2 sc in each loop around and join. 30 loops × 2 = 60 sc, which is 30 per flat side.
R2: Ch 1, sc in next st, ch 1, sk 1. Rep around and join. (30 sc + 30 ch-1 sps = 60 sts; 30 per side)
R3–R4: Sl st into the first ch-1 sp. Ch 1, sc in the ch-1 sp, ch 1. Rep around and join. (30 sc + 30 ch-1 sps = 60 sts each round)
R5: Ch 1, sc in each sc and in each ch-1 sp, then join. (60 sc; 30 per side)
R6: Ch 1, rev sc in each st around, then join. (60 rev sc) Fasten off.
Why the math works: Each round has the same 60 stitches, so the rim sits flat and doesn’t ruffle or pucker. The moss rounds use 1 sc + 1 ch in place of every 2 sc, so the count stays at 60. Six rounds at 18 rounds per 4 in come to about 1.3 in (3.3 cm) deep.
Strap (CC)
Foundation: Ch 7.
Row 1: Sc in the 2nd ch from the hook and in each ch across. (6 sc)
Rows 2–45: Ch 1, turn, and sc across. (6 sc)
Row 46: Ch 1, turn. Sc 2, ch 2, sk 2, sc 2. (4 sc + 1 ch-2 sp)
Row 47: Ch 1, turn. Sc 2, 2 sc in the ch-2 sp, sc 2. (6 sc)
Rows 48–49: Ch 1, turn, and sc across. (6 sc)
Rows 50–51: Repeat Rows 46–47.
Rows 52–54: Ch 1, turn, and sc across. (6 sc) Fasten off.
The finished strap is 1.5 in (3.8 cm) wide and 12 in (30.5 cm) long. The two buttonholes let you adjust the loop. Sew the button to the outer face of the strap at Row 24.
Daisy Appliqué
Rnd 1 (golden yellow): Make a MR and work 8 sc into it. Join, then fasten off. (8 sc)
Rnd 2 (CC): Join in any sc. (Ch 3, 2 dc, ch 3, sl st) all in the same st, sl st in next st. Rep around. (8 petals) Fasten off and leave a 10 in (25.4 cm) tail for sewing.
The daisy measures about 1.5 in (3.8 cm) across.
Drawstring Cord (CC)
Ch 60. Sl st into the back bump of each ch along the chain. This makes a firm cord about 12 in (30.5 cm) long.
Assembly
- Weave the cord in and out through the 15 eyelets in cuff Rnd 2, starting and ending at the same eyelet.
- Thread both cord ends through the cord lock. Knot them together to make a pull loop about 1.5 in (3.8 cm) long, and trim the ends.
- Sew Rows 1–4 of the strap to the inside of the rim at the center back.
- Sew the daisy to the outside of the rim at the center front, across R2–R4.
Final Blocking
- Wet the body, then gently squeeze out the water. Don’t wring it.
- Roll it in a towel to remove more moisture.
- Stuff the body loosely with a rolled towel or plastic bags to shape the teardrop.
- Line up the diamonds so the columns run straight.
- Pin the rim to 7.5 in (19.1 cm) wide when flat.
- Lay the strap flat at 1.5 in × 12 in (3.8 cm × 30.5 cm).
- Let everything dry completely.
Final Quality-Control Checklist
- [ ] The cuff is 7.5 in (19.1 cm) around and the puffs all pop to the outside.
- [ ] Each mesh round has 30 loops from M4 onward.
- [ ] No growth loops are stacked on top of each other.
- [ ] The rim has 60 stitches, 30 per flat side.
- [ ] The rim is 1.3 in (3.3 cm) deep.
- [ ] The strap is centered at the back and the daisy is centered at the front.
- [ ] The button fits through both buttonholes.
- [ ] The cord lock slides firmly and holds the cuff closed.
- [ ] All yarn tails are woven in securely.
Troubleshooting
- The mesh spirals or leans. Check that every round closes into its first sc, and spread your growth loops out evenly.
- The rim ruffles. You have more than 60 stitches. Recount R1.
- The rim pulls in. Your sc tension is too tight. Work the rim with a 5.5 mm hook.
- The diamonds collapse. Your chains are too tight. Loosen them, or chain 1 extra per loop and accept a slightly longer body.
- Bags fall out of the bottom. Tighten the cord lock, or add 1 more sc round to the cuff before Rnd 2.
- The strap stretches. Use firmer tension, or work the strap with a 4.5 mm hook.
Care
Hand wash in cool water and lay flat to dry, keeping the teardrop shape. Don’t tumble dry, because the mesh will stretch.

Final Notes
Here is the full measurement chain:
- The cuff’s 30 stitches make 7.5 in (19.1 cm) around.
- The mesh grows from 15 to 30 loops, widening to 22.5 in (57.2 cm) around.
- Shorter loops at the top bring the mesh back down to about 15 in (38.1 cm).
- The 60-stitch rim locks that 15 in (38.1 cm) top in place, 30 stitches per side.
- The whole body measures 14.9 in (37.8 cm) long.
If you check each stage against these numbers, the finished dispenser will match.
Happy crocheting!