

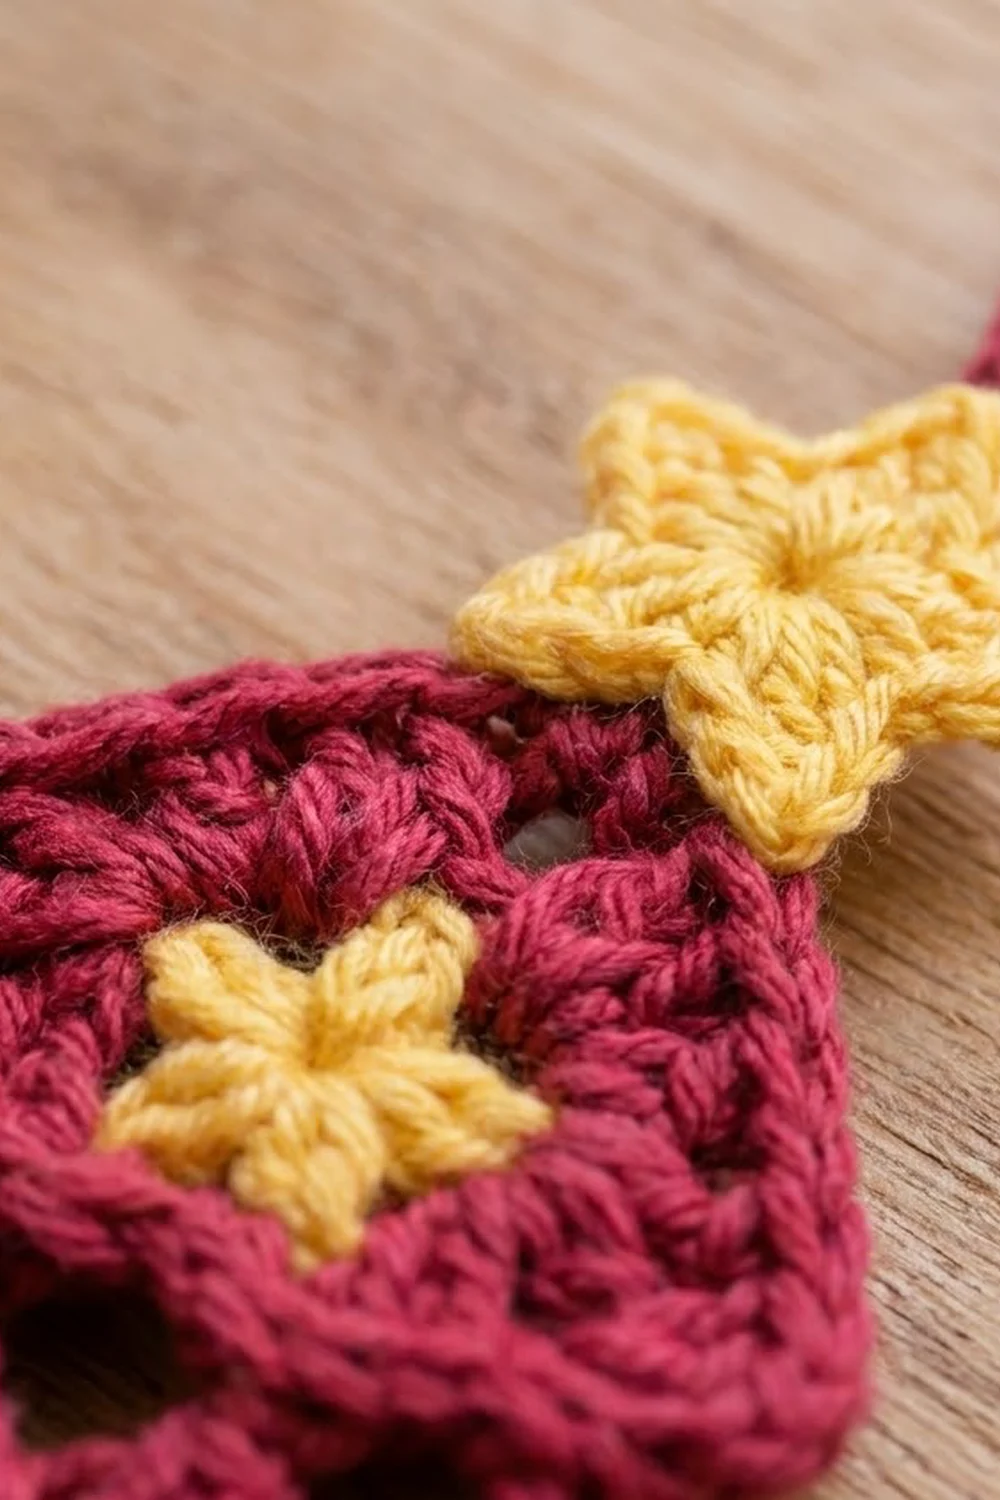
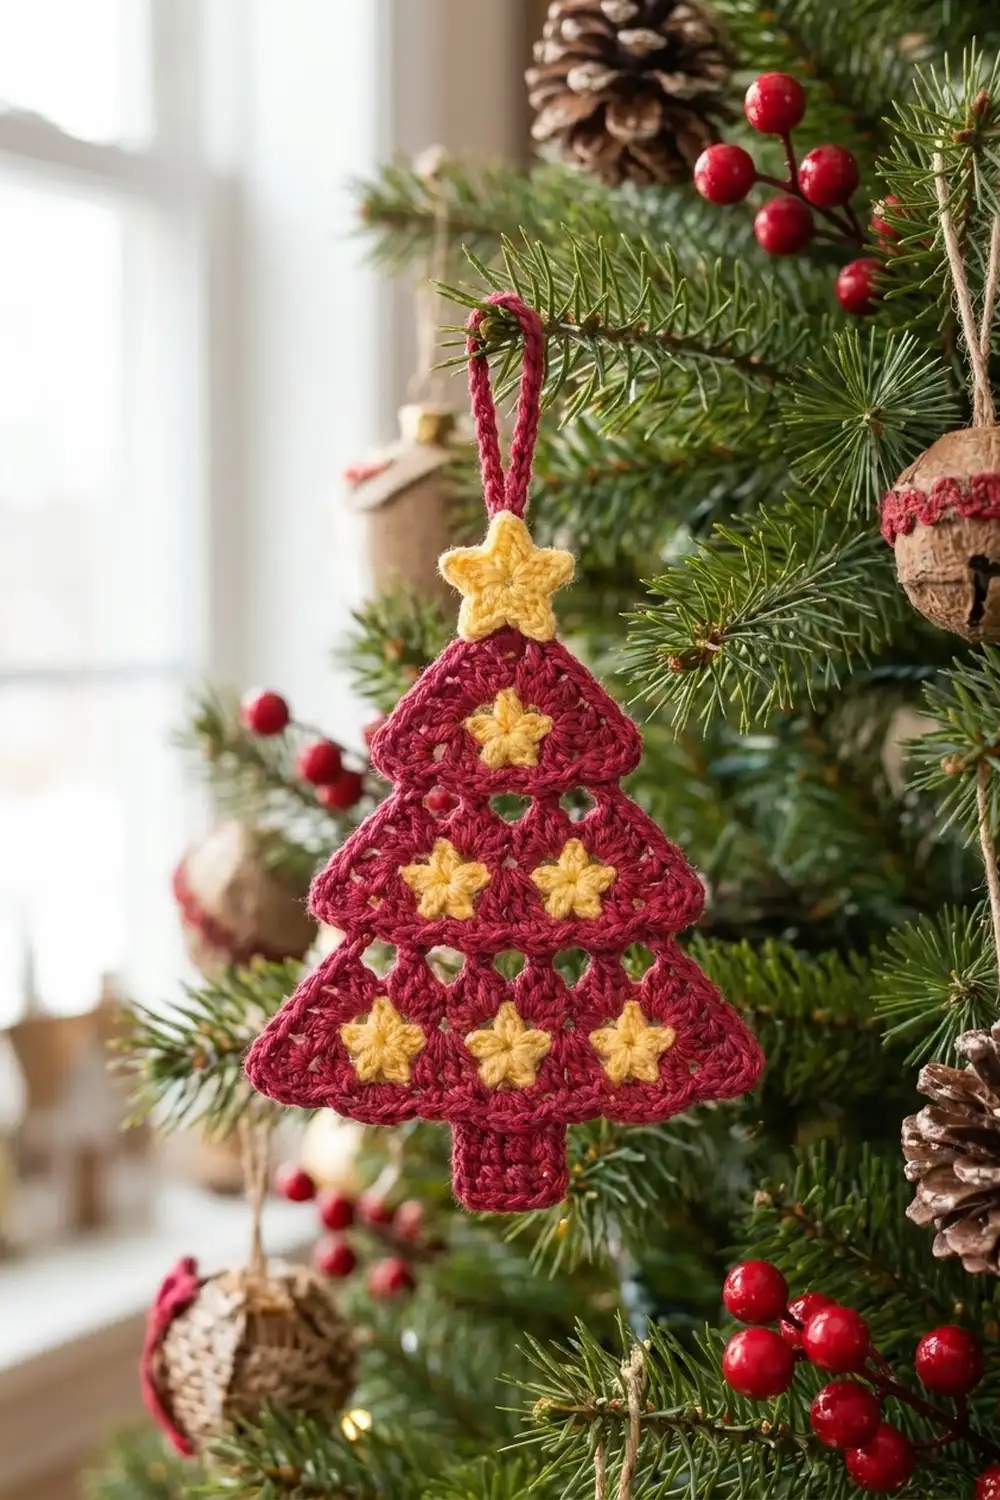
This little tree ornament is made from three stacked granny-cluster tiers in deep cranberry red. Small butter-yellow stars sit in the open lace, and a larger star sits on top. A short trunk hangs below the tiers, and a sturdy red loop sits above them.
You need two colors: cranberry for the tiers, trunk, and loop, and soft yellow for the stars. The style is classic and cozy. The open clusters give a lacy texture, and a single crochet edging gives each tier a clean outline.
This pattern uses US crochet terms. The finished ornament is 4.75 in (12.1 cm) wide and 7.25 in (18.4 cm) tall from the bottom of the trunk to the top of the star. With the hanging loop it is 8.75 in (22.2 cm) tall.
Each tier is worked flat from the bottom up on a single crochet foundation. Every cluster row has one cluster fewer than the row before, so the tier narrows on its own. You edge each tier with single crochet, then sew all the parts together into one ornament.
Finished Size and Construction
- Finished size: 4.75 in (12.1 cm) wide x 7.25 in (18.4 cm) tall; 8.75 in (22.2 cm) including the loop
- Skill level: Easy
- Terminology: US crochet terms
- Yarn weight: Worsted (#4)
- Hook: 4.0 mm (G-6)
- Number of pieces: 1 finished ornament made from 12 parts (3 tiers, 1 trunk, 6 small stars, 1 topper star, 1 loop)
- Layout: 3 tiers stacked vertically; each upper tier overlaps the one below by 0.5 in (1.3 cm)
- Piece sizes (after edging): bottom tier 4.75 x 2.25 in (12.1 x 5.7 cm); middle tier 3.75 x 2.25 in (9.5 x 5.7 cm); top tier 2.75 x 2.25 in (7.0 x 5.7 cm)
- Size before border: bottom tier 4.25 x 1.75 in (10.8 x 4.4 cm); middle tier 3.25 x 1.75 in (8.3 x 4.4 cm); top tier 2.25 x 1.75 in (5.7 x 4.4 cm)
- Border depth: 0.25 in (0.6 cm) on every edge
Materials
Use a smooth worsted-weight yarn so the clusters show clearly. Acrylic holds its shape and is easy to wash. Cotton gives crisper edges but is a little stiffer. Avoid fuzzy yarns, because they blur the small stars.
- Color A (cranberry red): 15 g, about 30 m
- Color B (soft yellow): 5 g, about 10 m
These amounts are for one ornament and include a margin for swatching and sewing.
Tools:
- 4.0 mm (G-6) crochet hook
- Yarn needle
- Scissors
- Rustproof pins
- Spray bottle or steam iron
- Ruler or tape measure
Abbreviations (US Terms)
- ch – chain
- sl st – slip stitch
- sc – single crochet
- hdc – half double crochet
- dc – double crochet
- sk – skip
- sp – space
- st(s) – stitch(es)
- rep – repeat
- RS – right side
Special stitch – Cluster: 3 dc worked into the same stitch or space. At the start of a row, ch 3 counts as the first dc, so “ch 3, 2 dc” makes one cluster.
Gauge and Checkpoints
Gauge: 16 sc = 4 in (10.2 cm). Three cluster rows = 1.5 in (3.8 cm) tall.
Make the top tier first and use it as your test piece. It is the smallest part and uses every tier stitch.
Checkpoints for the top tier:
- After Row 1: the 9 sc measure 2.25 in (5.7 cm) across.
- After Row 4: the tier is 1.75 in (4.4 cm) tall.
- After the edging: the tier is 2.75 in (7.0 cm) wide and 2.25 in (5.7 cm) tall.
If your tier is too big, switch to a 3.75 mm hook. If it is too small, switch to a 4.5 mm hook. Change the hook, not the stitch counts, so the three tiers stay in proportion.
Tiers
All three tiers use the same method; only the foundation length changes. Use Color A.
Bottom Tier
Ch 18.
Row 1 (RS): Sc in 2nd ch from hook and in each ch across. Turn. (17 sc)
Checkpoint: 4.25 in (10.8 cm) across.
Row 2: Ch 3 (counts as dc), 2 dc in first sc, *ch 1, sk next 3 sc, 3 dc in next sc; rep from * 3 more times. Turn. (5 clusters, 4 ch-1 sps; 15 dc)
The clusters sit in sc 1, 5, 9, 13, and 17, so the row ends exactly at the edge.
Row 3: Sl st in next 2 dc, sl st in next ch-1 sp, ch 3, 2 dc in same sp, *ch 1, 3 dc in next ch-1 sp; rep from * 2 more times. Turn. (4 clusters, 3 ch-1 sps; 12 dc)
Row 4: Sl st in next 2 dc, sl st in next ch-1 sp, ch 3, 2 dc in same sp, *ch 1, 3 dc in next ch-1 sp; rep from * once more. (3 clusters, 2 ch-1 sps; 9 dc) Fasten off.
Checkpoint: 1.75 in (4.4 cm) tall. Each side steps in by half a cluster per row, which makes a neat trapezoid.
Middle Tier
Ch 14.
Row 1 (RS): Sc in 2nd ch from hook and in each ch across. Turn. (13 sc)
Checkpoint: 3.25 in (8.3 cm) across.
Row 2: Ch 3, 2 dc in first sc, *ch 1, sk next 3 sc, 3 dc in next sc; rep from * 2 more times. Turn. (4 clusters, 3 ch-1 sps; 12 dc)
Row 3: Sl st in next 2 dc, sl st in next ch-1 sp, ch 3, 2 dc in same sp, *ch 1, 3 dc in next ch-1 sp; rep from * once more. Turn. (3 clusters, 2 ch-1 sps; 9 dc)
Row 4: Sl st in next 2 dc, sl st in next ch-1 sp, ch 3, 2 dc in same sp, ch 1, 3 dc in next ch-1 sp. (2 clusters, 1 ch-1 sp; 6 dc) Fasten off.
Top Tier
Ch 10.
Row 1 (RS): Sc in 2nd ch from hook and in each ch across. Turn. (9 sc)
Row 2: Ch 3, 2 dc in first sc, *ch 1, sk next 3 sc, 3 dc in next sc; rep from * once more. Turn. (3 clusters, 2 ch-1 sps; 9 dc)
Row 3: Sl st in next 2 dc, sl st in next ch-1 sp, ch 3, 2 dc in same sp, ch 1, 3 dc in next ch-1 sp. Turn. (2 clusters, 1 ch-1 sp; 6 dc)
Row 4: Sl st in next 2 dc, sl st in next ch-1 sp, ch 3, 2 dc in same sp. (1 cluster; 3 dc) Fasten off.
This single cluster forms the point of the tree.
Trunk
Use Color A. Ch 6.
Row 1: Sc in 2nd ch from hook and in each ch across. Turn. (5 sc)
Rows 2–6: Ch 1, sc in each sc across. Turn. (5 sc)
Fasten off and leave a 12 in (30.5 cm) tail. The trunk is 1.25 in (3.2 cm) wide and 1.5 in (3.8 cm) tall.
Stars
Use Color B.
Small Stars (make 6)
Rnd 1: Make a magic ring, 5 sc in ring, sl st to first sc, and pull the ring tight. (5 sc)
Rnd 2: *Ch 3, sl st in 2nd ch from hook, hdc in next ch, sl st in next sc; rep from * 4 more times. (5 points)
Fasten off and leave an 8 in (20.3 cm) tail. Each star is 0.75 in (1.9 cm) across from point to point.
Topper Star (make 1)
Rnd 1: Make a magic ring, 5 sc in ring, sl st to first sc. (5 sc)
Rnd 2: Ch 1, 2 sc in each sc around, sl st to first sc. (10 sc)
Rnd 3: *Ch 4, sl st in 2nd ch from hook, sc in next ch, hdc in next ch, sk next sc, sl st in next sc; rep from * 4 more times. (5 points)
The last sl st lands in the joining stitch. Fasten off and leave a 12 in (30.5 cm) tail. The topper is 1.25 in (3.2 cm) across from point to point.
Hanging Loop
Use Color A. Ch 16. Sl st in 2nd ch from hook and in each ch across. (15 sl st)
Fasten off and leave an 8 in (20.3 cm) tail. The row of slip stitches makes the loop firm.
Border: Tier Edging
Border gauge: One round of sc adds 0.25 in (0.6 cm) to every edge, so each tier gets 0.5 in (1.3 cm) wider and 0.5 in (1.3 cm) taller.
On the slanted sides, work 1 sc into the end of each sc row and 2 sc into the end of each dc row. Each side has 1 sc row and 3 dc rows, so each side gets 1 + 2 + 2 + 2 = 7 sc. The side counts below do not include the corners. The bottom corners are counted in the bottom edge.
Bottom Tier Edging
With Row 4 facing you, join Color A in the first dc at the right-hand end.
Rnd 1: Sc in each dc and each ch-1 sp across the top (11 sc). Work 7 sc evenly down the side. Working into the free loops of the foundation chain: 3 sc in the first ch, sc in the next 15 ch, 3 sc in the last ch (21 sc). Work 7 sc evenly up the other side. Sl st to first sc. (46 sc)
Per-side counts: top 9 dc + 2 ch-1 sps = 11 sc; each side 7 sc; bottom 17 sc (1 per ch) + 4 extra corner sc = 21 sc. Fasten off and leave a 12 in (30.5 cm) tail.
Middle Tier Edging
Rnd 1: Sc in each dc and ch-1 sp across the top (7 sc). Work 7 sc down the side. 3 sc in the first foundation ch, sc in the next 11 ch, 3 sc in the last ch (17 sc). Work 7 sc up the side. Sl st to first sc. (38 sc)
Per-side counts: top 6 dc + 1 ch-1 sp = 7; each side 7; bottom 13 + 4 extra = 17.
Top Tier Edging
Rnd 1: Sc in the first dc of the tip cluster, 3 sc in the center dc, sc in the last dc (5 sc). Work 7 sc down the side. 3 sc in the first foundation ch, sc in the next 7 ch, 3 sc in the last ch (13 sc). Work 7 sc up the side. Sl st to first sc. (32 sc)
Per-side counts: tip 3 sts worked once + 2 extra = 5; each side 7; bottom 9 + 4 extra = 13.
Why the Math Works
The bottom edge gets one sc per foundation chain, so its length matches Row 1. The 2 extra sc at each bottom corner let the edging turn without cupping. The top edge gets one sc per stitch or space, so it lies flat over the clusters. Both sides use the same 7 sc, so every tier stays symmetrical.
Assemble the Tree
Block each tier first (Final Blocking, step 1). Then:
- Small stars: Center each star over a Row 3 ch-1 sp, in the gap between two Row 3 clusters. That gives 3 stars on the bottom tier, 2 on the middle tier, and 1 on the top tier. Whipstitch around each star’s center.
- Middle tier: Center it over the bottom tier so its lower edge covers the top 0.5 in (1.3 cm) of the bottom tier. Sew along its bottom edging from the back.
- Top tier: Stack it over the middle tier with the same 0.5 in (1.3 cm) overlap and sew it the same way.
- Trunk: Center the trunk behind the bottom tier with its top 0.75 in (1.9 cm), or 3 rows, tucked behind. Sew it in place.
- Topper: Sew it to the front of the tip so it rises 0.75 in (1.9 cm) above the point and covers the top 0.5 in (1.3 cm).
- Loop: Fold it in half and sew both ends behind the topper so the loop stands 1.5 in (3.8 cm) above the star.
Final Blocking
- Mist each tier and pin it to size: 4.75 x 2.25 in (12.1 x 5.7 cm), 3.75 x 2.25 in (9.5 x 5.7 cm), or 2.75 x 2.25 in (7.0 x 5.7 cm). Let it dry.
- After assembly, lay the ornament face down on a towel.
- Hold a steam iron 1 in (2.5 cm) above the back and steam without pressing.
- Pat the tiers so the edges line up and the trunk hangs straight.
- Pin the topper’s points flat and let everything dry completely.
Final Quality-Control Checklist
- The tier edgings count 46, 38, and 32 sc.
- The bottom tier is 4.75 in (12.1 cm) wide.
- The height without the loop is 7.25 in (18.4 cm).
- Each overlap is 0.5 in (1.3 cm).
- The six small stars are fully visible in a 3-2-1 arrangement.
- The trunk shows 0.75 in (1.9 cm) below the bottom tier.
- The loop is secure and the ornament hangs straight.
- All ends are woven in on the back.
Troubleshooting
Tier edges curl: There are too few side stitches. Work 2 sc into each dc row end.
Bottom edge ruffles: The foundation chain is too tight. Make the chain with a hook one size larger.
Clusters lean: Check that the Row 2 clusters land in every 4th sc and that the row starts and ends with a cluster.
Stars look lumpy: Pull the magic ring tight and keep the point chains relaxed.
Ornament tilts: Re-center the loop directly above the tip and the trunk directly below it.
Care
Hand wash in cool water, roll the ornament in a towel to remove water, and dry flat. Store it flat or hanging so the star points don’t get crushed.
Final Notes
Start with a gauge of 16 sc = 4 in (10.2 cm). Foundations of 17, 13, and 9 sc give tiers 4.25, 3.25, and 2.25 in (10.8, 8.3, and 5.7 cm) wide. The edging brings them to 4.75, 3.75, and 2.75 in (12.1, 9.5, and 7.0 cm). Stacked with 0.5 in (1.3 cm) overlaps, the tiers are 5.75 in (14.6 cm) tall. The trunk adds 0.75 in (1.9 cm) and the topper adds 0.75 in (1.9 cm), for 7.25 in (18.4 cm) in total.
Happy crocheting!