

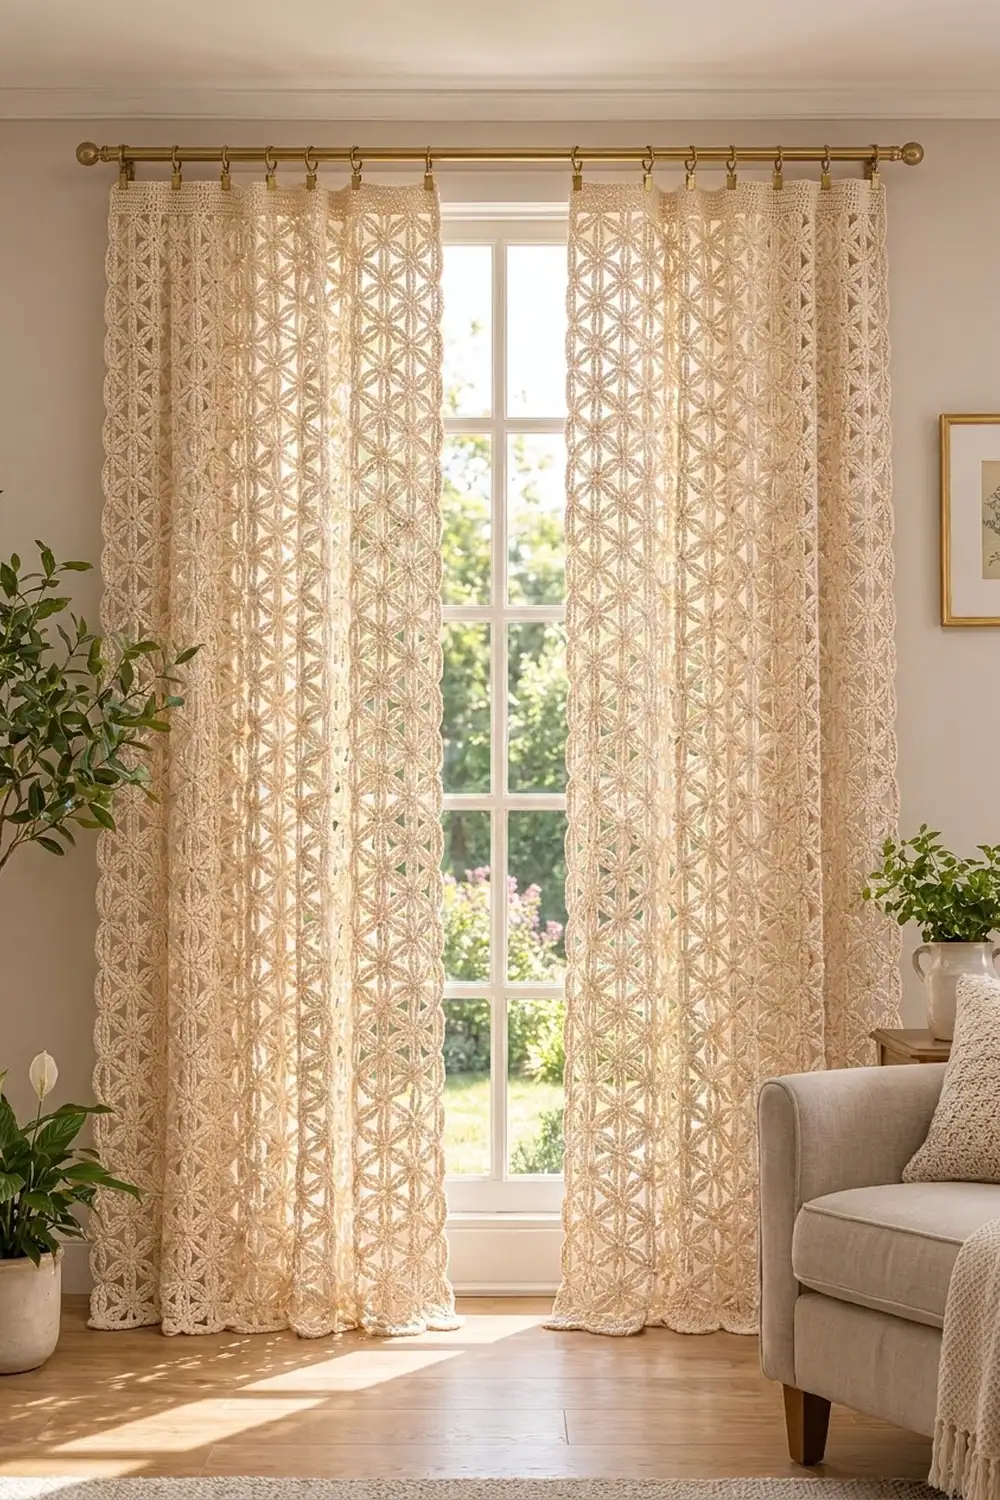
These curtains are made from a lattice of six-petal flowers. Each flower has long, rope-like petals that reach out to touch its neighbors, so the panel turns into a light, airy screen. Daylight comes through the hexagonal windows between the flowers, and it still gives the room a bit of privacy. The curtains suit a living room, bedroom, or sunny reading corner.
The design uses one color, a warm natural ecru, so the texture does all the work. The petals are chain loops wrapped closely in single crochet, which makes them look like soft cord. A solid single-crochet header across the top gives the clip rings something firm to hold.
Each finished panel measures 54 in (137.2 cm) wide at the side petal tips and 86.2 in (218.9 cm) long, header included. The pattern is written in US crochet terms. It covers one panel, and you make two for a pair.
Here is the construction in brief. You crochet one complete flower motif, then join every following motif to its neighbors as you go, working on its last round. Rows run from the top of the panel to the bottom. Once all 144 motifs are joined, you work a 12-row header across the top edge.
Finished Size and Construction
- Finished panel size: 54 in (137.2 cm) wide × 86.2 in (218.9 cm) long
- Skill level: Intermediate
- Terminology: US crochet terms
- Yarn weight: Aran / worsted (weight 4), cotton or cotton blend
- Hook: 5.0 mm (H-8)
- Number of pieces: 144 motifs per panel (288 for a pair)
- Layout: 9 motifs across × 16 motifs down, in a straight grid
- Single motif size: 6 in (15.2 cm) from the left petal tip to the right petal tip; 5.2 in (13.2 cm) vertical repeat
- Size before header: 54 in (137.2 cm) × 83.2 in (211.3 cm)
- Header depth: 3 in (7.6 cm)
Materials
Yarn: Pick a smooth, firm aran-weight cotton or cotton/linen blend at about 85 m per 50 g. Cotton holds the petal shape and doesn’t stretch much on a long drop, which matters here. Avoid fuzzy or loosely plied yarns, because they blur the corded petals.
- Ecru / natural cream: 650 g (about 1,100 m) per panel; 1,300 g (about 2,200 m) for a pair
The quantities include a margin of roughly 15% for your gauge test, the joins, and weaving in ends.
Tools:
– 5.0 mm (H-8) crochet hook
– Tapestry needle
– Stitch markers
– Tape measure
– Blocking mats and rust-proof pins
– 10 curtain clip rings per panel
– Spray bottle
Abbreviations (US Terms)
- ch – chain
- sc – single crochet
- sl st – slip stitch
- sp – space
- st(s) – stitch(es)
- RS – right side
Special stitch – Joining Tip (JT): Ch 1, remove the hook, and insert it from the front into the ch-3 tip of the neighboring motif. Pick up the dropped loop and pull it through, then ch 1. The JT takes the place of the ch-3 tip.
Petal numbering: Hold the motif RS up. Petal 1 (P1) points right and the others follow counterclockwise. P2 is upper right, P3 upper left, P4 left, P5 lower left, and P6 lower right.
Gauge and Checkpoints
Base gauge: 16 sc and 16 rows = 4 in (10.2 cm) in sc worked in rows.
Test one motif first. Crochet one full motif and steam it lightly. Then check it against these numbers:
- After Rnd 1: center ring is 1.25 in (3.2 cm) across.
- After Rnd 3: P1 tip to P4 tip measures 6 in (15.2 cm).
- Tip spacing: P2 tip to P3 tip measures 3 in (7.6 cm).
- Height: the P2 and P3 tips sit 2.6 in (6.6 cm) above the center, which gives a 5.2 in (13.2 cm) vertical repeat once the motifs are joined.
If the motif is too big: go down to a 4.5 mm hook. If it’s only slightly over, you can also shorten every petal chain from 14 to 13.
If the motif is too small: go up to a 5.5 mm hook.
Don’t fix it by changing the number of sc on a petal. The 8 + 8 cover is what keeps the petals corded and straight.
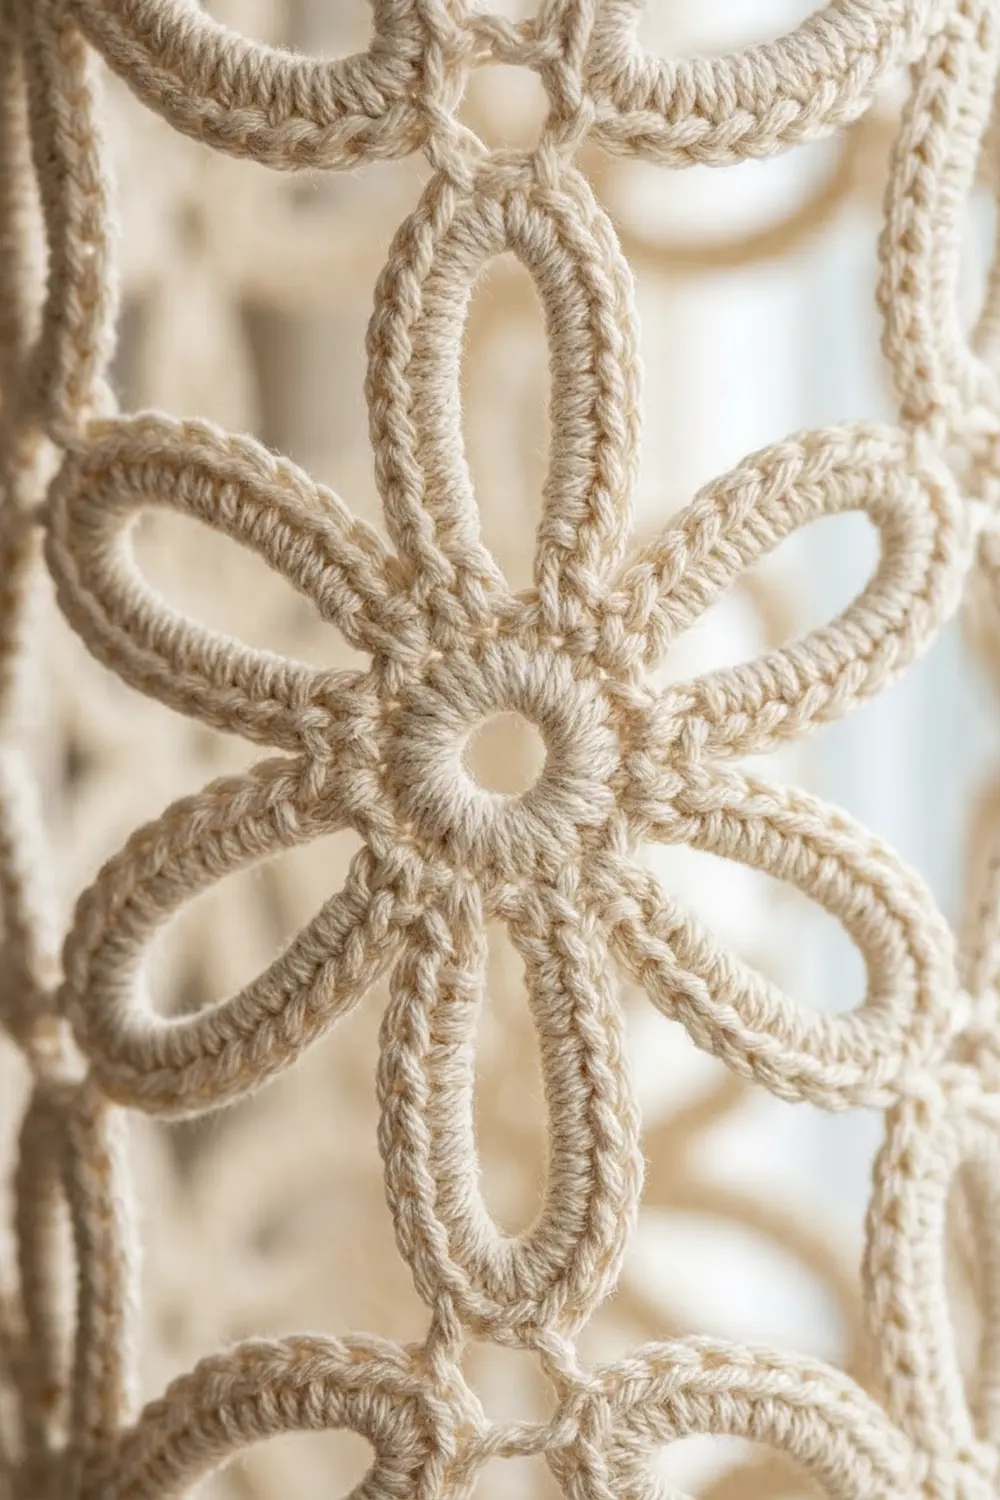
Motif (make 144 per panel)
Ring: Ch 6, sl st in the first ch to form a ring.
Rnd 1: Ch 1, 12 sc in the ring, sl st in the first sc. (12 sc)
Rnd 2 (petal loops): Ch 1, sc in the next sc, ch 14, skip the next sc. Repeat from * 5 more times, then sl st in the first sc. (6 sc, 6 ch-14 loops)
Each loop is anchored between two sc that sit one skipped stitch apart. That keeps the petal bases narrow, so the six petals fan out evenly at 60-degree intervals.
Rnd 3 (covering the petals): Sl st into the first ch-14 loop. Work (8 sc, ch 3, 8 sc) in the ch-14 loop, then sl st in the next sc of Rnd 2. Repeat from * 5 more times. Fasten off with a 6 in (15.2 cm) tail. (96 sc, 6 ch-3 tips, 6 sl st)
Put eight sc on each side of the folded 14-chain loop. Pack them in snugly so the petal fills out into a firm, round cord with a small ch-3 point at the tip. The sl st between petals pulls each petal base tight against the center.
Stitch check: each petal has 16 sc, and 16 × 6 = 96 sc per motif.
Make All Pieces
Each panel uses one color only:
- Ecru: 144 motifs per panel, laid out as 9 across × 16 down
Only Motif 1 is made on its own. Every other motif is joined to its neighbors during its Rnd 3.
Layout grid (one panel, viewed from the RS, numbered in working order):
Row 1:   1   2   3   4   5   6   7   8   9
Row 2:  10  11  12  13  14  15  16  17  18
Row 3:  19  20  21  22  23  24  25  26  27
 ...    (rows 4–15 continue the same way)
Row 16: 136 137 138 139 140 141 142 143 144
Joining (Join-As-You-Go)
Method: Work Rnds 1–2 of the new motif as usual. On Rnd 3, use a Joining Tip (JT) in place of the ch-3 wherever a petal meets a finished neighbor. Every join is one tip to one tip, and no extra stitches are added at the seams.
Which petals join:
– Row 1, motifs 2–9: P4 joins with JT to P1 of the motif on the left.
– Rows 2–16, first motif in the row: P3 joins to P5 of the motif above, and P2 joins to P6 of the motif above.
– Rows 2–16, all other motifs: P4 joins to P1 of the motif on the left, P3 joins to P5 of the motif above, and P2 joins to P6 of the motif above.
Why it fits: Each petal is 3 in (7.6 cm) long from the center to the tip. So the side tips of two motifs placed 6 in (15.2 cm) apart meet exactly. The P5/P6 tips of one motif and the P3/P2 tips of the motif below meet when the centers are 5.2 in (13.2 cm) apart, because 3 × 1.732 = 5.2. The petals lock into a straight rectangular grid with hexagonal openings between them.
Stitch logic: The petal stitch count stays the same (8 sc, tip, 8 sc). Only the tip changes. A JT tip has 2 ch and a sl st joined to the neighbor, where a free tip has 3 ch, so a joined tip ends up the same length as a free one.
Tension: Make the two chains of the JT at the same tension as your normal ch-3. If they’re tight, the tips pucker and the row draws in. If they’re loose, the grid sags into diamonds.
Size checkpoint: After you join a 2 × 2 block (motifs 1, 2, 10, 11), it should measure 12 in (30.5 cm) between the outer side tips and 10.4 in (26.4 cm) between the top and bottom tips. After Row 1 is complete, it should measure 54 in (137.2 cm) between the outer side tips. Once all 16 rows are done, the panel is 83.2 in (211.3 cm) from the top tips to the bottom tips.
Border (Header Band)
Only the top edge gets a border. The side tips (P1/P4) and the bottom tips (P5/P6) stay free as a soft scalloped edge.
Border gauge: 16 sc = 4 in (10.2 cm), so 1 st = 0.25 in (0.6 cm). In the same gauge, a ch-9 is 2.25 in (5.7 cm) and a 3-sc group is 0.75 in (1.9 cm).
Row 1 (RS, setup): Hold the panel with the RS facing. Join the yarn in the P3 tip of motif 1. For each motif: 3 sc in the P3 tip, ch 9, 3 sc in the P2 tip of the same motif. Between motifs, ch 9 (bridge chain) and continue into the P3 tip of the next motif. Turn.
- Per motif: 3 + 9 + 3 = 15 sts
- Bridges: 8 bridges × 9 ch = 72 sts
- Total: (9 × 15) + 72 = 135 + 72 = 207 sts
Rows 2–12: Ch 1 (does not count as a st), sc in each st across, turn. (207 sc in each row) On Row 2, work into each chain, not into the ch-space.
Fasten off after Row 12.
Why the math works: Along the top edge the free tips are spaced evenly, 3 in (7.6 cm) apart. Within one motif it’s P3 to P2, and between motifs it’s P2 to the next P3. Each 3 in gap is filled by 3 sc + 9 ch = 12 sts, and 12 sts × 0.25 in = 3 in (7.6 cm). So the header lies flat without pulling the tips together or making them ruffle. The finished header measures 207 ÷ 4 = 51.75 in (131.4 cm) wide. That’s the span from the first P3 tip to the last P2 tip. The side petals reach out 1.125 in (2.9 cm) past the header on each side, giving the full 54 in (137.2 cm) width.
Header depth: 12 rows ÷ 4 rows per in = 3 in (7.6 cm).
Total length: 83.2 in + 3 in = 86.2 in (218.9 cm).
Hanging: Space 10 clip rings evenly along the header, about 5.75 in (14.6 cm) apart, with one clip at each end.
Final Blocking
- Weave in all ends along the petal covers, hiding each tail inside the sc of a petal.
- Soak the panel in cool water for 15 minutes, then gently press the water out. Don’t wring it.
- Roll it in towels to take out the extra moisture.
- Lay it flat on mats or a clean sheet. Pin the header straight to 51.75 in (131.4 cm).
- Pin the side tips out to 54 in (137.2 cm) and the overall length to 86.2 in (218.9 cm).
- Pin the free bottom tips in a straight line so every hexagonal opening sits open and even.
- Leave it to dry completely. Then hang it for 24 hours before deciding on any length changes, so the cotton can settle to its hanging length.
Final Quality-Control Checklist
- 144 motifs, 9 across × 16 down
- Every motif has 96 sc and 6 tips, either ch-3 or JT
- Each interior motif is joined at P2, P3, and P4, and none are skipped
- Petals are straight and evenly corded, with no twisted loops
- Header Row 1 has 207 sts, and every row after it has 207 sc
- The header lies flat with no ripples
- Panel is 54 in (137.2 cm) × 86.2 in (218.9 cm)
- All ends are woven in securely
Troubleshooting
Petals curl or twist. The ch-14 loop twisted before you covered it. Lay it flat and untwisted before you work Rnd 3 into it.
Petals look thin and gappy. The sc are too loose. Pack the 8 sc closer together, or go down half a hook size for Rnd 3 only.
Grid leans or forms diamonds. A join went to the wrong petal. Check the P2 → P6 and P3 → P5 pairing against the layout.
Header ruffles. Your chains are looser than your sc. Work the ch-9 chains in Row 1 with a hook one size smaller, and keep the count at 207.
Header pulls tips together. Your chains are too tight. Work the ch-9 chains with a hook one size larger, and keep the count at 207.
Center ring won’t close. Pull the starting tail firmly before you weave it in, then stitch through the ring once more.
Panel too long. Leave off the last row of motifs. Each motif row is 5.2 in (13.2 cm).
Care
Hand wash cool or machine wash on a gentle cycle in a mesh laundry bag, then dry flat. Rehang while the panel is still a little damp so it settles straight.
Final Notes
Each step’s measurement depends on the one before it. A 1.25 in (3.2 cm) center grows into a 6 in (15.2 cm) motif with 3 in (7.6 cm) petals. Those petals set the 6 in (15.2 cm) horizontal and 5.2 in (13.2 cm) vertical grid. Nine motifs across give a 54 in (137.2 cm) width and sixteen down give 83.2 in (211.3 cm). The 207-stitch header adds 3 in (7.6 cm), for a total of 86.2 in (218.9 cm). If your first motif matches the checkpoints, the rest of the panel will match too.
Happy crocheting!