

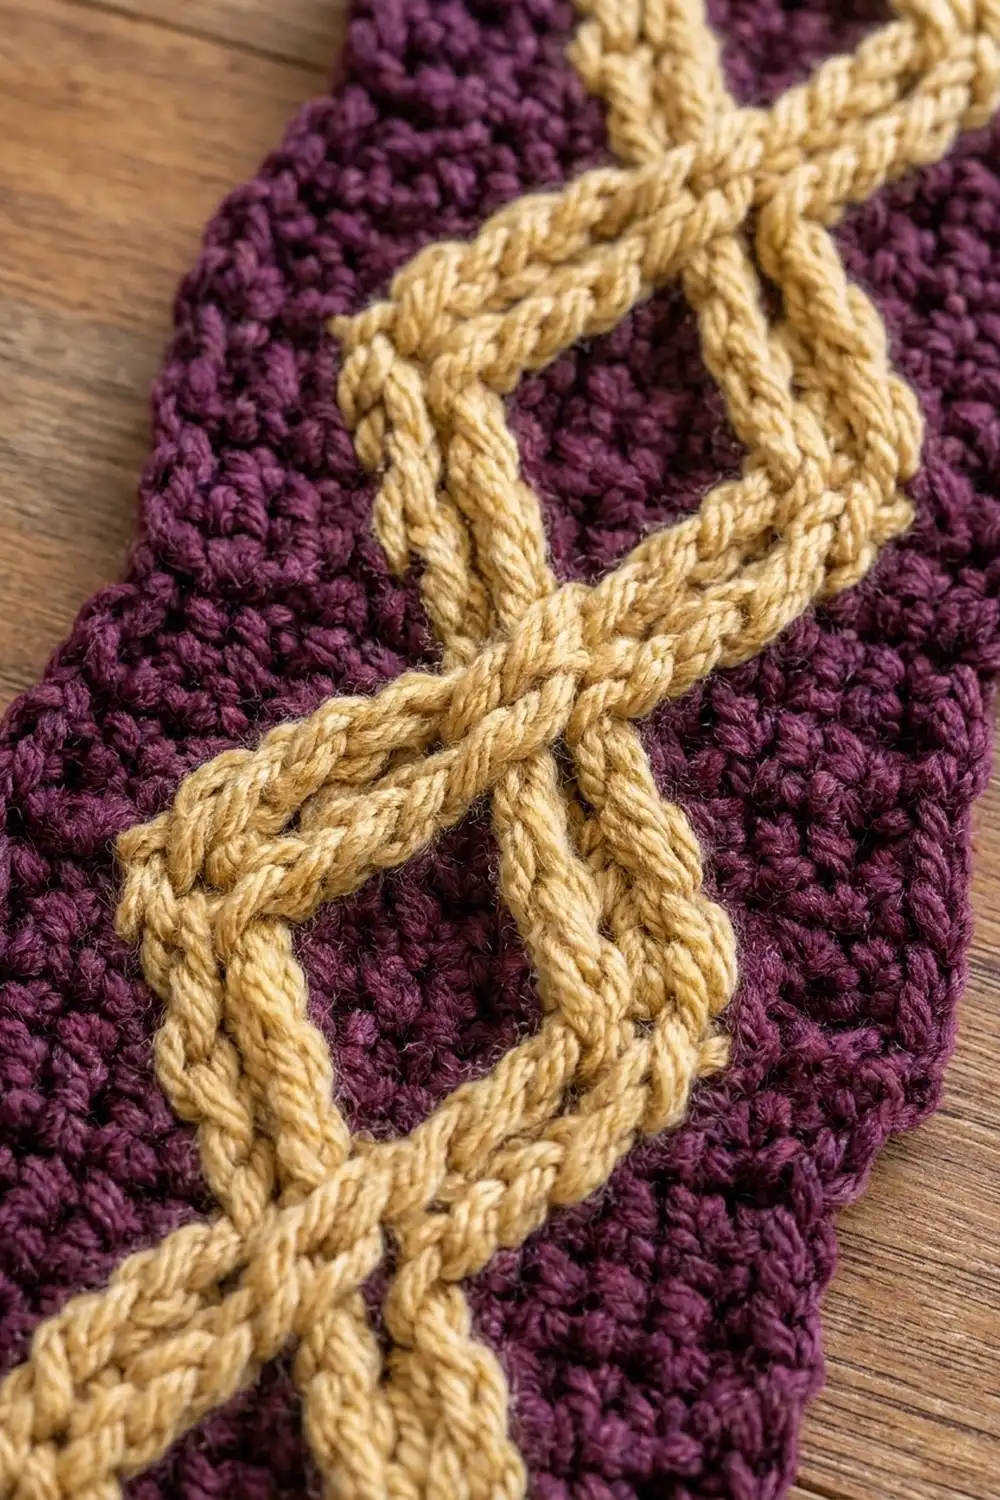
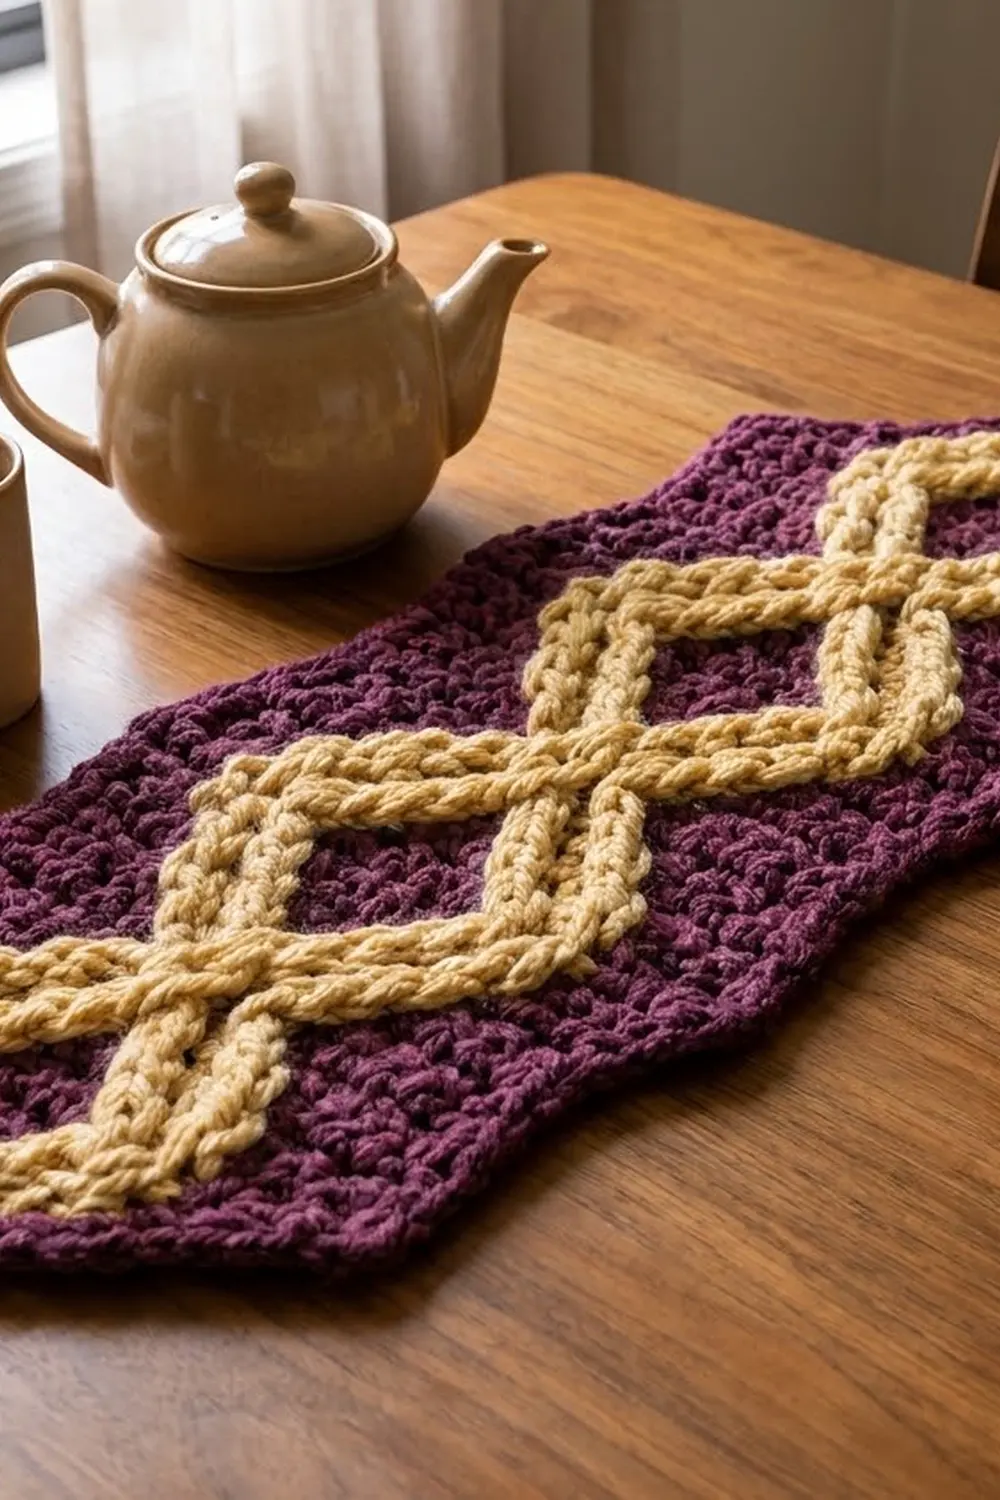
The Plum Lattice Pointed Panel is one crocheted piece: a long, narrow panel with a pointed tip at each end, worked in deep plum single crochet. Two gold lines curve down its length and cross each other three times, making four stacked diamonds that look like a twisted cable.
The look is rich and a little vintage, with warm mustard gold against wine-plum. The gold lines are surface slip stitch worked with two strands held together, so they sit raised on the fabric like a braided chain. A crab stitch edge finishes the outline with a small corded ridge.
This pattern uses US crochet terms. The finished panel measures 6.25 in (15.9 cm) wide by 14.5 in (36.8 cm) long, tip to tip.
Construction is simple. First, crochet the plum body in rows: increase from the bottom point, work a straight middle section, then decrease to the top point. Next, add the two gold lines on the right side with surface slip stitch, following a path set by column and row. Last, work a two-round border and block the piece.
Finished Size and Construction
- Finished size: 6.25 in x 14.5 in (15.9 cm x 36.8 cm)
- Skill level: Easy to intermediate
- Terminology: US crochet terms
- Yarn weight: Worsted (#4)
- Hooks: 5.0 mm (H-8) for the body and border; 6.0 mm (J-10) for the surface lines
- Number of pieces: 1 (a single panel with no joining)
- Layout: One vertical panel with a pointed tip at each end
- Piece size before border: 5.75 in x 14 in (14.6 cm x 35.6 cm)
- Border depth: 0.25 in (0.6 cm) on every edge
Materials
Choose a smooth worsted-weight yarn with good stitch definition. Wool blends and acrylic both work well. For the gold, avoid fuzzy or heavily textured yarns, because the chain shape of the surface lines is the main feature.
- Color A, Plum: 30 g, about 60 m (66 yd)
- Color B, Gold: 10 g, about 20 m (22 yd), used held double
Tools:
- 5.0 mm (H-8) crochet hook
- 6.0 mm (J-10) crochet hook
- Tapestry needle
- Scissors
- 2 locking stitch markers
- Tape measure
- Blocking mat, rust-proof pins, and a spray bottle
The yarn amounts include a margin of about 25 percent for swatching and weaving in ends.
Abbreviations (US Terms)
- ch = chain
- sc = single crochet
- sc2tog = single crochet 2 together
- sl st = slip stitch
- rev sc = reverse single crochet (crab stitch)
- st(s) = stitch(es)
- RS = right side
- WS = wrong side
Surface slip stitch (surf sl st): Hold the yarn behind the work. With the RS facing, insert the hook from front to back through the center of the target stitch. Yarn over at the back, then pull a loop up through the fabric and through the loop on your hook. Each surf sl st sits on one stitch of the background.
Reverse single crochet (rev sc): Work from left to right (if you crochet right-handed). Insert the hook into the next stitch to the right, yarn over, pull up a loop, yarn over, and pull through both loops.
Gauge and Checkpoints
Gauge: 16 sc and 18 rows = 4 in (10.2 cm) with a 5.0 mm hook, blocked.
That works out to 4 sts per inch and 4.5 rows per inch. Every size in this pattern depends on it.
Before starting the panel, make a gauge swatch. Ch 21 and work 20 rows of sc (20 sts per row). Block it, then measure 16 sts across and 18 rows down in the center. You can also use the swatch to practice a few surface slip stitches with the gold held double.
Checkpoints while you work the body:
- After Row 11: width 23 sts = 5.75 in (14.6 cm); height about 2.4 in (6.1 cm)
- After Row 53: length about 11.8 in (30.0 cm); width still 5.75 in (14.6 cm)
- After Row 63: length 14 in (35.6 cm) tip to tip
- After the border: 6.25 in x 14.5 in (15.9 cm x 36.8 cm)
If your fabric is too big, go down one hook size. If it is too small, go up one hook size. Don’t change the stitch counts, because the gold line path depends on the exact grid of 23 stitches by 63 rows.
Body
Use Color A and the 5.0 mm hook. The ch 1 at the start of each row does not count as a stitch.
Bottom Point (Increase Section)
Foundation: Ch 2.
Row 1 (RS): 3 sc in 2nd ch from hook, turn. (3 sts)
Place a marker on this row to mark the RS.
Row 2: Ch 1, 2 sc in first st, sc in next st, 2 sc in last st, turn. (5 sts)
Row 3: Ch 1, 2 sc in first st, sc in each st to last st, 2 sc in last st, turn. (7 sts)
Rows 4-11: Repeat Row 3.
Stitch counts: Row 4 (9), Row 5 (11), Row 6 (13), Row 7 (15), Row 8 (17), Row 9 (19), Row 10 (21), Row 11 (23).
Each row is 2 sts wider than the one before, so each side steps out by 1 stitch per row. This gives the point its clean diagonal edges.
Middle Section (Straight)
Rows 12-53: Ch 1, sc in each st across, turn. (23 sts)
That is 42 straight rows. At Row 53, check your length: it should be about 11.8 in (30.0 cm).
Top Point (Decrease Section)
Row 54: Ch 1, sc2tog, sc in each st to last 2 sts, sc2tog, turn. (21 sts)
Rows 55-63: Repeat Row 54.
Stitch counts: Row 55 (19), Row 56 (17), Row 57 (15), Row 58 (13), Row 59 (11), Row 60 (9), Row 61 (7), Row 62 (5), Row 63 (3).
Row 63 is a RS row. Fasten off and weave in ends.
The body now has 63 rows and measures 5.75 in x 14 in (14.6 cm x 35.6 cm). The two points mirror each other: at the bottom, 11 rows widen to the full 23 sts, and at the top, 10 rows narrow back to 3 sts.
Gold Surface Lines
Setting Up the Grid
Lay the body RS up with Row 1 at the bottom. Number the 23 columns from 1 on the left to 23 on the right, as seen from the RS. Column 12 is the center.
In the narrow rows, the stitches are centered. Row 1 covers columns 11-13, Row 11 covers columns 1-23, and Row 63 covers columns 11-13 again.
Use the 6.0 mm hook and two strands of Color B held together. The larger hook keeps the surface lines from puckering the fabric. Work one surf sl st per row, so each line has one stitch in every row it crosses.
Line A
Leave a 6 in (15.2 cm) tail on the back. Bring the loop up through column 12 of Row 1.
- Rows 1-4: surf sl st in column 12 of each row. The line runs straight up the center of the bottom point.
- Rows 5-11: move 1 column left each row, ending in column 5 on Row 11.
- Rows 12-25: move 1 column right each row, passing column 12 on Row 18 and ending in column 19 on Row 25.
- Rows 26-39: move 1 column left each row, passing column 12 on Row 32 and ending in column 5 on Row 39.
- Rows 40-53: move 1 column right each row, passing column 12 on Row 46 and ending in column 19 on Row 53.
- Rows 54-60: move 1 column left each row, ending in column 12 on Row 60.
Line A ends at Row 60. Pull the yarn to the back, cut it, and leave a 6 in (15.2 cm) tail.
Line A count: 4 sts in Rows 1-4 + 56 sts in Rows 5-60 = 60 surf sl sts.
Line B
Line B is the mirror image of Line A. In any row, Line B’s column = 24 minus Line A’s column.
Bring the loop up through column 12 of Row 4, right beside Line A’s stitch.
- Rows 5-11: move 1 column right each row, ending in column 19 on Row 11.
- Rows 12-25: move 1 column left each row, ending in column 5 on Row 25.
- Rows 26-39: move 1 column right each row, ending in column 19 on Row 39.
- Rows 40-53: move 1 column left each row, ending in column 5 on Row 53.
- Rows 54-60: move 1 column right each row, ending in column 12 on Row 60.
- Rows 61-63: surf sl st in column 12 of each row. The line runs straight up into the top point.
Fasten off to the back.
Line B count: 57 sts in Rows 4-60 + 3 sts in Rows 61-63 = 60 surf sl sts.
What You Should See
The two lines meet at Row 4 and Row 60 and cross at Rows 18, 32, and 46. This makes four diamonds, each 14 rows tall, or about 3.1 in (7.9 cm). Each diamond spans column 5 to column 19, so it is 15 sts wide, or 3.75 in (9.5 cm).
At the widest points, four plum columns stay clear on each side (columns 1-4 and 20-23). That leaves a margin of 1 in (2.5 cm) on each side before the border.
Check that every line stays inside its row. In Row 6, for example, the stitches cover columns 6-18, and Line A sits in column 10. In the points, the lines always run 4 sts in from the tapered edges.
On the WS, weave each gold tail along the back of its own line.
Border
Use Color A and the 5.0 mm hook. The border matches the body’s gauge: 1 sc per stitch across the tips (4 sc per inch) and 1 sc per row end along the sides (4.5 rows per inch).
Round 1
With RS facing, join Color A in the first st of Row 63.
Top tip: Ch 1, sc in first st, 3 sc in center st, sc in last st. (5 sts)
Upper diagonal: sc in the end of each row from Row 62 down to Row 54. (9 sts)
Long side: sc in the end of each row from Row 53 down to Row 12. (42 sts)
Lower diagonal: sc in the end of each row from Row 11 down to Row 2. (10 sts)
Bottom tip: sc in the end of Row 1, 3 sc in the foundation ch, sc in the other end of Row 1. (5 sts)
Lower diagonal: sc in the end of each row from Row 2 up to Row 11. (10 sts)
Long side: sc in the end of each row from Row 12 up to Row 53. (42 sts)
Upper diagonal: sc in the end of each row from Row 54 up to Row 62. (9 sts)
Join with sl st to the first sc.
Round 1 total: 5 + 9 + 42 + 10 + 5 + 10 + 42 + 9 = 132 sts.
Round 2
Ch 1, rev sc in each st around. Join with sl st to the first rev sc and fasten off. (132 sts)
This round makes the small, corded edge.
Why the Math Works
Each long side has 42 rows, which is 9.33 in (23.7 cm) at 4.5 rows per inch. One border stitch goes in each row end, so the side gets 42 stitches and keeps its length. It won’t flare or pull in.
The diagonal sides step out by 1 stitch per row, so they also take 1 sc per row end. Where a diagonal meets a long side, the corner is a wide angle of about 135 degrees and needs no extra stitches. Only the two sharp tips need 3 sc in one stitch to turn the corner.
Round 1 adds 1 sc on every edge, about 0.25 in (0.6 cm). The rev sc round sits on top of it and adds almost no width. The panel grows from 5.75 in (14.6 cm) to 6.25 in (15.9 cm) wide and from 14 in (35.6 cm) to 14.5 in (36.8 cm) long.
Final Blocking
- Weave in any remaining ends.
- Lay the panel RS up on a blocking mat.
- Pin the two tips first, 14.5 in (36.8 cm) apart.
- Pin the four side corners so the panel is 6.25 in (15.9 cm) wide at its widest.
- Pin along each long side every 1 in (2.5 cm), keeping the edges straight.
- Check that both points are symmetric and the diagonal edges are straight.
- Spray the panel until it is damp but not soaked.
- Press the gold lines gently with your fingertips so they lie evenly raised.
- Let it dry completely before unpinning, usually 12-24 hours.
Final Quality-Control Checklist
- The body has 63 rows, and Rows 12-53 each have 23 sts.
- Both points end at 3 sts.
- Line A and Line B each have 60 surf sl sts.
- The lines cross at Rows 18, 32, and 46.
- All four diamonds are the same size.
- At each widest point, a 4-stitch plum margin stays clear on both sides.
- Border Round 1 has 132 sts.
- The crab stitch edge is even all the way around.
- The finished size is 6.25 in x 14.5 in (15.9 cm x 36.8 cm).
- No gold tails show on the RS.
Troubleshooting
The gold lines pucker the fabric. Work more loosely, or switch to a 6.5 mm (K-10.5) hook for the lines. Pull out the tight section and redo it.
The diamonds look lopsided. One line probably skipped or repeated a column. Count the columns from the left edge along a straight row, then redo the line from the mistake.
The points are crooked. Make sure you increased or decreased at both ends of every shaping row.
The long sides ripple after the border. You added extra stitches. Work exactly 1 sc per row end.
The long sides pull in after the border. You skipped row ends. Work 1 sc in every row end.
The crab stitch looks twisted or flat. Keep your loops loose and work steadily from left to right.
The panel is the wrong size. Re-measure your gauge on the body itself, then block to the target size.
Care
Hand wash in cool water with mild soap and lay flat to dry. While it is damp, reshape it to 6.25 in x 14.5 in (15.9 cm x 36.8 cm).
Final Notes
Every size in this design comes from the gauge. A gauge of 16 sc and 18 rows to 4 in (10.2 cm) gives a body of 23 sts by 63 rows, which measures 5.75 in x 14 in (14.6 cm x 35.6 cm). The gold lines follow the same grid and make four diamonds, each 15 sts wide and 14 rows tall. The 132-stitch border adds 0.25 in (0.6 cm) on every edge, for a finished panel of 6.25 in x 14.5 in (15.9 cm x 36.8 cm).
Check your gauge, count your columns, and the diamonds will line up.
Happy crocheting!