

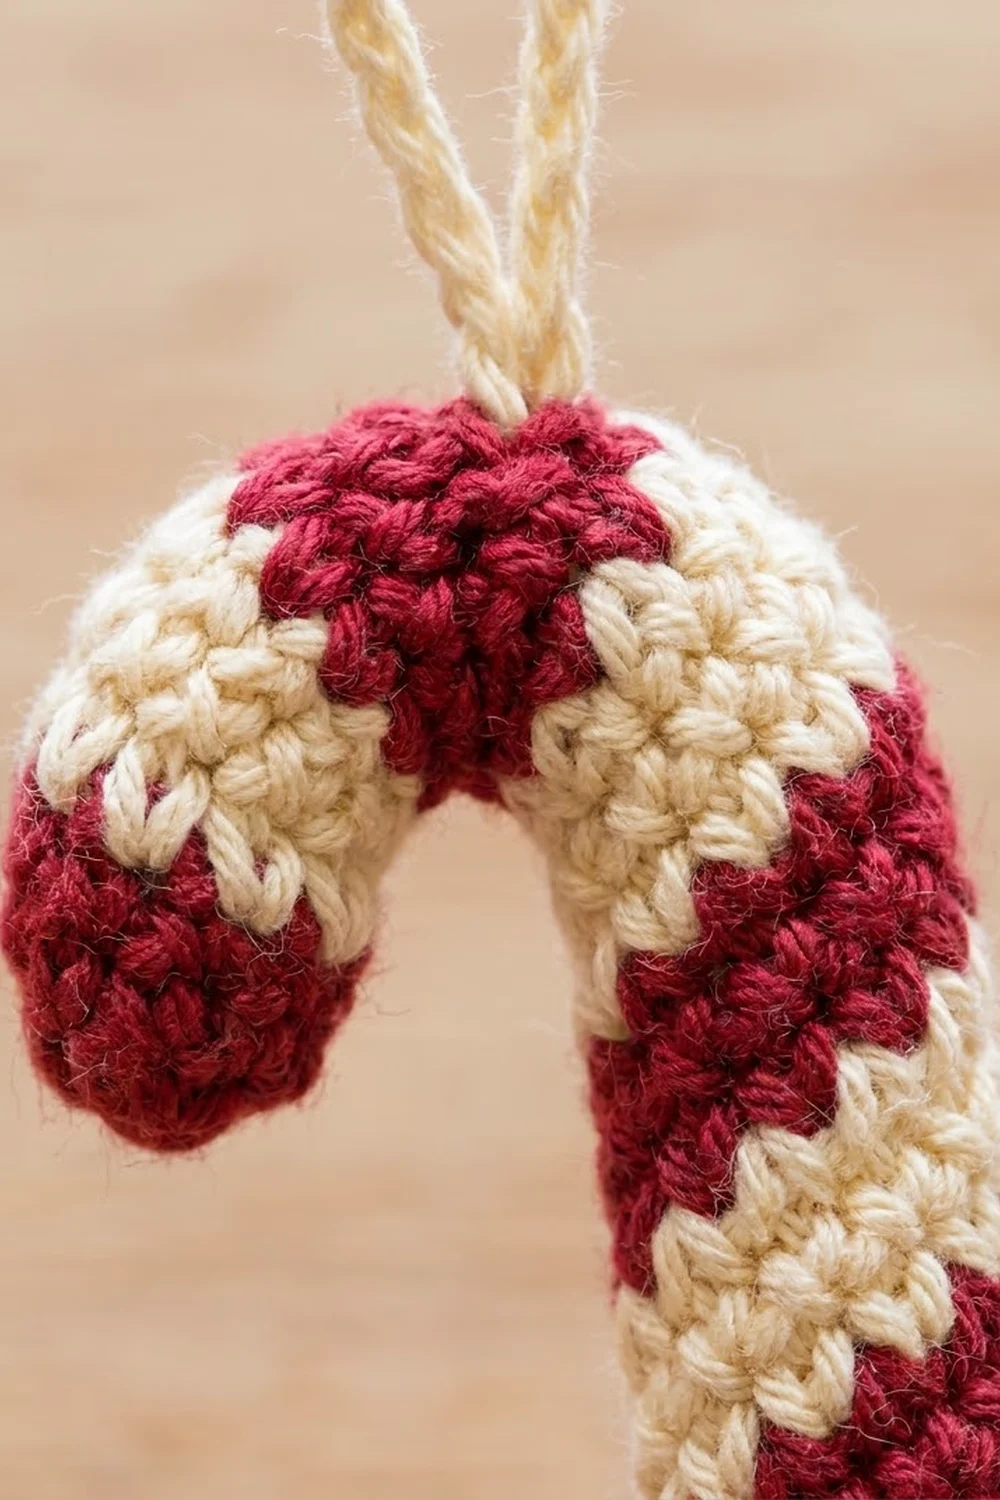
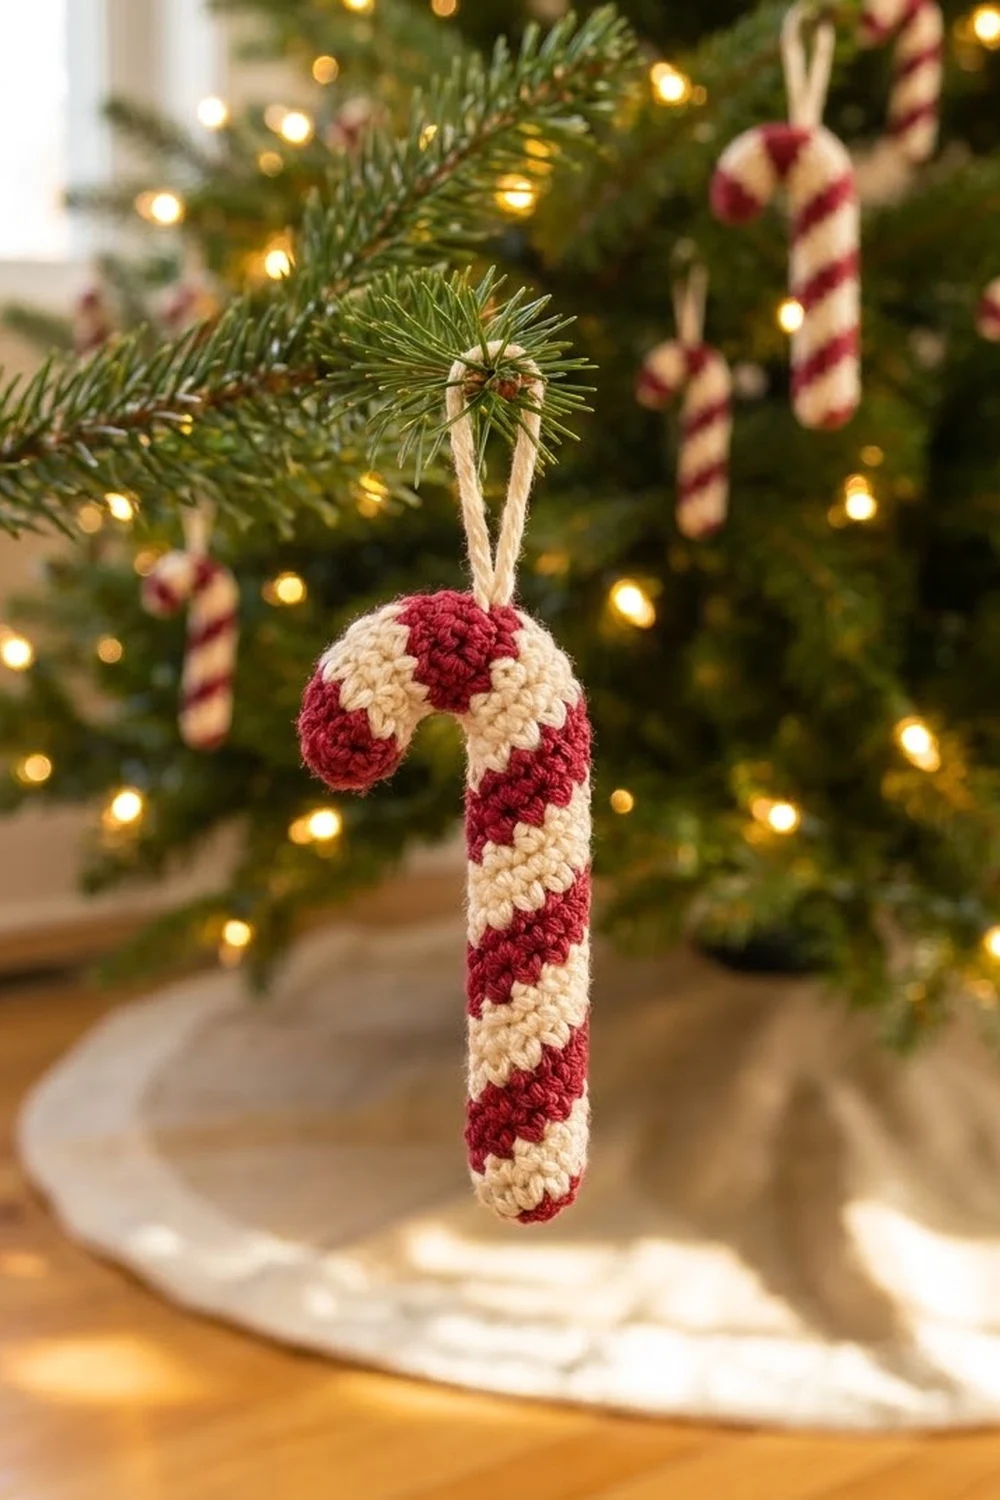
This little candy cane is a classic Christmas tree ornament with a bit of extra charm. It’s a firm, stuffed amigurumi tube with crisp diagonal stripes that wind around it like peppermint candy. A slim cream chain loop at the top of the crook makes it ready to hang.
The palette has two colors: a warm cream and a deep cranberry red. The cream bands are twice as wide as the red ones, so the stripes look bright and clean rather than busy. The surface is dense single crochet with no gaps, so it holds its shape on a branch and stays tidy up close. It makes a quick weekend make, a gift topper, or a stash-busting project for a whole tree.
The pattern uses US crochet terms. The finished candy cane is 4.5 in (11.4 cm) tall and 2 in (5.1 cm) wide across the crook, and the tube is about 0.75 in (1.9 cm) thick. The hanging loop adds 1.5 in (3.8 cm) above the crook.
You make it in one piece, working continuous rounds from the straight bottom end up to the tip of the crook. The stripes come from tapestry color changes that move 2 stitches forward every round. A folded chenille stem inside lets you bend the top into the crook, and you add the loop last. There’s no sewing of separate parts.
Finished Size and Construction
- Finished size: 4.5 in (11.4 cm) tall x 2 in (5.1 cm) wide at the crook, not counting the loop
- Tube length before bending: 5.5 in (14.0 cm)
- Tube thickness: about 0.75 in (1.9 cm) when stuffed
- Skill level: Intermediate (tapestry color changes in the round)
- Terminology: US
- Yarn weight: DK (#3, light)
- Hook: 2.75 mm (US C/2)
- Number of pieces: 1. The loop is crocheted directly onto the finished cane.
- Layout: one 3D ornament with no assembly
- Piece size: 12 stitches around, 33 rounds long
- Size before border: straight tube 5.5 in (14.0 cm) long
- Border depth: there’s no edging border. The finishing is a closing round plus a 1.5 in (3.8 cm) hanging loop.
Materials
Smooth DK yarn works best. Cotton or a cotton blend gives the crispest stripes, and soft acrylic is fine too. Avoid fuzzy, brushed, or very dark-dyed yarns. The red strand is carried inside the tube the whole time, and a halo or heavy dye can show through the cream. Use the same fiber for both colors so they behave the same way when you block.
- Cream (Color C): 6 g / about 14 m
- Cranberry red (Color R): 4 g / about 9 m
These quantities include a margin of about 25% for swatching, tails, and the carried strand. Leftovers from larger projects are usually plenty.
Tools:
- 2.75 mm (US C/2) crochet hook
- Stitch marker
- Fiberfill stuffing, a small handful
- 1 chenille stem (pipe cleaner), 12 in (30.5 cm)
- Wire cutters or old scissors
- Tapestry needle
- Ruler or tape measure
Abbreviations (US Terms)
- MR: magic ring
- ch: chain
- sl st: slip stitch
- sc: single crochet
- inc: 2 sc in the same stitch
- sc2tog: single crochet 2 together (an invisible decrease through the front loops works well)
- st(s): stitch(es)
- rnd(s): round(s)
- C / R: Cream / Red
- FO: fasten off
Special technique: tapestry color change. Work the last sc before a color change until 2 loops are on the hook. Drop the old color, yarn over with the new color, and pull through. As you work with the new color, lay the unused color along the tops of the stitches and work over it, so it’s enclosed inside the stitches. Keep both colors attached for the whole tube.
Gauge and Checkpoints
Gauge: 6 sc and 6 rnds = 1 in (2.5 cm) in continuous rounds of sc, stuffed.
The piece is small, so let the first 12 rounds of the cane be your swatch. Measure at each checkpoint before going on:
- After Rnd 2: the flat base circle is about 5/8 in (1.6 cm) across.
- After Rnd 12: the tube is 2 in (5.1 cm) long from the base.
- After Rnd 24: the tube is 4 in (10.2 cm) long.
- After Rnd 32: the tube is about 5.25 in (13.3 cm) long.
- After Rnd 33: the full tube is 5.5 in (14.0 cm) long.
If your tube is too long or too thick, go down a hook size to 2.5 mm. If it’s too short or thin, go up to 3.0 mm. Don’t change the stitch count. The 12-stitch round and the 2-stitch shift are what make the diagonal stripes.
Stripe Sequence
Each round has 12 stitches: a block of 4 Red and 8 Cream. The Red block starts 2 stitches later every round, so after 6 rounds it’s back where it started. This 6-round repeat (S1–S6) is what builds the diagonal stripe.
- S1: R sc 4, C sc 8. (12 sts)
- S2: C sc 2, R sc 4, C sc 6. (12 sts)
- S3: C sc 4, R sc 4, C sc 4. (12 sts)
- S4: C sc 6, R sc 4, C sc 2. (12 sts)
- S5: C sc 8, R sc 4. (12 sts)
- S6: R sc 2, C sc 8, R sc 2. (12 sts)
Every repeat round has 4 Red + 8 Cream = 12 sts. Notice that the Red stitches at the end of S6 run straight into the first 2 Red stitches of S1, so the band continues smoothly into the next repeat.
Tip for two colors: Keep the cream ball on your left and the red ball on your right. Always drop the old color toward the back. This keeps the twist in the yarns to a minimum. Count the color blocks out loud for the first few repeats, and the rhythm will soon feel natural.
Candy Cane Tube
Work in continuous rounds without joining. Move the marker up to the first stitch of each round.
Rnd 1: With C, make a MR and work 6 sc into it. (6 sts)
Rnd 2: Join R with a color change in the last st of Rnd 1. With R, inc in each of the next 2 sts (4 sts). With C, inc in each of the next 4 sts (8 sts). (12 sts) This round is the increase version of S1 and sets the 4 Red + 8 Cream layout.
Rnds 3–7: Work S2, S3, S4, S5, S6, one round each. (12 sts per round)
Checkpoint: the first diagonal band should now be clearly visible.
Rnds 8–31: Work S1 through S6 four times. That’s 24 rounds, with 12 sts per round.
- Stuff the base lightly after Rnd 12, then top up the stuffing every 6 rounds.
- After Rnd 26: Cut the chenille stem to 10 in (25.4 cm) and fold it in half to make a 5 in (12.7 cm) double rod. Bend each cut end back on itself by about 0.25 in (0.6 cm) so nothing pokes through. Push it down through the stuffing until the fold rests at the base. Arrange stuffing around it so it sits in the center, then keep crocheting around the part that sticks out.
Rnd 32: Work S1. (12 sts)
Rnd 33: Cut C, leaving a 4 in (10.2 cm) tail, and tuck it inside. With R, sc2tog 6 times. (6 sts)
This finishes the tube, which should measure 5.5 in (14.0 cm). Go on to the closing and the loop below.
Border (Closing and Hanging Loop)
This piece doesn’t have an edging border. Its “border” is the closed tip of the crook plus the hanging loop, and both have exact counts.
Border gauge: the closing uses the same 6 sc per 1 in (2.5 cm) gauge. The loop uses 6 ch per 1 in (2.5 cm), relaxed.
Closing: Add a last bit of stuffing so the tip is firm. FO R with a 6 in (15.2 cm) tail. Thread the tail through the front loops of all 6 sts from Rnd 33, pull tight, and weave it into the tube.
Bending the crook: Measure 3.5 in (8.9 cm) up from the base, which is the end of Rnd 21. Rnds 1–21 form the straight shank. Bend Rnds 22–33 over into a smooth half-circle so the tip points down, beside the shank. The gap inside the crook should be about 0.5 in (1.3 cm). If the curve springs open, take 2 or 3 small hidden stitches with leftover cream across the inside of the curve.
Hanging loop: Find the highest point on the outside of the crook, around Rnds 27–28. Join C with a sl st around 1 st there. Ch 18, then sl st around the next st over (1 st away from the join). FO and weave both tails into the tube.
Why the math works:
- Closing: Rnd 33 turns 12 sts into 6 using 6 sc2tog (12 ÷ 2 = 6). Six stitches pull into a tight point.
- Tube length: 33 rnds ÷ 6 rnds per in = 5.5 in (14.0 cm).
- The shank uses 21 rnds, which is 3.5 in (8.9 cm).
- The crook uses 12 rnds, which is 2 in (5.1 cm). That’s enough for a half-circle around a center line 1.25 in (3.2 cm) across.
- Crook width: 0.5 in (1.3 cm) gap + two tube widths of 0.75 in (1.9 cm) each = 2 in (5.1 cm).
- Height: 3.5 in (8.9 cm) shank + 1 in (2.5 cm) from the middle of the arc to its top = 4.5 in (11.4 cm).
- Loop: 18 ch ÷ 6 = 3 in (7.6 cm) of chain. Folded in half, it stands 1.5 in (3.8 cm) tall.
Final Blocking
- Check the bend. The crook should be an even half-circle with no kinks or flat spots.
- If the stem pushed the stuffing to one side, roll the cane gently between your palms until the stuffing settles evenly.
- Wrap the crook around a marker or dowel about 0.5 in (1.3 cm) thick to set the inner curve.
- Hold a steam iron 1 in (2.5 cm) above the cane and steam it lightly without touching it. Skip this step for acrylic yarn, or use only a quick, cool puff of steam.
- Let it cool and dry completely on the marker, then slide it off.
- Check the measurements again: 4.5 in (11.4 cm) tall and 2 in (5.1 cm) wide.
Final Quality-Control Checklist
- [ ] The tube has 12 sts all the way around, with no extra or missing stitches.
- [ ] The Red bands are 4 sts wide and move 2 sts each round, so they form steady diagonals.
- [ ] No carried strand shows on the outside.
- [ ] The base is flat and round, about 5/8 in (1.6 cm) across.
- [ ] The tip is closed tight, with no hole.
- [ ] The chenille stem can’t be felt at either end.
- [ ] The cane measures 4.5 in (11.4 cm) tall and 2 in (5.1 cm) across the crook.
- [ ] The loop sits centered at the top of the crook, 1.5 in (3.8 cm) tall.
- [ ] All tails are woven in and hidden.
Troubleshooting
The stripes go straight up instead of diagonally. The color blocks aren’t shifting. Check that every round moves the Red block 2 sts forward, following S1–S6.
The stripes zigzag or break. You’ve added or lost stitches. Count to 12 at the end of every round, and frog back to the last round that counted correctly.
Red shows through the cream. Tension is too loose, or the carried strand is sitting on top. Go down a hook size, and keep the carried yarn tucked low in the stitches.
The yarns tangle. Always drop one color in front and pick up the other from behind. Untwist the balls every few rounds.
The tube twists or leans. This is normal in spiral amigurumi. Roll the tube while it’s still unstuffed and straighten it before you add the stem.
The crook won’t hold its shape. Use a thicker stem, or fold it into three layers instead of two. The hidden tacking stitches across the curve also help.
The cane is too stiff or lumpy. Use less stuffing around the stem, and stuff in small wisps.
Care
Spot clean only with a damp cloth and mild soap, because of the wire inside. Let it air dry flat, and store it in tissue so the crook keeps its shape.
Final Notes
Everything in this pattern follows one measurement chain:
- The gauge is 6 sc and 6 rnds per 1 in (2.5 cm).
- The 12-st round gives a tube about 0.75 in (1.9 cm) thick when stuffed.
- 33 rounds make a tube 5.5 in (14.0 cm) long.
- 21 of those rounds form the 3.5 in (8.9 cm) shank, and 12 rounds form the 2 in (5.1 cm) crook.
- The finished cane is 4.5 in (11.4 cm) tall, plus a 1.5 in (3.8 cm) loop.
Check those numbers at each stage and the stripes and curve will come out right. Make one for your own tree, then a few more to tie onto gifts.
Happy crocheting!