

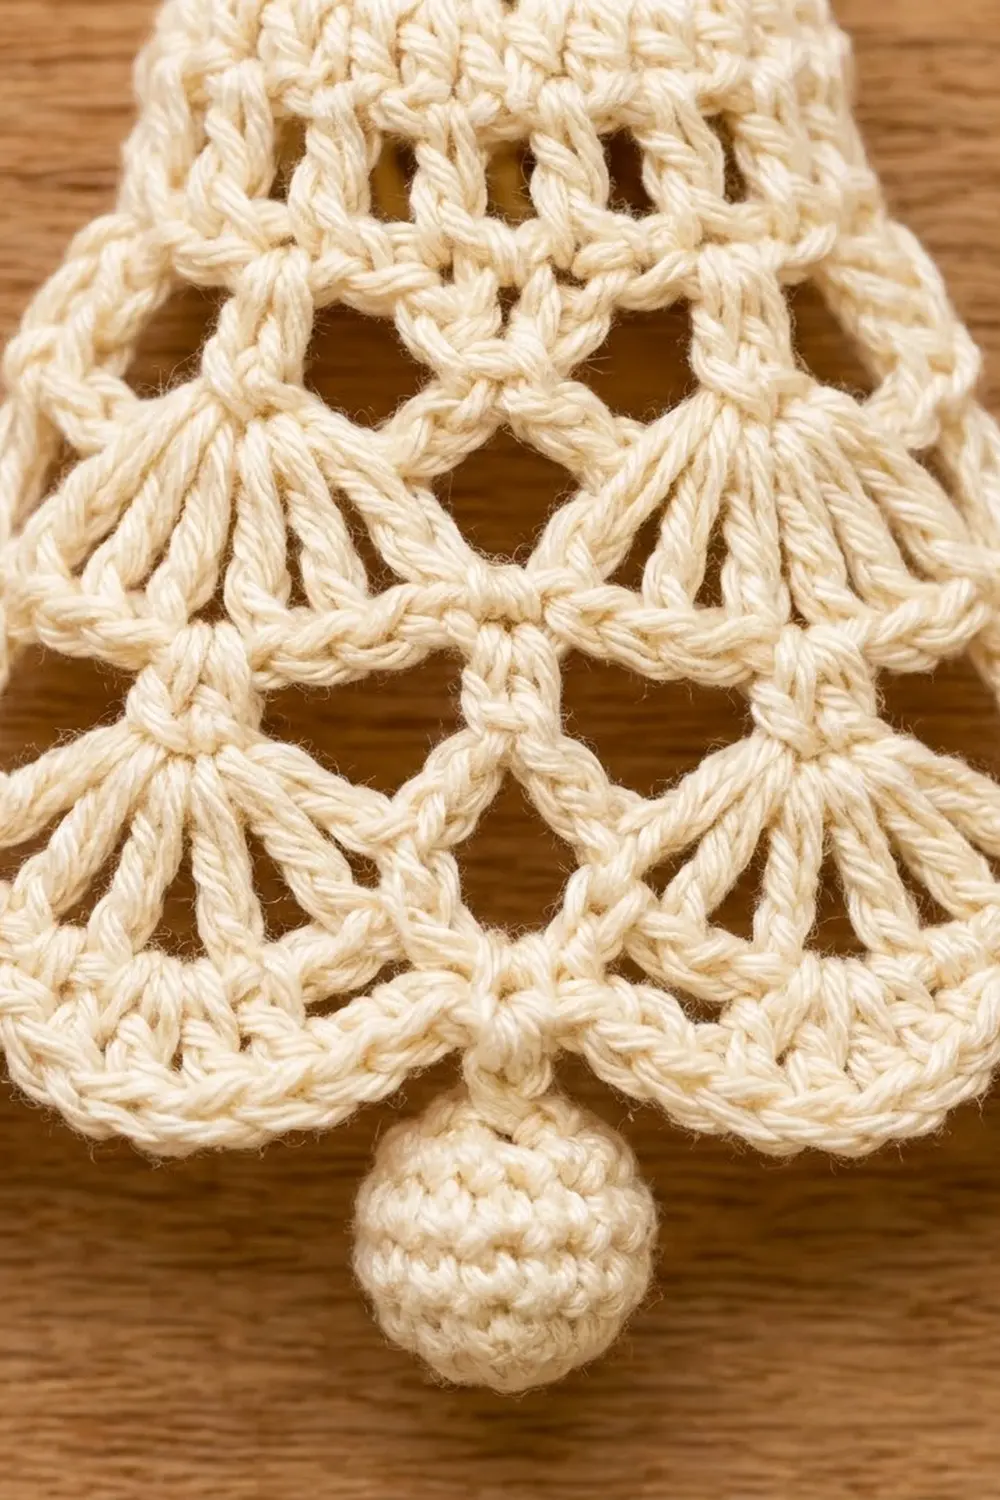
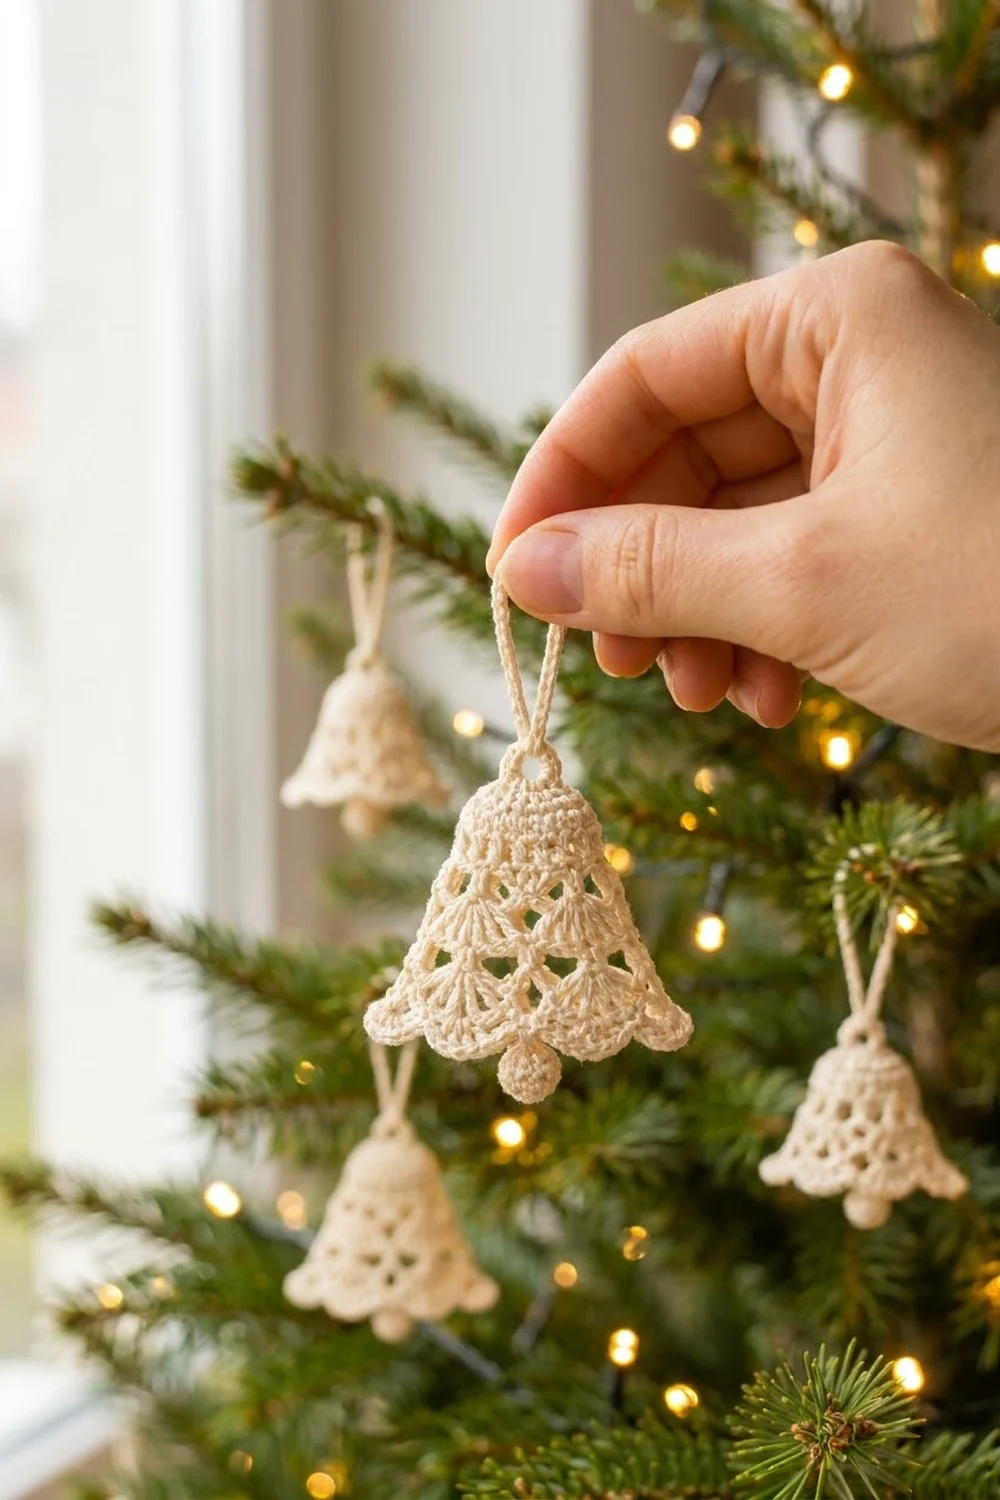
This little lace bell is a classic Christmas tree ornament with a soft, vintage feel. It has a small solid ring at the top and a smooth, rounded crown. Below that, an airy ladder row opens into two rows of fan shells, and the hem finishes in soft scallops. A small round clapper hangs at the center of the hem, and a slim chain loop at the top is ready for a branch.
The sample is made in a single color, a warm ivory cream cotton thread. One neutral shade makes the openwork the star and suits rustic, Scandinavian, or traditional white-and-gold trees. It also works well as a gift-wrap topper, a napkin-ring charm, or a small hostess gift.
This pattern uses US crochet terms. The finished bell measures 3.25 in (8.3 cm) wide at the hem and 3 in (7.6 cm) tall from the top of the ring to the bottom of the scallops. The clapper adds 0.5 in (1.3 cm) below the hem, and the hanging loop adds about 1.75 in (4.4 cm) above the ring.
Construction is simple. You make a ring, then work the bell flat in rows from the bottom of that ring, widening as you go. One border pass runs down one side, across the hem in scallops, and back up the other side. Last, you add a tiny stuffed clapper ball and a single crochet hanging loop.
Finished Size and Construction
- Finished size: 3.25 in (8.3 cm) wide x 3 in (7.6 cm) tall, not counting the clapper or loop
- Skill level: Easy-Intermediate (shells and working into chain spaces)
- Terminology: US crochet terms
- Yarn weight: Size 3 cotton crochet thread (fine, close to light fingering)
- Hook: 2.25 mm (B-1)
- Number of pieces: 1 bell, plus a small clapper ball sewn on
- Layout: Single flat ornament, worked in rows from the top down
- Piece size before border: 3 in (7.6 cm) wide x 2.875 in (7.3 cm) tall
- Border depth: 0.125 in (0.3 cm) on each side and along the hem
Materials
Yarn: Mercerized size 3 cotton crochet thread gives crisp stitches and blocks well. Matte cotton works too but looks softer. Avoid acrylic, because it won’t hold a blocked shape.
- Ivory/cream: about 8 g, about 20 m (22 yd), enough for the bell, clapper, and loop
The quantities include a margin of about 30% for your gauge check and tails. One standard ball of thread will make many bells.
Tools:
- 2.25 mm (B-1) crochet hook
- Tapestry needle with a small eye
- Small scissors
- A pinch of fiberfill or matching thread scraps for the clapper
- Rust-proof pins and a foam blocking mat
- Spray bottle with water, or fabric stiffener (optional)
Abbreviations (US Terms)
- ch: chain
- sl st: slip stitch
- sc: single crochet
- dc: double crochet
- sc2tog: single crochet 2 together
- sp: space
- st(s): stitch(es)
- tch: turning chain
- RS / WS: right side / wrong side
Special stitch – Fan: Work the stated number of dc into one stitch or space. In this pattern the Row 6 fans are 7 dc and the Row 7 fans are 9 dc.
Turning chains: Ch 3 at the start of a row counts as 1 dc. Ch 4 at the start of Row 5 counts as 1 dc plus ch 1.
Gauge and Checkpoints
Gauge: 8 dc = 1 in (2.5 cm) wide and 4 dc rows = 1.25 in (3.2 cm) tall, worked in thread and lightly blocked.
The bell is small enough to act as its own swatch. Make one bell first and measure it at each checkpoint:
- Ring: 0.625 in (1.6 cm) across the outside
- After Row 4 (crown): 1.875 in (4.8 cm) wide at the bottom edge, and 1.875 in (4.8 cm) tall including the ring
- After Row 5 (ladder): about 2.1875 in (5.6 cm) tall
- After Row 6 (first fans): about 2.75 in (7.0 cm) wide
- After Row 7 (hem fans): 3 in (7.6 cm) wide x 2.875 in (7.3 cm) tall
- After the border: 3.25 in (8.3 cm) wide x 3 in (7.6 cm) tall
If your bell is too big, go down to a 2.0 mm hook, or work the fans more snugly. If it’s too small, go up to a 2.5 mm hook. A difference of 0.25 in (0.6 cm) or less is fine for an ornament. Just make every bell in a set with the same hook so they match on the tree.
Bell Pattern
Top Ring
Ch 8, sl st in first ch to form a ring.
Rnd 1: Ch 1, 16 sc in ring, sl st in first sc. (16 sc)
Number the sc from 1 to 16, with sc 1 at the top. Sc 9 is at the bottom center, directly across from sc 1. The crown is worked into the 5 bottom sc (sc 7–11). The other 11 sc stay free and form the visible ring.
Sl st in each of the next 6 sc. You are now in sc 7.
Crown
Row 1 (RS): Ch 3 (counts as dc), dc in same sc 7, 2 dc in sc 8, dc in sc 9, 2 dc in sc 10, 2 dc in sc 11. Turn. (9 dc)
The 2-2-1-2-2 spread keeps the crown centered under the ring.
Row 2: Ch 3, dc in first st, dc in each st across to tch, 2 dc in top of tch. Turn. (11 dc)
Row 3: Ch 3, dc in first st, dc in each st across to tch, 2 dc in top of tch. Turn. (13 dc)
Row 4: Ch 3, dc in first st, dc in each st across to tch, 2 dc in top of tch. Turn. (15 dc)
Checkpoint: The crown is a solid, rounded trapezoid, 1.875 in (4.8 cm) wide at Row 4.
Ladder Row
Row 5: Ch 4 (counts as dc + ch 1), skip next st, dc in next st, ch 1, skip next st, dc in next st; repeat from * across, working the last dc in top of tch. Turn. (8 dc, 7 ch-1 sps)
The math: the 15 sts in Row 4 give dc on sts 1, 3, 5, 7, 9, 11, 13, and 15. That makes 8 posts with a ch-1 sp between each pair. This is the row of short vertical “windows” below the crown.
Label the dc from D1 to D8 and the spaces from Sp1 to Sp7 as you look at the row. Sp4 is the exact center.
First Fan Row
Row 6: Ch 3 (counts as dc), dc in first st (edge), ch 2, skip Sp1, 7 dc in Sp2 (Fan), ch 2, skip D3, Sp3, and D4, sc in Sp4 (center), ch 2, skip D5, Sp5, and D6, 7 dc in Sp6 (Fan), ch 2, skip Sp7, 2 dc in 3rd ch of tch. Turn.
(18 dc: 2 + 7 + 7 + 2; 1 sc; 4 ch-2 sps)
You now have two fans with a V-shaped opening between them, dipping down to the center sc. Each edge holds a 2-dc cluster with its own small opening.
Checkpoint: About 2.75 in (7.0 cm) wide.
Hem Fan Row
Label the Row 6 sections as you face them: edge pair, sp A, Fan 1, sp B, center sc, sp C, Fan 2, sp D, edge pair.
Row 7: Ch 3 (counts as dc), 2 dc in first st, ch 2, sc in sp A, ch 2, skip first 3 dc of Fan 1, 9 dc in 4th (center) dc of Fan 1, ch 3, skip rest of Fan 1 and sp B, sc in center sc, ch 3, skip sp C and first 3 dc of Fan 2, 9 dc in 4th (center) dc of Fan 2, ch 2, sc in sp D, ch 2, 3 dc in top of tch. Fasten off.
(24 dc: 3 + 9 + 9 + 3; 3 sc; 4 ch-2 sps; 2 ch-3 sps)
Each 9-dc fan sits directly below a 7-dc fan, so the scallops flare out. The center sc is the low point of the hem, and the clapper will hang from it.
Checkpoint: 3 in (7.6 cm) wide x 2.875 in (7.3 cm) tall.
Border
Border gauge: 2 sc per dc row-end, 1 sc per dc along the hem, and 3 sc at each fan tip. This adds 0.125 in (0.3 cm) all around.
With RS facing, join thread with a sl st in ring sc 12, right beside the end of Row 1.
First side (14 sc): Work 2 sc around the post of the end stitch of each of Rows 1–7, moving down the side. (14 sc)
Hem (44 sc + 3 sl st):
- Edge cluster: 2 sc in first dc (corner), sc in each of next 2 dc. (4 sc)
- 2 sc in ch-2 sp, sl st in sc, 2 sc in next ch-2 sp. (4 sc)
- Fan: sc in each of first 4 dc, 3 sc in 5th dc, sc in each of last 4 dc. (11 sc)
- 3 sc in ch-3 sp, sl st in center sc, 3 sc in next ch-3 sp. (6 sc)
- Fan: sc in each of first 4 dc, 3 sc in 5th dc, sc in each of last 4 dc. (11 sc)
- 2 sc in ch-2 sp, sl st in sc, 2 sc in next ch-2 sp. (4 sc)
- Edge cluster: sc in each of next 2 dc, 2 sc in last dc (corner). (4 sc)
Second side (14 sc): Work 2 sc around the post of the end stitch of each of Rows 7–1, moving up the side. (14 sc)
Sl st in ring sc 6. Fasten off. (Border total: 72 sc + 3 sl st)
Why the math works: A dc row is about as tall as 2 sc, so 2 sc per row-end keeps the sides flat. Seven rows x 2 = 14 sc per side. Along the hem, every dc gets 1 sc, and the 3-sc tip on each fan rounds the scallop. Each sl st pulls a valley into place. The hem adds up to 4 + 4 + 11 + 6 + 11 + 4 + 4 = 44 sc. The 2-sc corners turn the bottom edge without cupping, and the 4 sc in each edge cluster already include that corner stitch, so it isn’t counted twice.
Clapper Ball
Leave a 6 in (15.2 cm) starting tail.
Rnd 1: Magic ring, 6 sc in ring, sl st in first sc. (6 sc)
Rnd 2: Ch 1, 2 sc in each st around, sl st in first sc. (12 sc)
Rnd 3: Ch 1, sc in each st around, sl st in first sc. (12 sc)
Rnd 4: Ch 1, sc2tog 6 times, sl st in first st. (6 sts)
Stuff firmly with fiberfill or thread scraps.
Rnd 5: Ch 1, sc2tog 3 times. (3 sts) Fasten off, run the tail through the last stitches, and pull tight.
The ball should be 0.5 in (1.3 cm) across. Use the long starting tail to sew it to the center sl st of the hem border, so it hangs right below the center valley. Take 2–3 stitches so it can’t spin, then weave in the end.
Hanging Loop
With RS facing, join thread with a sl st in ring sc 1 (top center).
Ch 30, sl st in same sc 1. Then work 1 sc in each ch around the loop (30 sc), and sl st in sc 1. Fasten off.
The loop hangs about 1.75 in (4.4 cm) above the ring.
Final Blocking
- Weave each tail into the solid crown or border stitches, not into the lace.
- Spray the bell until damp, or dip it in diluted fabric stiffener and squeeze out the extra.
- Lay it RS up on the mat. Pin the ring at the top center.
- Pin the two bottom corners so the hem is 3.25 in (8.3 cm) wide and the bell is 3 in (7.6 cm) tall.
- Pin the tip of each fan scallop and each sl st valley. Keep the center valley straight under the ring.
- Open the ladder windows and the V-openings with a pin tip.
- Let the bell dry completely, then unpin.
Final Quality-Control Checklist
- Ring is round, with 16 sc and no gaps
- Crown counts are 9, 11, 13, and 15 dc
- Ladder has 8 posts and 7 windows
- Row 6 has two 7-dc fans, and Row 7 has two 9-dc fans
- Border has 14 sc on each side and 44 sc along the hem
- Bell measures 3.25 in (8.3 cm) x 3 in (7.6 cm) after blocking
- Clapper is centered and secure
- Loop is attached at sc 1 and stands straight up
- All ends are hidden in solid stitches
Troubleshooting
Crown leans to one side: Row 1 started in the wrong sc. Count again so the 5 crown stitches are sc 7–11.
Ladder has the wrong count: Row 4 needs exactly 15 sts. Recount, including the turning chain.
Fans ruffle: Your tension is loose. Go down a hook size, or tighten the dc in each fan.
Hem cups upward: The border is tight. Work the hem sc more loosely, or check that each fan tip has 3 sc.
Sides pucker: Make sure you used 2 sc per row-end, not 3.
Clapper hangs off-center: Sew it again, with stitches on both sides of the center sl st.
Bell is floppy on the tree: Block it again with fabric stiffener.
Care
Hand wash in cool water with mild soap, press out the water in a towel, and reshape flat to dry. Store the bell flat in tissue so the scallops stay crisp.
Final Notes
The measurement chain runs like this: a 0.625 in (1.6 cm) ring, a 1.875 in (4.8 cm) crown, a 2.75 in (7.0 cm) first fan row, and a 3 in (7.6 cm) hem before the border. The border brings the bell to 3.25 in (8.3 cm) wide x 3 in (7.6 cm) tall. If each checkpoint matches, every bell in your set will match too. Hang a few together on the tree, or tie one to a gift.
Happy crocheting!