

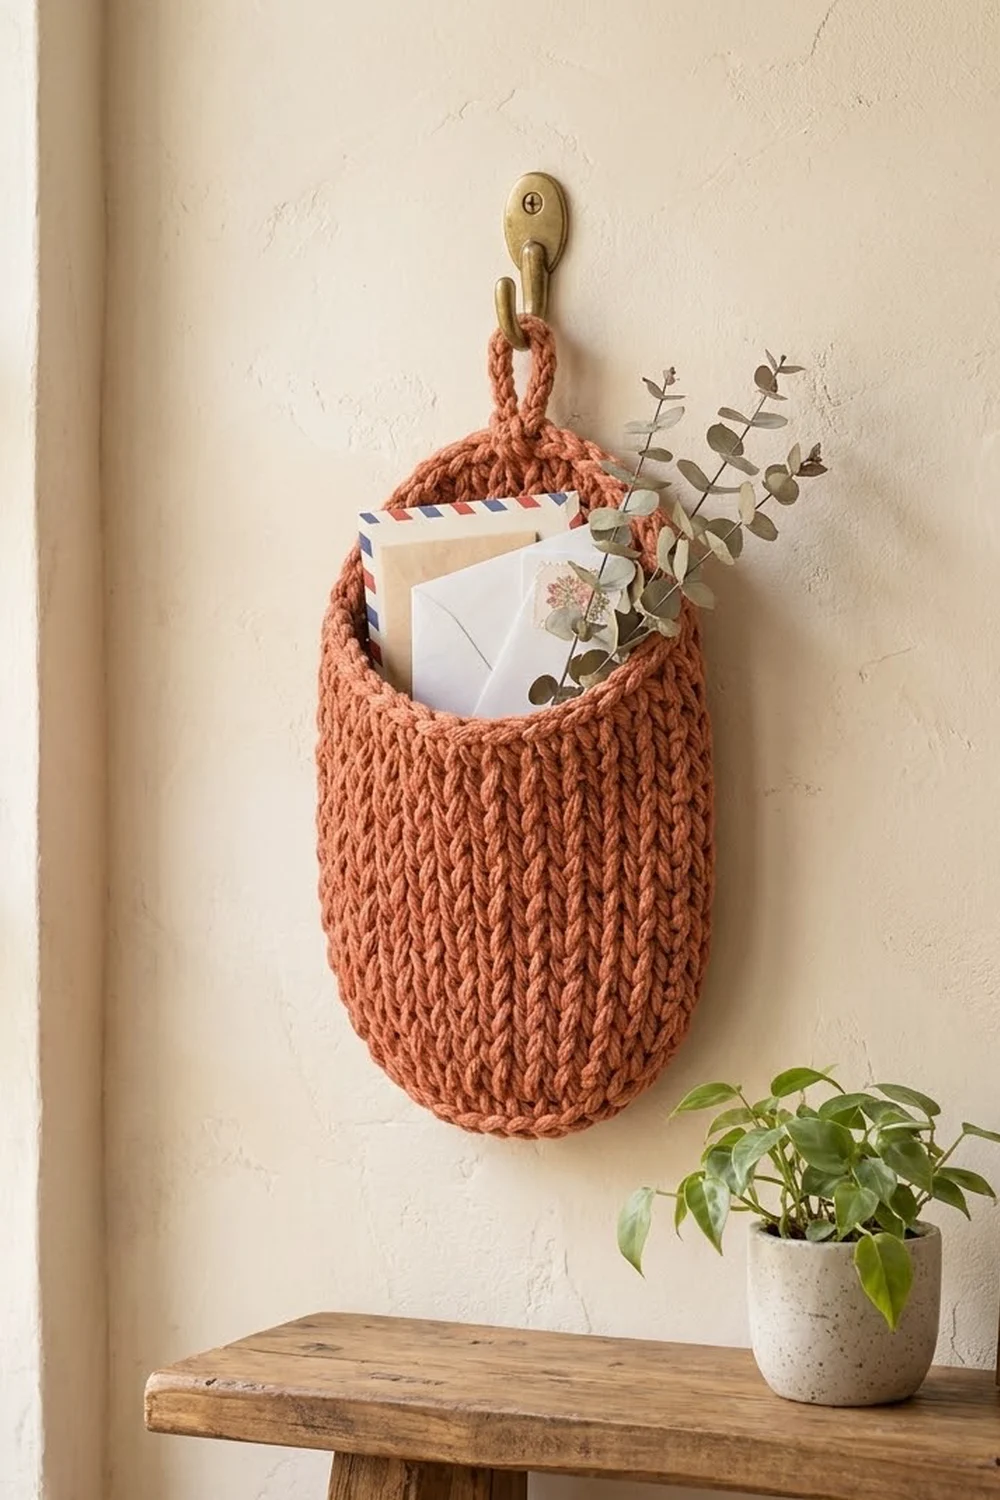
The Terracotta Mail Nook is a hanging wall pocket with a knit-look texture. It has a tall oval back panel, a U-shaped front pocket sewn over the lower part, and a short hanging loop at the top. It holds letters, cards, or small notebooks by the door.
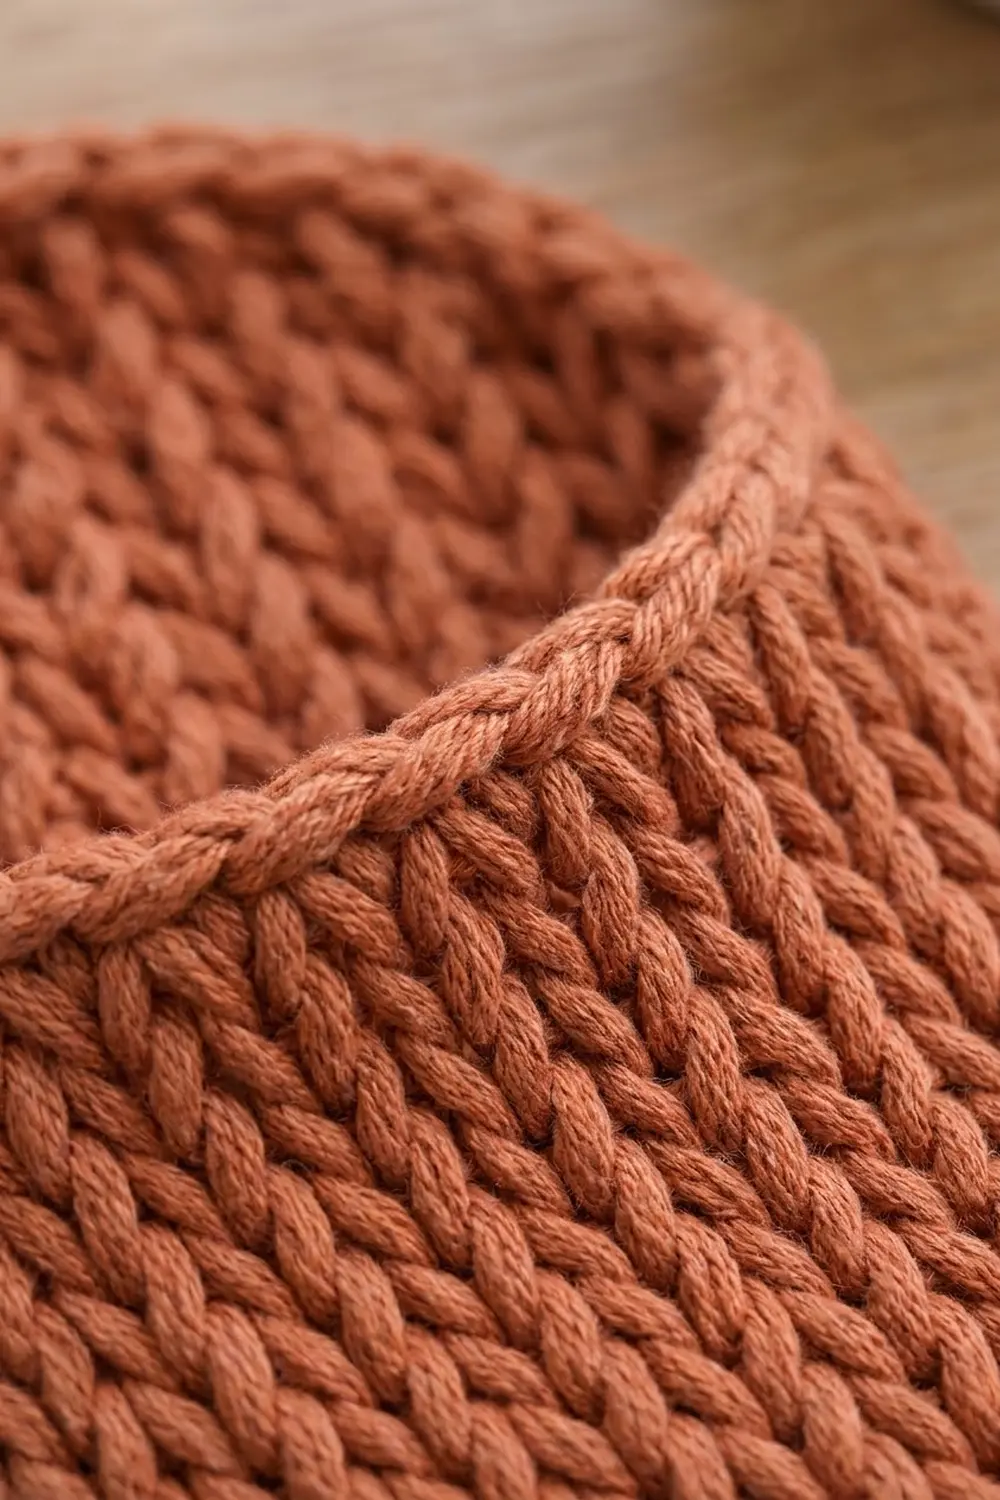
The whole piece uses one warm terracotta (rust-orange) yarn. Neat vertical columns of V stitches look like knitting, and a rounded, cord-like reverse single crochet edge goes around the outside. The front pocket’s top edge has a matching rolled rim.
This pattern uses US crochet terms. The finished back panel measures 8 in wide x 11 in tall (20.3 cm x 27.9 cm). With the loop it is about 13.5 in (34.3 cm) tall. The front pocket is about 7 in (17.8 cm) tall from the bottom of the piece.
You work the back and the front flat in turned rows of camel stitch (hdc in the third loop), shaping the curves with increases and decreases. Then you stack the front on the back and join them with the first border round. A second border round of reverse sc finishes the edge, and the slip-stitch loop is sewn to the top.
Finished Size and Construction
- Finished size: 8 in x 11 in (20.3 cm x 27.9 cm), plus a 2.5 in (6.4 cm) loop
- Skill level: Easy to intermediate
- Terminology: US crochet terms
- Yarn weight: Bulky (#5), cotton or cotton blend
- Hook: 6.0 mm (US J-10)
- Number of pieces: 3 (back panel, front pocket, hanging loop), joined into one finished pocket
- Layout: Front pocket over the lower part of the back panel, bottoms aligned; loop centered at the top
- Back panel before border: 7 in x 10 in (17.8 cm x 25.4 cm)
- Front pocket before border: 7 in (17.8 cm) wide x about 7 in (17.8 cm) tall including rim
- Border depth: 0.5 in (1.3 cm) on every side
Materials
Pick a smooth cotton or cotton-blend bulky yarn with clear plies. You need stitch definition for the V columns to show. Avoid fuzzy or very splitty yarn, because reverse sc is hard to work in yarn that splits.
- Terracotta: 150 g, about 165 m (180 yd)
Quantities include a margin of about 25% for your gauge swatch and for differences between yarn brands.
Tools:
- 6.0 mm (US J-10) crochet hook
- Tapestry needle
- 6 locking stitch markers
- Rustproof pins
- Tape measure
- Blocking mat and spray bottle
- Scissors
Abbreviations (US Terms)
- ch – chain
- sl st – slip stitch
- sc – single crochet
- hdc – half double crochet
- st(s) – stitch(es)
- RS / WS – right side / wrong side
- rev sc – reverse single crochet (crab stitch): working left to right, insert hook in next st to the right, yo, pull up a loop, yo, pull through both loops
Special stitches:
- Camel stitch (cst): Hdc worked into the third loop only. The third loop is the horizontal bar just below the top two loops, on the side facing away from you. Working here pushes the top loops forward and makes the knit-look V’s.
- cst inc: 2 camel stitches in the same st.
- cst2tog: Yo, insert hook in third loop of next st, pull up a loop, insert hook in third loop of following st, pull up a loop, yo, pull through all 4 loops.
The ch 1 at the start of each row does not count as a stitch.
Gauge and Checkpoints
Gauge: 12 sts and 10 rows = 4 in (10.2 cm) in camel stitch with a 6.0 mm hook.
Test the gauge by making the back panel first, since it is the largest piece. Stop after Row 6 and measure.
- After Row 1: 11 sts measure 3.7 in (9.4 cm) wide.
- After Row 6: 21 sts measure 7 in (17.8 cm) wide; height is 2.4 in (6.1 cm).
- After Row 16: height is 6.4 in (16.3 cm). The front pocket body should match this exactly.
- After Row 25: back panel is 7 in x 10 in (17.8 cm x 25.4 cm).
- After the border: 8 in x 11 in (20.3 cm x 27.9 cm).
A tolerance of 0.25 in (0.6 cm) either way is fine.
If your piece is too big: go down to a 5.5 mm (US I-9) hook and start again.
If your piece is too small: go up to a 6.5 mm (US K-10.5) hook.
Rows that are too tall can usually be fixed by pulling the hdc loop a little lower before you finish it. Do not change the stitch counts. All three pieces and the border depend on these 21 sts and these row counts.
Back Panel
Ch 13.
Row 1 (RS): Hdc in 3rd ch from hook and in each ch across, turn. (11 sts)
Place a marker on this side to mark it as the RS. The V columns show on the RS.
Row 2: Ch 1, cst inc in first st, cst in each st to last st, cst inc in last st, turn. (13 sts)
Row 3: Repeat Row 2. (15 sts)
Row 4: Repeat Row 2. (17 sts)
Row 5: Repeat Row 2. (19 sts)
Row 6: Repeat Row 2. (21 sts)
Checkpoint: 7 in (17.8 cm) wide. The bottom edge is now a rounded curve.
Rows 7–20: Ch 1, cst in each st across, turn. (21 sts in each row)
These 14 straight rows make the straight sides of the oval.
Row 21: Ch 1, cst2tog, cst in each st to last 2 sts, cst2tog, turn. (19 sts)
Row 22: Repeat Row 21. (17 sts)
Row 23: Repeat Row 21. (15 sts)
Row 24: Repeat Row 21. (13 sts)
Row 25: Repeat Row 21. (11 sts)
Fasten off and weave in the ends. Total: 25 rows. The top curve mirrors the bottom curve, so the panel is a symmetrical oval of 7 in x 10 in (17.8 cm x 25.4 cm).
Front Pocket
Ch 13.
Rows 1–6: Work exactly as Back Panel Rows 1–6. (11, 13, 15, 17, 19, 21 sts)
Rows 7–16: Ch 1, cst in each st across, turn. (21 sts in each row)
Checkpoint: 7 in x 6.4 in (17.8 cm x 16.3 cm). Lay the pocket over the back panel, bottoms aligned. Rows 1–16 should match the back’s Rows 1–16 row for row.
Rolled rim:
Row 17: Ch 1, sc in each st across, turn. (21 sts)
Row 18: Ch 1, sc in each st across. (21 sts) Do not turn.
Row 19: Ch 1, rev sc in each st back across. (21 sts)
The rev sc row makes a rounded, cord-like rim. The rim adds about 0.6 in (1.5 cm), so the pocket is about 7 in (17.8 cm) tall. Fasten off and weave in the ends.
Hanging Loop
Ch 21.
Row 1: Sl st in the back bump of 2nd ch from hook and in each ch across. (20 sl sts)
The cord is about 5 in (12.7 cm) long. Fasten off and leave a 10 in (25.4 cm) tail for sewing.
Make All Pieces
Make 1 of each piece in Terracotta:
- Back panel: 1 (about 70 g)
- Front pocket: 1 (about 45 g)
- Hanging loop: 1 (about 5 g)
The border uses about 15 g, for about 135 g in total.
Layout (RS facing, front view):
      ( loop )
   [  back top   ]   back Rows 18–25
   [  back       ]
   [=== rim =====]   front Rows 17–19 over back Row 17
   [  front      ]   front Rows 1–16 over back Rows 1–16
   [  pocket     ]
    \___________/    bottoms aligned
Joining
The front pocket and back panel are joined with the first border round, which is worked through both layers wherever they overlap.
- Place the back panel RS up. Place the front pocket on top, RS up, so its foundation edge lines up with the back’s foundation edge.
- Line up the row ends: front Row 1 on back Row 1, and so on through Row 16. The rim (front Rows 17–19) sits over back Row 17.
- Pin every 5 rows along both sides, and pin each end of the bottom edge.
Stitch-to-stitch logic: Both pieces have the same 11 foundation sts and the same row ends on Rows 1–16. Each joining sc therefore goes through one matching stitch or row end of each layer. You add no extra stitches at any seam. You simply work through 2 layers where the counts are already identical.
Tension: Work the doubled sc slightly looser than normal, since the hook passes through twice the fabric. If the bottom starts to cup, loosen up. If it ruffles, tighten up.
Size checkpoint: After joining, the pocket should lie flat, and its sides should line up with the back’s sides with no overhang.
Border
Border gauge: 3 sc per in (2.5 cm). Each side is 10 in (25.4 cm) tall, so it needs 30 sc to lie flat.
Round 1 (sc, joining): With RS facing, join yarn at the right end of the bottom edge. Work through both layers along the bottom: 2 sc in first foundation st, sc in next 9 sts, 2 sc in last st. (13 sts)
Continue up the left side (as worked) along the row ends. Work 1 sc in each row end, and 2 sc in the ends of Rows 5, 10, 15, 20, and 25. For Rows 1–17, work through both layers.
Across the top of Row 25, work 2 sc in first st, sc in next 9 sts, 2 sc in last st. (13 sts)
Work down the other side the same way: 1 sc in each row end, 2 sc in the ends of Rows 25, 20, 15, 10, and 5. Again, work through both layers for Rows 17–1.
Sl st to first sc to join.
Round 1 count:
- Bottom: 11 sts worked 1 per st + 2 extra = 13
- Each side: 25 row ends worked 1 per row end + 5 extra = 30
- Top: 11 sts worked 1 per st + 2 extra = 13
- Total: 13 + 30 + 13 + 30 = 86 sts (72 worked 1 per st or row end, plus 14 extra)
Round 2 (rev sc): Ch 1, rev sc in each st around. Sl st to first st to join. (86 sts)
Fasten off and weave in the ends.
Why the math works: 25 rows at 10 rows per 4 in is 10 in (25.4 cm). At 3 sc per in, 10 in needs 30 sc, which is 25 + 5. The top and bottom are only 11 sts wide but sit on curves. The 2 extra sc at each end ease around the turn, so the oval stays round and does not pull into points. The two rounds add 0.5 in (1.3 cm) on every side. That brings 7 in x 10 in to 8 in x 11 in (20.3 cm x 27.9 cm).
Attach the loop: Fold the cord in half. Center both ends behind the top edge at the 7th sc of the top 13. Sew them firmly through the border and Rows 24–25 of the back. Wrap the tail 3 times around the base of the loop to make the small knot-like bump, then secure it. The loop stands about 2.5 in (6.4 cm) above the edge.
Final Blocking
- Spray the piece evenly until damp, or soak it briefly in cool water and press out the excess in a towel.
- Lay it flat RS up on the blocking mat.
- Pin the outline to 8 in x 11 in (20.3 cm x 27.9 cm). Place pins every 1 in (2.5 cm) around the curves.
- Straighten the V columns so they run vertically. Nudge the front pocket so its sides line up with the back.
- Shape the pocket rim into a gentle, even line. Don’t press it flat.
- Let it dry completely, at least 24 hours, before unpinning.
- Hang it on a hook and check that the loop holds the pocket straight.
Final Quality-Control Checklist
- Back panel measures 7 in x 10 in (17.8 cm x 25.4 cm) before the border.
- Front pocket Rows 1–16 match back Rows 1–16 exactly.
- Every row of the back has the correct count: 11, 13, 15, 17, 19, 21 (x14), 19, 17, 15, 13, 11.
- Border Round 1 has 86 sts: 13 / 30 / 13 / 30.
- Border Round 2 has 86 rev sc with no skipped sts.
- Pocket rim is straight and smooth.
- Loop is centered and firmly sewn.
- Finished piece measures 8 in x 11 in (20.3 cm x 27.9 cm).
- All ends are woven in on the WS.
Troubleshooting
V’s lean or look messy: You may be working into the back loop instead of the third loop. Find the horizontal bar below the top loops.
Sides waver: You may have missed the first or last stitch. Count 21 sts at the end of each straight row.
Border ruffles: You may have added too many extras. Work the side increases on every 5th row end only.
Border cups or pulls: The doubled sc may be too tight. Go up half a hook size for Round 1.
Pocket gapes away from the back: The pocket rows may be taller than the back rows. Re-pin and block, or rework the pocket with a tighter hdc.
Loop tilts: Re-sew it at the exact center (7th sc).
Rev sc looks flat: Twist the hook slightly as you pull through so each stitch rolls.
Care
Hand wash in cool water with mild soap, press out the water in a towel, and dry flat in shape. Don’t hang it to dry, and avoid the dryer.
Final Notes
The measurement chain is simple. A gauge of 12 sts and 10 rows to 4 in (10.2 cm) gives 21 sts at 7 in (17.8 cm) wide. Twenty-five rows give 10 in (25.4 cm) tall. Sixteen matching pocket rows give 6.4 in (16.3 cm), plus the rim. Border Round 1 has 86 sts (13 / 30 / 13 / 30), and two border rounds add 0.5 in (1.3 cm) per side. The result is a finished wall pocket of 8 in x 11 in (20.3 cm x 27.9 cm). If each checkpoint matches, the next stage fits without adjustment.
Happy crocheting!