
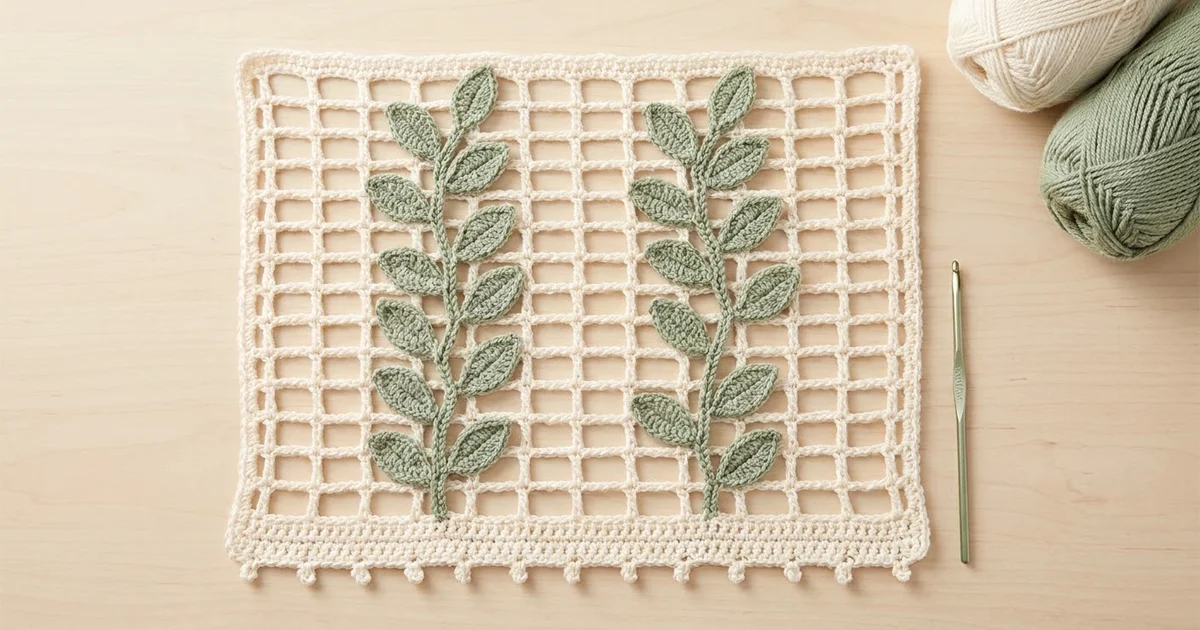
This panel puts a light, airy ivory mesh behind two sage-green vines climbing up it. Each vine has a corded stem that curves a little as it rises, with eight almond-shaped leaves that alternate left and right. Along the bottom edge, a row of small ivory picot loops hangs below each vertical post.
The look is cottage-garden and botanical, inspired by filet lace. The open grid of tall posts and softly dipping chain bars lets light through, and the solid green leaves stand out against it. Only two colors are used: ivory for the mesh and sage green for the vines.
This pattern uses US crochet terms. The finished panel measures 9 in (22.9 cm) wide by 11.5 in (29.2 cm) tall, including the picot edge.
Construction is simple. You crochet one rectangular mesh panel in rows, starting with a single crochet foundation row and following it with ten rows of treble posts and chain-5 bars. Then you make two separate vine strips, each with its leaves worked directly off the stem chain, and sew them onto the panel as appliqués. To finish, you work a picot edge into the foundation chain along the bottom.
Finished Size and Construction
- Finished size: 9 in (22.9 cm) wide x 11.5 in (29.2 cm) tall
- Skill level: Easy+ (basic stitches, simple shaping, appliqué sewing)
- Terminology: US crochet terms
- Yarn weight: Worsted (#4) cotton
- Hook: 5.0 mm (US H-8)
- Number of pieces: 1 mesh panel + 2 vine appliqués
- Layout: 5 mesh cells wide x 10 mesh rows tall; vines run up cell columns 2 and 4
- Piece size: each mesh cell is about 1.8 in (4.6 cm) wide x 1.1 in (2.8 cm) tall
- Size before border: 9 in (22.9 cm) x 11.25 in (28.6 cm)
- Border depth: 0.25 in (0.6 cm), bottom edge only
Materials
Use a smooth, mercerized or matte worsted-weight cotton with about 120 m per 100 g. Cotton holds the mesh square, blocks crisply, and keeps the leaves flat. Avoid fuzzy yarns, because they blur the open grid.
- Ivory (Color A): 20 g, about 24 m, for the mesh panel and picot edge
- Sage green (Color B): 25 g, about 30 m, for the two vines and for sewing them on
These quantities include a margin of roughly 30% over what the sample used, so you can swatch and re-do a row if needed.
Tools:
- 5.0 mm (US H-8) crochet hook
- Tapestry needle
- Scissors
- Stitch markers (4–6)
- Rust-proof pins
- Blocking mat or folded towel
- Spray bottle
- Measuring tape or ruler
Abbreviations (US Terms)
- ch – chain
- sl st – slip stitch
- sc – single crochet
- hdc – half double crochet
- dc – double crochet
- tr – treble crochet (yarn over twice)
- sk – skip
- sp – space
- st(s) – stitch(es)
- tch – turning chain
- RS – right side
Special stitches:
- Picot: Ch 3, then sl st in the front loop and left leg of the sc just made. This makes a small round loop that hangs down.
- Surface sl st (vein): Hold the yarn behind the leaf, insert the hook from front to back through the leaf’s center line, pull up a loop, and draw it through the loop on the hook.
- Back bump: The single horizontal bar on the back of a chain.
Gauge and Checkpoints
Before you start the full panel, make a test swatch. Ch 14, then work Row 1 below over 13 sc, and then work 3 mesh rows using two cells per row (ch 4, then [ch 5, sk 5, tr in next st] 2 times).
Gauge: 2 mesh cells = 3.6 in (9.1 cm), measured from post center to post center; 3 mesh rows = 3.3 in (8.4 cm) tall, after light blocking.
Checkpoints for the full panel:
- After Row 1: 31 sc = 9 in (22.9 cm) wide
- After Row 6 (5 mesh rows): 5.75 in (14.6 cm) tall
- After Row 11: 11.25 in (28.6 cm) tall
- Each vine stem: 48 ch = 12 in (30.5 cm) relaxed
- Each leaf: 2 in (5.1 cm) long x 0.75 in (1.9 cm) wide
- After border: 11.5 in (29.2 cm) tall
If your swatch is too big, change to a 4.5 mm (US 7) hook. If it’s too small, change to a 5.5 mm (US I-9) hook. If the width is correct but the rows are too tall, wrap the yarn less loosely on your treble stitches, or switch to dc for a shorter post and add one extra mesh row. Recheck your gauge on the first three mesh rows of the real panel. A difference of 0.25 in (0.6 cm) can be fixed when blocking. If the difference is larger, start again.
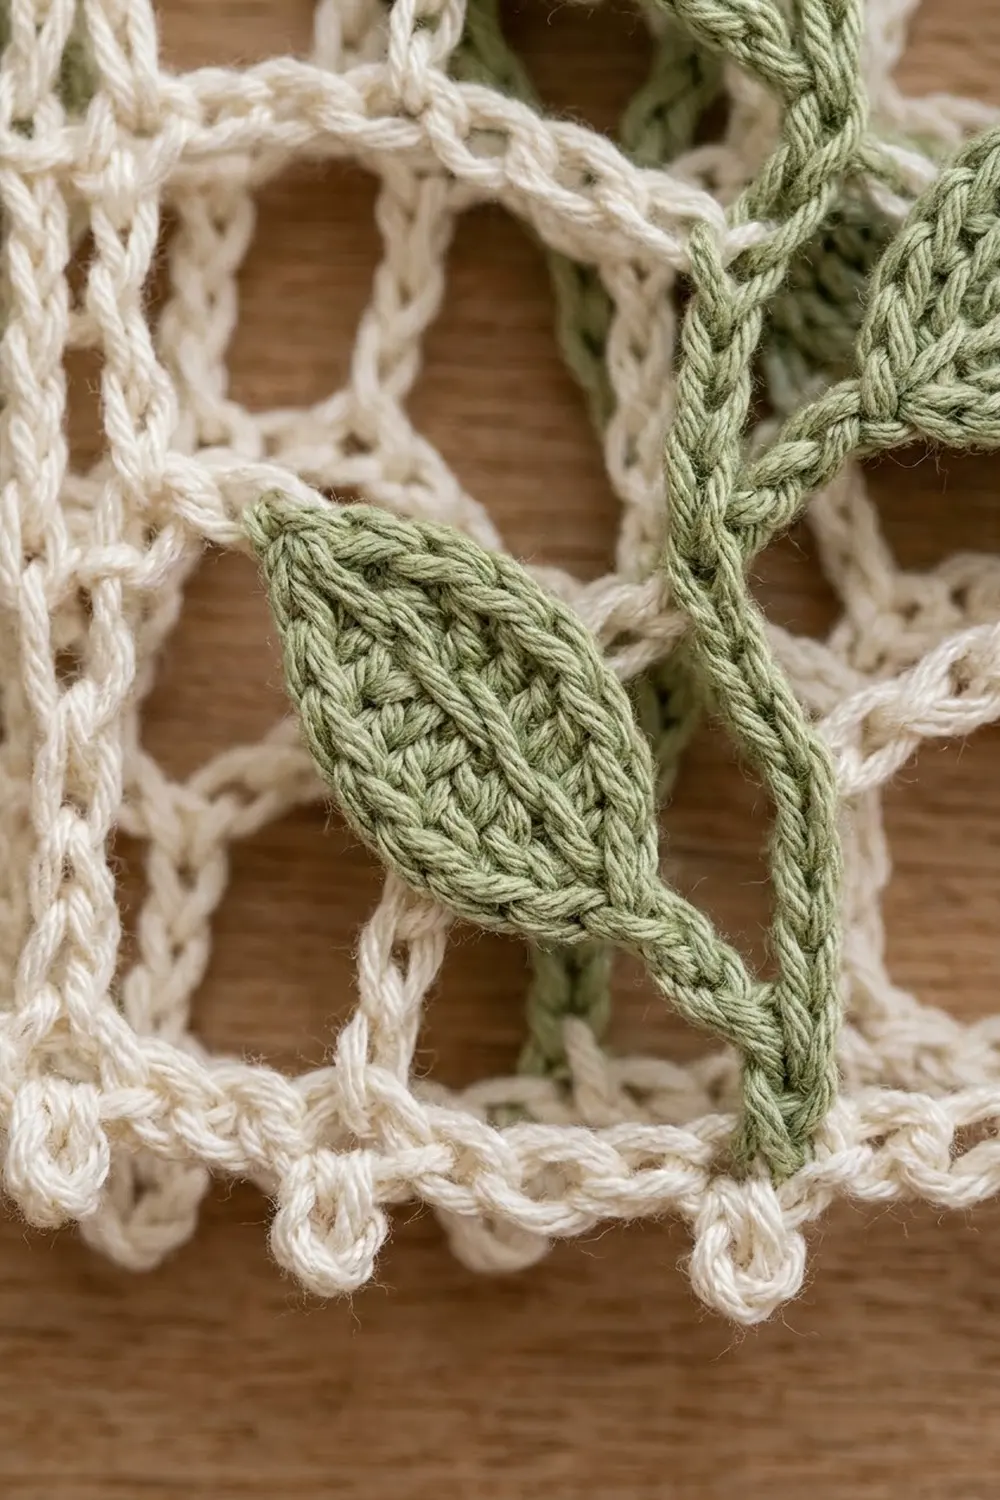
Part 1: Mesh Panel (Color A, Ivory)
Foundation: With ivory, ch 32.
Row 1 (RS): Sc in 2nd ch from hook and in each ch across, turn. (31 sc)
Row 2: Ch 4 (counts as tr here and throughout), then ch 5, sk next 5 sc, tr in next sc; repeat from * 4 more times. The final tr goes into the last sc. (6 tr + 5 ch-5 sps = 31 sts)
Each post now sits on sc 1, 7, 13, 19, 25, and 31. Those positions are symmetrical from both ends, so it doesn’t matter which end you count from.
Row 3: Ch 4, turn, then ch 5, sk ch-5 sp, tr in next tr; repeat from * 4 more times. Work the last tr into the 4th ch of the tch. (6 tr + 5 ch-5 sps = 31 sts)
Rows 4–11: Repeat Row 3. Each row has 31 sts. Fasten off after Row 11.
Checkpoint: The panel has 10 mesh rows over the sc foundation row. It should measure 9 in (22.9 cm) x 11.25 in (28.6 cm).
Tension tip: Make your ch-5 bars slightly relaxed. A gentle dip in the middle of each bar is part of the look. If you pull the chains tight, the panel will narrow above Row 1.
Part 2: Leafy Vines (Color B, Sage) – Make 2
Each vine is worked from the bottom up as a single strip. The leaves are worked onto spare chains that branch off the stem.
Leaf (worked off the stem):
- Ch 9. The ch closest to the hook is the leaf tip, and the first of the 9 ch is the leaf base, where it meets the stem.
- Side 1, from tip toward base: Working in back bumps, sc in 2nd ch from hook, hdc in next ch, dc in each of next 3 ch, hdc in next ch, sc in next ch, sl st in last ch (base). (8 sts)
- Side 2, from base toward tip: Rotate the work. Working in the free loops of the same chain, sc in the 1st free loop, hdc in next, dc in each of next 3, hdc in next, sc in next. (7 sts)
- Tip: Ch 2, sl st in the leaf tip (the skipped ch) to form the point.
- Vein: Work 8 surface sl sts down the center line of the leaf, ending at the base. This forms the center vein and returns the hook to the stem.
Leaf total: 8 sts on side 1 + 7 sts on side 2 + tip + 8-st vein.
Vine:
- With sage, ch 4 for the bottom tail.
- Ch 5 for the stem, then make 1 Leaf; repeat from * 7 more times. (8 leaves)
- Ch 4 for the top tail. (stem: 4 + [8 x 5] + 4 = 48 ch)
- Cord the stem: Turn. Sl st in the back bump of each stem ch, going back down to the start and skipping over the leaf bases. (48 sl sts) This thickens the stem into a firm cord.
- Fasten off, leaving a 36 in (91.4 cm) tail for sewing.
Checkpoint: The stem is 12 in (30.5 cm) long, and the leaves are 1.25 in (3.2 cm) apart along it. Your panel is 11.25 in (28.6 cm) tall, so the extra 0.75 in (1.9 cm) of stem goes into the gentle wave.
Part 3: Attaching the Vines
- Lay the panel RS up with Row 1 at the bottom. Counting cells from the right, place a marker in the center of cell column 2 (above sc 10) and another in the center of cell column 4 (above sc 22).
- Using the sage tail, sew the bottom of the stem to the top of Row 1 at the marker. Keep the free foundation loops clear for the border.
- Lead the stem upward, letting it wander about 0.25 in (0.6 cm) to either side of the column center. Tack it to each of the 10 ch-5 bars it crosses, using 2 small stitches per bar.
- Turn the leaves so they alternate: first leaf to the left, second to the right, and so on. Angle each one upward at about 45°.
- Tack each leaf at its base, middle, and tip to the mesh underneath. A leaf tip may reach across a post into the neighboring cell. This is intentional.
- Sew the top tail to the Row 11 bar, then weave in all ends on the wrong side.
Repeat for the second vine in column 4. Turn its leaves the same way as the first vine so the two vines echo each other.
Border: Picot Edge (Color A, Ivory)
Border gauge: Each picot hangs about 0.25 in (0.6 cm) below the foundation edge.
Bottom edge only: Rotate the panel so the foundation chain is at the top, RS facing. Join ivory with a sl st in the free loop of the first foundation ch, at the right-hand corner.
Border row: Ch 1, sc in the same loop, Picot, sc in each of next 6 free loops, Picot; repeat from * 4 more times. Fasten off. (31 sc + 6 picots)
Per side:
- Bottom: 31 sc + 6 picots
- Sides: 0 sts (the tr posts form the side edges)
- Top: 0 sts (the Row 11 ch-5 bars form the top edge)
Why the math works: The foundation has 31 free loops, and the picots land on sts 1, 7, 13, 19, 25, and 31. These are exactly the same positions as the 6 posts in Row 2 (1 + [5 x 6] = 31), so every picot hangs directly below a post. You don’t add any corner stitches, because the first and last picots are the corners.
Final Blocking
- Weave in all remaining ends, keeping ivory tails inside ivory stitches and sage tails behind the leaves.
- Soak the panel in cool water for 10 minutes, then press out the water in a towel. Don’t wring it.
- Lay it RS up on the mat. Pin the four corners to 9 in (22.9 cm) x 11.25 in (28.6 cm).
- Pin each tr post straight up and down. Then ease each ch-5 bar into a soft, even dip.
- Pin each picot down so the bottom edge measures 11.5 in (29.2 cm) from top to picot tips.
- Flatten each leaf with your fingers and pin the tips out so the points are sharp.
- Let it dry completely, at least 24 hours, before you unpin.
Final Quality-Control Checklist
- Row 1 has 31 sc, and every mesh row has 6 posts and 5 bars.
- The panel measures 9 in (22.9 cm) x 11.5 in (29.2 cm), within 0.25 in (0.6 cm).
- The posts line up vertically from Row 2 to Row 11.
- Each vine has 8 leaves that alternate left and right.
- Each stem is tacked at all 10 bars, and neither end is loose.
- There are 6 picots, each directly below a post.
- No knots or ends show on the RS.
Troubleshooting
- Panel narrows toward the top: Your ch-5 bars are too tight. Work them more loosely, or go up a hook size for the chains only.
- Posts lean to one side: Check that you’re working the last tr into the 4th ch of the tch, not into the tch space.
- Leaves cup or ruffle: Your vein sl sts are too tight. Rework them loosely, or skip one sl st.
- Leaves are too long for the cells: Make each leaf from ch 8 instead, and work only 2 dc in the middle of each side.
- Stem twists while sewing: Pin the whole vine in place before you tack any of it.
- Picots flip upward: Steam them lightly and pin them pointing down while they dry.
Care
Hand wash in cool water with a mild detergent, then reshape and dry flat. Avoid hanging the panel while it’s wet, because the open mesh can stretch.
Final Notes
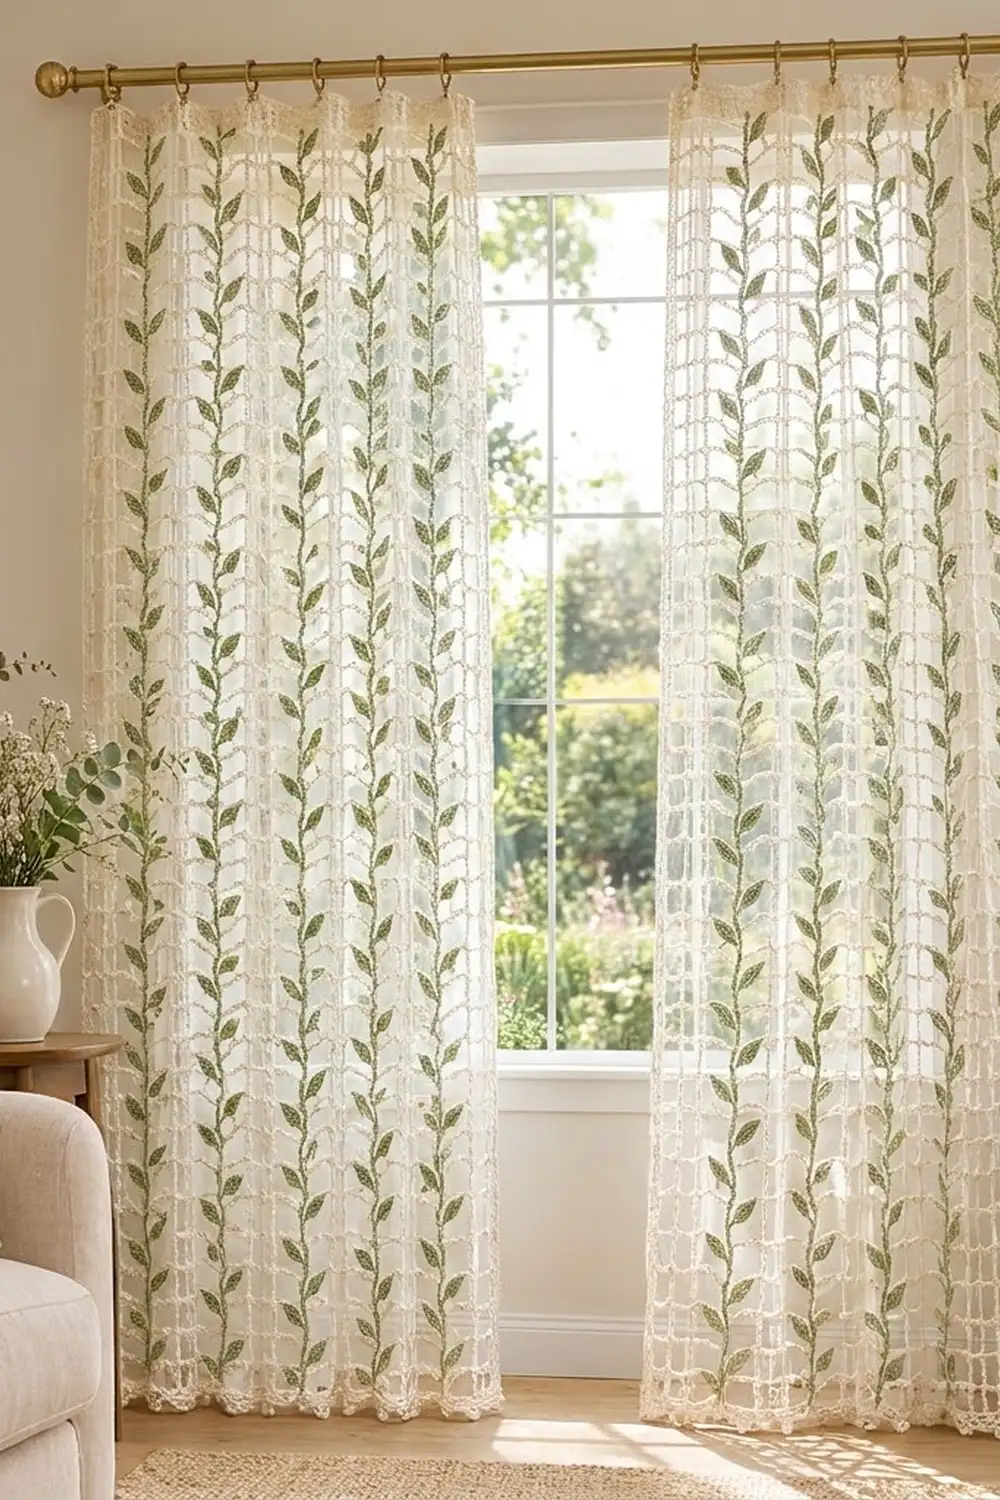
The measurement chain is short and easy to check. Your 31-sc foundation sets the width at 9 in (22.9 cm). Ten mesh rows at 1.1 in (2.8 cm) each bring the panel to 11.25 in (28.6 cm). Each 12 in (30.5 cm) vine fits that height with a gentle wave, and the 0.25 in (0.6 cm) picot edge completes the 11.5 in (29.2 cm) finished size. Check gauge at each of these points and the panel will come out flat and square.
Happy crocheting!