

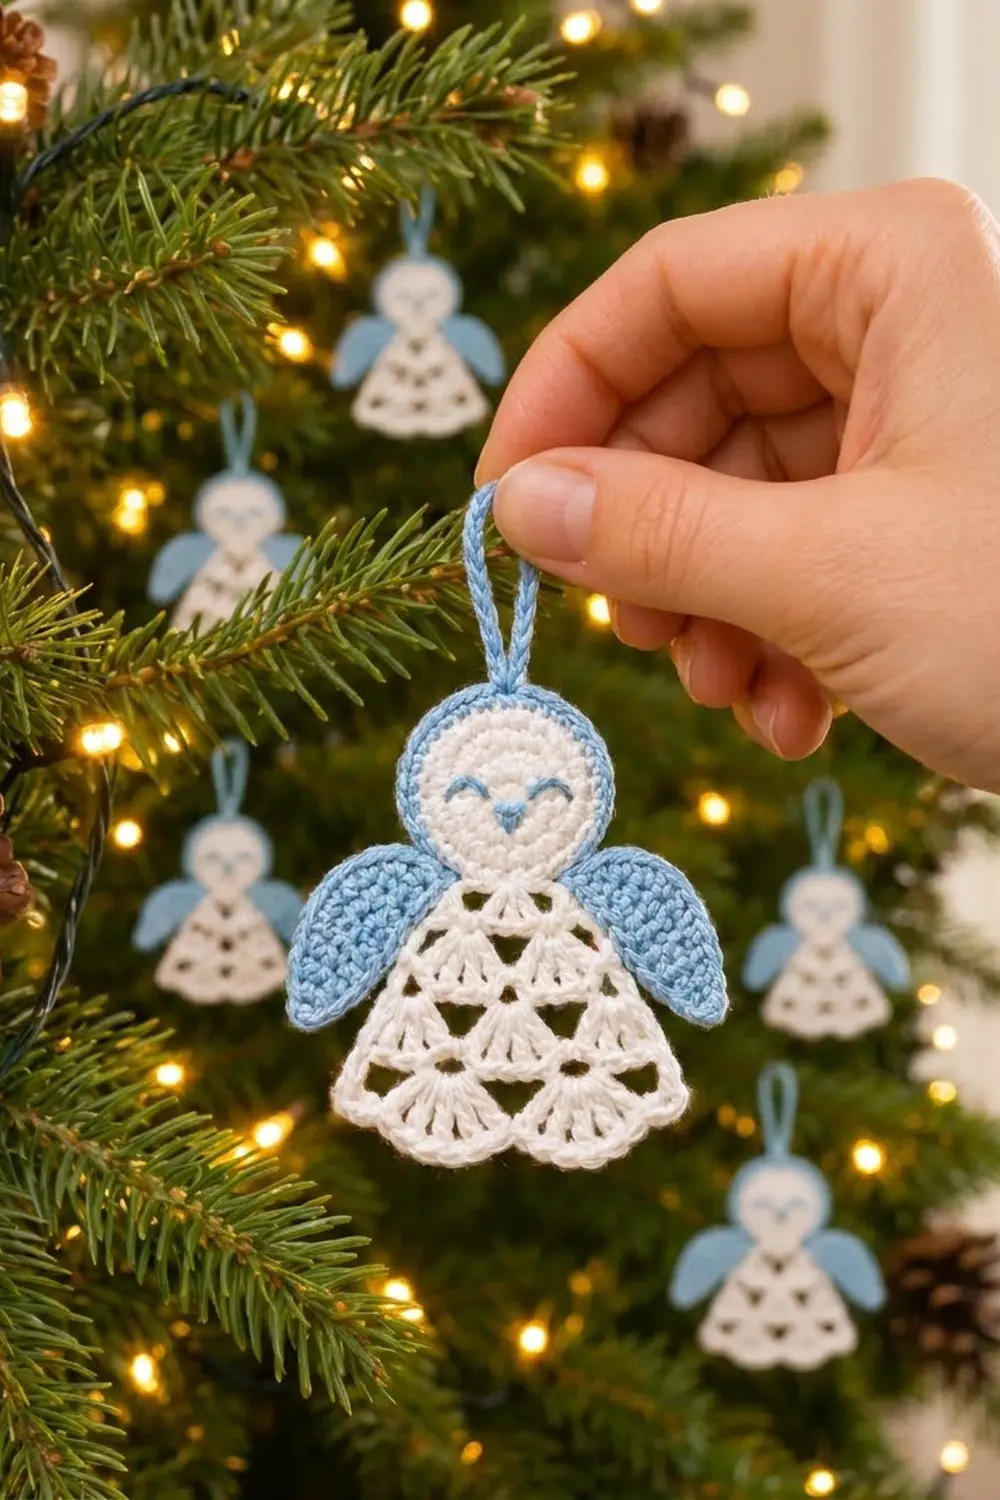
The Bluebell Angel is a small Christmas ornament with a round white face, a lacy fan-stitch skirt, and two soft blue wings. Her closed, smiling eyes and tiny triangle beak are stitched in blue, which gives her a sleepy, peaceful look. She works well on a tree, on a gift tag, or hanging from a window hook.
The palette is just two colors. Crisp white is used for the face and skirt. A gentle sky blue is used for the wings, the head edging, the hanging loop, and the face details. Matte cotton shows every fan and triangle opening clearly.
This pattern uses US crochet terms. The finished angel measures about 5.5 in (14.0 cm) across the wings. She is 4.75 in (12.1 cm) tall from the top of the head to the skirt hem, plus a 1.5 in (3.8 cm) hanging loop.
You will make four small parts:
- a head worked in the round
- a triangle-shaped skirt worked from the top down in rows of fans
- two wings worked around a foundation chain
The head gets a blue edging round and a slip-stitch loop, and the skirt gets a scalloped edging row. Then everything is sewn into one finished ornament.
Finished Size and Construction
- Finished size: 5.5 in (14.0 cm) wide x 4.75 in (12.1 cm) tall, plus a 1.5 in (3.8 cm) loop
- Skill level: Easy to intermediate
- Terminology: US crochet terms
- Yarn weight: DK / light worsted cotton (CYC 3)
- Hook: 3.5 mm (E-4)
- Number of pieces: 1 finished ornament, assembled from 4 crocheted parts (head, skirt, 2 wings)
- Layout: the head sits centered above the skirt and overlaps its top point; one wing goes at each shoulder
- Head size: 2.5 in (6.4 cm) across with edging
- Size before border: head 2.25 in (5.7 cm) across; skirt 4 in (10.2 cm) wide x 2.5 in (6.4 cm) tall
- Border depth: the head edging adds 0.25 in (0.6 cm) to the width of the head; the skirt edging adds 0.25 in (0.6 cm) to the hem
- Wing size: 2.5 in (6.4 cm) long x 1.25 in (3.2 cm) wide
Materials
Choose a smooth cotton in DK weight, either mercerized (shiny) or matte. Cotton holds the fan shapes crisply and blocks flat, which matters for an ornament that hangs. Acrylic also works, but the lace will look softer and the wing tips may curl.
- White: 10 g, about 21 m (23 yd)
- Sky blue: 8 g, about 17 m (19 yd), including embroidery
These amounts include about 30 percent extra for your gauge test, yarn tails, and embroidery practice.
Tools:
- 3.5 mm (E-4) crochet hook
- Tapestry needle
- Scissors
- Stitch marker
- Rust-proof pins and a blocking mat or folded towel
- Spray bottle with water
- Ruler or tape measure
Abbreviations (US Terms)
- ch – chain
- sl st – slip stitch
- sc – single crochet
- hdc – half double crochet
- dc – double crochet
- sk – skip
- sp – space
- st(s) – stitch(es)
- RS – right side
Special stitch – Fan: 7 dc worked into the same stitch. When a row starts with a fan, the ch 3 counts as the first dc, so “ch 3, 6 dc in first st” also makes a fan.
Gauge and Checkpoints
Gauge for the head is 20 sc and 22 rounds = 4 in (10.2 cm). On an ornament this small, the head itself works as your gauge test. Make it first and measure it before you start the other parts.
Checkpoints:
- Head after Rnd 3: 1.25 in (3.2 cm) across
- Head after Rnd 6: 2.25 in (5.7 cm) across
- Head after Rnd 7: 2.5 in (6.4 cm) across
- Skirt after Row 1: one fan, 1 in (2.5 cm) wide
- Skirt after Row 4: 4 in (10.2 cm) wide at the hem
- Wing after Rnd 3: 2.5 in (6.4 cm) x 1.25 in (3.2 cm)
If your head is more than 0.25 in (0.6 cm) too big, change to a 3.25 mm hook. If it is too small or curls up like a bowl, change to a 3.75 mm hook. Use the same hook for every part so the sizes stay in proportion.
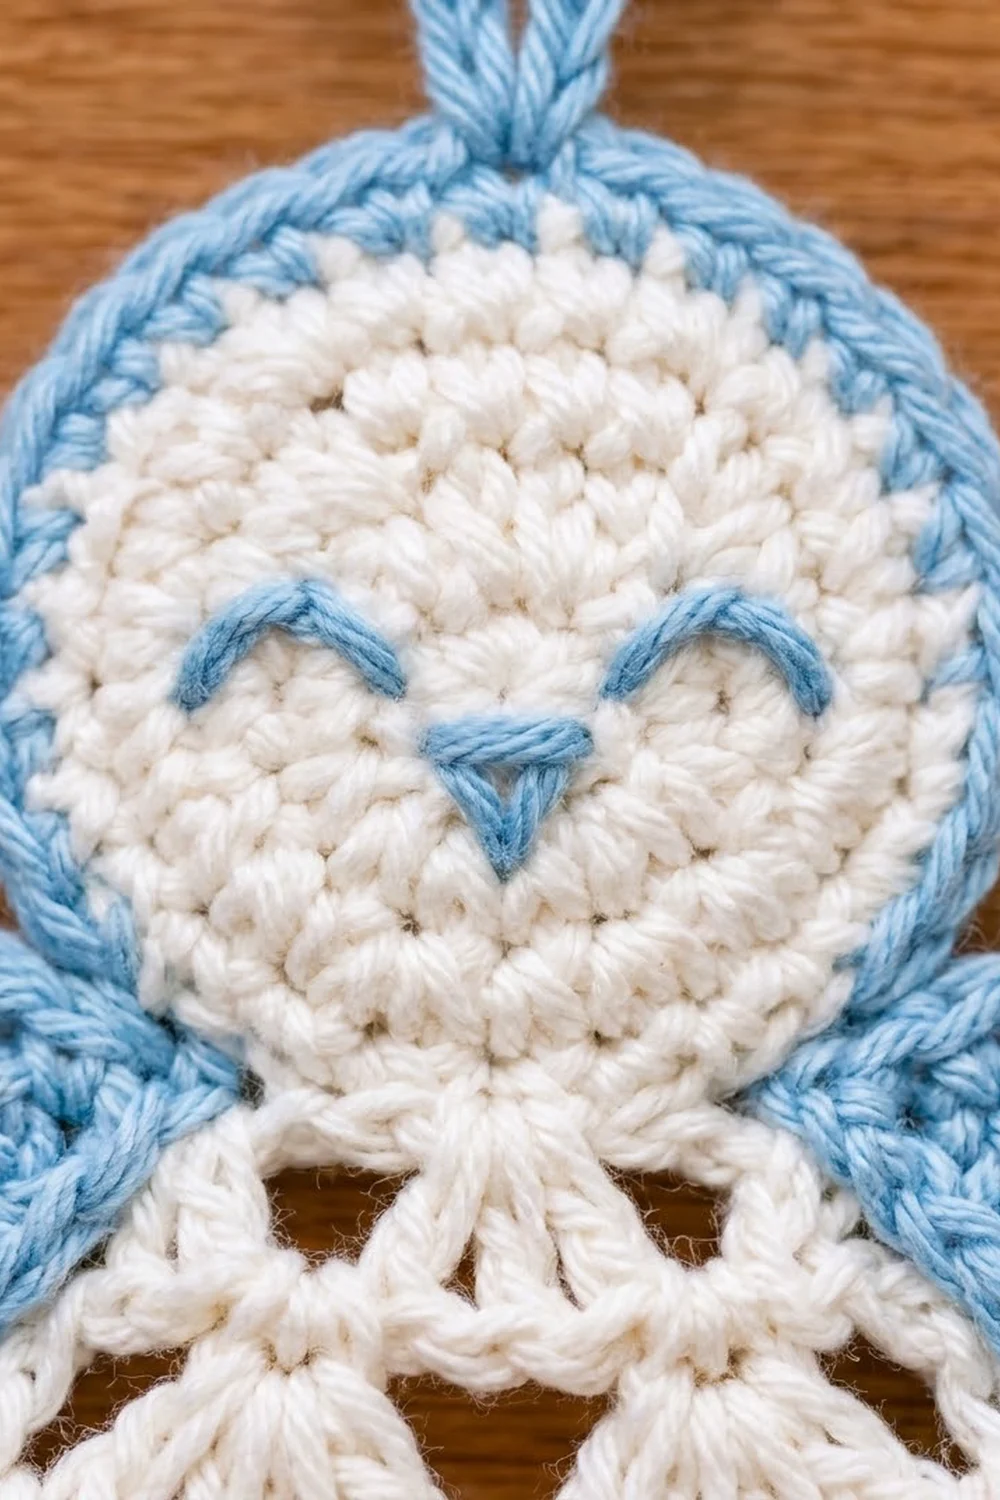
Head (White, Edging in Blue)
With white, make a magic ring.
Rnd 1: Ch 1, 6 sc in ring. Pull the ring closed, sl st to first sc. (6 sc)
Rnd 2: Ch 1, 2 sc in each st around, sl st to first sc. (12 sc)
Rnd 3: Ch 1, sc in next st, 2 sc in next st; repeat from * around (6 repeats), sl st to first sc. (18 sc)
Rnd 4: Ch 1, sc in next 2 sts, 2 sc in next st; repeat from * around (6 repeats), sl st to first sc. (24 sc)
Rnd 5: Ch 1, sc in next 3 sts, 2 sc in next st; repeat from * around (6 repeats), sl st to first sc. (30 sc)
Rnd 6: Ch 1, sc in next 4 sts, 2 sc in next st; repeat from * around (6 repeats), sl st to first sc. (36 sc)
Fasten off white and weave in the tail. The head should lie flat and measure 2.25 in (5.7 cm) across. You will add the blue edging in the Border section.
Skirt (White)
The skirt is worked from the top down in rows. Each row adds one fan, so the piece grows into a triangle with a scalloped hem and triangle-shaped openings between the fans.
With white, ch 4, sl st to first ch to form a ring.
Row 1 (RS): Ch 3 (counts as dc), 6 dc in ring. Turn. (1 fan: 7 dc)
Row 2: Ch 3, 6 dc in first st (first fan made); ch 2, sc in center (4th) dc of the Row 1 fan, ch 2, 7 dc in top of turning ch. Turn. (2 fans: 14 dc, 1 sc, 2 ch-2 sps)
Row 3: Ch 3, 6 dc in first st; ch 2, sc in center dc of the fan you started in, ch 2, 7 dc in next sc; ch 2, sc in center dc of last fan, ch 2, 7 dc in top of turning ch. Turn. (3 fans: 21 dc, 2 sc, 4 ch-2 sps)
Row 4: Ch 3, 6 dc in first st; [ch 2, sc in center dc of next fan, ch 2, 7 dc in next sc] twice; ch 2, sc in center dc of last fan, ch 2, 7 dc in top of turning ch. Turn. (4 fans: 28 dc, 3 sc, 6 ch-2 sps)
Don’t fasten off. The skirt now measures about 4 in (10.2 cm) across the hem and 2.5 in (6.4 cm) tall.
Each count above is the complete total for that row. Row n has n fans (7n dc), n – 1 sc, and 2(n – 1) ch-2 sps.
Each sc goes in the center of a fan, and each new fan goes in an sc. This is what makes the small triangle openings between the fans.
Wings (Make 2, Blue)
Each wing is a curved teardrop shape. It has one long, straight inner edge and one fuller outer edge that gets wider at the shoulder end.
With blue, ch 11.
Rnd 1: Sc in 2nd ch from hook and in the next 8 ch, 3 sc in last ch. Turn the piece so you can work along the other side of the foundation chain: sc in next 8 ch, 2 sc in last ch (the same ch as the first sc). Sl st to first sc. (22 sc)
Number the stitches 1 to 22, starting from the first sc:
- sts 1–9 are the first side
- sts 10–12 are the tip
- sts 13–20 are the second side
- sts 21–22 are the shoulder end
Rnd 2: Ch 1, sc in sts 1–9, 2 sc in each of sts 10–12, sc in sts 13–15, hdc in sts 16–17, dc in sts 18–20, 2 dc in each of sts 21–22. Sl st to first sc. (9 + 6 + 3 + 2 + 3 + 4 = 27 sts)
Rnd 3: Ch 1, sc in each of the first 23 sts, 2 sc in each of the last 4 sts. Sl st to first sc. (27 sts worked 1 per st + 4 extra = 31 sc)
Fasten off, leaving an 8 in (20.3 cm) tail for sewing. The wing should measure 2.5 in (6.4 cm) long and 1.25 in (3.2 cm) at its widest point.
Make a second wing exactly the same way. When you sew it on, flip it over so the two wings mirror each other.
Border
Border gauge: the edging uses the same gauge as the head, about 5 sc per 1 in (2.5 cm).
Head Edging (Blue)
Join blue with a sl st in any st of Rnd 6. This join will be the top center of the head, where the loop goes.
Rnd 7: Ch 1, sc in next 5 sts, 2 sc in next st; repeat from * around (6 repeats), sl st to first sc. (36 sts worked 1 per st + 6 extra = 42 sc)
Why the math works: a flat circle of sc needs 6 increases per round. Rnds 2 through 6 each add 6 stitches, and Rnd 7 follows the same rule. That keeps the edging flat, with no ruffles and no curling. The head grows from 2.25 in (5.7 cm) to 2.5 in (6.4 cm).
Hanging loop: Don’t fasten off. Ch 30, then sl st in the same st as the join. Turn the loop and sl st in each of the 30 ch back around the loop, then sl st into the head again. (30 ch, 30 sl sts)
The layer of sl sts makes the loop firm and gives it a twisted, braided look. Fasten off and weave in the tail. The loop stands about 1.5 in (3.8 cm) above the head.
Skirt Hem Edging (White)
Keep working from Row 4 without fastening off.
Row 5 (RS): Ch 1, sc in each of the 7 dc of the first fan; ch 2, sk the ch-2, sc, and ch-2 between fans, sc in each of the 7 dc of next fan; repeat from * 3 times total. The last sc goes into the top of the turning ch. (28 sc + 3 ch-2 sps)
Why the math works: Row 4 has 4 fans of 7 dc, so the edging starts with 4 x 7 = 28 sc. There are 3 gaps between fans, and each one gets a ch-2 bridge. Each fan keeps its rounded scallop and nothing gets pulled in. The edging adds about 0.25 in (0.6 cm), bringing the skirt to 2.75 in (7.0 cm) tall.
Fasten off, leaving a 12 in (30.5 cm) white tail for sewing.
Face Embroidery
Split the blue yarn to get a thinner strand, or use a full strand for a bolder look. Keep the loop at the top while you stitch so the face is upright.
- Eyes: Between Rnds 4 and 5, backstitch two small arcs that curve upward, about 0.75 in (1.9 cm) apart. Make each one about 0.5 in (1.3 cm) wide so they look like closed, smiling eyes.
- Beak: On Rnd 3, centered just below the eyes, stitch a small triangle pointing down. Use satin stitch and make it about 0.25 in (0.6 cm) wide.
Weave all the embroidery tails into the back.
Assemble the Angel
- Lay the skirt right side up with the ring at the top. Place the head over it so the bottom of the head covers the Row 1 fan by about 0.5 in (1.3 cm). The top point of the skirt should be hidden behind the face.
- Use the white tail to whipstitch the top of the skirt to the back of the head. Catch only the back loops of the head so nothing shows on the front.
- Place one wing on each side. Tuck the shoulder end (the wide dc end) behind the lower edge of the head and the top corner of the skirt. Angle the narrow tip down and outward. Flip the second wing so the pair mirrors.
- Whipstitch each wing to the back of the head and skirt with its blue tail, using about 0.75 in (1.9 cm) of seam per wing.
- Check from the front that the wings sit evenly and the tips are level.
The finished ornament should measure 5.5 in (14.0 cm) across the wings. It should be 4.75 in (12.1 cm) tall from the top of the head edging to the hem. That height is 2.5 in (6.4 cm) head + 2.75 in (7.0 cm) skirt – 0.5 in (1.3 cm) overlap.
Final Blocking
- Lightly spray the ornament with water until it is damp but not soaked.
- Lay it face up on the blocking mat.
- Pin the head into a true circle, 2.5 in (6.4 cm) across.
- Pin the hem at the center of each of the 4 fans, keeping it straight and 4 in (10.2 cm) wide.
- Open each triangle opening with a pin or your fingertip so the lace shows clearly.
- Smooth the wings flat and pin the tips level with each other.
- Pin the loop straight up.
- Let it dry completely, for at least 6 hours, before you remove the pins.
Final Quality-Control Checklist
- The head is 2.5 in (6.4 cm) across, lies flat, and has 42 sc in the blue edging.
- The loop is centered at the top of the head and feels firm.
- The skirt has 1, 2, 3, and 4 fans in Rows 1 to 4, each with 7 dc.
- The hem edging has 28 sc and 3 ch-2 bridges.
- Each wing has 31 sc in Rnd 3, and the two wings mirror each other.
- The eyes are level and the beak is centered.
- No seams or yarn tails show on the front.
- The total size is 5.5 in (14.0 cm) x 4.75 in (12.1 cm), plus the 1.5 in (3.8 cm) loop.
Troubleshooting
The head curls up like a bowl: You are crocheting too tightly on the increases. Go up a hook size, and check that you have exactly 6 increases per round.
The head ruffles: You have too many stitches or your tension is loose. Recount each round and go down a hook size if needed.
The skirt twists or leans: Check that each sc goes in the center (4th) dc of a fan, not the 3rd or 5th.
The triangle openings close up: Your ch-2s are too tight. Make the chains a little looser.
The wings look like plain ovals: Check that the hdc and dc stitches in Rnd 2 are at the shoulder end. They create the wing’s fuller curve.
The loop flops over: Make sure you worked the full row of sl sts back around the chain, or block the loop pinned straight up.
Care
Hand wash in cool water with mild soap, roll the ornament in a towel to remove water, and dry it flat while reshaping the fans and wings. Store it flat in tissue paper between seasons.
Final Notes
Here is how the measurements add up:
- The 2.25 in (5.7 cm) head grows to 2.5 in (6.4 cm) with its blue edging.
- The skirt grows by one fan per row to 4 in (10.2 cm) wide, and the hem edging brings it to 2.75 in (7.0 cm) tall.
- Two 2.5 in (6.4 cm) wings bring the width to 5.5 in (14.0 cm).
- The 0.5 in (1.3 cm) overlap sets the final height at 4.75 in (12.1 cm).
If your head matches its checkpoint, the other parts should come out the right size too.
Make one for your tree, or make a whole set in an afternoon to use as gift tags and package toppers.
Happy crocheting!