

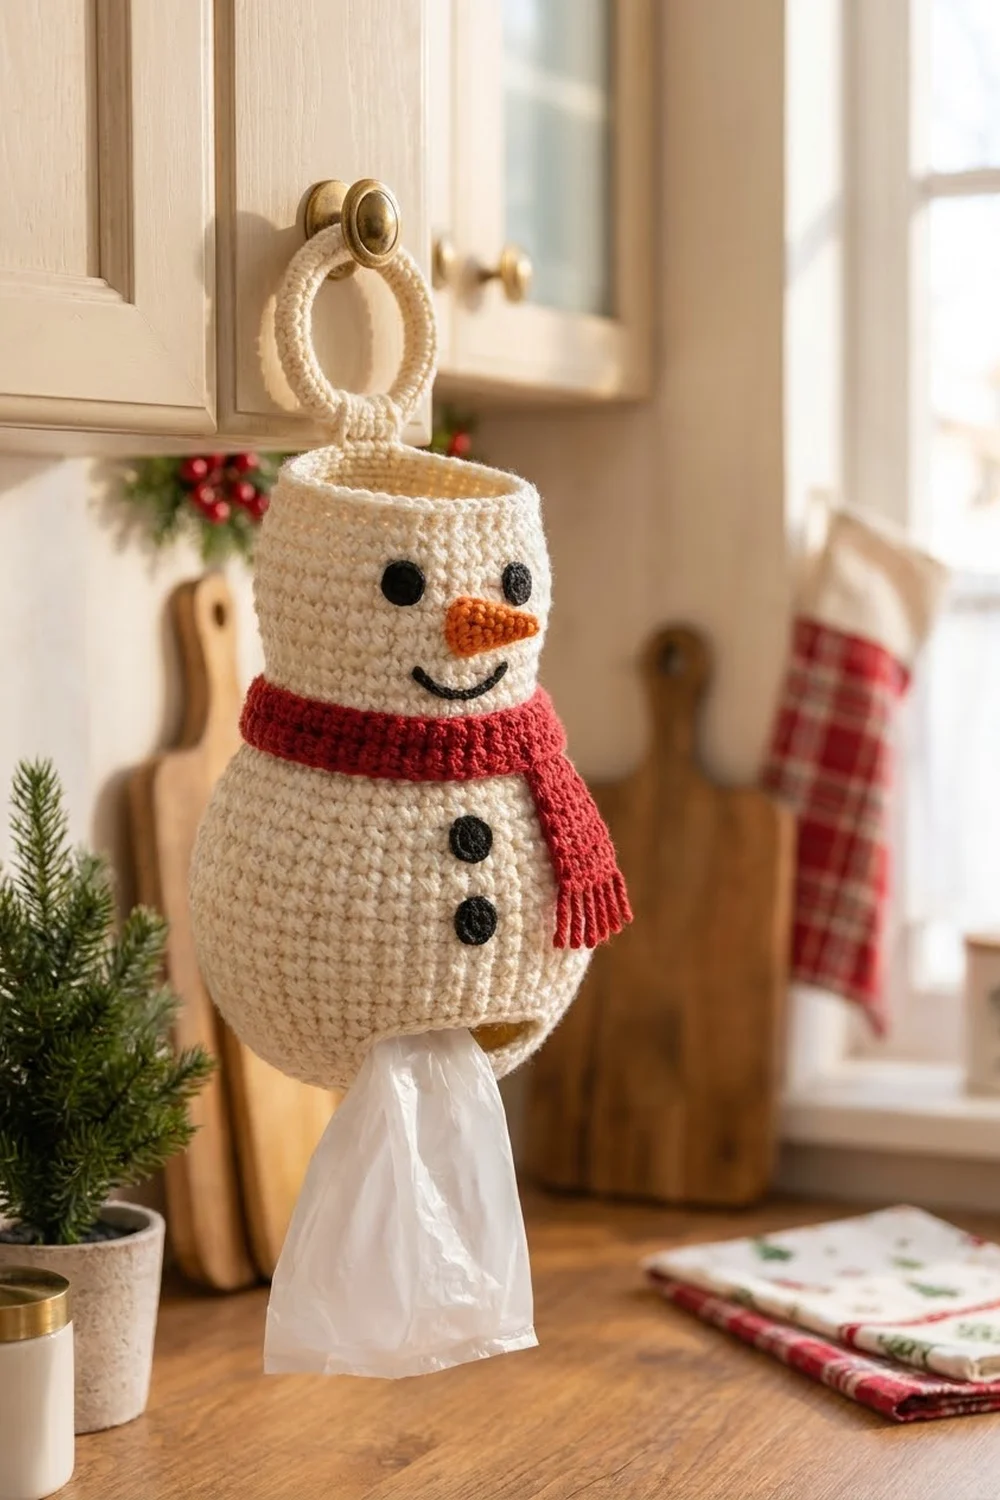
This snowman is a hanging plastic bag holder. You push grocery bags in through the open top and pull them out one at a time through a wide slot near the base. He hangs from a cabinet knob or hook by a covered ring and is useful in the kitchen all winter.
The body is worked in cream single crochet, which makes a dense, sturdy fabric with a soft, nubby texture. Black is used for the eyes, smile and two buttons. Orange makes the carrot nose, and a red ribbed scarf with a fringed tail adds the classic holiday color.
All instructions use US crochet terms. The finished body is about 7.7 in (19.6 cm) wide laid flat and 10 in (25.4 cm) tall. With the hanging ring, the holder is about 14.5 in (36.8 cm) tall.
The body is one seamless piece worked in continuous rounds from the bottom up. You start with a flat circular base, make the bag slot in a single chain round, and shape a rounded lower body. Then you decrease to a neck and work a slightly flared head. The top rim and the slot get a short edging. Finally, you sew on a covered hanging ring, the face, the buttons and the scarf.
Finished Size and Construction
- Finished size: body 7.7 in (19.6 cm) wide flat x 10 in (25.4 cm) tall; 14.5 in (36.8 cm) tall with the ring
- Skill level: Advanced beginner
- Terminology: US
- Yarn weight: Worsted (#4)
- Hook: 4.5 mm (US 7)
- Number of pieces: 1 body plus 9 small parts (hanging ring, 2 eyes, nose, smile, 2 buttons, scarf band, scarf tail)
- Layout: Single 3D piece, worked in the round from the bottom up
- Piece size: 54-stitch body circumference, about 15.4 in (39.1 cm) around
- Size before border: 9.5 in (24.1 cm) tall, from the base edge to the top of Round 46
- Border depth: 0.5 in (1.3 cm) top rim (2 rounds)
Materials
Use a smooth worsted acrylic or cotton blend. A firm yarn keeps the holder upright and stops it stretching under the weight of the bags. Avoid splitty or very fuzzy yarns, because they hide the stitch texture.
- Cream (body, rim, ring, tab): 80 g / 145 m
- Red (scarf): 15 g / 27 m
- Black (eyes, smile, buttons): 5 g / 9 m
- Orange (nose): 3 g / 5 m
Tools:
- 4.5 mm (US 7) crochet hook
- 3 in (7.6 cm) plastic or metal ring
- Stitch markers (at least 2)
- Tapestry needle
- Scissors
- Tape measure
- Straight pins
All quantities include a margin of about 15 percent for gauge testing and differences in tension.
Abbreviations (US Terms)
- ch – chain
- sc – single crochet
- hdc – half double crochet
- sl st – slip stitch
- inc – 2 sc in the same stitch
- dec – sc2tog (single crochet 2 together)
- BLO – back loop only
- MR – magic ring
- st(s) – stitch(es)
- rnd(s) – round(s)
Special stitch – reverse sc (crab stitch): Work from left to right with the right side facing. Insert the hook into the next stitch to the right, yarn over and pull up a loop. Yarn over again and draw through both loops.
Gauge and Checkpoints
Gauge: 14 sc and 16 rnds = 4 in (10.2 cm), worked in the round.
The base doubles as your gauge test. Work Rounds 1–8 and measure before you go on to the body. If it matches the checkpoint below, keep going on the same piece.
Checkpoints:
- After Round 8: base is about 4.4 in (11.2 cm) across
- After Round 14: slot is 4 in (10.2 cm) wide
- After Round 30: body is 7.7 in (19.6 cm) wide flat and 5.5 in (14.0 cm) tall from Round 9
- After Round 35: neck is 5.1 in (13.0 cm) wide flat
- After Round 46: top is 6.9 in (17.5 cm) wide flat; height is 9.5 in (24.1 cm)
- After the rim: height is 10 in (25.4 cm)
Too big? Go down to a 4.0 mm (US G-6) hook. Too small? Go up to a 5.0 mm (US H-8) hook. If you’re unsure, choose the firmer fabric, because loose fabric sags when the holder is full.
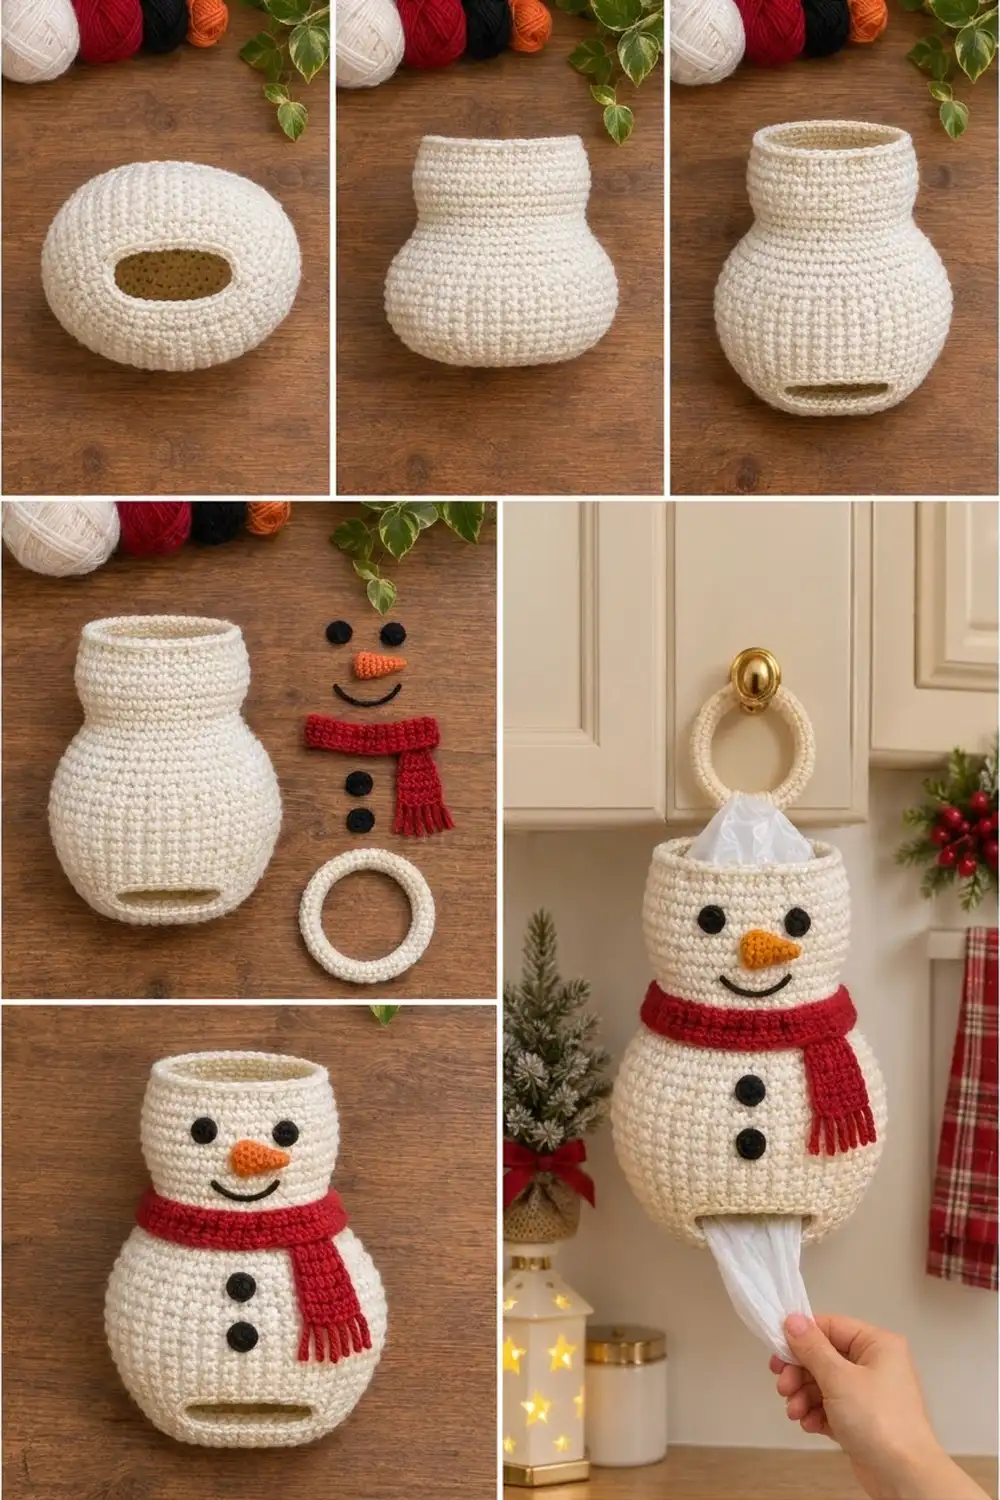
Body
Work in continuous spiral rounds without joining. Put a marker in the first stitch of each round and move it up as you go. The start of the round sits at the center back.
Base
- Rnd 1: With cream, MR, 6 sc in the ring. (6)
- Rnd 2: Inc in each st around. (12)
- Rnd 3: (Sc 1, inc) 6 times. (18)
- Rnd 4: (Sc 2, inc) 6 times. (24)
- Rnd 5: (Sc 3, inc) 6 times. (30)
- Rnd 6: (Sc 4, inc) 6 times. (36)
- Rnd 7: (Sc 5, inc) 6 times. (42)
- Rnd 8: (Sc 6, inc) 6 times. (48)
Checkpoint: the base lies flat and measures about 4.4 in (11.2 cm) across. If it ruffles, your stitches are too loose. If it cups, they are too tight.
Rounded lower body
- Rnd 9: Sc in each st around. (48)
- Rnd 10: (Sc 7, inc) 6 times. (54)
- Rnds 11–12: Sc in each st around. (54)
These rounds are worked through both loops, so the base curves up gradually and the bottom stays soft and rounded.
Bag slot
- Rnd 13: Sc 20, ch 14, skip the next 14 sts, sc 20. (40 sc + 14 ch)
- Rnd 14: Sc 20, sc 1 in the back bump of each of the 14 ch, sc 20. (54)
The slot sits at the center front, opposite the marker. It is 14 sts or 4 in (10.2 cm) wide.
Main body
- Rnds 15–30: Sc in each st around. (54)
Checkpoint: the body is 7.7 in (19.6 cm) wide flat and 5.5 in (14.0 cm) tall from Round 9.
Shoulders and neck
- Rnd 31: (Sc 7, dec) 6 times. (48)
- Rnd 32: Sc in each st around. (48)
- Rnd 33: (Sc 6, dec) 6 times. (42)
- Rnd 34: (Sc 5, dec) 6 times. (36)
- Rnd 35: Sc in each st around. (36)
These 5 rounds take up 1.25 in (3.2 cm) and give the clear waist between the body and head.
Head
- Rnd 36: (Sc 5, inc) 6 times. (42)
- Rnds 37–45: Sc in each st around. (42)
- Rnd 46: (Sc 6, inc) 6 times. (48)
The head is 11 rounds, or 2.75 in (7.0 cm) tall. Round 46 flares it slightly so the opening is wide enough for loading bags. Don’t fasten off; go straight on to the border.
Hanging Ring and Tab
- Ring cover: Join cream to the ring. Work 52 sc around the ring, pushing the stitches close together so no ring shows through. Sl st to the first sc. (52)
- Tab Row 1: Ch 1, sc in the next 6 sts of the ring cover. Turn. (6)
- Tab Rows 2–6: Ch 1, sc 6. Turn. (6)
Fasten off and leave a 12 in (30.5 cm) tail. The tab is 1.7 in (4.3 cm) wide and 1.5 in (3.8 cm) long. The covered ring is about 3.5 in (8.9 cm) across.
Face, Buttons and Scarf
Eyes (make 2, black): MR, 6 sc, sl st to the first sc. (6) Each eye is about 0.5 in (1.3 cm) across.
Buttons (make 2, black): MR, 8 hdc, sl st to the first hdc. (8) Each button is about 0.75 in (1.9 cm) across.
Smile (black): Ch 12, sl st in the 2nd ch from the hook and in each ch across. (11) The smile is about 2 in (5.1 cm) long.
Nose (orange): Work in a spiral.
- Rnd 1: MR, 4 sc. (4)
- Rnd 2: (Sc 1, inc) 2 times. (6)
- Rnd 3: Sc 6. (6)
- Rnd 4: (Sc 2, inc) 2 times. (8)
- Rnd 5: Sc 8. (8)
Fasten off and leave a long tail. The nose is 1.25 in (3.2 cm) long. Don’t stuff it; just press it lightly flat.
Scarf band (red): Ch 47.
- Row 1: Sc in the 2nd ch from the hook and in each ch across. Turn. (46)
- Rows 2–5: Ch 1, sc in BLO across. Turn. (46)
The band is about 13.1 in (33.3 cm) long and 1.25 in (3.2 cm) wide.
Scarf tail (red): Ch 17.
- Row 1: Sc in the 2nd ch from the hook and across. Turn. (16)
- Rows 2–5: Ch 1, sc in BLO across. Turn. (16)
The tail is 4.6 in (11.7 cm) long. Fringe: Cut 5 strands of red, each 2 in (5.1 cm) long. Fold each strand in half and attach it to one short end with a lark’s head knot, one strand per row end. Trim the fringe to 0.75 in (1.9 cm).
Border: Top Rim and Slot Edging
Border gauge: Same as the body, 14 sc = 4 in (10.2 cm). This keeps the rim the same width as Round 46.
Top rim (cream, continuing from Round 46):
- Rim Rnd 1: Sc in each st around, sl st to the first sc. (48)
- Rim Rnd 2: Ch 1, reverse sc in each st around, sl st to join. (48)
Fasten off. The rim adds 0.5 in (1.3 cm), which brings the body to 10 in (25.4 cm) tall.
Slot edging (trim round): Join cream at the right corner of the slot.
- Slot Rnd: Sc 14 along the bottom edge, working into the Round 12 stitches that were skipped. Sc 1 at the left end. Sc 14 along the top edge, working into the base of the Round 14 stitches. Sc 1 at the right end. Sl st to join. (28 sc worked 1 per existing st + 2 end sc = 30)
Why the math works: Each long side of the slot has exactly the 14 sts that were skipped or chained. One sc per stitch keeps each edge at 4 in (10.2 cm) with no ruffling. The 2 end stitches let the corners turn without pulling. The top rim keeps the same 48 sts as Round 46, so it neither flares nor tightens.
Assembly
- Find the front. The center of the slot marks the center front.
- Tab: Sew the last 2 rows of the tab inside the rim at the center back. This 0.5 in (1.3 cm) overlap leaves 1 in (2.5 cm) of tab showing. Sew through both layers twice so it’s strong.
- Eyes: Sew them on Round 42, 6 sts apart, centered above the slot.
- Nose: Sew it on Round 40, centered between the eyes and pointing slightly to one side.
- Smile: Pin it in a gentle curve across Rounds 38–39, then whipstitch it in place.
- Scarf band: Wrap it around the neck so it covers Rounds 31–35. Overlap the ends by 1 in (2.5 cm) just right of center front. Tack the band in place at the back and sides.
- Scarf tail: Tuck the end without fringe under the overlap, sew it in place, and let it hang down over the body.
- Buttons: Sew them on Rounds 26 and 22, centered above the slot.
Final Blocking
- Weave in all ends on the inside.
- Stuff the body firmly with a rolled towel or plastic bags.
- Shape the waist with your fingers and round out the head and lower body.
- Hold a steam iron 1 in (2.5 cm) above the fabric and steam lightly. Never press acrylic.
- Pin the scarf tail flat and steam it so it hangs straight.
- Let it dry completely before removing the stuffing.
Final Quality-Control Checklist
- Body measures 7.7 in (19.6 cm) wide flat and 10 in (25.4 cm) tall
- Slot is 4 in (10.2 cm) wide, centered, with a smooth edge
- Neck is clearly narrower than both the head and the body
- Top rim lies evenly with no gaps
- Tab is sewn securely and holds a firm tug on the ring
- Face, scarf and buttons line up on the center front
- No ends show on the outside
Troubleshooting
- Base cups or ruffles: Recount your stitches, then change hook size.
- Base looks hexagonal: Stagger the increases by working half the leading sc before the first inc on alternate rounds.
- Slot is off-center: Spiral rounds drift slightly, so line the face up with the slot rather than the marker.
- Slot gapes or droops: Work the slot edging more tightly, or add a round of sl st.
- Holder stretches when full: The fabric is too loose; remake it with a smaller hook.
- Ring shows through the cover: Add sc until the cover is tightly packed, then recenter the tab.
Care
Spot clean with mild soap and cool water, or hand wash it. Dry it flat, stuffed into shape, and don’t tumble dry.
Final Notes
Here is the measurement chain from start to finish:
- The 48-stitch base is 4.4 in (11.2 cm) across.
- It grows into a 54-stitch body 7.7 in (19.6 cm) wide flat.
- The body narrows to a 36-stitch neck 5.1 in (13.0 cm) wide.
- The head flares to a 48-stitch rim 6.9 in (17.5 cm) wide.
- The body is 9.5 in (24.1 cm) tall before the border and 10 in (25.4 cm) after it.
- The ring brings the total height to 14.5 in (36.8 cm).
Check your gauge on the base and match each checkpoint, and your snowman will keep his shape and hand out bags neatly all season.
Happy crocheting!