

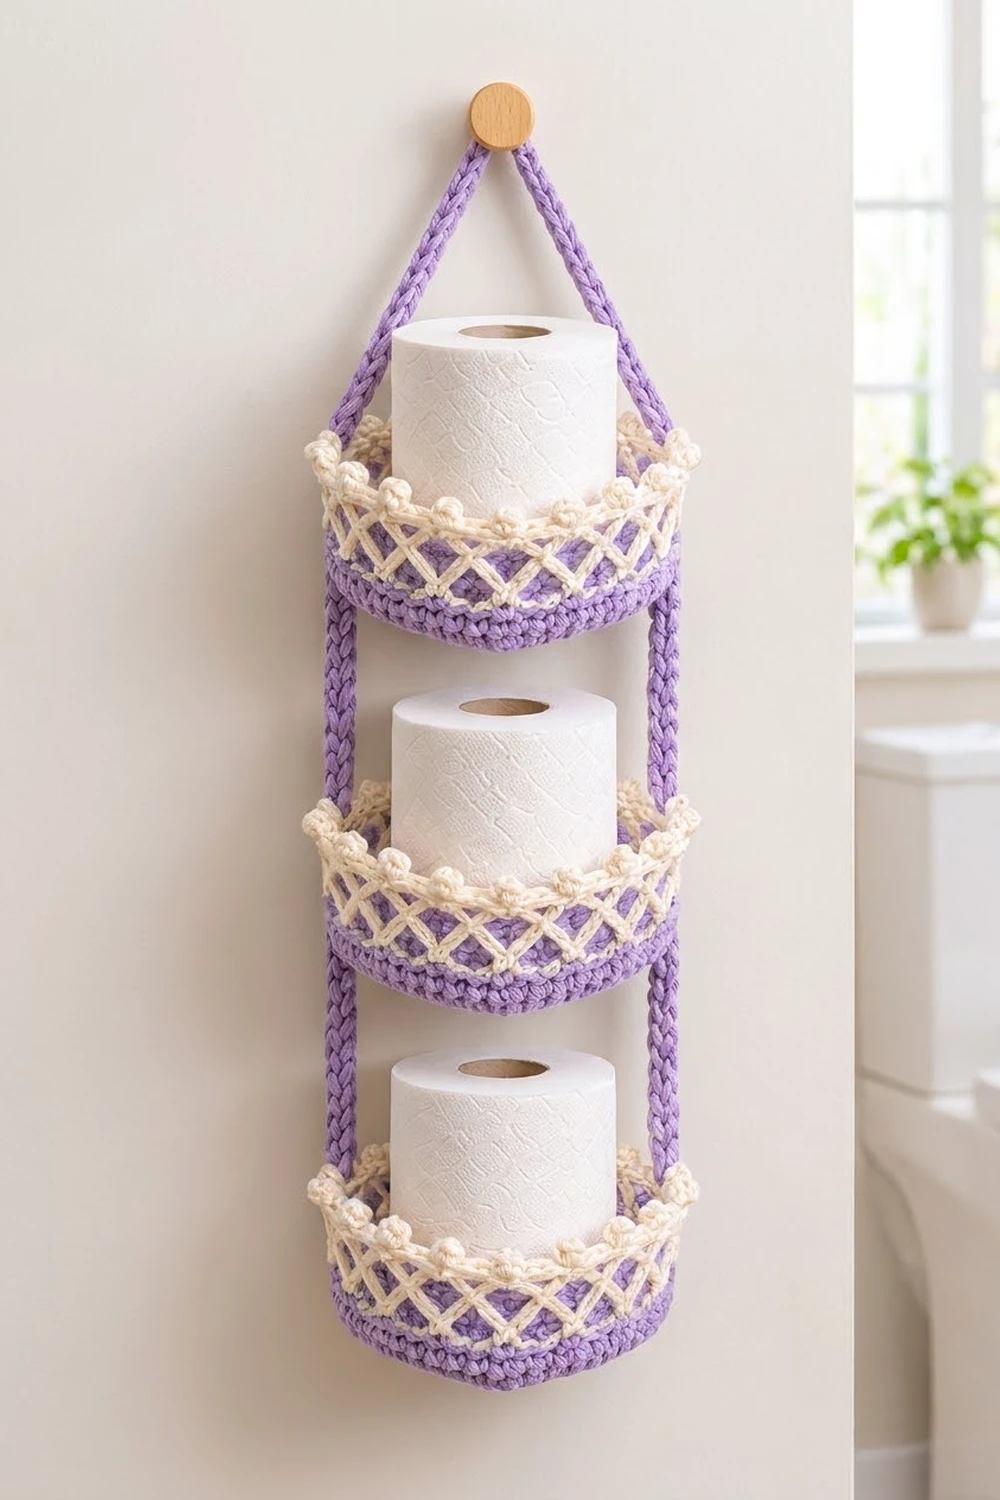
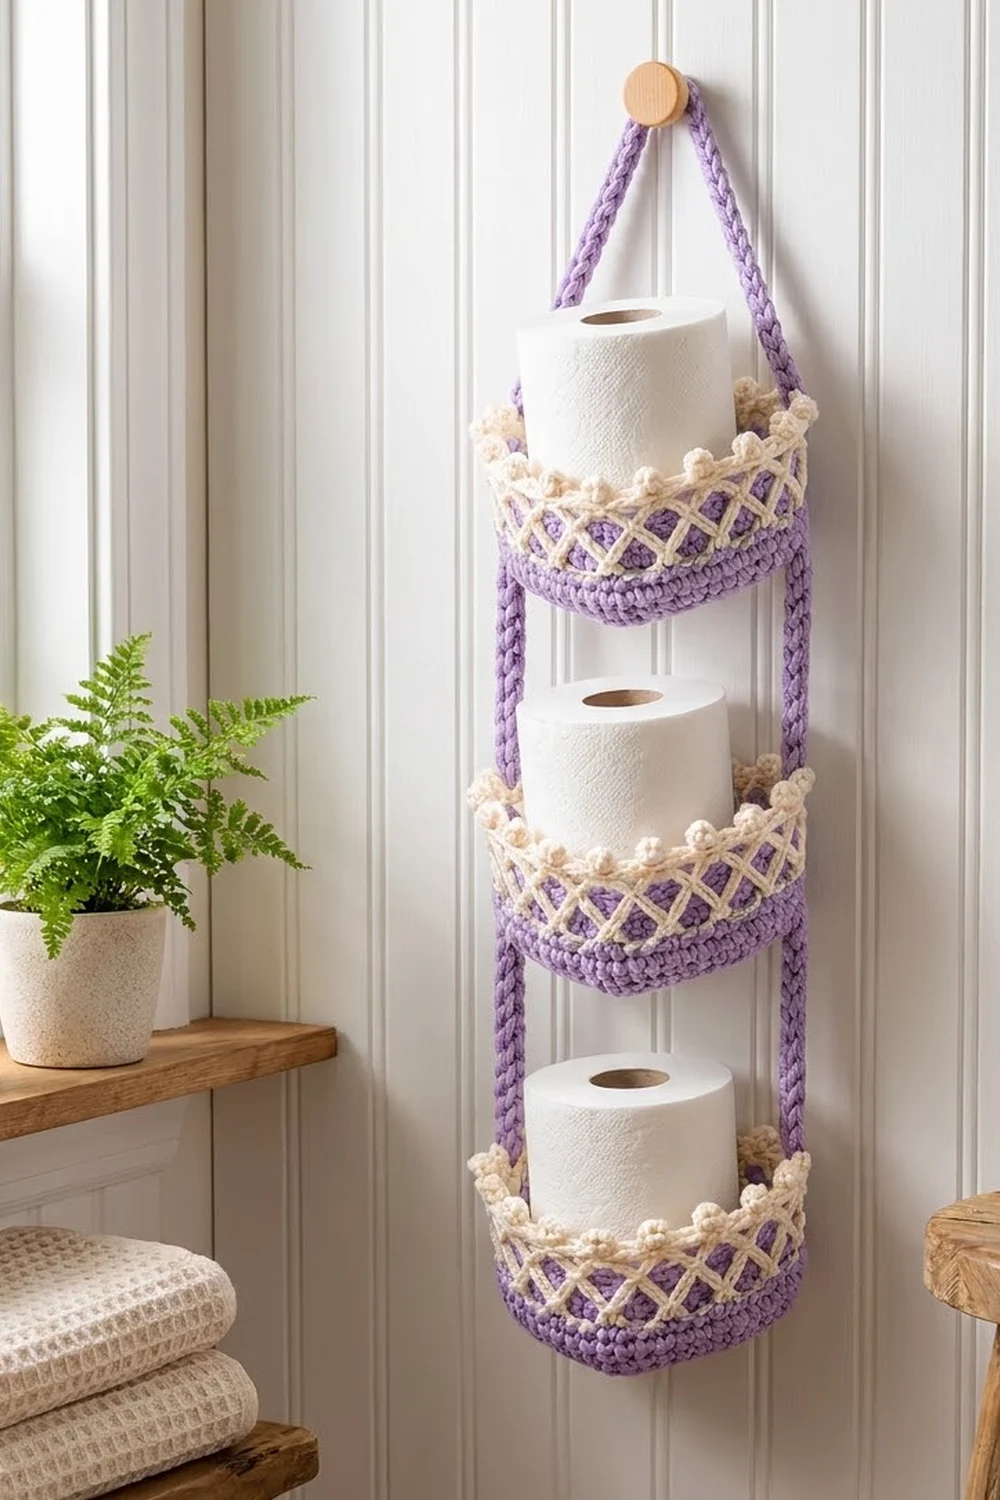
This hanging organizer stacks three heart-shaped baskets on two slim braided straps. Each basket has a solid lavender heart base, a short lavender wall, and an open cream lattice rim trimmed with small bead picots. On a peg, it holds one toilet paper roll per tier. It also works well for washcloths, hair ties, or yarn cakes.
The colors are soft and fresh: lavender for the structure and cream for the lattice. It looks like a pretty cottage-style bathroom piece, but the stitches are simple and sturdy. It’s worked in bulky cotton so the baskets hold their shape, even when full.
This pattern uses US crochet terms. Each basket is about 7 in (17.8 cm) wide, 5.75 in (14.6 cm) front to back, and 4.25 in (10.8 cm) tall. The assembled organizer hangs about 27 in (68.6 cm) tall and 7.75 in (19.7 cm) wide.
You make it in three stages. First, work an oval base around a foundation chain and shape it into a heart in one round. Next, crochet the wall and lattice rim straight up. Finally, sew two slip-stitch cords to the sides of all three baskets and join them at the top to form a hanging peak.
Finished Size and Construction
- Finished size: about 7.75 in (19.7 cm) wide × 27 in (68.6 cm) tall, hanging
- Skill level: Intermediate
- Terminology: US
- Yarn weight: Bulky (#5) cotton or cotton cord
- Hook: 6.0 mm (J-10)
- Number of pieces: 5 (3 baskets, 2 straps)
- Layout: 3 baskets stacked vertically, 3 in (7.6 cm) apart
- Piece size: each basket 7 in (17.8 cm) × 5.75 in (14.6 cm) × 4.25 in (10.8 cm) tall; each strap 28 in (71.1 cm) long
- Size before border: heart base with a 1.25 in (3.2 cm) lavender wall
- Border depth: cream lattice rim, 3 in (7.6 cm)
Materials
Choose a smooth, firm bulky cotton or 3–4 mm cotton cord, about 115 m per 100 g. Cotton gives crisp stitches and stiff walls. Acrylic will work, but the baskets will be softer and may slump under a full roll. If you substitute a yarn, choose one that matches the base gauge below. Matching the yardage alone is not enough.
- Lavender: 150 g (about 170 m)
- Cream: 100 g (about 115 m)
- 6.0 mm (J-10) crochet hook
- Tapestry needle
- 4 locking stitch markers
- Scissors and a tape measure
- Rustproof pins and a blocking surface
The quantities include a margin of about 25 percent.
Abbreviations (US Terms)
- ch – chain
- sl st – slip stitch
- sc – single crochet
- hdc – half double crochet
- dc – double crochet
- tr – treble crochet
- BLO – back loop only
- st(s) – stitch(es)
- sp – space
Special stitches
- Cross stitch (Xst): Skip 2 sts, tr in next st, ch 1. Then, working in front of the tr you just made, tr in the first skipped st. One Xst uses 3 sts and makes 3 sts (tr, ch-1 sp, tr).
- Bead picot (bp): Ch 3, sl st in 3rd ch from hook. Picots never count as stitches.
Gauge and Checkpoints
- Base gauge: 12 sc and 13 rounds = 4 in (10.2 cm)
- Lattice gauge: 1 Xst = 1 in (2.5 cm) wide and about 1 in (2.5 cm) tall
- Strap gauge: 8 sl sts = 2 in (5.1 cm)
Make one complete basket before anything else. It is your gauge swatch. Measure the base flat on a table, without stretching it, across the widest part and from the dip to the point.
Checkpoints:
- After Round 8: oval about 6.25 in (15.9 cm) × 5 in (12.7 cm)
- After Round 9: heart about 7 in (17.8 cm) × 5.75 in (14.6 cm)
- After Round 13: lavender wall 1.25 in (3.2 cm) tall
- After Round 18: total wall 4.25 in (10.8 cm) tall
If the oval is more than 0.25 in (0.6 cm) too big, use a hook 0.5 mm smaller. If it’s too small, use a hook 0.5 mm larger. A base that ruffles means your tension is loose. A base that cups before Round 10 means it’s tight. Fix the gauge rather than changing the stitch counts, because the lattice needs exactly 66 stitches.
Basket (Make 3)
Oval Base
Use lavender. Join each round with a sl st to the first sc. The ch 1 at the start of a round does not count as a stitch.
Round 1: Ch 7. Sc in 2nd ch from hook and next 4 ch, 3 sc in last ch. Rotate and work along the other side of the chain: sc in next 4 ch, 2 sc in last ch (the ch holding the first sc). Join. (14 sts)
This makes two straight sides of 4 sts and two rounded ends of 3 sts.
Rounds 2–8: Every round follows the same formula, where k = round number minus 2 (k = 0 in Round 2, k = 6 in Round 8):
Ch 1, (sc in next k sts, 2 sc in next st) once, sc in next 4 sts, (sc in next k sts, 2 sc in next st) 3 times, sc in next 4 sts, (sc in next k sts, 2 sc in next st) 2 times. Join.
Each round adds 6 sts, all in the rounded ends. The straight sides stay at 4 sts.
| Round | k | Total sts |
|---|---|---|
| 2 | 0 | 20 |
| 3 | 1 | 26 |
| 4 | 2 | 32 |
| 5 | 3 | 38 |
| 6 | 4 | 44 |
| 7 | 5 | 50 |
| 8 | 6 | 56 |
After Round 8 you have 56 sts. Sts 9–12 and 37–40 are the straight sides. Fasten off.
Counting from the first st of Round 8, place marker A in st 10 and marker B in st 38. There are exactly 27 sts between A and B on each side.
Heart Shaping
Round 9: Join lavender with a sl st in st A. This sl st is the heart’s dip and counts as 1 st.
- Right half (27 sts): sc in next 3 sts, hdc in next 2 sts, 2 dc in each of next 4 sts, dc in next 2 sts, hdc in next 4 sts, sc in next 12 sts. (31 sts)
- Point: (sc, dc, sc) in st B. (3 sts)
- Left half (27 sts): sc in next 12 sts, hdc in next 4 sts, dc in next 2 sts, 2 dc in each of next 4 sts, hdc in next 2 sts, sc in next 3 sts. (31 sts)
Join with a sl st to the first sl st. (66 sts: 1 + 31 + 3 + 31)
The taller dc groups raise the two lobes, the sl st pulls in the dip, and the dc at B sharpens the point. From here on, st 1 is the dip, sts 33–35 are the point, and st 34 is the center of the point.
Lavender Wall
Round 10: Ch 1, sc in BLO of each st around. Join. (66 sts)
The unworked front loops form a crisp ridge, so the wall turns straight up.
Rounds 11–13: Ch 1, sc in each st around. Join. (66 sts)
Fasten off. The wall measures 1.25 in (3.2 cm). Every round starts at the dip, so the joins stay hidden there. Weave the lavender tail up the inside so it doesn’t show through the lattice later.
Border: Cream Lattice Rim
The lattice rim is the border of each basket.
Border gauge: 1 Xst = 1 in (2.5 cm) wide, using 3 sts.
Round 14: Join cream in st 1 (the dip). Ch 1, sc in each st around. Join. (66 sts: 33 per half)
Round 15: Ch 4 (does not count). Work 22 Xst around. Join with a sl st to the top of the first tr. (22 Xst = 66 sts: 11 Xst per half)
Round 16: Ch 1, sc in next tr, (sc, bp) in next ch-1 sp, sc in next tr; repeat from * around. Join. (66 sc + 22 bp)
Push each picot to the outside. These picots form the middle row of beads.
Round 17: Ch 4 (does not count). Work 22 Xst around. Work only into the sc and skip behind the picots. Join. (22 Xst = 66 sts)
Start the first Xst in the same st as in Round 15. That way the crosses stack and the open triangles between them line up as diamonds.
Round 18: Repeat Round 16. (66 sc + 22 bp) Fasten off.
These picots form the beaded top edge.
Why the math works: The rim always has 66 sts, which is 3 × 22. Each half of the heart holds 33 sts, or 11 Xst. The count never changes and the picots don’t count, so the wall rises straight without flaring or pulling in.
Strap (Make 2)
Use lavender.
Ch 113. Sl st in back bump of 2nd ch from hook and each ch across. (112 sl sts) Fasten off, leaving a 12 in (30.5 cm) tail.
The strap measures 28 in (71.1 cm). Work the sl sts loosely so the cord stays flexible and doesn’t twist. If your strap is short, rip it out and redo it with looser slip stitches rather than adding chains. The section counts below depend on exactly 112 sts.
Counting from the tail end, mark these sections:
- Sts 1–37: free top leg, 9.25 in (23.5 cm)
- Sts 38–54: basket 1, 4.25 in (10.8 cm)
- Sts 55–66: gap, 3 in (7.6 cm)
- Sts 67–83: basket 2
- Sts 84–95: gap
- Sts 96–112: basket 3
Total: 37 + 17 + 12 + 17 + 12 + 17 = 112 sts.
Make All Pieces
- Baskets: 3, each with lavender Rounds 1–13 and cream Rounds 14–18
- Straps: 2, lavender
Layout grid:
           /\          peak: st 1 of both straps
          /  \         strap legs: sts 1-37
         /    \
       | B1     |      sts 38-54
       |        |      gap: sts 55-66
       | B2     |      sts 67-83
       |        |      gap: sts 84-95
       | B3     |      sts 96-112
Joining
Method: Whipstitch with lavender yarn and a tapestry needle.
Attachment points: On each basket, mark st 18 (right side) and st 50 (left side). Each is 17 sts from the dip and 16 sts from the center of the point (st 34), so the basket hangs level.
Stitch-to-stitch logic: Each 17-st strap section covers the full 4.25 in (10.8 cm) wall. Pin three spots on the strap section to the wall:
- the top st of the section (for example, st 38) at the Round 18 edge
- the bottom st (st 54) at the Round 10 ridge
- the middle st (st 46) halfway up Round 15
Then whipstitch through every strap st and the matching wall column, catching both the lavender and the cream rounds.
Attach basket 1, then basket 2, then basket 3 to the right strap. Repeat with the left strap at st 50, checking that each gap is 3 in (7.6 cm) on both sides.
Peak: Overlap sts 1–3 of both straps and whipstitch them together through both layers, back and forth twice. Use the 12 in (30.5 cm) tails for this, then bury them inside the strap.
Tension: Pull each whipstitch snug but not tight. Sewing too tightly puckers the wall. Sewing too loosely lets the basket tip forward.
Size checkpoint: Lay the organizer flat. The basket section should measure 18.75 in (47.6 cm) from the top of basket 1 to the base of basket 3.
Final Blocking
Block the whole organizer at once so all three hearts match.
- Lightly mist each basket with water until damp.
- Stuff each basket firmly with a toilet roll or a towel wrapped in plastic.
- Pinch the point and push out the two lobes so the heart outline is clear.
- Pin the bead picots so they stand upright along Rounds 16 and 18.
- Lay the straps flat and straight, pinning each end.
- Let everything dry completely, about 24 hours.
- Remove the stuffing and pins and hang the organizer.
Final Quality-Control Checklist
- Each basket has 66 sts in every round from 9 to 18
- Each lattice round has 22 Xst
- Each picot row has 22 bead picots
- All three hearts match within 0.25 in (0.6 cm)
- Each strap has 112 sl sts and measures 28 in (71.1 cm)
- Straps are attached at sts 18 and 50 on every basket
- Gaps between baskets measure 3 in (7.6 cm)
- The peak is sewn securely and all ends are woven in
Troubleshooting
The base ruffles. Your tension is loose or your hook is too large. Use a hook 0.5 mm smaller.
The base cups early. Your tension is tight. Use a hook 0.5 mm larger, or work the increase stitches more loosely.
The heart looks like an oval. Check that Round 9 started exactly at st A. Mist it and pinch the point and lobes while blocking.
The crosses lean or don’t stack. You started Round 17 in a different st. Start each Xst round in st 1.
The rim flares. Your tr stitches are too loose. Shorten the ch 1 between the trebles.
The rim leans inward. Your sc rounds are tight. Work Rounds 16 and 18 a little more loosely.
The picots flatten. Re-block with the picots pinned upright, or make each picot with a slightly tighter sl st.
The baskets tilt. The straps are sewn at uneven positions. Recount from the dip to sts 18 and 50.
The organizer hangs crooked. One strap section is stretched. Compare the strap stitch markers side by side and re-sew.
A strap twists. Block it flat, or sew on the baskets first and let their weight straighten it.
Care
Hand wash in cool water with mild soap. Reshape and dry flat, and keep it out of the dryer.
Final Notes
Here is how the measurements build on each other:
- A gauge of 12 sc = 4 in (10.2 cm) gives a 56-st oval of 6.25 in (15.9 cm) × 5 in (12.7 cm).
- Round 9 turns it into a 66-st heart of 7 in (17.8 cm) × 5.75 in (14.6 cm).
- Twenty-two Xst on 66 sts build a wall 4.25 in (10.8 cm) tall.
- Two 112-st straps, sewn at sts 18 and 50, stack the baskets 3 in (7.6 cm) apart for an organizer 27 in (68.6 cm) tall.
Check your gauge on the first basket, and the rest will come out the right size.
Happy crocheting!