

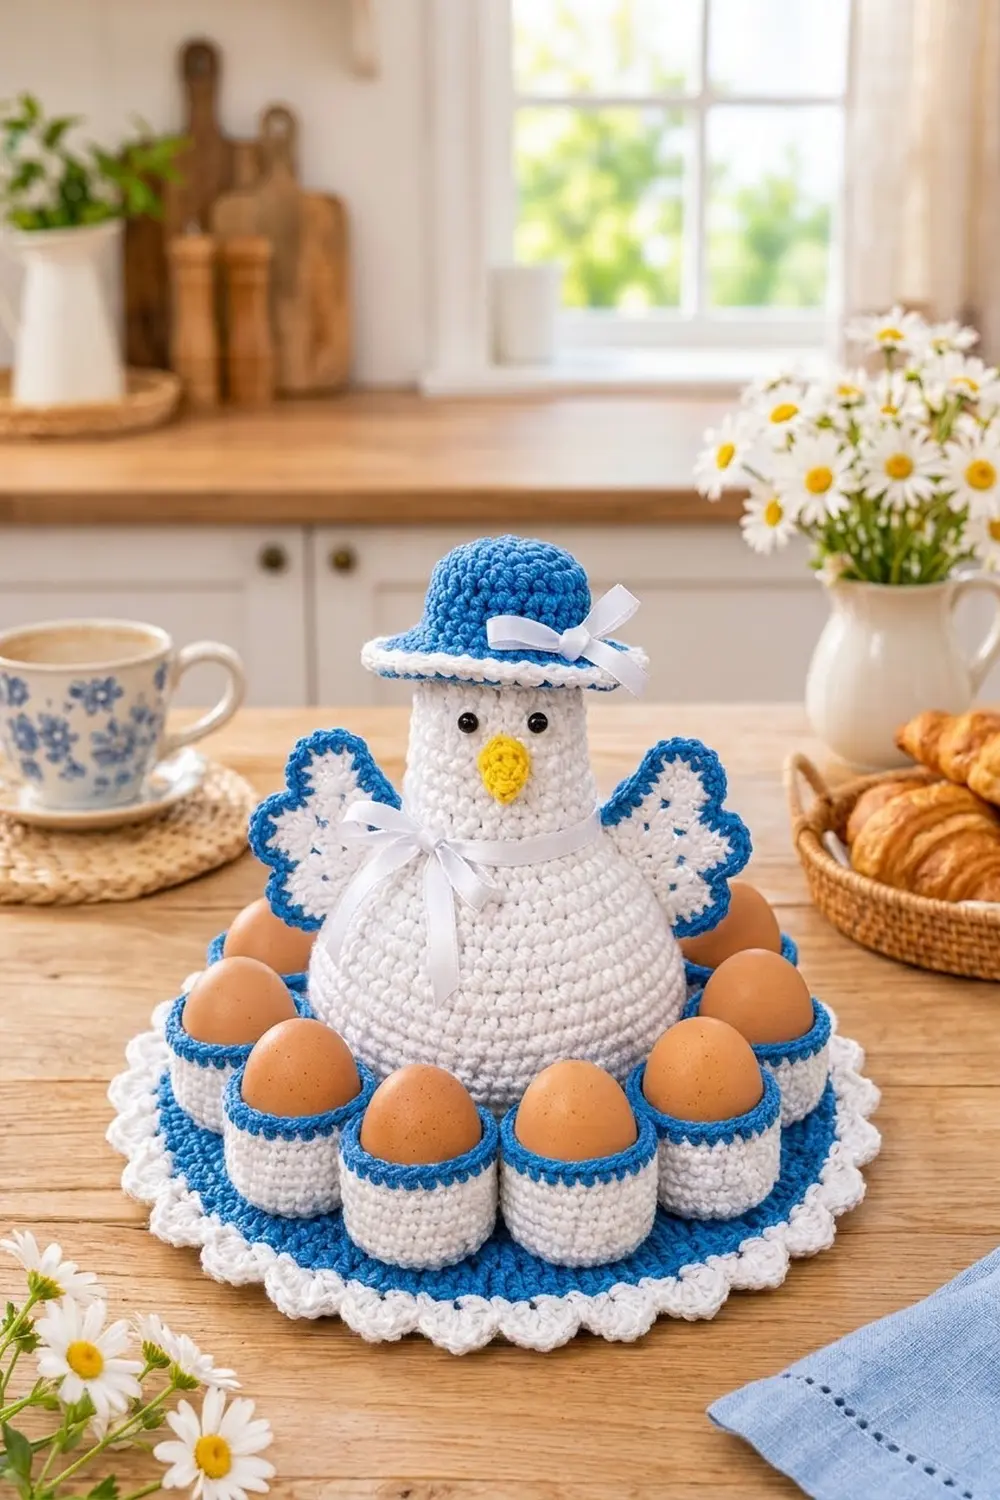
This cheerful hen sits in the middle of a round blue tray and keeps ten eggs in a ring of little cups around her. She works as a country-style Easter centerpiece, a brunch table decoration, or a practical holder on a kitchen counter.
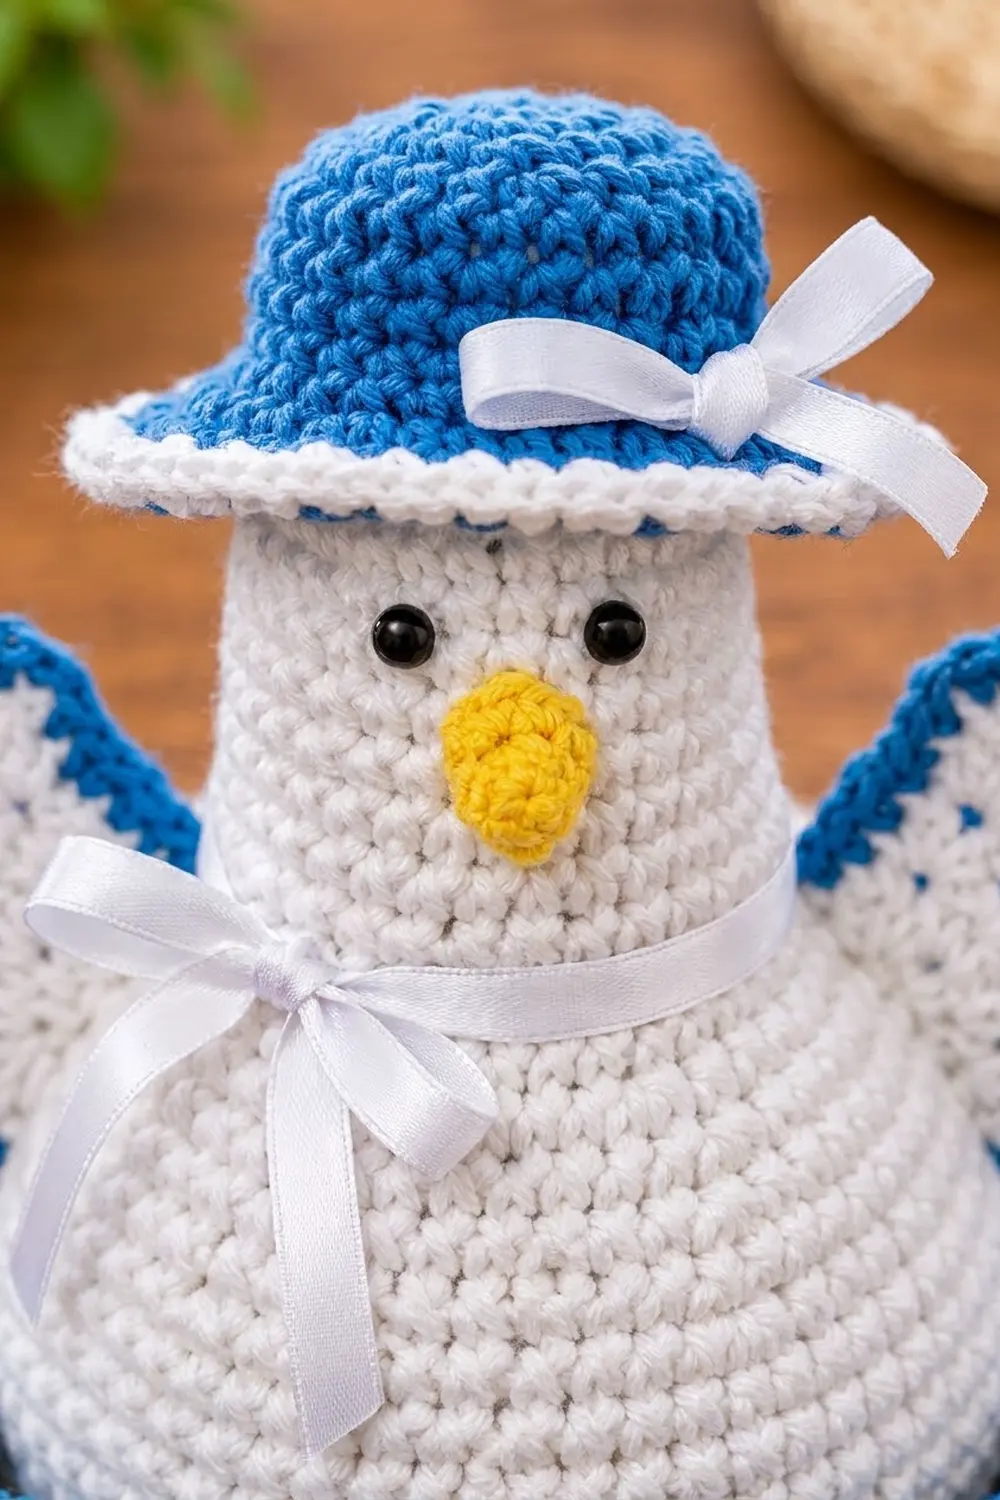
The palette is classic blue and white: a solid royal-blue base with a white shell-scallop edge, white egg cups with blue rims, and a white hen with blue-trimmed lace wings and a little blue sun hat. A yellow beak and white satin bows finish her off.
The pattern uses US crochet terms throughout. The finished base measures 11.5 in (29.2 cm) across, each egg cup is 2.0 in (5.1 cm) wide, and the hen stands 4.6 in (11.7 cm) tall before her hat.
Every piece is worked separately in single crochet spirals and simple shell rows: one base, ten cups, one hen body, two wings, one hat, and one beak. You then sew the hen to the center of the base and the cups in a ring around her.
Finished Size and Construction
- Finished size: 11.5 in (29.2 cm) base diameter; about 6 in (15.2 cm) tall overall with hat
- Skill level: Easy–Intermediate
- Terminology: US crochet terms
- Yarn weight: Worsted weight (#4) cotton
- Hook: 4.0 mm (US G-6)
- Number of pieces: 16 crocheted pieces (1 base, 10 cups, 1 hen body, 2 wings, 1 hat, 1 beak)
- Layout: Hen centered on the base, 10 cups evenly spaced in a ring around her
- Cup size: 2.0 in (5.1 cm) diameter x 1.8 in (4.6 cm) tall
- Hen body: 4.25 in (10.8 cm) wide x 4.6 in (11.7 cm) tall
- Base before border: 10.0 in (25.4 cm) diameter
- Border depth: 0.75 in (1.9 cm)
Materials
Use a smooth, mercerized or matte worsted-weight cotton. Cotton holds its shape well, so the cups stay upright and the base lies flat. Acrylic also works, but the cups will be softer.
- Blue: 100 g (about 170 m)
- White: 150 g (about 255 m)
- Yellow: 5 g (about 9 m)
These amounts include a margin of about 15 percent for gauge swatches and sewing tails.
Tools and notions:
- 4.0 mm (US G-6) crochet hook
- Two 8 mm black safety eyes
- 3/8 in (1.0 cm) white satin ribbon: 20 in (50.8 cm) for the neck bow and 10 in (25.4 cm) for the hat bow
- Polyester fiberfill
- One 3 in (7.6 cm) circle of plastic canvas or stiff card for the hen’s bottom
- Stitch markers (at least 12)
- Tapestry needle, sewing pins, scissors
- Needle and white sewing thread for the bows
Abbreviations (US Terms)
- ch – chain
- sl st – slip stitch
- sc – single crochet
- dc – double crochet
- inc – 2 sc in the same stitch
- dec – single crochet 2 together (invisible decrease recommended)
- BLO / FLO – back loop only / front loop only
- MR – magic ring
- sk – skip
- st(s) – stitch(es)
- ( ) x6 – repeat the bracketed part the stated number of times
Special stitch – Shell: 7 dc in the same stitch.
Work all spiral pieces in continuous rounds without joining. Move a stitch marker to the first stitch of each round.
Gauge and Checkpoints
Gauge: 18 sc and 20 rounds = 4 in (10.2 cm). That is 4.5 sts and 5 rounds per inch (2.5 cm).
Start with one egg cup as your test piece. Its base (Rnd 5, 30 sts) should measure 2.0 in (5.1 cm) across. If it does, your gauge is right for every piece.
Checkpoints:
- Egg cup Rnd 5: 2.0 in (5.1 cm) diameter
- Base Rnd 10 (60 sts): 4.0 in (10.2 cm)
- Base Rnd 20 (120 sts): 8.0 in (20.3 cm)
- Base Rnd 25 (150 sts): 10.0 in (25.4 cm)
- Hen Rnd 8 (48 sts): 3.2 in (8.1 cm)
Too big? Go down to a 3.75 mm (US F-5) hook. Too small? Go up to a 4.5 mm (US 7) hook. A medium egg is about 1.75 in (4.4 cm) wide, so a cup smaller than 1.9 in (4.8 cm) will not hold it well.
Egg Cup (make 10)
With white:
- Rnd 1: 6 sc in MR. (6)
- Rnd 2: inc in each st around. (12)
- Rnd 3: (sc 1, inc) x6. (18)
- Rnd 4: (sc 2, inc) x6. (24)
- Rnd 5: (sc 3, inc) x6. (30)
Check: 2.0 in (5.1 cm) across.
- Rnd 6: sc in BLO of each st around. (30) This turns the wall up and leaves a ridge of 30 front loops around the bottom edge for sewing.
- Rnds 7–12: sc in each st around. (30)
Change to blue on the last stitch of Rnd 12.
- Rnds 13–14: sc in each st around. (30)
Sl st in the next st and fasten off, leaving a 12 in (30.5 cm) tail. Weave in the white tail.
The wall is Rnds 6–14, which is 9 rounds, so 1.8 in (4.6 cm) tall.
Base
With blue:
- Rnd 1: 6 sc in MR. (6)
- Rnd 2: inc in each st around. (12)
- Rnd 3: (sc 1, inc) x6. (18)
- Rnds 4–25: In each round, work (sc in the next stitches, inc) x6, with one more plain sc before each inc than in the previous round. Each round adds 6 sts, so Rnd n has 6 x n sts.
Key counts: Rnd 8 = 48, Rnd 10 = 60, Rnd 15 = 90, Rnd 20 = 120, Rnd 25 = 150.
To keep the circle round instead of hexagonal, stagger the increases from Rnd 6 onward. In every second round, start with half of the plain stitches, then (inc, sc to the next increase point) around, and end with the rest of the plain stitches.
Check: Rnd 25 measures 10.0 in (25.4 cm). Do not fasten off. The border comes after assembly.
Hen Body
With white:
- Rnd 1: 6 sc in MR. (6)
- Rnds 2–8: Increase as for the base. (12, 18, 24, 30, 36, 42, 48)
Check: 3.2 in (8.1 cm) across.
- Rnd 9: sc in BLO of each st around. (48) This leaves 48 front loops on the bottom edge.
- Rnd 10: (sc 7, inc) x6. (54)
- Rnd 11: (sc 8, inc) x6. (60)
- Rnds 12–18: sc in each st around. (60)
- Rnd 19: (sc 8, dec) x6. (54)
- Rnd 20: sc in each st around. (54)
- Rnd 21: (sc 7, dec) x6. (48)
- Rnd 22: (sc 6, dec) x6. (42)
- Rnd 23: (sc 5, dec) x6. (36)
- Rnd 24: (sc 4, dec) x6. (30)
- Rnds 25–31: sc in each st around. (30)
Sl st in the next st and fasten off. The head stays open at the top.
Face: Put the safety eyes between Rnds 27 and 28, 5 sts apart. Fix the washers before you stuff.
Beak (yellow): Rnd 1: 4 sc in MR. (4) Rnd 2: (sc 1, inc) x2. (6) Rnd 3: (sc 1, inc) x3. (9) Rnd 4: sc in each st around. (9) Flatten the beak into a teardrop and sew it centered between the eyes, from Rnd 26 down to Rnd 25.
Stuffing: Drop the plastic-canvas circle into the bottom. Stuff firmly up to Rnd 24, then leave the head hollow so the hat can sit snugly on the opening.
Wings (make 2)
With white, worked flat:
- Row 1: MR, ch 3 (counts as dc), 6 dc in ring, pull the ring closed, turn. (7 dc)
- Row 2: ch 4 (counts as dc + ch 1), dc in next st, ch 1, dc in next st across, turn. (7 dc, 6 ch-1 sps = 13 sts)
- Row 3: ch 3 (counts as dc), dc in the first st, 3 dc in each ch-1 sp across, dc in the 3rd ch of the turning ch, turn. (2 + 18 + 1 = 21 dc)
- Row 4: ch 1, sc in the first st, sk 1, shell in the next st, sk 1, sc in the next st x5. (5 shells, 6 sc)
Fasten off white.
Edging (blue): Join in the first sc of Row 4. Work along the scalloped top, putting 1 sc in each sc and in each dc, with 3 sc in the 4th (center) dc of each shell: 41 sts worked (35 dc + 6 sc) + 10 extra = 51 sc. Then work 8 sc down the straight side, 3 sc in the ring at the point, and 8 sc up the other side. Total: 51 + 8 + 3 + 8 = 70 sc. Sl st to the first sc and fasten off, leaving a 12 in (30.5 cm) tail.
Each wing measures about 2.25 in (5.7 cm) tall x 2.75 in (7.0 cm) wide.
Hat
With blue:
- Rnds 1–5: Work as egg cup Rnds 1–5. (30)
- Rnds 6–10: sc in each st around. (30)
- Rnd 11: In FLO, (sc 2, inc) x10. (40)
- Rnd 12: (sc 3, inc) x10. (50)
Change to white.
- Rnd 13: sc in each st around. (50) Sl st and fasten off.
The crown has 30 sts, the same as the hen’s neck, so the hat fits over the head opening. The finished hat is about 3.25 in (8.3 cm) across the brim.
Make All Pieces
Totals:
- White: 10 cup bodies, 1 hen body, 2 wing centers, 1 hat edge round, 1 base border
- Blue: 10 cup rims, 1 base, 2 wing edgings, 1 hat
- Yellow: 1 beak
Layout (top view, C = cup, H = hen):
        C   C
     C         C
   C      H      C
     C         C
        C   C
The cups sit in an even ring. Their centers are on base Rnd 20, 12 sts apart.
Joining
Hen to base: Pin the hen to the center of the base. Use a blue tail and whipstitch each of the hen’s 48 front loops from Rnd 8 to one stitch of base Rnd 8 (48 sts). Because the counts match 1:1, the hen sits centered and without puckers.
Cup placement: Put 10 markers in base Rnd 20, one every 12 sts (120 ÷ 12 = 10). Center one cup over each marker. Each cup reaches from about base Rnd 15 to Rnd 25, with about 0.5 in (1.3 cm) between neighbouring cups. That leaves 6.0 in (15.2 cm) of open space in the middle for the 4.25 in (10.8 cm) hen.
Sewing the cups: Use white yarn and whipstitch through the 30 front loops on the cup’s bottom ridge and into the base stitches underneath. Pull each stitch snug but not tight. Too much tension pulls the base into a dome.
Wings: Sew each wing to one side of the body, point down at about Rnd 22 and top edge at about Rnd 18, angled outward.
Size check: The base should still lie flat at 10.0 in (25.4 cm).
Border
Border gauge: Each shell repeat uses 6 sts of Rnd 25, which is about 1.25 in (3.2 cm) of edge.
- Rnd 26 (white): Join white in any st of base Rnd 25. Ch 1, sc in each st around, sl st to the first sc. (150)
- Rnd 27: Ch 1, sc in the first st, sk 2, shell in the next st, sk 2, sc in the next st. Repeat around, but end the last repeat with sk 2 and sl st to the first sc. (25 shells, 25 sc)
Fasten off.
Why the math works: 150 ÷ 6 = 25 exactly, so every repeat is complete and the last shell meets the first sc without a gap. Each 7-dc shell over 6 sts flares just enough to scallop the edge without ruffling it. The border adds 0.75 in (1.9 cm) on each side: 10.0 + 0.75 + 0.75 = 11.5 in (29.2 cm).
Final Blocking
- Pin the base, right side up, to a blocking mat as an 11.5 in (29.2 cm) circle.
- Pin out each scallop.
- Spray with water until damp. Don’t soak the stuffed hen.
- Push each cup into a round shape with a medium egg or a 2 in (5.1 cm) bottle cap.
- Pin the wings flat and open the lace.
- Leave everything to dry completely, about 12 hours.
- Tie the ribbon bows. Tack the 20 in (50.8 cm) bow at the hen’s neck and the 10 in (25.4 cm) bow on the hat brim.
- Set the hat on the head. Tack it in place or leave it removable.
Final Quality-Control Checklist
- Base is 10.0 in (25.4 cm) before the border and 11.5 in (29.2 cm) after
- Border has exactly 25 shells
- All 10 cups are 2.0 in (5.1 cm) wide and 1.8 in (4.6 cm) tall
- Cups are centered on base Rnd 20 at 12-st intervals
- Hen sits upright and doesn’t wobble
- Eyes are level and the beak is centered
- Both wing edgings have 70 sc
- All ends are woven in securely
Troubleshooting
- Base curls up into a bowl: Your tension is too tight, or you skipped increases. Count each round.
- Base ruffles: You have extra stitches. Check Rnd 20 for 120 sts.
- Cups lean: The foot ridge was sewn loosely. Add a second round of whipstitches.
- Hen tips over: Add more stuffing low in the body, or stiffen the bottom circle.
- Hat slides off: Work Rnd 10 with a 3.75 mm (US F-5) hook, or tack the hat in place.
- Shells look crowded: Recount Rnd 26. It needs exactly 150 sts.
Care
Spot clean with mild soap and cool water, then reshape and dry flat. Don’t machine wash, because of the stuffing, safety eyes, and ribbon.
Final Notes
The measurement chain is simple. At gauge, the 2.0 in (5.1 cm) test cup confirms 4.5 sts per inch. The base grows to 10.0 in (25.4 cm) at 150 sts, and the hen’s 48-st foot matches base Rnd 8 stitch for stitch. Ten cups fit on Rnd 20 at 12 sts apart, and the 25-shell border brings the piece to 11.5 in (29.2 cm). If you check each number as you go, the hen and her eggs will sit neatly every time.
Happy crocheting!