

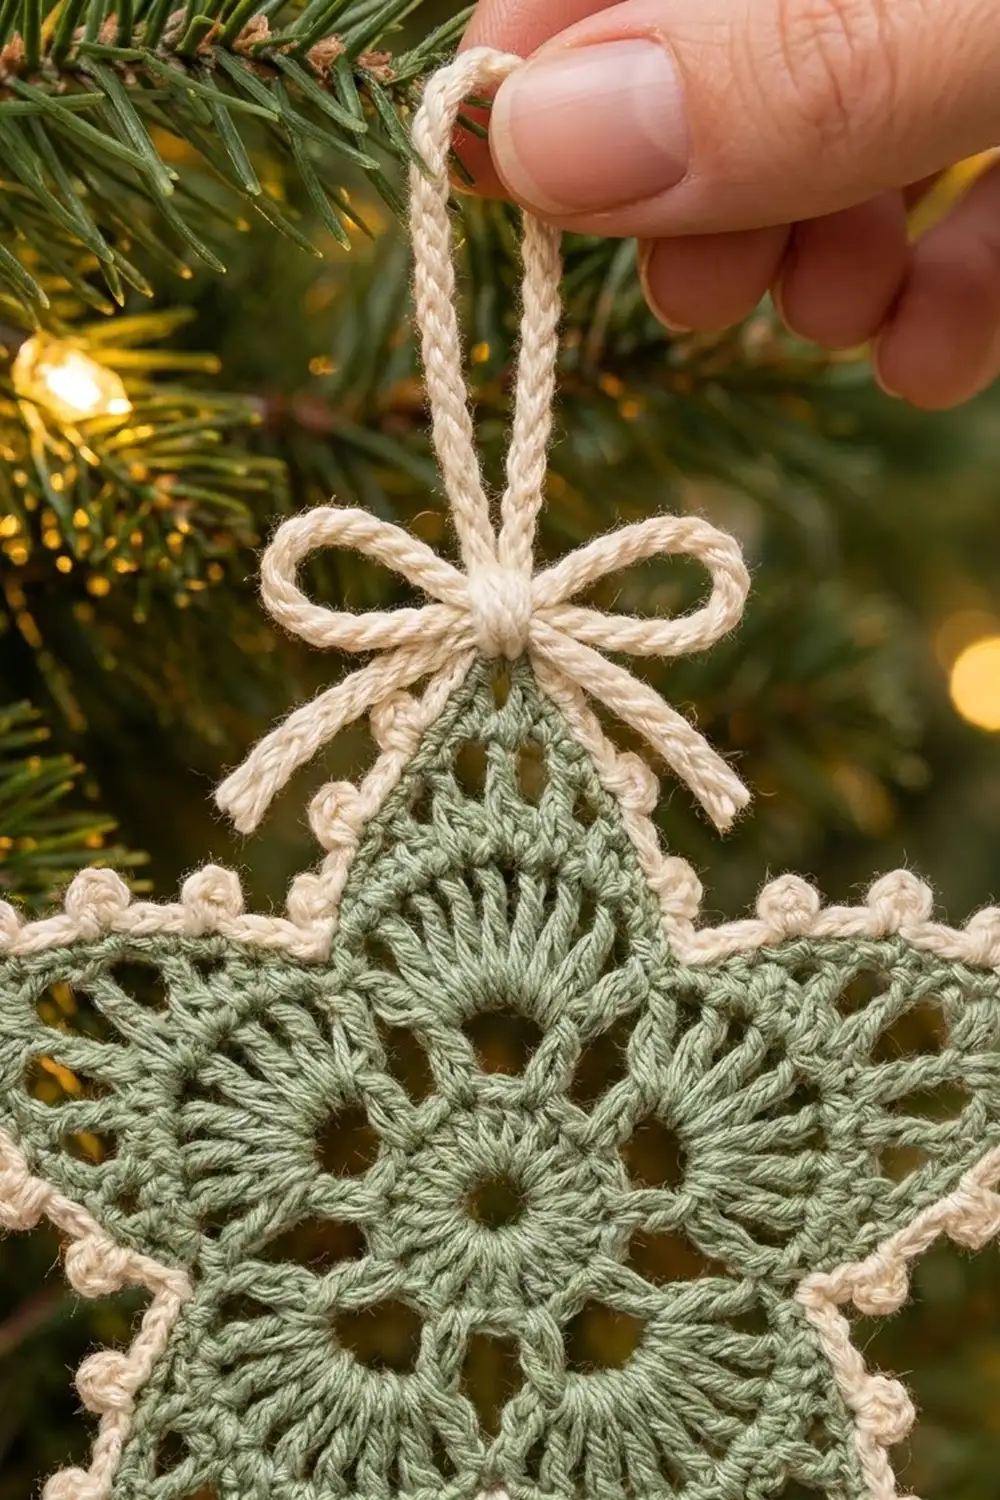
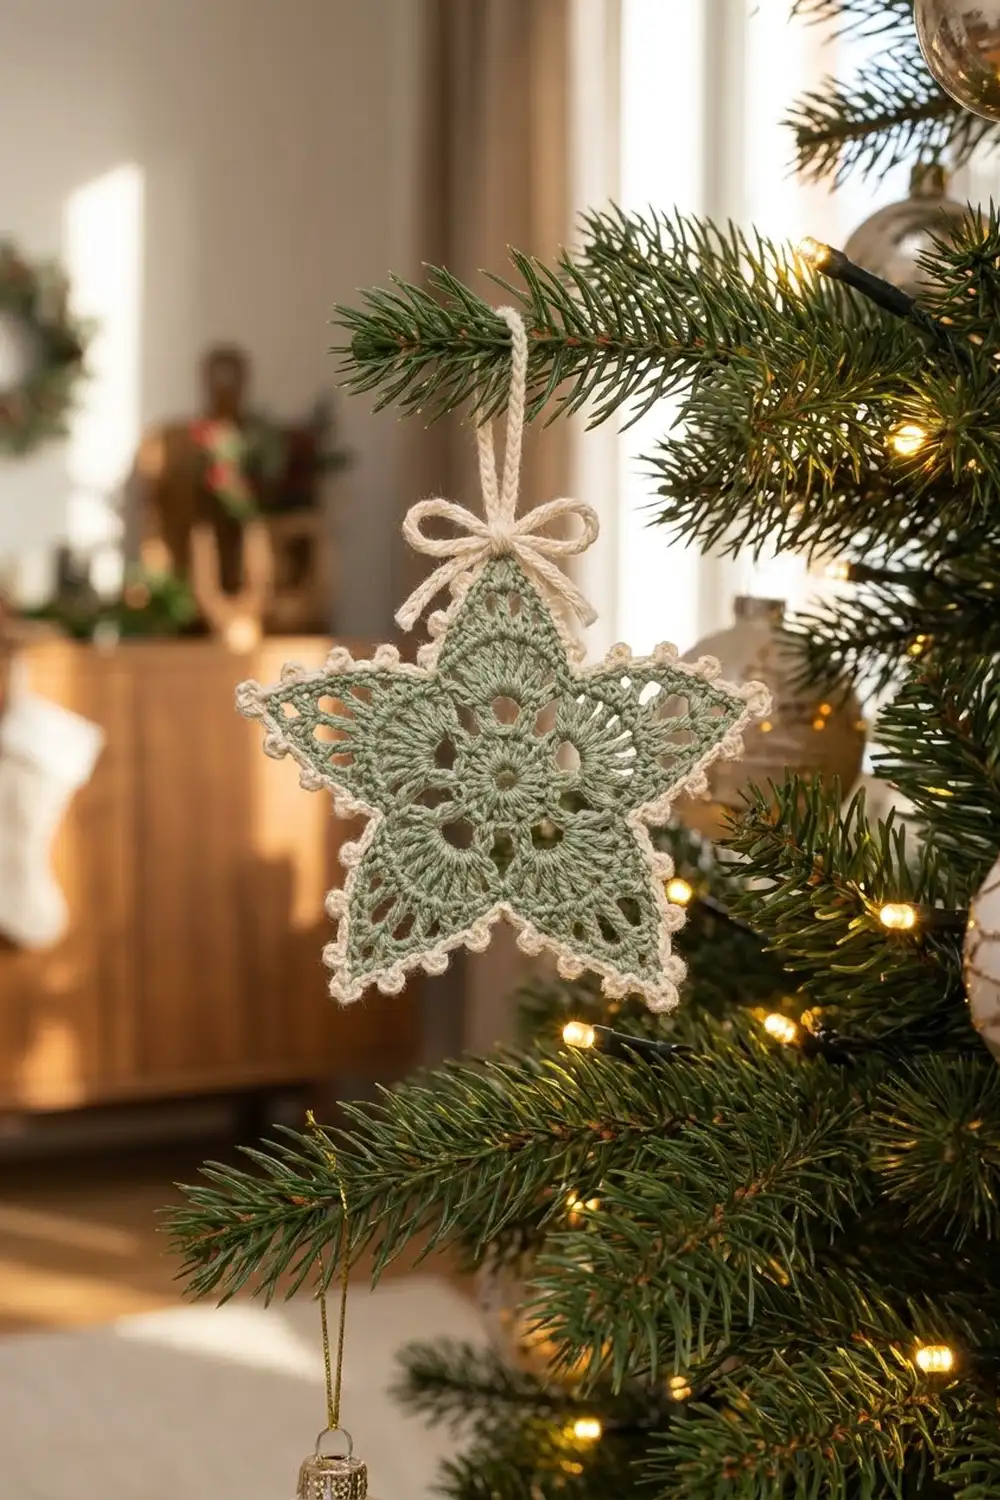
The Sage Frost Lace Star is a delicate five-pointed ornament with a soft vintage look. A sage green flower sits at the center of the star, and five airy lace points grow out from its petals. A cream picot border runs along every edge, and a cream chain loop with a tiny tied bow finishes the top.
The colors are calm and natural: muted sage for the lace body and warm cream for the trim, loop, and bow. It looks right on a real evergreen, on a gift package, or hanging in a window.
This pattern uses US crochet terms. The finished star measures about 6.25 in (15.9 cm) wide and 6 in (15.2 cm) tall, not counting the loop. The loop adds about 2 in (5.1 cm) above the top point.
The star is worked without fastening off between sections. You work a five-petal flower in rounds, add a foundation round, then build each point in short rows. A two-round cream border, a chain loop, and a separate chain bow complete the ornament.
Finished Size and Construction
- Finished size: 6.25 in (15.9 cm) wide x 6 in (15.2 cm) tall
- Skill level: Intermediate (short rows, decreases, picots)
- Terminology: US crochet terms
- Yarn weight: Sport / light #2 cotton or cotton blend
- Hook: 2.75 mm (US C-2)
- Number of pieces: 1 star (loop attached), plus 1 chain tie for the bow
- Layout: Single five-pointed star; no joining
- Flower center (Rounds 1-3): 2 in (5.1 cm) across
- Size before border: 5.75 in (14.6 cm) wide x 5.5 in (14.0 cm) tall
- Border depth: about 0.25 in (0.6 cm)
Materials
Choose a smooth mercerized or matte cotton in sport weight. Cotton gives crisp stitch definition, holds its shape after blocking, and doesn’t get fuzzy on the tree. Avoid very fuzzy or stretchy yarns, which blur the lace and picots.
Yarn:
- Color A, Sage Green: 10 g, about 30 m (star body)
- Color B, Cream: 6 g, about 18 m (border, loop, and bow)
These amounts include extra for a gauge test and for weaving in ends.
Tools:
- 2.75 mm (US C-2) crochet hook
- Tapestry needle
- Scissors
- Stitch marker
- Rust-proof pins and a foam blocking mat
- Spray bottle with water
- Optional: liquid starch for a firmer ornament
Abbreviations (US Terms)
- ch – chain
- sl st – slip stitch
- sc – single crochet
- dc – double crochet
- sp – space
- st(s) – stitch(es)
- sc2tog – single crochet 2 together
- sc3tog – single crochet 3 together
- dc2tog – double crochet 2 together
- MR – magic ring
- RS / WS – right side / wrong side
Special stitches:
- Beginning decrease (beg dec): Ch 2, dc in next st. The ch-2 and the dc together count as 1 dc2tog.
- Picot: Ch 3, sl st in the 3rd ch from hook (the first ch you made).
Gauge and Checkpoints
Exact gauge isn’t critical for an ornament, but it sets the final size and how flat the star lies. Work Rounds 1-3 as a test first.
Gauge: Rounds 1-3 (the flower) = 2 in (5.1 cm) across, measured from petal tip to petal tip.
Checkpoints:
- After Round 1: about 0.75 in (1.9 cm) across.
- After Round 3: 2 in (5.1 cm) across.
- After Round 5: 2.5 in (6.4 cm) across.
- Each finished point: 1.75 in (4.4 cm) from valley line to tip.
- Before border: 5.75 in (14.6 cm) wide x 5.5 in (14.0 cm) tall.
- After border: 6.25 in (15.9 cm) wide x 6 in (15.2 cm) tall.
If your flower is too big, go down to a 2.5 mm hook. If it is too small or tight, go up to a 3.0 mm hook. If the flower cups at Round 3, your tension is usually too tight. If it ruffles, the hook is too large.
Star Body (Color A, Sage Green)
The Flower Center
Round 1: MR, ch 3 (counts as dc), 9 dc in ring, pull ring closed, sl st to top of beg ch-3. (10 dc)
Round 2: Ch 5 (counts as dc + ch 2), dc in next dc, ch 2; repeat from * 8 more times, sl st to 3rd ch of beg ch-5. (10 dc, 10 ch-2 sps)
These dc spokes make the open wheel at the center of the star.
Round 3 (petals): Sl st in first ch-2 sp, ch 1, sc in same sp, 7 dc in next ch-2 sp, sc in next ch-2 sp, 7 dc in next ch-2 sp; repeat from * 3 more times, sl st to first sc. (5 petals of 7 dc, 5 sc; 40 sts)
Checkpoint: the flower measures 2 in (5.1 cm) across and lies flat.
Foundation Round
Round 4: Sl st in next 4 sts to reach the 4th (center) dc of the first petal. Ch 1, sc in same dc, ch 5, sc in next sc, ch 5, sc in 4th dc of next petal, ch 5, sc in next sc, ch 5; repeat from * 3 more times, sl st to first sc. (10 sc, 10 ch-5 sps)
The sc at each petal center becomes the middle of a point. Each sc between petals becomes a “valley” between points.
Round 5: Ch 1, sc in first sc, 6 sc in next ch-5 sp, sc in next sc; repeat from * 8 more times, 6 sc in last ch-5 sp, sl st to first sc. (70 sc)
Count check: 10 ch-5 sps x 6 sc = 60, plus 10 sc worked into sc = 70.
Each point base is 13 sts: 6 sc, the petal-center sc, and 6 sc. The 5 valley sc sit between the bases: 5 x 13 + 5 = 70.
Checkpoint: 2.5 in (6.4 cm) across.
The Points
Don’t fasten off. Sl st in next 7 sts (6 sc plus the valley sc) and place a marker in this valley sc. Work Point 1 on the next 13 sts.
Row 1 (RS): Beg dec over first 2 sts, [ch 1, skip next st, dc in next st] 4 times, ch 1, skip next st, dc2tog over last 2 sts, turn. (11 sts: 6 dc-type sts and 5 ch-1 sps)
Count: beg dec (1) + 4 x (ch 1 + dc) (8) + ch 1 (1) + dc2tog (1) = 11.
Row 2 (WS): Ch 1, sc2tog over first 2 sts, sc in next 7 sts (work into each dc and each ch-1 sp), sc2tog over last 2 sts, turn. (9 sc)
Row 3: Beg dec over first 2 sts, [ch 1, skip next st, dc in next st] 2 times, ch 1, skip next st, dc2tog over last 2 sts, turn. (7 sts)
Count: beg dec (1) + 2 x (ch 1 + dc) (4) + ch 1 (1) + dc2tog (1) = 7.
Row 4: Ch 1, sc2tog, sc in next 3 sts, sc2tog, turn. (5 sc)
Row 5: Beg dec over first 2 sts, ch 1, skip next st, dc2tog over last 2 sts, turn. (3 sts)
Row 6: Ch 1, sc3tog. (1 st, the point tip)
Each point loses exactly 2 sts per row: 13, 11, 9, 7, 5, 3, 1. That steady taper gives the clean triangle shape.
Travel to the next point: Sl st evenly down the side edge of the point toward the next valley (about 9 sl sts), then sl st in the next valley sc of Round 5.
Points 2-5: Repeat Rows 1-6 and the travel step on each next 13 sts. After Point 5, sl st down its edge and sl st in the marked valley sc. Fasten off Color A and weave in ends.
Checkpoint: the unbordered star measures 5.75 in (14.6 cm) wide x 5.5 in (14.0 cm) tall. Each point is 1.75 in (4.4 cm) tall from valley to tip.
Border (Color B, Cream)
Border Gauge
Along each point edge, work 9 sc over about 2 in (5.1 cm). That is about 4.5 sc per inch, slightly looser than normal sc, so the edge stays flat and doesn’t pull the points inward.
How many sc to work along each side of a point:
- Each dc row end (Rows 1, 3, 5): 2 sc
- Each sc row end (Rows 2, 4, 6): 1 sc
- Total per side: 3 x 2 + 3 x 1 = 9 sc
On the side with the travel sl sts, work through the row ends behind the sl sts so they hide inside the border.
Border Round 1
Join Color B with a sl st in any valley sc.
Round 1: Ch 1, sc in same valley sc, 9 sc up the side of the point, 3 sc in the tip st, 9 sc down the other side, sc in next valley sc; repeat from * 4 more times, leaving out the final valley sc on the last repeat, sl st to first sc. (110 sc)
Count per point: 9 + 3 + 9 + 1 valley = 22. 22 x 5 = 110.
Border Round 2 (Picots)
Round 2: Ch 1, sc in first sc (valley).
Repeat from * to * 5 times, leaving out the final valley sc on the last repeat:
*
- Side A: sc in next 2 sc, picot, sc in next 3 sc, picot, sc in next 3 sc, picot, sc in next sc.
- Tip: sc in next sc, (sc, picot, sc) in center tip sc, sc in next sc.
- Side B: sc in next sc, picot, sc in next 3 sc, picot, sc in next 3 sc, picot, sc in next 2 sc.
- Valley: sc in next valley sc.
*
Sl st to first sc. (115 sc, 35 picots)
Fasten off and weave in ends, or keep the yarn attached to make the loop right away.
Why the math works:
- Each side uses exactly its 9 sc from Round 1: 2 + 3 + 3 + 1 = 9.
- The tip uses 3 sts but holds 4 sc. That 1 extra sc lets the point turn sharply.
- Per point: 9 + 4 + 9 + 1 = 23 sc. 23 x 5 = 115 sc.
- Picots: 3 per side x 2 + 1 tip = 7 per point; 7 x 5 = 35.
- The valley stays a single plain sc with no increase, which keeps the inner angles crisp.
Checkpoint: 6.25 in (15.9 cm) wide x 6 in (15.2 cm) tall.
Hanging Loop and Bow (Color B)
Loop: Join Color B with a sl st in the tip picot of the top point. If you kept the yarn attached, sl st along to that picot instead. Ch 24, sl st in the same tip picot. Fasten off and weave in ends. The loop stands about 2 in (5.1 cm) tall.
Bow tie: Leaving a 3 in (7.6 cm) tail, ch 60, about 10 in (25.4 cm) long. Fasten off, leaving another 3 in (7.6 cm) tail. Wrap the chain around both strands at the base of the loop, just above the tip, and tie a bow with loops about 1 in (2.5 cm) wide. Knot the tails under the bow and trim them to about 0.5 in (1.3 cm). Add a dab of fabric glue to hold them if you like.
Final Blocking
- Weave in all ends before blocking. Leave the bow off until the star is dry.
- Soak the star in cool water for 5 minutes, or spray it until it is damp all over.
- Press the water out in a towel; don’t wring.
- Lay the star RS up on a blocking mat.
- Pin the center flower first so it measures 2 in (5.1 cm) across.
- Pin each tip outward so every point is the same height.
- Pin each valley inward, and pin each tip picot out to a sharp point.
- Check the finished size: 6.25 in (15.9 cm) wide x 6 in (15.2 cm) tall.
- Open each side picot with a pin so it sits round and separate.
- For a firm ornament, spray lightly with starch.
- Let it dry completely, then unpin and tie the bow.
Final Quality-Control Checklist
- Round 3 has 5 equal petals of 7 dc each.
- Round 5 has 70 sc.
- Each point tapers 13, 11, 9, 7, 5, 3, 1.
- All 5 points are the same height, 1.75 in (4.4 cm), before the border.
- Border Round 1 has 110 sc; Round 2 has 115 sc and 35 picots.
- Each point has 7 picots, with one centered at the tip.
- Valleys are plain sc with no picots.
- Travel sl sts are hidden under the border.
- Finished star: 6.25 in (15.9 cm) x 6 in (15.2 cm).
- The loop is centered on the top tip and stands about 2 in (5.1 cm).
- The bow is tied snugly and its ends are secure.
Troubleshooting
Flower cups or curls. Round 3 is too tight. Loosen your dc or go up a hook size.
Flower ruffles. The hook is too large or the dc are too tall. Go down a hook size.
Points are different heights. Recount each base. Every point must start on exactly 13 sts between valley sc.
Points lean sideways. Check that you worked both the beg dec and the final dc2tog on every dc row.
Border pulls the points inward. Your border sc are too tight. Use a slightly larger hook for Round 1 only, or loosen up along the edges.
Border ripples. You worked more than 9 sc per side. Stick to 2 sc per dc row end and 1 sc per sc row end.
Tips are blunt. Make sure the (sc, picot, sc) goes in the center tip sc, and pin the tip picot sharply when blocking.
Picots lean or flatten. Sl st into the 3rd ch from hook, not into the base sc, and pin each picot open while damp.
Care
Hand wash in cool water with mild soap, press dry in a towel, and reshape it flat to dry. Store it flat in tissue paper between seasons so the points and picots stay crisp.
Final Notes
Each stage of the star has one measurement to check. The flower measures 2 in (5.1 cm) after Round 3, and the foundation round brings it to 2.5 in (6.4 cm). Adding five points of 1.75 in (4.4 cm) gives a star of 5.75 in (14.6 cm) x 5.5 in (14.0 cm). The 0.25 in (0.6 cm) border brings it to 6.25 in (15.9 cm) x 6 in (15.2 cm), with a 2 in (5.1 cm) loop on top.
If every checkpoint matches, the star will block flat and even. Make one in sage, then try a set in other soft colors for the tree.
Happy crocheting!