
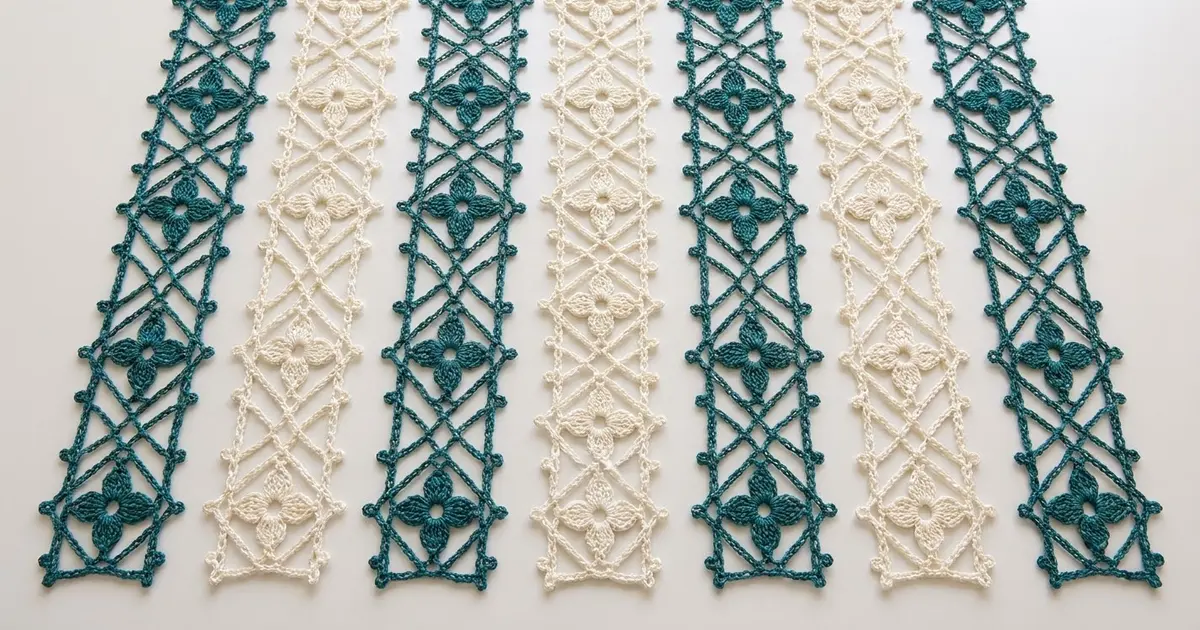
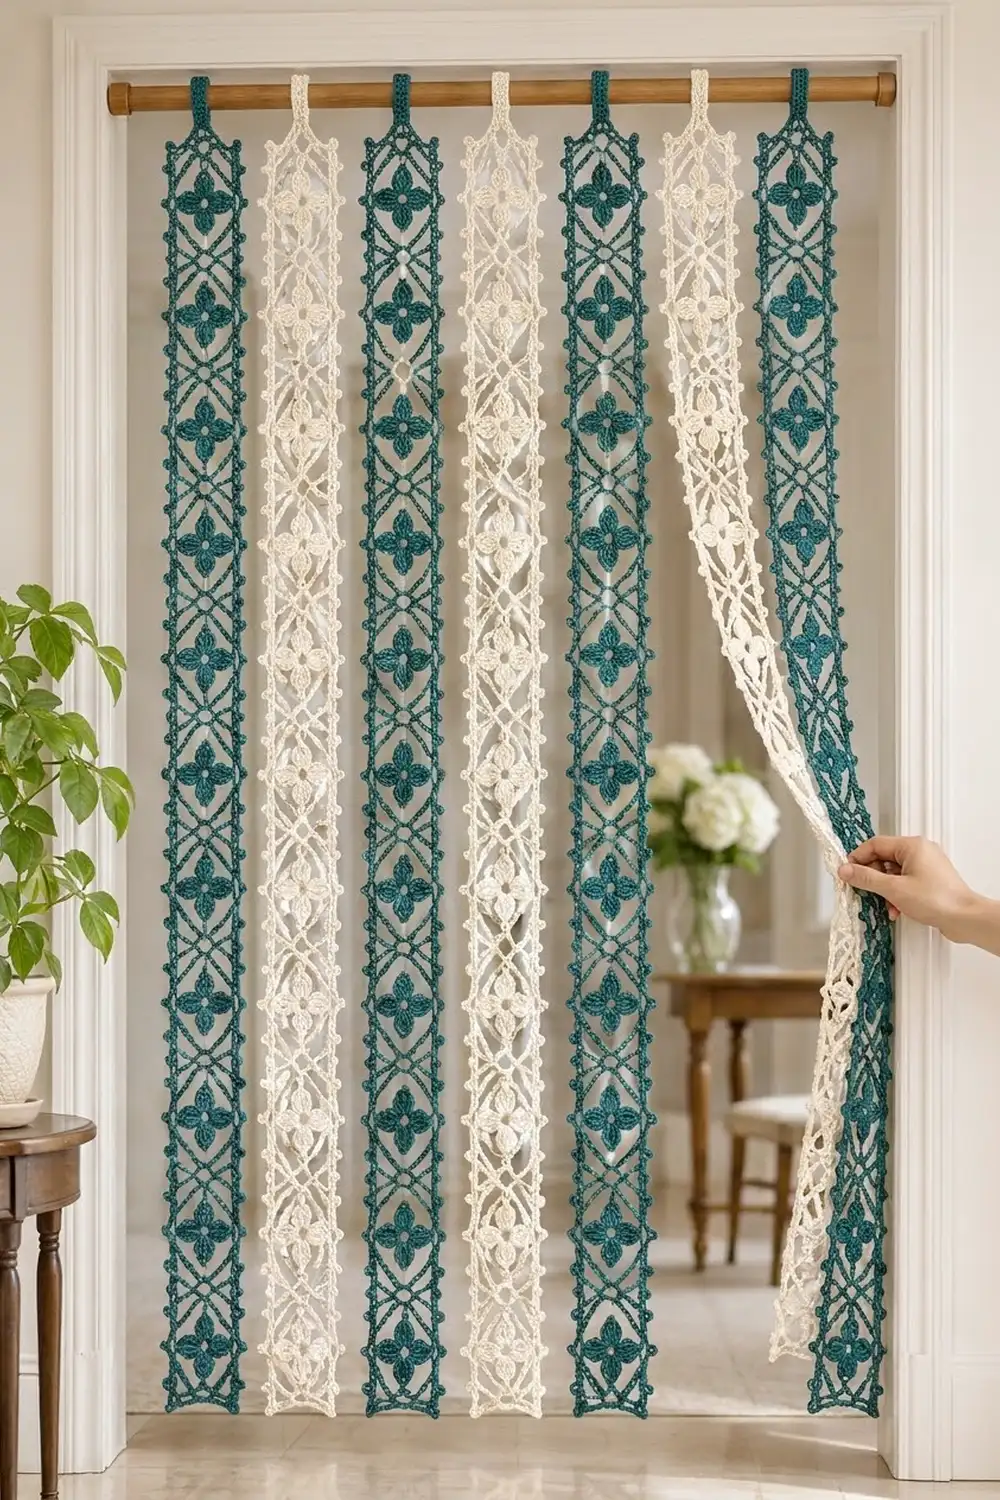
This curtain is made of seven narrow lace strips hung side by side from a wooden rod. Each strip is a column of square lace units. A small four-petal flower sits at the center of every unit, framed by a chain diamond, and chain diagonals run from the diamond out to the corners, so they cross in an X wherever two units meet. Small picots dot both long edges like tiny beads.
The strips alternate deep teal and cream: teal, cream, teal, cream, teal, cream, teal. The style is light, airy, and a little boho. Light passes through the mesh, and the strips sway and part easily when you walk through the doorway. This pattern uses US crochet terms throughout.
Each finished strip measures 4 in (10.2 cm) wide by 73 in (185.4 cm) long, not counting the hanging tab. With about 1.5 in (3.8 cm) of space between strips, the curtain covers roughly 37 in (94.0 cm) of rod.
Construction is simple and repetitive. You make 3 in (7.6 cm) square flower motifs in the round, join 24 of them into a column with a flat slip stitch seam, work a two-round picot border around the strip, and then add a folded tab at the top. The strips are not joined to each other. Each one hangs from the rod on its own tab.
Finished Size and Construction
- Finished strip size: 4 in x 73 in (10.2 cm x 185.4 cm), plus the tab loop
- Full curtain: 7 strips, about 37 in (94.0 cm) wide on the rod
- Skill level: Intermediate
- Terminology: US
- Yarn weight: DK / light (#3) cotton
- Hook: 4.0 mm (US G-6)
- Number of pieces: 168 motifs (24 per strip) and 7 tabs
- Layout: each strip is 1 motif wide by 24 motifs tall; 7 separate strips
- Motif size: 3 in (7.6 cm) square
- Strip size before border: 3 in x 72 in (7.6 cm x 182.9 cm)
- Border depth: 0.5 in (1.3 cm) on every side
Materials
Use a smooth, mercerized DK cotton or cotton blend. Cotton gives crisp stitch definition, holds the picots open, and hangs straight without stretching the way acrylic can. Look for about 115 m per 50 g.
- Teal (Color A): 500 g, about 1,150 m (4 strips, 96 motifs)
- Cream (Color B): 400 g, about 920 m (3 strips, 72 motifs)
These quantities include a margin of roughly 10 to 15 percent for your gauge swatch, tails, and small tension differences.
Tools:
- 4.0 mm (US G-6) crochet hook
- 4.5 mm (US 7) hook for seaming (optional)
- Tapestry needle
- Stitch markers
- Scissors
- Measuring tape
- Blocking mats and rust-proof pins
- Spray bottle
- Curtain rod or tension rod, up to 1.25 in (3.2 cm) thick
Abbreviations (US Terms)
- ch – chain
- sl st – slip stitch
- sc – single crochet
- dc – double crochet
- tr – treble crochet
- dtr – double treble crochet (yo 3 times, insert hook, yo and pull up a loop, [yo, pull through 2 loops] 4 times)
- sk – skip
- sp(s) – space(s)
- st(s) – stitch(es)
- RS / WS – right side / wrong side
- yo – yarn over
Special stitches:
- Petal: (dc, 2 tr, ch 2, 2 tr, dc) all in the same stitch. This makes 6 stitches and a ch-2 tip.
- Picot: ch 3, sl st into the top of the sc you just made.
Gauge and Checkpoints
Make one complete motif before you start production. Gauge is measured on the motif itself.
- After Rnd 1: the ring is about 0.75 in (1.9 cm) across.
- After Rnd 2: the flower measures 2 in (5.1 cm) from petal tip to petal tip.
- After Rnd 3: the diamond measures 2.5 in (6.4 cm) from tip to tip.
- After Rnd 5: the motif is a 3 in (7.6 cm) square. Each side has 13 sc, which works out to 13 sc in about 2.75 in (7.0 cm).
If your motif is larger than 3 in (7.6 cm), go down to a 3.75 mm hook. If it is smaller, go up to a 4.5 mm hook. A difference of 0.25 in (0.6 cm) per motif adds up to 6 in (15.2 cm) over 24 motifs, so this check matters.
Strip checkpoints: 6 joined motifs should measure 18 in (45.7 cm), 12 should measure 36 in (91.4 cm), and 24 should measure 72 in (182.9 cm).
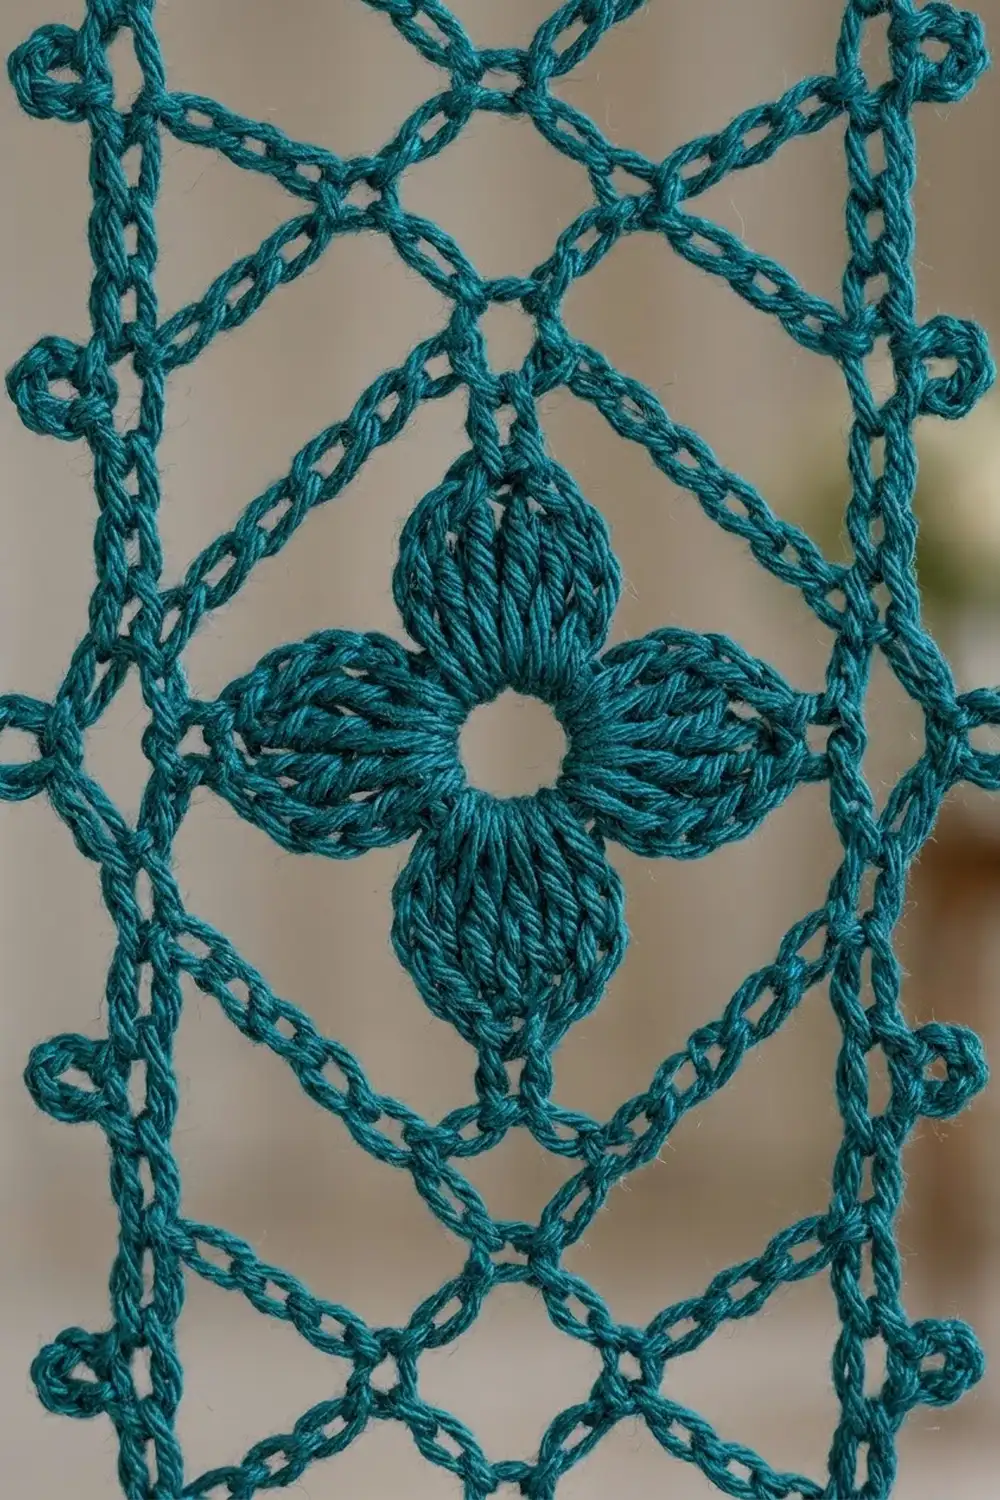
Flower Motif (Make 168)
Make this with Color A or Color B.
Rnd 1: Ch 6, sl st to the first ch to form a ring. Ch 1, work 16 sc in the ring, then sl st to the first sc. (16 sc)
Rnd 2 (petals): Ch 1, sc in the same st. Sk 1 st, petal in the next st, sk 1 st, sc in the next st. Repeat from * to * 2 more times, then sk 1 st, petal in the next st, sk 1 st, and sl st to the first sc. (4 petals, 4 sc: 28 sts and 4 ch-2 tips)
Each repeat uses exactly 4 stitches of Rnd 1, and 4 x 4 = 16, so the flower closes evenly. The petals point up, down, left, and right.
Rnd 3 (diamond frame): Sl st in each of the next 3 sts, then into the ch-2 tip sp. Ch 1, (sc, ch 3, sc) in the same tip sp. Ch 7, (sc, ch 3, sc) in the next ch-2 tip. Repeat from * to * 2 more times, then ch 7 and sl st to the first sc. (8 sc, 4 ch-3 tip sps, 4 ch-7 loops)
The ch-7 loops arch around the petals and form the diamond. Its 4 tips sit at the petal tips.
Rnd 4 (corner diagonals): Sl st into the first ch-3 tip sp. Ch 1, sc in the same sp. Ch 4, (dtr, ch 4, dtr) in the next ch-7 loop, ch 4, sc in the next ch-3 tip sp. Repeat from * to * 3 more times, but on the last repeat skip the final sc and sl st to the first sc instead. (4 sc, 8 dtr, 12 ch-4 sps: 8 side sps and 4 corner sps)
The dtr pairs push out to make the square’s corners. The ch-4 lines run diagonally from each diamond tip to a corner, and these lines form the X crossings once the motifs are joined.
Rnd 5 (squaring round): Ch 1, sc in the first sc (this is a diamond tip, at the center of a side). 3 sc in the next ch-4 sp, sc in the dtr, (2 sc, ch 2, 2 sc) in the corner ch-4 sp, sc in the dtr, 3 sc in the next ch-4 sp, sc in the tip sc. Repeat from * to * 3 more times, but on the last repeat skip the final sc and sl st to the first sc instead. Fasten off and weave in the ends. (52 sc and 4 corner ch-2 sps)
Per-side count: For this pattern, a side is defined as the stitches between two corner ch-2 sps. The corner spaces are not counted. Each side has 2 + 1 + 3 + 1 + 3 + 1 + 2 = 13 sc, with the tip sc as the 7th (center) stitch. Check: 4 sides x 13 = 52 sc.
Make All Pieces
- Color A (teal): 96 motifs, 24 for each of the 4 teal strips
- Color B (cream): 72 motifs, 24 for each of the 3 cream strips
Lightly steam each batch flat to 3 in (7.6 cm) before you join them. The curtain layout, with each letter being one strip of 24 motifs, is:
Rod:  ====================================
      [A]  [B]  [A]  [B]  [A]  [B]  [A]
       |    |    |    |    |    |    |
      x24  x24  x24  x24  x24  x24  x24
Strip: 1    2    3    4    5    6    7
Joining
Join each strip as a single column of 24 motifs using a flat slip stitch seam. Because the curtain is seen from both sides, this seam is a good choice: it lies flat and looks almost the same on the front and the back.
- Lay motif 1 and motif 2 side by side, RS up, with the bottom side of motif 1 against the top side of motif 2.
- Join the yarn by working a sl st through both corner ch-2 sps at once.
- Work 1 sl st through the inside loops of each matching pair of sc. That is 13 sl sts, matching stitch 1 to stitch 1 and on through stitch 13 to stitch 13.
- Work 1 sl st through the other pair of corner ch-2 sps. (15 sl sts per seam)
- Fasten off and add the next motif in the same way, until you have 23 seams.
The seam joins stitch to stitch, so it adds no stitches to the long edges. The joined pairs of corner spaces at each seam are handled in the border.
Tension: Keep the slip stitches as loose as the sc beneath them. If the seam pulls in, switch to the 4.5 mm hook. Lay the strip flat every 6 motifs and check it against the strip checkpoints. The finished column should be 3 in x 72 in (7.6 cm x 182.9 cm).
Border
Border gauge: One motif side plus one seam stitch is 14 sts, which equals 3 in (7.6 cm). Rnd 1 is worked 1-to-1 into the existing edge stitches, so it automatically matches the length of the strip.
Rnd 1: With RS facing, join the yarn in the top-right corner ch-2 sp of the strip. Ch 1, (sc, ch 2, sc) in the same sp.
- Long side: Sc in each of the 13 sc of the motif. At each seam, work 1 sc through both joined corner ch-2 sps (the seam sc). Repeat down the strip. When you reach the next strip corner, work (sc, ch 2, sc) in its ch-2 sp.
- Short side: Sc in each of the 13 sc, then (sc, ch 2, sc) in the corner sp.
Repeat both sides once more, omitting the last corner, and sl st to the first sc.
Counts:
- Each long side: 1 corner sc + (24 x 13 = 312 sc) + 23 seam sc + 1 corner sc = 337 sc
- Each short side: 1 + 13 + 1 = 15 sc
- Total: (2 x 337) + (2 x 15) = 704 sc and 4 ch-2 corner sps
Check: 650 motif sc + 46 seam sc + 8 corner sc = 704.
Rnd 2 (picot round): Sl st into the corner ch-2 sp. Ch 1, (sc, picot, sc) in the same sp.
- Long side: Sc in the first 8 sts, picot. Sc in the next 7 sts, picot. Repeat from * to * 45 more times, then sc in the last 7 sts. (337 sc and 47 picots)
This places a picot on stitches 8, 15, 22, and so on up to 330. Those are the center of every motif and every seam stitch. The math is 8 + (46 x 7) + 7 = 337.
- Bottom short side: Sc in the first 8 sts, picot, sc in the last 7 sts. (15 sc, 1 picot at the motif center)
- Top short side: Sc in all 15 sts with no picot, because the tab covers the center.
- Each corner: (sc, picot, sc) in the ch-2 sp.
Sl st to the first sc and fasten off.
Rnd 2 totals: 704 + 8 corner sc = 712 sc. There are 47 + 47 + 1 + 4 = 99 picots.
The border works because every count comes straight from the motif: 13 sts per side, 1 per seam, and 1 per corner. Nothing is guessed or eased in.
Hanging tab: With RS facing, join the yarn in the 5th sc of the top short side. Ch 1, sc in the same st and in the next 6 sts. (7 sc)
- Rows 2–25: Ch 1, turn, sc in each st. (7 sc)
The tab is about 1.5 in (3.8 cm) wide and 5 in (12.7 cm) long. Fold it to the WS and whipstitch the last row across the top border row. This makes a loop about 2.5 in (6.4 cm) deep. Repeat the tab on all 7 strips.
Final Blocking
- Weave in all remaining ends along the seams, not across the open mesh.
- Mist each strip until it is evenly damp.
- Pin the strip to 4 in x 73 in (10.2 cm x 185.4 cm). Work in sections if your mats are short.
- Pin each picot into a point and open each petal so it looks like a leaf.
- Straighten the X diagonals so every diamond is symmetrical.
- Let the strip dry completely, then unpin it.
- Hang the strips on the rod, about 1.5 in (3.8 cm) apart, in the order A, B, A, B, A, B, A.
Final Quality-Control Checklist
- [ ] Every motif has 52 sc in Rnd 5 and measures 3 in (7.6 cm).
- [ ] Each strip has 24 motifs and 23 seams of 15 sl sts each.
- [ ] Border Rnd 1 has 337 sc on each long side and 15 on each short side.
- [ ] There are 47 picots on each long side and they line up with the motif centers and seams.
- [ ] The tab is secure, with 7 sc across and 25 rows.
- [ ] The strips measure 4 in x 73 in (10.2 cm x 185.4 cm) after blocking.
- [ ] The colors alternate across the rod, with teal on both outer edges.
Troubleshooting
- Petals cup: Your Rnd 1 is too tight. Make the starting ring with looser chains.
- Diamond buckles: Change the ch-7 loops to ch 8. If they sag, use ch 6.
- Corners curl: Your dtrs are too tight. Pull up the first loop taller.
- Strip is too long: Your gauge is too loose. Remove one motif or go down a hook size.
- Edge waves: The seam stitches are loose. Re-seam them with your smaller hook.
- Strip twists while hanging: Re-block it with the strip pinned straight, and check that the tab is centered.
Care
Hand wash in cool water with a mild detergent, roll the strip in a towel, and dry it flat. Re-pin it to size if needed.
Final Notes
The measurement chain is short and reliable: a 3 in (7.6 cm) motif with 13 sc per side, joined 24 tall into a 72 in (182.9 cm) column, plus a 0.5 in (1.3 cm) border, gives a 4 in x 73 in (10.2 cm x 185.4 cm) strip. Seven strips spaced 1.5 in (3.8 cm) apart cover about 37 in (94.0 cm) of rod. Check your first motif, and the rest of the curtain will follow.
Happy crocheting!