
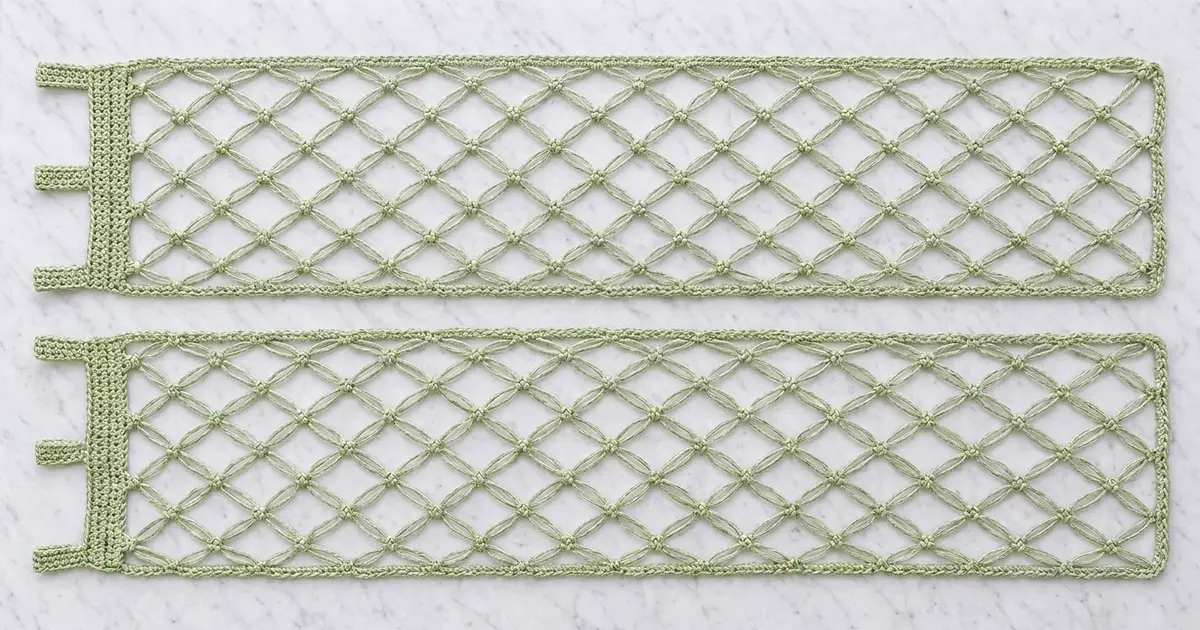
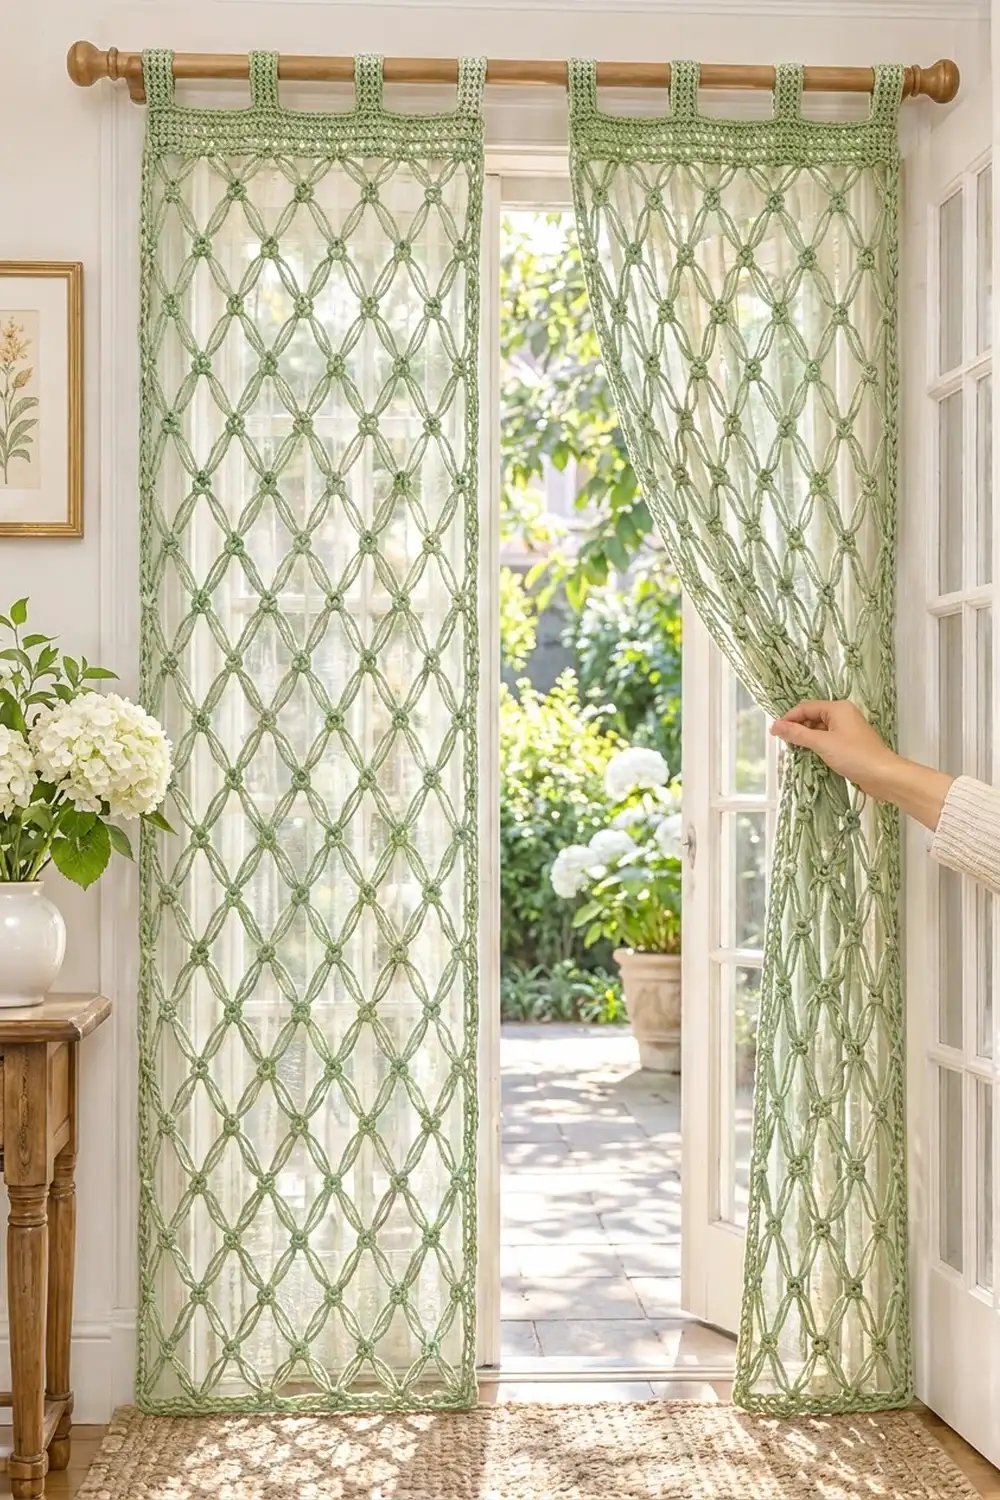
These airy curtain panels are made from long, open lover’s knots (also called Solomon’s knots). They form a diamond lattice that lets light and garden views through while still framing the doorway. A small knotted “nub” sits at every crossing, so the mesh looks beaded and handmade instead of plain netting.
The whole pair is worked in one soft sage-green cotton. A solid band of half double crochet holds the top edge straight. Three loop tabs slide onto the rod, and a slim three-round single crochet border neatens the sides and bottom.
This pattern uses US crochet terms. Each finished panel measures 24¼” × 78½” (61.6 cm × 199.4 cm) without the tabs. With the tab loops it measures 80½” (204.5 cm) from the bottom edge to the top of the tabs.
Each panel is worked flat from the bottom up. You make a foundation strip of knots, work 50 rows of lattice, add a leveling row and a 6-row header band, then work the border all the way around and add the tabs. You make two identical panels. They are not joined to each other; each one hangs on the rod by its own tabs.
Finished Size and Construction
- Finished panel size: 24¼” × 78½” (61.6 cm × 199.4 cm), with tab loops adding 2″ (5.1 cm)
- Skill level: Intermediate
- Terminology: US crochet terms
- Yarn weight: Worsted (#4) cotton or cotton blend
- Hook: 5.0 mm (H-8)
- Number of pieces: 2 identical panels, plus 3 tabs worked onto each panel
- Layout: 2 panels hung side by side and not joined
- Lattice size: 9 diamonds across × 50 rows, 22¾” × 75″ (57.8 cm × 190.5 cm)
- Size before border: 22¾” × 77″ (57.8 cm × 195.6 cm), lattice plus header band
- Border depth: ¾” (1.9 cm), 3 rounds
Materials
Yarn: Use a smooth, tightly plied worsted cotton or cotton blend. Lover’s knots depend on the yarn holding a long loop without collapsing, and cotton keeps its shape when the panels hang. Avoid fuzzy or very stretchy yarns because the knots will blur and the panels will grow in length.
- Sage green: 400 g / 600 m (656 yd) for both panels, about 200 g / 300 m (328 yd) per panel
These quantities include a margin of roughly 15% for swatching and for knots that need to be redone.
Tools:
– 5.0 mm (H-8) crochet hook
– Gauge card: a strip of stiff cardboard cut 2″ (5.1 cm) wide
– Tapestry needle
– Locking stitch markers
– Measuring tape
– Rust-proof pins and a large blocking surface (foam mats or a sheet on a carpet)
– Spray bottle
– Curtain rod up to 1″ (2.5 cm) in diameter
Abbreviations (US Terms)
- ch: chain
- sc: single crochet
- hdc: half double crochet
- tr: treble crochet
- dtr: double treble crochet
- st(s): stitch(es)
- sp: space
- rep: repeat
- RS / WS: right side / wrong side
Special stitches
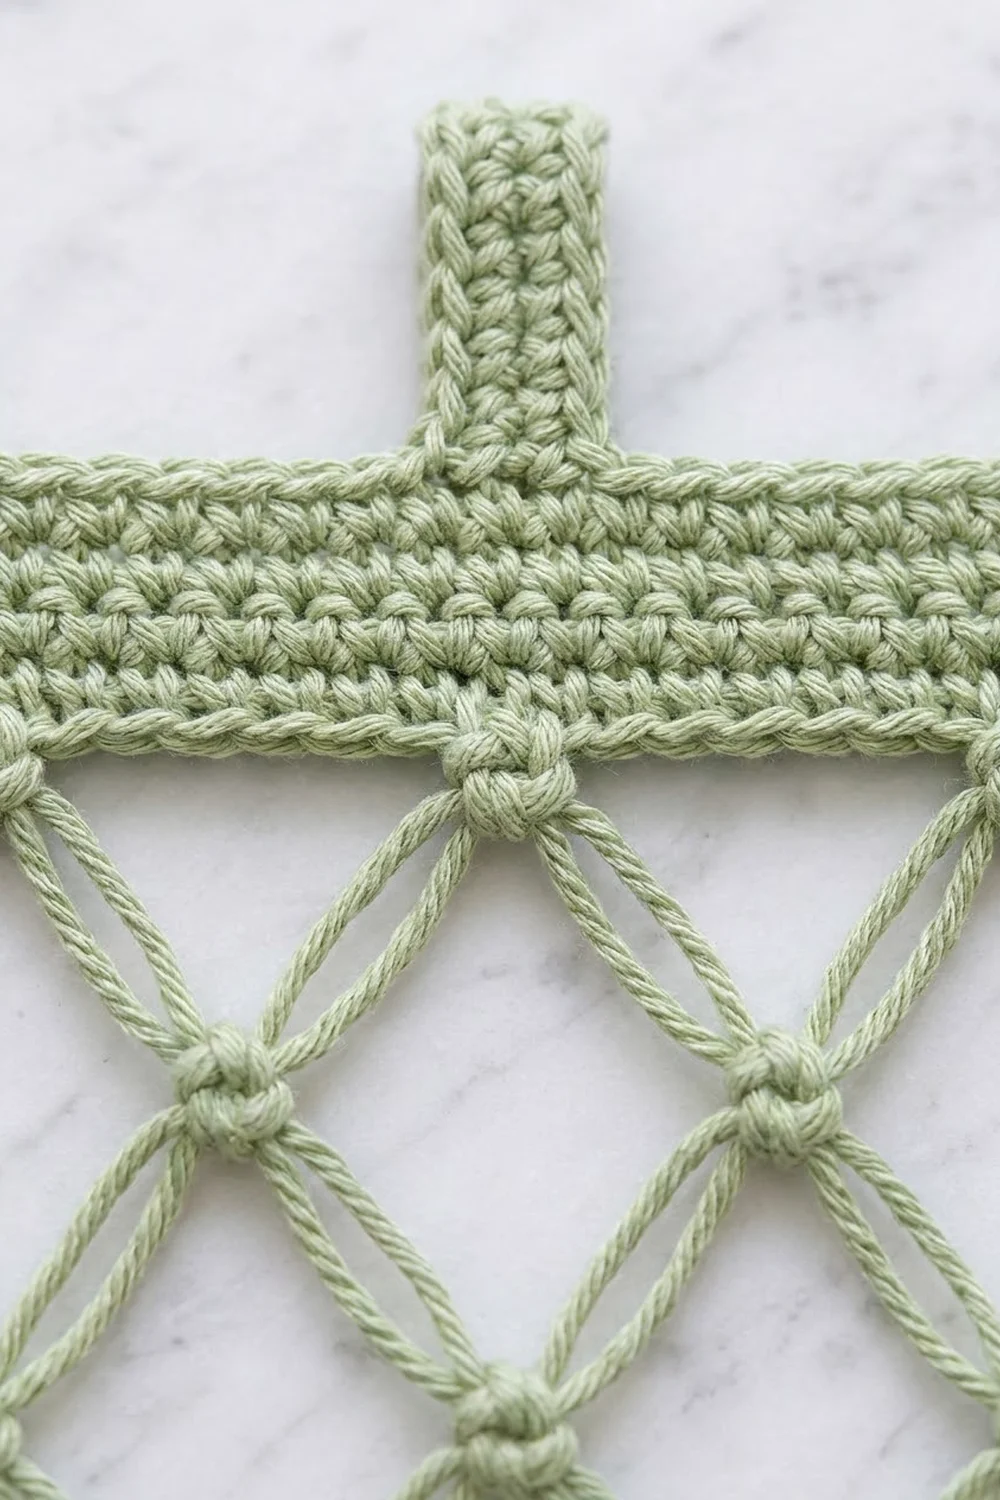
SK (Solomon’s knot / lover’s knot): Pull up the loop on your hook until it is 2″ (5.1 cm) long (use the gauge card to check). Yarn over and draw through the long loop. Insert the hook under the single back strand of the long loop, yarn over and pull up a loop, then yarn over and draw through both loops on the hook. This makes one locked knot. The small sc-like knot that closes each SK is called a joint.
Nub: Sc in the indicated joint, ch 1, then sc in the same joint again. Pull it snug. This makes the rounded bead you see at every lattice crossing. Every anchor in the lattice is a Nub.
Apex: The joint in the middle of a pair of knots. It sits at the top of each arch.
Gauge and Checkpoints
Lattice gauge: With 2″ (5.1 cm) knots, after blocking, 1 diamond is 2½” (6.4 cm) wide and 2 rows make 3″ (7.6 cm) of height. Each row adds 1½” (3.8 cm).
Band and border gauge: 16 hdc and 12 rows = 4″ (10.2 cm). 16 sc and 16 rows = 4″ (10.2 cm).
Test swatch: Make a foundation of 8 SK, then work Rows 1–6 below using 4 diamonds instead of 9. Wet-block it. The swatch should measure 10″ × 9″ (25.4 cm × 22.9 cm).
- Diamonds wider than 2½” (6.4 cm): Shorten your loops to 1⅞” (4.8 cm).
- Diamonds narrower: Lengthen your loops to 2⅛” (5.4 cm).
- Hdc swatch too wide: Use a 4.5 mm hook for the band and border only.
Checkpoints for the full panel:
– Foundation: 18 SK, about 22½” (57.2 cm) when stretched
– After Row 10: 15″ (38.1 cm) tall
– After Row 30: 45″ (114.3 cm) tall
– After Row 50: 75″ (190.5 cm) tall, measured lightly stretched
– After the band: 22¾” × 77″ (57.8 cm × 195.6 cm)
Panel Lattice
Foundation: Ch 2, sc in the 2nd ch from the hook (this is the first joint). Make 18 SK.
(18 knots, 19 joints)
The joint on your hook is the starting corner. The first sc you made is the far corner.
Row 1: Make 2 SK. Skip the joint on your hook and the next joint, then work a Nub in the following joint. Make 2 SK, skip the next joint, Nub in the next joint; rep from * 8 more times, ending at the far corner.
(18 knots, 9 arches, 9 apexes)*
Row 2 (edge-climbing row): Make 3 SK, then Nub in the first apex of the previous row. Knots 1 and 2 climb straight up the edge. The joint between knots 1 and 2 stays free, and the joint between knots 2 and 3 becomes the edge apex. Make 2 SK, Nub in the next apex; rep from * 7 more times. You are now at the last apex of the previous row. Make 1 SK. Its joint is the opposite edge apex. Do not anchor it.
(20 knots, 10 apexes: 2 edge apexes + 8 interior apexes)*
Row 3 (straight row): Starting from the edge apex on your hook, make 2 SK, Nub in the next apex; rep from * 8 more times, ending with a Nub in the far edge apex.
(18 knots, 9 apexes)*
Rows 4–50: Repeat Rows 2 and 3 alternately, ending with a Row 2 repeat on Row 50.
- Even rows: 20 knots, 10 apexes
- Odd rows: 18 knots, 9 apexes
This gives two different side edges. The edge where Row 2 starts has pairs of climbing knots, each with a free joint in the middle. The opposite edge has shallow notches, each with a Nub at the back. The border straightens both edges.
Leveling Row: Ch 1. Sc in the edge apex on your hook. Ch 4, dtr in the next Nub below (the dip), ch 4, sc in the next apex; rep from * 8 more times.
(10 sc + 9 dtr + 72 ch = 91 sts)*
The dtr fill each dip so the top edge becomes straight.
Header Band
Band Row 1 (RS): Ch 2 (does not count as a st), turn. Hdc in each sc, each ch, and each dtr across.
(91 hdc)
Band Rows 2–6: Ch 2, turn, hdc in each st across.
(91 hdc per row)
Do not fasten off.
Checkpoint: The band measures 22¾” × 2″ (57.8 cm × 5.1 cm). Gently stretch the lattice: it should spread to the same width.
Border
Work the border with the RS facing and the band at the top. Each side’s count includes every stitch between two corner ch-2 spaces. The corner ch-2 spaces are not counted.
Round 1: Ch 1, turn so the RS is facing. Sc in each of the 91 band sts across the top. Ch 2 for the corner.
- First side: Work 8 sc evenly across the side of the band: 1 sc in each of the 7 row ends (Leveling Row and Band Rows 1–6), plus 1 extra sc in the end of Band Row 1. Then work 25 lattice segments down the edge. In each segment: ch 5; work the middle st; ch 5; sc in the next edge apex below. For the middle st, sc in the free joint on the climbing-knot edge, or tr in the Nub at the back of the notch on the notched edge. The last segment ends with an sc in the bottom corner joint. (8 + 25 × 12 = 308 sts) Ch 2 for the corner.
- Bottom: Sc in the same corner joint again. Ch 4, sc in the next foundation joint; rep from * 17 more times. (1 + 18 × 5 = 91 sts)* Ch 2 for the corner.
- Second side: Work 25 lattice segments up the edge, each ending with an sc in the next edge apex above. Then work 8 sc across the side of the band. (308 sts) Ch 2, then sl st to the first sc.
Round 2: Ch 1. Sc in each st around, working (sc, ch 2, sc) in each corner ch-2 sp. Sl st to the first sc.
(top 93, sides 310 each, bottom 93)
Round 3: Repeat Round 2. Fasten off.
(top 95, sides 312 each, bottom 95)
Why the math works:
– The top count, 91, comes directly from the band.
– The bottom count, 91, is 18 knots × 5 sts (4 ch + 1 sc) plus 1 starting sc. That matches the top, so the panel stays square.
– Each side segment covers 2 lattice rows, or 3″ (7.6 cm), with 12 sts. At 4 sts per inch, the 25 segments give 75″ (190.5 cm). The 8 band sts give 2″ (5.1 cm). Together that is 308 sts for 77″ (195.6 cm).
– Rounds 2 and 3 add exactly 1 st at each end of every side (2 per side per round), and the ch-2 corner spaces let the corners turn flat.
Checkpoint: The panel measures 24¼” × 78½” (61.6 cm × 199.4 cm).
Tabs
Count the 95 top sts from one corner. The tabs go on sts 1–7, 45–51, and 89–95. That leaves 37 sts between each pair of tabs. The center tab is centered on st 48.
Row 1: With the RS facing, join yarn in the first tab st. Ch 1, sc in the same st and in the next 6 sts.
(7 sc)
Rows 2–20: Ch 1, turn, sc in each st across.
(7 sc per row)
Fasten off, leaving a 12″ (30.5 cm) tail. The tab is 1¾” × 5″ (4.4 cm × 12.7 cm).
Repeat for the other two tabs.
Make All Pieces
Make 2 identical panels in sage green, about 200 g / 300 m each. Each panel gets 3 tabs, for 6 tabs total.
Layout on the rod (the panels are not joined):
Rod: ==O=====O=====O=======O=====O=====O==
     [ Panel 1        ]  [ Panel 2        ]
     [ 24¼" × 78½"    ]  [ 24¼" × 78½"    ]
Joining (Attaching the Tabs)
The panels are not sewn to each other. The only joining in this project is closing each tab into a loop.
Method: Fold the tab toward the WS so it forms a loop 2″ (5.1 cm) tall above the top edge. Lay the last row of the tab across the WS of the panel at Band Row 6, about 1″ (2.5 cm) below the top edge.
Stitch to stitch: Whipstitch each of the tab’s 7 last-row sts to the 7 band sts directly behind the tab’s base. Then tack both side edges of the overlap down.
Tension: Sew firmly but don’t pull, so the RS of the band stays flat without dimples.
Checkpoint: Slide the rod through all 3 loops. Each loop should move freely, and the panel should measure 80½” (204.5 cm) from the bottom edge to the top of the loops.
Final Blocking
- Soak one panel in cool water for 15 minutes. Press the water out without wringing.
- Roll the panel in a towel to remove the excess water.
- Lay it flat and pin the four corners to 24¼” × 78½” (61.6 cm × 199.4 cm).
- Pin the band straight. Then pin every edge apex along both sides so the border lies in a straight line.
- Open the diamonds evenly. Each one should be about 2½” (6.4 cm) wide, with the Nubs lined up in straight diagonals.
- Smooth each tab flat, and spray any areas that dried too early.
- Leave the panel to dry completely before unpinning. Repeat for the second panel.
Final Quality-Control Checklist
- Every lattice crossing has a snug, rounded Nub.
- The diamonds are all the same size, with no stretched or short knots.
- The band has 91 sts and lies straight.
- After Round 3 the counts are 95 / 312 / 95 / 312.
- Both side borders are straight, with no scallops at the notches.
- The 3 tabs are evenly spaced and flush with the corners.
- Both panels measure the same within ½” (1.3 cm).
- All yarn tails are woven into solid stitches, not into the mesh.
Troubleshooting
- Diamonds vary in size: Check every loop against the 2″ gauge card before locking it.
- Knots slip or untwist: You are probably working under two strands. Make sure the locking sc goes under the single back strand only.
- Panel narrower than the band: Stretch the lattice harder when blocking, or lengthen the loops slightly for the next panel.
- Wavy side edges: Your chain-5s are too tight or too loose. Re-chain them to match 4 sts per inch.
- Top edge dips: Each dtr in the Leveling Row must reach all the way down into its Nub.
- Tabs pull the band forward: Sew them lower on the WS and with less tension.
- Panels grow when hung: Re-block them flat, and store them folded rather than hanging between uses.
Care
Hand wash in cool water, or machine wash on a gentle cycle inside a mesh laundry bag. Then reshape and dry the panels flat; never hang them wet.
Final Notes
The measurements in this pattern build on each other:
- 2″ (5.1 cm) knots make diamonds 2½” (6.4 cm) wide and rows 1½” (3.8 cm) tall.
- Nine diamonds stretch to 22¾” (57.8 cm), which matches the 91-st band.
- Fifty rows plus the band give 77″ (195.6 cm).
- A ¾” (1.9 cm) border brings each panel to 24¼” × 78½” (61.6 cm × 199.4 cm).
- Three 2″ (5.1 cm) tab loops carry each panel on the rod.
Check your measurements at each stage and both panels will hang evenly side by side.
Happy crocheting!