
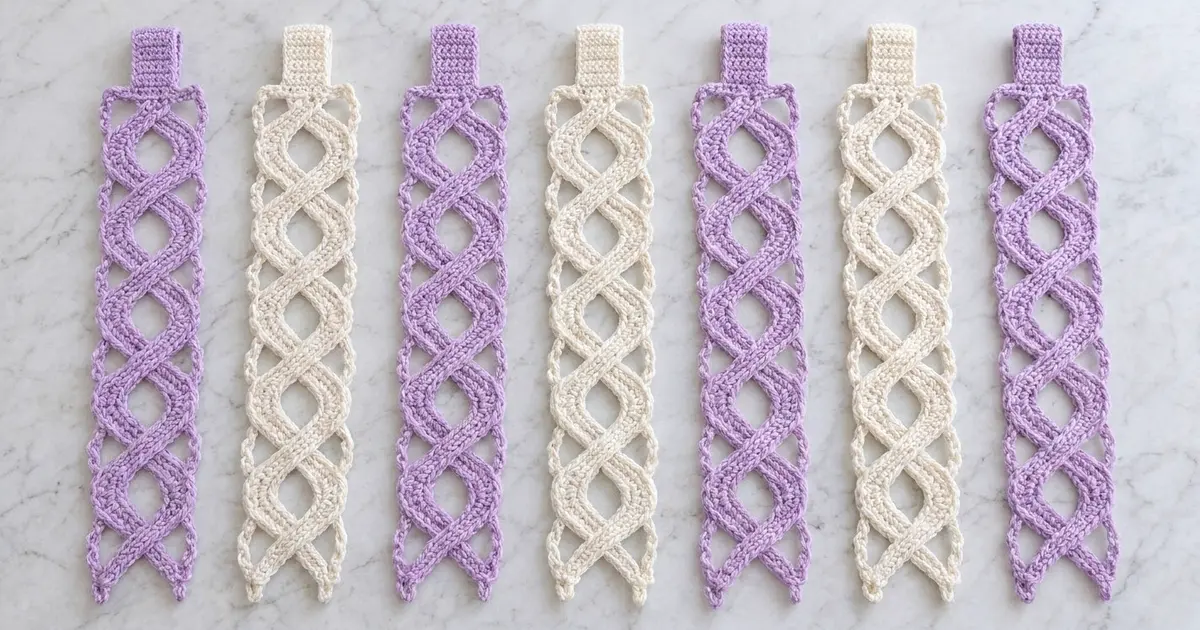
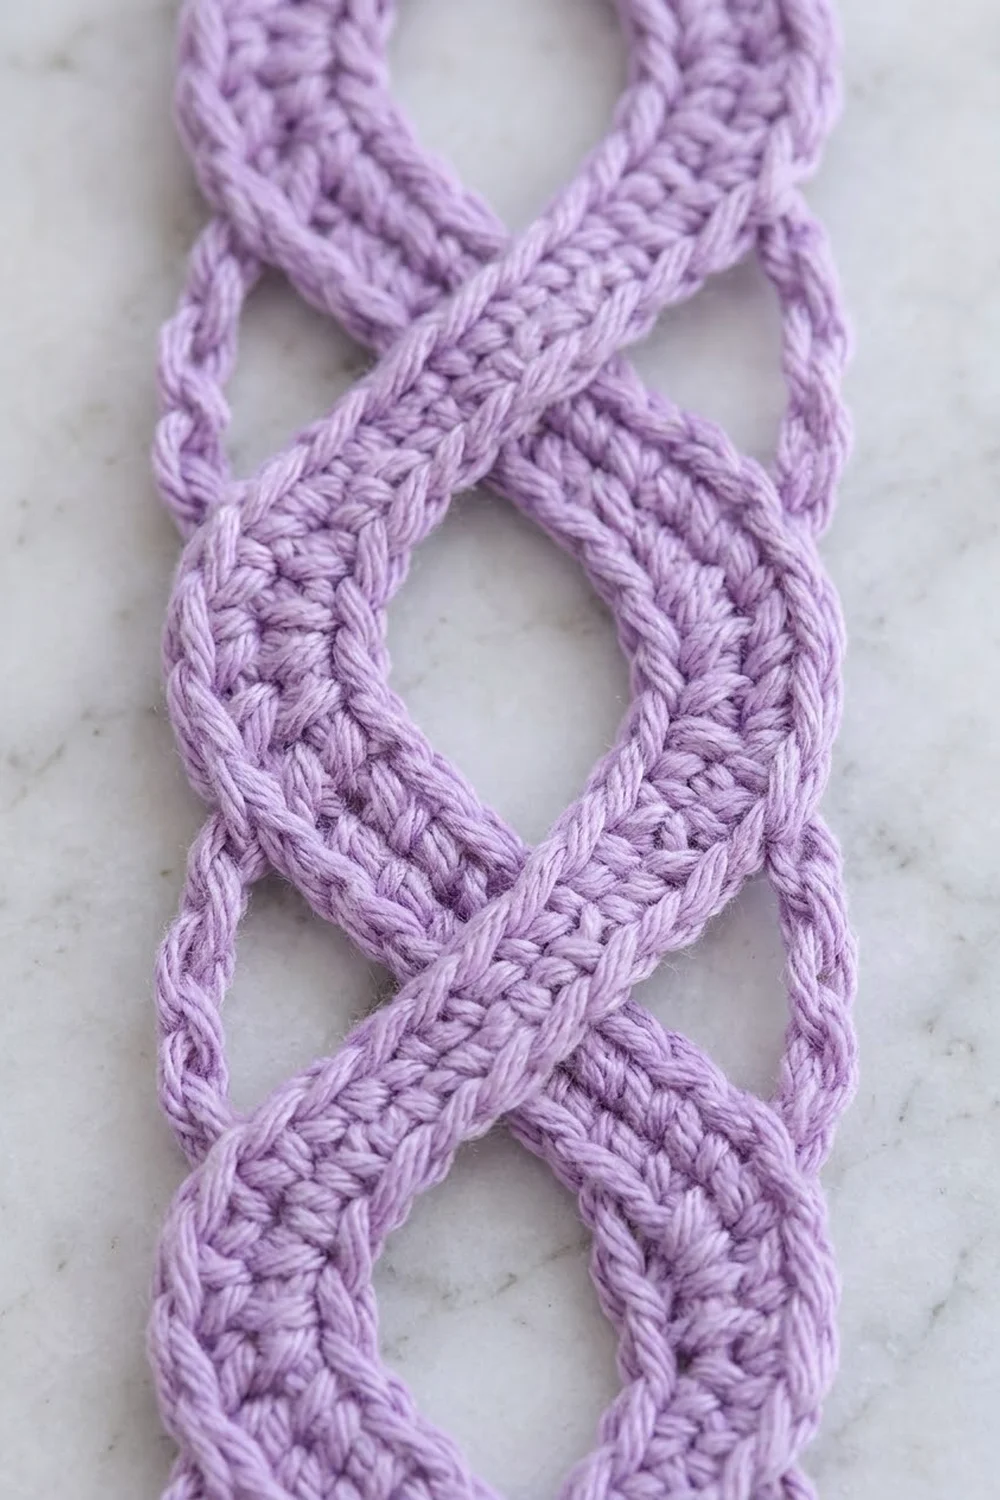
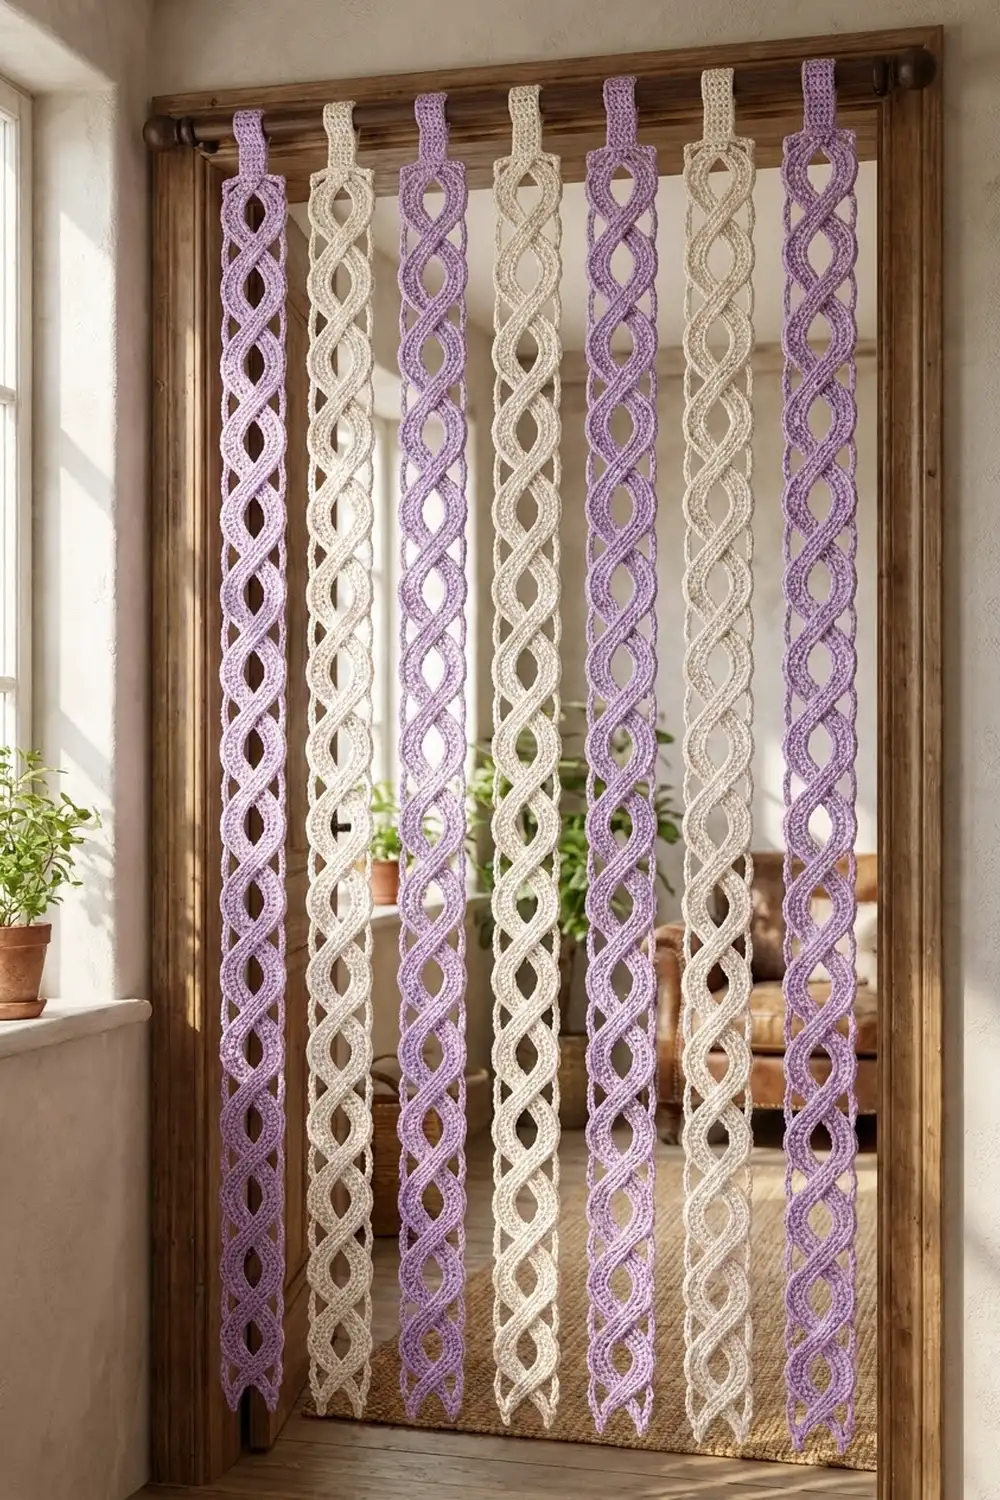
This doorway curtain is made of seven lacy strips that alternate soft lavender and creamy white. In each strip, two solid bands cross and separate down the center, so the strip looks like a twisted cable full of tall oval windows. Light passes through the openings, and the strips sway when someone walks through the doorway.
The style is airy and a little vintage, and it works in a bedroom, closet doorway, or reading nook. The corded outer edge gives each strip a neat frame, and the pointed lower ends hang cleanly.
This pattern uses US crochet terms. Each finished strip measures 4.75 in (12.1 cm) wide and 75 3/8 in (191.5 cm) long, plus a hanging loop of about 3 in (7.6 cm). With seven strips spaced 1/2 in (1.3 cm) apart, the curtain is 36.25 in (92.1 cm) wide.
Each strip is worked flat in half double crochet rows from the top down, finished with a taper and a two-round corded border. A tab worked from the top edge folds over the rod. The strips are never seamed together.
Finished Size and Construction
- Finished strip size: 4.75 in x 75 3/8 in (12.1 cm x 191.5 cm)
- Hanging drop (with tab loop): about 78 3/8 in (199.1 cm)
- Curtain width: 36.25 in (92.1 cm) with 1/2 in (1.3 cm) gaps
- Skill level: Easy intermediate
- Terminology: US
- Yarn weight: Worsted (#4) cotton
- Hook: 5.0 mm (H-8)
- Number of pieces: 7 separate strips (4 lavender, 3 cream)
- Layout: 7 strips side by side on one rod, alternating colors
- Strip size before border: 4 in x 75 in (10.2 cm x 190.5 cm)
- Border depth: 3/8 in (1.0 cm) on each long side and at the tip
Materials
Yarn: Use a smooth worsted-weight cotton or cotton blend. Cotton holds the open shapes, keeps the strips from stretching, and shows the bands clearly. Avoid fuzzy or very stretchy acrylics, because long strips made with them can grow while they hang.
- Lavender: about 810 g / 1,450 m (1,586 yd), enough for 4 strips
- Cream: about 620 g / 1,100 m (1,203 yd), enough for 3 strips
These amounts are based on a yarn with about 180 m per 100 g. Each strip uses about 330 m (361 yd). The quantities include a margin of about 10% for gauge swatches and small differences in tension.
Tools:
- 5.0 mm (H-8) crochet hook
- Tapestry needle
- Stitch markers
- Rust-proof pins and a long blocking surface
- Spray bottle
- Measuring tape
- Wooden curtain rod, at least 40 in (101.6 cm) long and up to 1.25 in (3.2 cm) in diameter
Abbreviations (US Terms)
- ch – chain
- sk – skip
- sl st – slip stitch
- sc – single crochet
- hdc – half double crochet
- hdc2tog – half double crochet 2 together
- rev sc – reverse single crochet
- st(s) – stitch(es)
- RS / WS – right side / wrong side
Special stitch: Reverse single crochet (rev sc). Work from left to right (right-handed). Insert the hook into the next stitch to the right, yarn over, pull up a loop, yarn over, and pull through both loops. This makes the twisted, corded frame edge.
Position rule: Every body row has 15 positions, counting stitches and chains together. When a row says “sk 4,” skip 4 positions of the row below, whether they are stitches or chains. When you work an hdc over a chain from the previous row, work into the chain itself, not around the space. This keeps the bands stacked exactly.
Gauge and Checkpoints
Gauge: 15 hdc and 12 rows = 4 in (10.2 cm) in solid hdc.
One row is 1/3 in (0.8 cm) tall. One 9-row repeat is 3 in (7.6 cm) long.
Test a short strip first. Work Row 1 and one full repeat (Rows 2–10), then measure:
- After Row 1: 4 in (10.2 cm) wide
- After Row 10: 3 1/3 in (8.5 cm) long, with one complete oval opening
- After Row 109 (12 repeats): 36 1/3 in (92.3 cm) long
- After Row 219: 73 in (185.4 cm) long
- After Row 225 (taper): 75 in (190.5 cm) long
- After border: 4.75 in x 75 3/8 in (12.1 cm x 191.5 cm)
If your piece is too big, switch to a hook 0.5 mm smaller. If it is too small, switch to a hook 0.5 mm larger. Row height matters most. If your rows are too tall, every strip will drag on the floor, because the error adds up over 225 rows.
Strip Pattern (Make 7)
Start at the top edge and work down.
Foundation: Ch 17.
Row 1 (RS): Hdc in 3rd ch from hook (the skipped chains do not count) and in each ch across, turn. (15 hdc)
From here on, start every row with ch 2 (does not count as a stitch), then turn at the end.
The 9-Row Lattice Repeat
Row A (crossing row): Hdc in first st, ch 4, sk 4, hdc in next 5, ch 4, sk 4, hdc in last st. (7 hdc + 8 ch = 15 positions)
The 5 center hdc are where the two bands cross. The ch-4 on each side makes the widest part of the side triangles.
Row B (bands begin to split): Hdc in first st, ch 3, sk 3, hdc in next 3, ch 1, sk 1, hdc in next 3, ch 3, sk 3, hdc in last st. (8 hdc + 7 ch = 15 positions)
Row C (bands open): Hdc in first st, ch 2, sk 2, hdc in next 3, ch 3, sk 3, hdc in next 3, ch 2, sk 2, hdc in last st. (8 hdc + 7 ch = 15 positions)
Row D (oval at full width): Hdc in first st, ch 1, sk 1, hdc in next 3, ch 5, sk 5, hdc in next 3, ch 1, sk 1, hdc in last st. (8 hdc + 7 ch = 15 positions)
Each 3-hdc band moves one position outward per row. It goes from positions 5–7 in Row B, to 4–6 in Row C, to 3–5 in Row D. That shift gives the twisted look.
Work the repeat in this order:
- Row A
- Row B
- Row C
- Row D
- Row D
- Row D
- Row C
- Row B
- Row A
Rows 2–217: Work the 9-row repeat 24 times (24 x 9 = 216 rows).
Row 9 of one repeat and Row 1 of the next are both crossing rows. Together they make a solid crossing 2 rows deep, and each oval opening is 5 positions wide and about 2 in (5.1 cm) tall.
Row 218: Hdc in each st and ch across. (15 hdc)
Row 219: Hdc in each st across. (15 hdc)
Checkpoint: The strip measures 73 in (185.4 cm) long and 4 in (10.2 cm) wide.
Tapered Lower End
Row 220: Hdc2tog, hdc in next 11, hdc2tog. (13 sts)
Row 221: Hdc2tog, hdc in next 9, hdc2tog. (11 sts)
Row 222: Hdc2tog, hdc in next 7, hdc2tog. (9 sts)
Row 223: Hdc2tog, hdc in next 5, hdc2tog. (7 sts)
Row 224: Hdc2tog, hdc in next 3, hdc2tog. (5 sts)
Row 225: Hdc2tog, hdc in next 1, hdc2tog. (3 sts)
Do not fasten off. Continue straight into the border.
Checkpoint: The strip is 75 in (190.5 cm) long. The taper adds 2 in (5.1 cm) of that length.
Hanging Tab
Work the tab after the border is finished (see Joining).
Make All Pieces
Make 7 identical strips:
- Lavender: 4 strips
- Cream: 3 strips
Layout grid (left to right, viewed from the room side):
[ L ] [ C ] [ L ] [ C ] [ L ] [ C ] [ L ]
  1     2     3     4     5     6     7
L = lavender, C = cream. Strips 1 and 7 are lavender, so the curtain has a matching frame at both outer edges.
Measure every strip after its border. All seven should be within 1/4 in (0.6 cm) of each other in length, or the lower points will hang unevenly.
Joining: Tabs and Hanging
The strips are not seamed together. Each one hangs from its own tab, so each strip moves freely and can be removed for washing.
Tab: With the RS facing, rotate the strip so the foundation chain is at the top. Count the 15 free loops of the foundation chain and place a marker in the 5th and the 11th.
- Join yarn in the 5th loop.
- Tab Row 1: Ch 2 (does not count), hdc in same loop and in next 6 loops, turn. (7 hdc)
- Tab Rows 2–18: Ch 2, hdc in each st across, turn. (7 hdc)
The tab measures 1.9 in (4.8 cm) wide and 6 in (15.2 cm) long. Fasten off and leave a 12 in (30.5 cm) tail.
Stitch-to-stitch logic: Fold the tab toward the WS. Whipstitch the 7 hdc of Tab Row 18 to the back of Row 1 of the strip, one-to-one onto the same 7 positions (5 through 11) where the tab begins. Matching 7 stitches to 7 stitches keeps the loop square, so it doesn’t twist. The finished loop stands about 3 in (7.6 cm) above the top edge.
Tension advice: Sew firmly, but don’t pull so hard that the top edge puckers. Run the tail back through the seam once to lock it, because the full weight of the strip hangs from this seam.
Size checkpoint: Slide the strips onto the rod in grid order. Space them 1/2 in (1.3 cm) apart: 7 x 4.75 in + 6 x 0.5 in = 36.25 in (92.1 cm).
Border
The border has two rounds. It runs down the right long side, around the tapered tip, and up the left long side. The top edge is left plain, because the tab and rod cover it.
Border gauge: One hdc row is as tall as about 2 sc. Work 2 sc into each hdc row-end, which gives 6 sc per inch (2.5 cm) along the sides.
Round 1 (sc): Continuing from Row 225, turn the strip so you are working along the row-ends.
- Taper, first side: Work 2 sc in each of the 6 taper row-ends. (12 sc)
- Long side 1: Work 2 sc in each of the 219 row-ends up to the top corner. (438 sc)
Fasten off. Rejoin at the opposite top corner.
- Long side 2: Work 2 sc in each of the 219 row-ends. (438 sc)
- Taper, second side: Work 2 sc in each of the 6 taper row-ends. (12 sc)
- Tip: Sc in the first st of Row 225, 3 sc in the center st, sc in the last st. (5 sc)
Join with a sl st to the first sc of the first taper side.
Round 1 totals:
- Long side 1: 438
- Bottom (12 + 5 + 12): 29
- Long side 2: 438
- Total: 905 sc
Round 2 (rev sc): Ch 1. Rev sc in each sc along the full edge, 1 per sc, so each side keeps the counts from Round 1. (905 rev sc) Fasten off.
Why the math works: At 3 rows per inch and 2 sc per row, the sc land at 6 per inch, which is close to the natural sc gauge of this yarn. The edge therefore lies flat without ruffling or cupping. Rev sc works 1-to-1 and adds no stitches, so the counts don’t drift. The 3 sc in the tip stitch give just enough extra stitches for the blunt point to turn without pulling.
The two rounds add 3/8 in (1.0 cm) to each long side, so the width grows from 4 in to 4.75 in (10.2 cm to 12.1 cm). They add the same 3/8 in (1.0 cm) at the tip, bringing the length to 75 3/8 in (191.5 cm).
Final Blocking
- Soak each strip in cool water for 10 minutes, then press out the water without wringing.
- Roll the strip in a towel to remove the extra moisture.
- Lay it flat on a blocking surface long enough to hold it. If your surface is too short, block in two halves.
- Pin the width to 4.75 in (12.1 cm) every 6 in (15.2 cm) along the strip.
- Pin the length to 75 3/8 in (191.5 cm). Don’t stretch it beyond that.
- Ease each oval open to about 1.3 in (3.4 cm) wide, using a finger or a blunt knitting needle.
- Straighten the bands so the crossings sit on the center line.
- Shape the tapered point and pin the tip.
- Let the strip dry completely before you unpin it.
Final Quality-Control Checklist
- Every body row has exactly 15 positions.
- There are 24 complete lattice repeats, with 2-row crossings between ovals.
- The ovals line up down the center of the strip.
- The taper ends at 3 stitches.
- Border Round 1 totals 905 sc (438 / 29 / 438).
- The rev sc edge is even and has no gaps.
- The tab is sewn stitch-for-stitch and not twisted.
- All strips match in length within 1/4 in (0.6 cm).
- Colors follow the order L, C, L, C, L, C, L.
Troubleshooting
Bands zigzag or drift off center: You probably worked around chain spaces instead of into the chains. Work into each chain so every row has 15 positions.
Ovals look like slits: Your chains are too tight. Chain more loosely, or go up 0.5 mm for the chain sections only.
Strip is too long: Your rows are too tall. Go down a hook size, or remove whole repeats. Each repeat removed shortens the strip by 3 in (7.6 cm).
Border ruffles: You may have added extra stitches at row-ends. Work exactly 2 sc per row-end.
Border pulls the strip into a curve: Your tension is too tight. Loosen up, or use a hook 0.5 mm larger for Round 1.
Tip curls: Pin it flat while blocking, and make sure the center stitch has its 3 sc.
Strips hang at different lengths: Count the repeats in each strip, then re-block the long ones a little narrower.
Care
Hand wash in cool water with a mild detergent, or machine wash on a gentle cycle in a mesh bag. Reshape and dry the strips flat. Never hang them wet, because the weight of the water stretches them.
Final Notes
Each measurement leads to the next:
- Gauge is 15 hdc and 12 rows = 4 in (10.2 cm).
- One 9-row repeat is 3 in (7.6 cm).
- Rows 1–219 make 73 in (185.4 cm), and the 6-row taper brings the strip to 75 in (190.5 cm).
- The border adds 3/8 in (1.0 cm), for a finished strip of 4.75 in x 75 3/8 in (12.1 cm x 191.5 cm).
- The tab loop adds 3 in (7.6 cm), for a drop of about 78 3/8 in (199.1 cm).
- Seven strips spaced 1/2 in (1.3 cm) apart fill 36.25 in (92.1 cm) of rod.
Check your gauge at the start and measure at each checkpoint, and the strips will hang evenly.
Happy crocheting!