
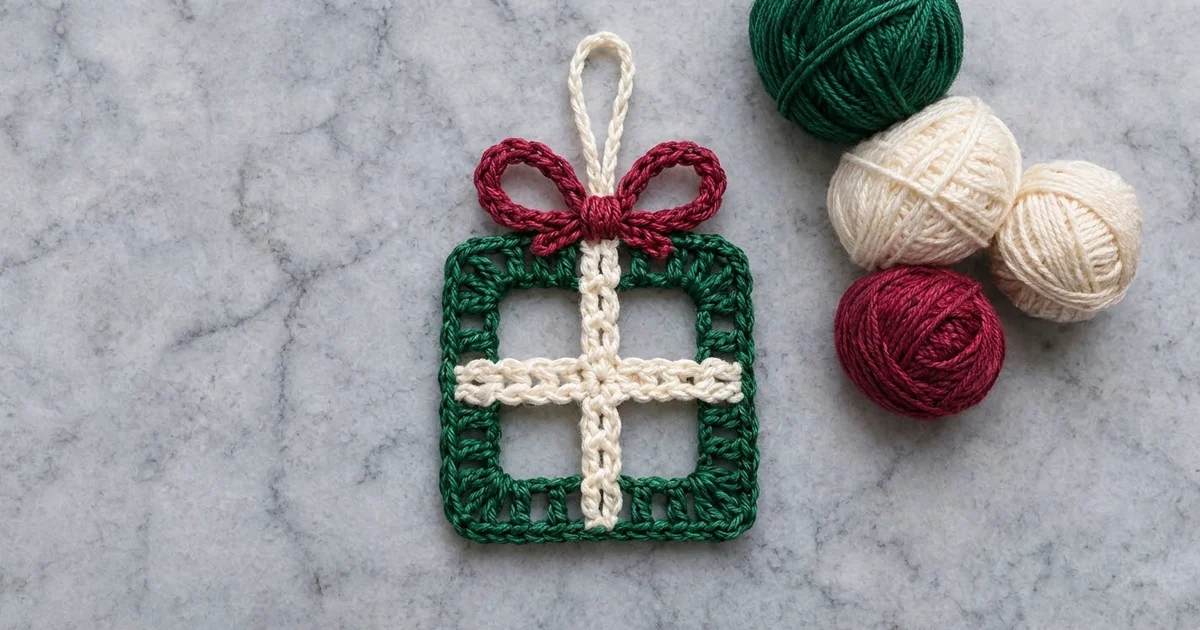
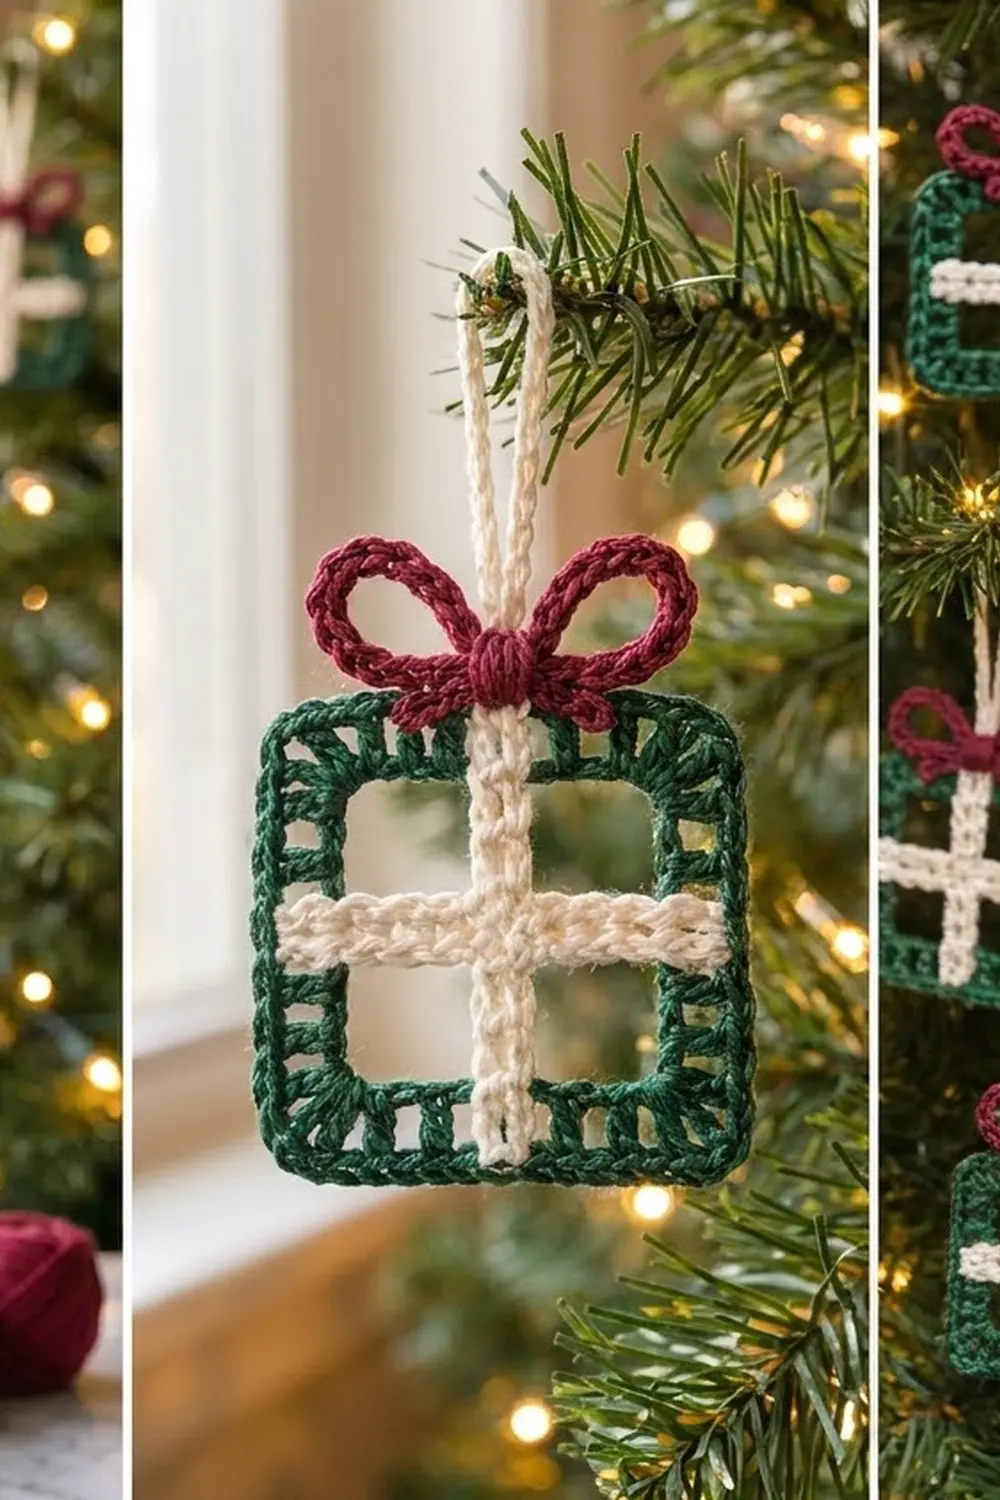
This little gift box ornament is an open, see-through square. A deep green frame holds a cream ribbon cross, and a cranberry red bow sits on top. A cream chain loop lets it hang from a tree branch, a gift tag, or a window hook.
The colors are forest green, warm cream, and cranberry red. They are worked in smooth mercerized cotton, which shows every stitch. The frame has a ladder-like texture made of double crochet posts with small gaps between them. A neat single crochet border finishes the outside.
This pattern uses US crochet terms. The finished box measures 3.5 in (8.9 cm) square. The bow adds about 0.75 in (1.9 cm) above the top edge, so the box with its bow is 4.25 in (10.8 cm) tall. The hanging loop adds another 2 in (5.1 cm).
Construction is quick. First, work a chain ring and one round of double crochet to make the frame. Next, stretch a single crochet ribbon across the opening, first top to bottom and then side to side. Then work a single crochet border. Last, pinch a small red strip into a bow and sew it on, then add the hanging loop.
Finished Size and Construction
- Finished size: 3.5 in x 3.5 in (8.9 cm x 8.9 cm) box; 4.25 in (10.8 cm) tall with the bow
- Skill level: Easy
- Terminology: US crochet terms
- Yarn weight: DK (weight 3) mercerized cotton
- Hook: 3.5 mm (US E-4)
- Number of pieces: 1 ornament (a frame with the ribbon crocheted in, plus 1 small bow sewn on)
- Layout: Single piece, not joined to any other pieces
- Piece size: 3.5 in (8.9 cm) square
- Size before border: 3.25 in (8.3 cm) square
- Border depth: 0.125 in (0.3 cm) per side, 1 round of single crochet
- Center opening: about 2.25 in (5.7 cm) square, crossed by a ribbon 0.25 in (0.6 cm) wide
Materials
Choose a smooth DK cotton or cotton blend. Mercerized cotton gives crisp stitch definition and holds its square shape after blocking. Acrylic also works, but it is softer and needs a firmer block.
- Color A, forest green: 6 g, about 14 m
- Color B, cream: 3 g, about 7 m
- Color C, cranberry red: 2 g, about 5 m
These quantities include a margin for checking gauge and for long sewing tails.
Tools:
- 3.5 mm (US E-4) crochet hook
- Tapestry needle
- Scissors
- 1 or 2 stitch markers
- Ruler or tape measure
- Pins and a blocking mat or folded towel
- Spray bottle with water
Abbreviations (US Terms)
- ch – chain
- sl st – slip stitch
- sc – single crochet
- dc – double crochet
- sp – space
- st(s) – stitch(es)
- beg – beginning
- rep – repeat
Special stitch – Corner: Work (1 dc, ch 2, 1 dc) all into the same foundation chain. This turns the frame 90 degrees and leaves a ch-2 sp for the border to work into.
Gauge and Checkpoints
Gauge matters less for an ornament than for a garment. It does decide whether the ribbon fits the opening without sagging. Make one complete ornament and check it against these numbers before you make a set.
- Base gauge: 10 sc = 2 in (5.1 cm). One round of dc is 0.5 in (1.3 cm) tall.
- Checkpoint 1, foundation ring: Lay the ring flat as a square. Each side of 12 chains measures about 2.4 in (6.1 cm).
- Checkpoint 2, after Round 1: The frame measures 3.25 in (8.3 cm) across the outside, with an opening of about 2.25 in (5.7 cm). The green band is 0.5 in (1.3 cm) wide.
- Checkpoint 3, after the ribbon: Both ribbon bars lie flat and straight. They should not sag, and they should not pull the sides of the frame inward.
- Checkpoint 4, after the border: The box measures 3.5 in (8.9 cm) square. The green band is now 0.625 in (1.6 cm) wide.
If your piece is too big: Use a 3.25 mm (US D-3) hook, or make your chains tighter. Loose chains are the most common cause.
If your piece is too small: Use a 3.75 mm (US F-5) hook. Do not add chains to the ring, because the ribbon and border counts depend on 12 chains per side.
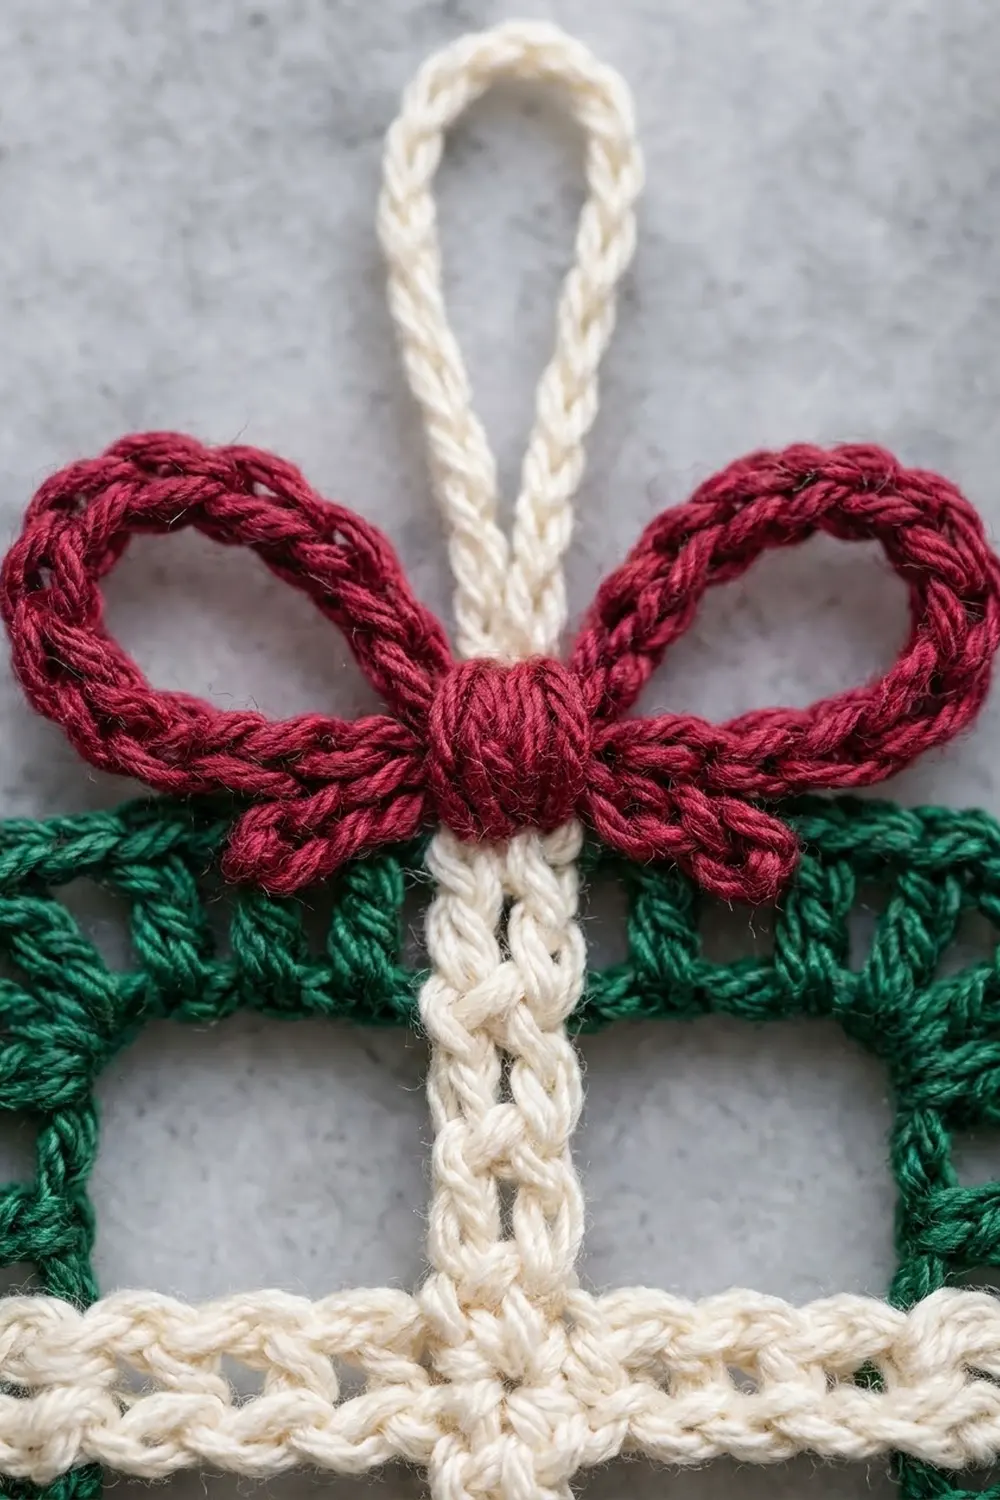
Frame (Color A, green)
Foundation Ring
With Color A, ch 48. Join with a sl st in the first ch to form a ring, making sure the chain is not twisted.
Think of the ring as 4 sides of 12 chains each. On each side, chains 1 to 11 hold straight stitches and chain 12 holds the corner.
Round 1
Ch 3 (counts as the first dc) in the same ch as the join. Dc in each of the next 10 ch, which gives 11 dc on this side. Work a Corner in the next ch.
*Dc in each of the next 11 ch, then work a Corner in the next ch; rep from * 2 more times. Join with a sl st to the top of the beg ch-3.
Stitch count: 52 dc and 4 ch-2 corner sps. That is 11 straight dc on each of 4 sides (44 dc), plus 2 dc in each of 4 corners (8 dc). Each side has 13 dc between its two corner sps.
The straight dc leave small gaps between their posts where they sit in the chain ring. These gaps make the ladder texture, so keep your chains even.
Do not fasten off. Put a marker in the live loop and set the frame aside. The side where you started is the top of the box. The bow will hide the join.
Ribbon Cross (Color B, cream)
The ribbon is worked into the foundation chain along the inside edge of the frame. On each side, find the 6th straight dc. It is the middle one of the 11, with 5 straight dc on either side. Every ribbon join goes into the foundation ch directly below that dc.
Vertical Bar
With the right side facing you, join Color B with a sl st in the foundation ch under the 6th straight dc of the bottom side.
- Ch 11.
- Sl st in the foundation ch under the 6th straight dc of the top side.
- Ch 1 and turn. Sc in each of the 11 ch back down the bar. (11 sc)
- Sl st in the foundation ch where you started. Fasten off.
The bar is now 2 strands wide: the chain plus the row of sc. It is about 0.25 in (0.6 cm) wide and spans the 2.25 in (5.7 cm) opening. Its 6th sc sits at the exact center, so mark that stitch.
Horizontal Bar
With the right side facing you, join Color B with a sl st in the foundation ch under the 6th straight dc of the left side.
- Ch 5.
- Sl st in the marked 6th sc of the vertical bar.
- Ch 5.
- Sl st in the foundation ch under the 6th straight dc of the right side.
- Ch 1 and turn. Sc in each of the next 5 ch, skip the center sl st, then sc in each of the next 5 ch. (10 sc)
- Sl st in the foundation ch where you started. Fasten off.
The ribbon now divides the opening into 4 equal windows, each about 1 in (2.5 cm) across. If one window is clearly larger than the others, take out that bar and redo the joins.
Bow (Color C, red)
Bow Strip
With Color C, ch 26.
Row 1: Sc in the 2nd ch from the hook and in each ch across. (25 sc)
Fasten off, leaving a 10 in (25.4 cm) tail. The strip is about 5 in (12.7 cm) long.
Shaping the Bow
- Use the tail to sew the two short ends together, making a ring.
- Flatten the ring so the seam sits at the center back.
- Cut a 12 in (30.5 cm) length of Color C. Wrap it tightly around the middle 6 to 8 times to pinch the ring into 2 loops. The wraps build up into a rounded knot.
- Thread both ends under the wraps at the back and tie them together. Keep these tails for sewing the bow on.
The finished bow is about 1.75 in (4.4 cm) wide and 0.75 in (1.9 cm) tall.
Border (Color A, green)
Border Gauge
The border uses the same gauge, 10 sc = 2 in (5.1 cm). One round of sc adds 0.125 in (0.3 cm) on each side, so the box grows from 3.25 in (8.3 cm) to 3.5 in (8.9 cm).
Border Round
Put the live green loop back on your hook. You are at the top of the beg ch-3 of Round 1.
Round 2: Ch 1. Sc in the same st as the join and in each of the next 11 dc (12 sc). Work 3 sc in the corner ch-2 sp. *Sc in each of the next 13 dc, then work 3 sc in the next ch-2 sp; rep from * 2 more times. Sc in the last dc. Join with a sl st to the first sc and fasten off.
Stitch count: 64 sc. This is a trim round. It has 52 sc worked 1 into each existing dc, plus 12 corner sc added (3 in each of 4 ch-2 sps).
Per side: 17 sc. Each side counts the corner center sc at both ends: 1 corner center + 1 corner sc + 13 sc over dc + 1 corner sc + 1 corner center. Four sides x 17 = 68. Each of the 4 corner center sc is shared by 2 sides, so 68 − 4 = 64.
Why the Math Works
Each side has 11 straight dc, 1 corner dc at each end, and 1 corner sc at each end, for 15 stitches. With the 2 shared corner center sc, each side has 17 sc. At 5 sc per inch, that is 3.4 in (8.6 cm), and the corner turn brings each side to 3.5 in (8.9 cm). The 9th sc of the top side is the middle of its 17 stitches. It sits directly above the 6th straight dc, so it lines up with the vertical ribbon.
Attach the Bow and Hanging Loop
- Bow: Center the bow on the top border so the knot covers the 9th sc and the top end of the ribbon. Sew through the knot and the border 3 or 4 times. Add one small stitch at the base of each loop so the loops stay level. Weave in the ends.
- Hanging loop: Join Color B with a sl st in the back loop of the 9th sc of the top side, behind the bow. Ch 20, then sl st in the same st and fasten off. The 20 chains measure about 4 in (10.2 cm) and fold into a 2 in (5.1 cm) loop.
Final Blocking
- Weave all tails along the inside of the dc posts so none show through the windows.
- Lay the ornament face up on a blocking mat or folded towel.
- Pin the corners to make a 3.5 in (8.9 cm) square, and check that both diagonals are the same length.
- Pin the center of each side so the edges stay straight.
- Pin the ribbon so both bars are straight and cross at the true center.
- Mist with water until the piece is damp. Leave the bow unpinned and shape its loops with your fingers.
- Let it dry completely, about 2 to 4 hours, before you remove the pins.
Final Quality-Control Checklist
- All 4 sides measure 3.5 in (8.9 cm).
- Round 1 has 52 dc and 4 ch-2 sps.
- The border has 64 sc, with 17 per side.
- The vertical bar has 11 sc and the horizontal bar has 10 sc.
- The 4 windows are equal, about 1 in (2.5 cm) each.
- The bow is 1.75 in (4.4 cm) wide, with a tight center knot.
- The bow and hanging loop sit at the top center, above the vertical ribbon.
- No tails show on the front.
Troubleshooting
The frame ruffles: The chain ring is too loose. Check that it has exactly 48 chains, and make the ring with a smaller hook.
The frame cups inward: The chain ring is too tight. Make the ring with a hook one size larger, then switch back for Round 1.
The ribbon sags: Redo the bar with 1 fewer chain: 10 for the vertical bar, or 4 on each half of the horizontal bar. Change the sc count to match.
The ribbon pulls the sides in: Add 1 chain to the bar and 1 sc to the return row.
The ribbon is off center: Count the straight dc again. The joins go under the 6th of the 11 straight dc, and the corner dc do not count.
The bow loops droop: Wrap the center more tightly, and add a holding stitch at the base of each loop.
The corners look rounded: Make sure each corner has 3 sc, and pin right at the corner center sc when you block.
Care
Hand wash in cool water with mild soap. Roll it in a towel to remove water, then dry it flat, pinning it back into shape if needed.
Final Notes
Here is the measurement chain from start to finish:
- The ring of 48 ch (12 per side) becomes Round 1: 52 dc, a 3.25 in (8.3 cm) square with a 2.25 in (5.7 cm) opening.
- An 11 sc vertical bar and a 10 sc horizontal bar make the ribbon cross.
- The 64 sc border, 17 per side, brings the box to 3.5 in (8.9 cm).
- A 25 sc strip becomes the 1.75 in (4.4 cm) bow.
Check each number as you go and every ornament in your set will match.
Happy crocheting!