
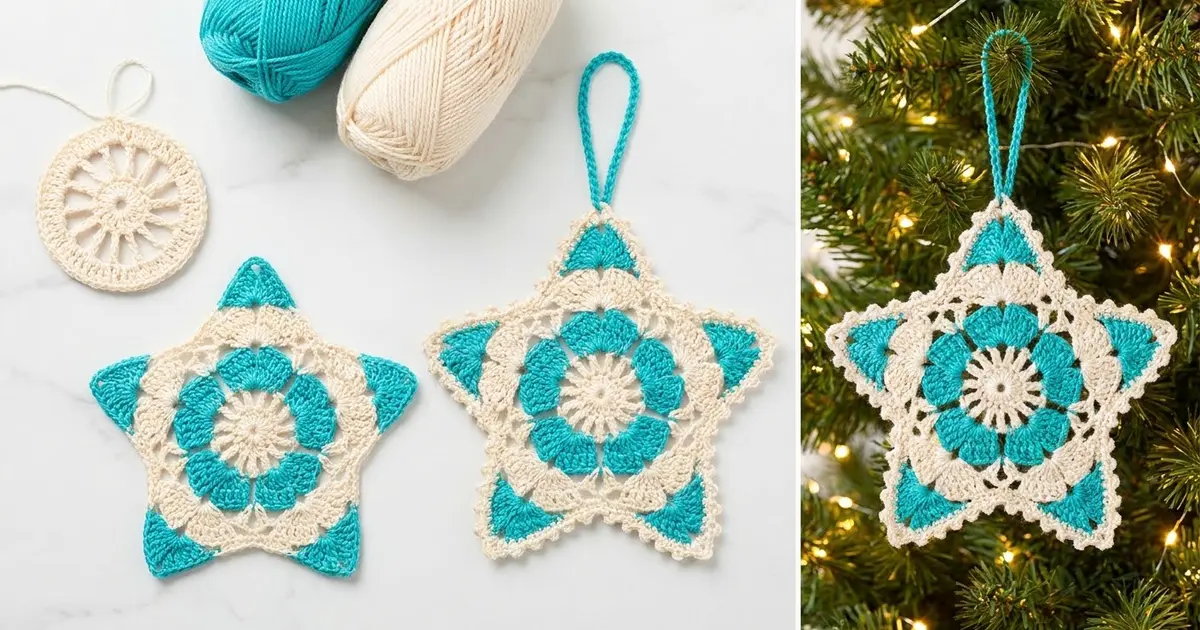
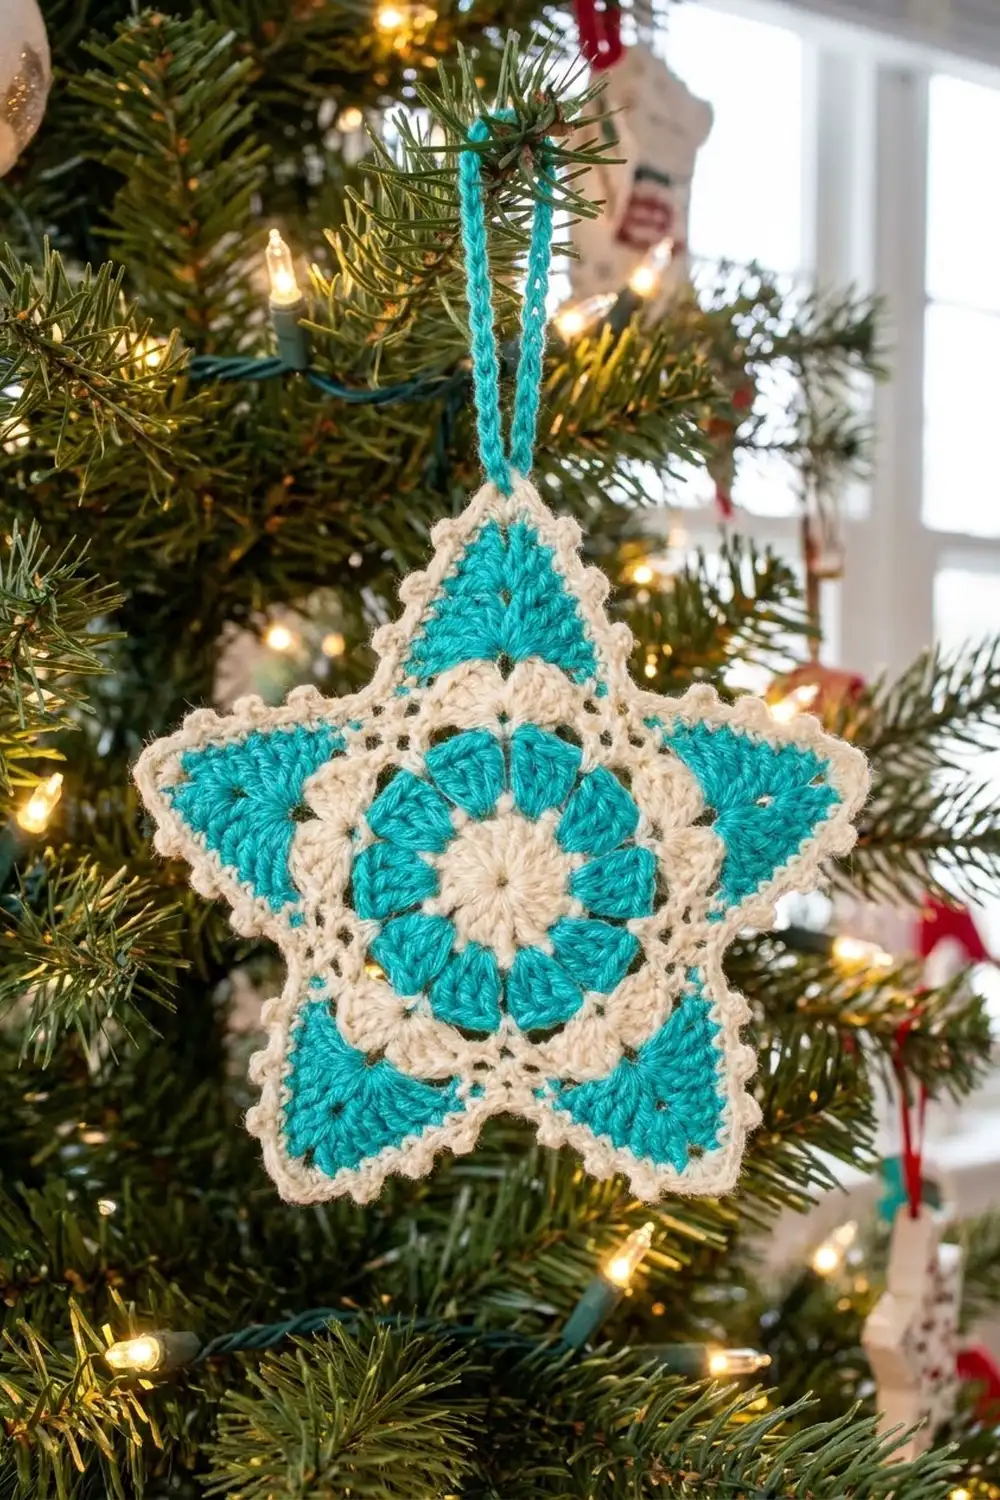
The Seafrost Star is a small, lacy, five-pointed star ornament in two colors: bright turquoise teal and soft cream. A cream spoked wheel sits at the center and a teal pentagon of fans frames it. Next comes a cream openwork round that shapes the star, and teal triangular tips give each point a pop of color. A crisp cream edging and a teal chain hanging loop finish it.
The style is classic and light, somewhere between a granny motif and a snowflake. It looks good on a tree, a gift package or a window hook. Make one or a dozen; each star is a single piece with nothing to join.
This pattern uses US crochet terms. The finished star measures about 4 in (10.2 cm) from tip to tip, plus a hanging loop of about 1.5 in (3.8 cm).
You work the star in the round from the center out, in five rounds, and change color every round. Round 1 is the cream wheel and Round 2 builds the teal pentagon. Round 3 sets up the five points, Round 4 shapes the teal tips and Round 5 is the cream edging. You add the hanging loop last.
Finished Size and Construction
- Finished size: about 4 in (10.2 cm) tip to tip, after blocking
- Skill level: Easy / advanced beginner
- Terminology: US crochet terms
- Yarn weight: DK (light worsted, #3), cotton or cotton blend
- Hook: 3.5 mm (E-4)
- Number of pieces: 1 (single star ornament)
- Layout: one five-pointed star worked in the round, plus a chain hanging loop
- Piece size: 4 in (10.2 cm) tip to tip
- Size before border: about 3.75 in (9.5 cm) tip to tip after Round 4
- Border depth: one round of single crochet, about 0.125 in (0.3 cm) per edge
Materials
Choose a smooth cotton in DK weight, either mercerized or matte. Cotton keeps the points crisp after blocking and shows the stitch texture clearly. Acrylic also works, but the points will be softer and may curl. Use two colors with strong contrast so the layers stay easy to see from a distance.
- Color A – Cream: about 6 g / 14 m (Rounds 1, 3 and 5)
- Color B – Teal: about 5 g / 12 m (Rounds 2 and 4, plus the hanging loop)
These amounts are for one star and include a small margin for joins, weaving in ends and a gauge test. A typical 50 g ball of either color makes about eight stars.
Tools:
- 3.5 mm (E-4) crochet hook
- Tapestry needle
- Scissors
- Stitch marker (optional)
- Rust-proof pins and a foam blocking mat
- Spray bottle with water
- Fabric stiffener (optional, for very crisp points)
Abbreviations (US Terms)
- ch – chain
- sl st – slip stitch
- sc – single crochet
- hdc – half double crochet
- dc – double crochet
- tr – treble crochet
- sp – space
- sk – skip
- st(s) – stitch(es)
- rep – repeat
- sc2tog – single crochet two together
Special stitch – sc2tog across a space: Insert the hook in the next st, yarn over and pull up a loop. Skip the ch-1 sp, insert the hook in the following st, yarn over and pull up a loop. Yarn over and pull through all 3 loops on the hook. This counts as 1 sc.
Gauge and Checkpoints
Gauge matters less for an ornament than for a garment, but it decides whether the points come out crisp or floppy. Work Rounds 1 and 2 as a test piece first. Measure the piece flat, without stretching it.
- After Round 1: about 1.25 in (3.2 cm) across
- After Round 2: about 2 in (5.1 cm) across, from a corner to the opposite flat side
- After Round 3: about 2.75 in (7.0 cm) across
- After Round 4: about 3.75 in (9.5 cm) tip to tip
- After Round 5: about 4 in (10.2 cm) tip to tip
If Round 2 is larger than 2.25 in (5.7 cm), go down to a 3.25 mm hook. If it is smaller than 1.75 in (4.4 cm), go up to a 3.75 mm hook. If Round 2 ruffles, your chains are too loose. If it cups, your dc are too tight.
Pattern
Starting note: Throughout the pattern, the beginning ch-3 counts as a dc and the beginning ch-2 counts as an hdc. Fasten off at the end of every round and join the new color where stated. Leave 4 in (10.2 cm) tails to weave in.
Color-change tip: Always join the new color in a corner or tip space. The join hides inside a stitch group there, and the color blocks stay sharp.
Round 1 – Cream Wheel
With Color A (cream), make a magic ring.
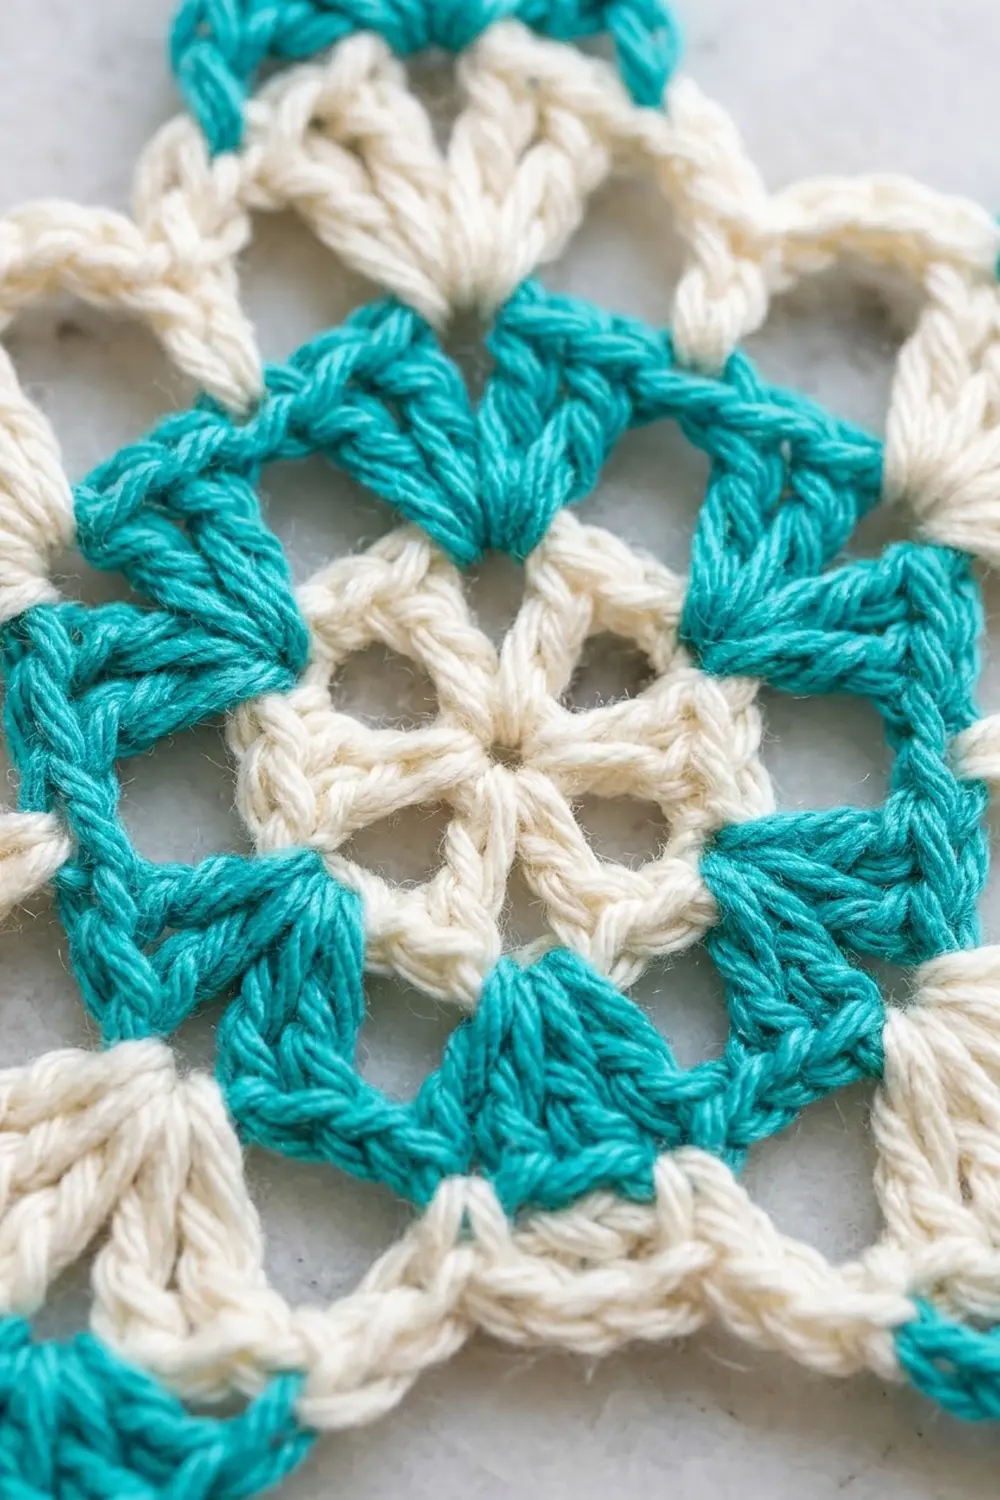
Ch 4 (counts as dc + ch 1), [dc in ring, ch 1] 9 times. Join with a sl st to the 3rd ch of the beginning ch-4. Pull the ring closed.
Count: 10 dc, 10 ch-1 sps.
The dc form ten spokes around a small open center. Fasten off.
Checkpoint: 1.25 in (3.2 cm) across.
Round 2 – Teal Pentagon
Join Color B (teal) with a sl st in any ch-1 sp.
Ch 3 (counts as dc), (dc, ch 2, 2 dc) in the same sp: first corner made. Ch 1, 3 dc in the next ch-1 sp, ch 1.
*(2 dc, ch 2, 2 dc) in the next ch-1 sp, ch 1, 3 dc in the next ch-1 sp, ch 1. Rep from * 3 more times. Join with a sl st to the top of the beginning ch-3. Fasten off.
Count: 35 dc (5 corners of 4 dc + 5 side groups of 3 dc), 5 ch-2 corner sps, 10 ch-1 sps.
Corners alternate with side groups, making a five-sided teal frame of fans around the cream wheel.
Checkpoint: 2 in (5.1 cm) across.
Round 3 – Cream Star Setup
Join Color A (cream) with a sl st in any ch-2 corner sp.
Ch 3 (counts as dc), (2 dc, ch 2, 3 dc) in the same sp.
*Ch 2. Sk the next 2 dc and the ch-1 sp. Sc in the center dc of the next 3-dc group, then ch 2. Sk the remaining dc of that group, the ch-1 sp and the next 2 dc. Work (3 dc, ch 2, 3 dc) in the next ch-2 corner sp.
Rep from * 3 more times. End with ch 2, sc in the center dc of the last side group, ch 2. Join with a sl st to the top of the beginning ch-3. Fasten off.
Count: 30 dc (5 corner shells of 6 dc), 5 sc, 5 ch-2 corner sps, 10 ch-2 side sps.
The corner shells become the bases of the five points. The sc in the middle of each side pulls inward to form the valleys between the points. The ch-2 spaces give the round its open, lacy look.
Checkpoint: 2.75 in (7.0 cm) across.
Round 4 – Teal Points
Join Color B (teal) with a sl st in any ch-2 corner sp.
Ch 2 (counts as hdc), (2 dc, tr, ch 3, tr, 2 dc, hdc) in the same sp: first point made.
*Sk the next 3 dc. Sc in the next ch-2 sp, ch 1, sk the sc, and sc in the next ch-2 sp. Sk the next 3 dc. Work (hdc, 2 dc, tr, ch 3, tr, 2 dc, hdc) in the next ch-2 corner sp.
Rep from * 3 more times. End with sc in the next ch-2 sp, ch 1, sc in the next ch-2 sp. Join with a sl st to the top of the beginning ch-2. Fasten off.
Count: 50 sts (5 points of 8 sts + 5 valleys of 2 sc), 5 ch-3 tip sps, 5 ch-1 valley sps.
Each point steps up from hdc to dc to tr and back down, which builds a triangular teal tip. The two valley sc anchor firmly into the cream round, so the cream ch-2 loops stay visible between the teal tips.
Checkpoint: 3.75 in (9.5 cm) tip to tip.
Round 5 – Cream Edging
Round 5 is the border. It is written out in full in the Border section below.
Hanging Loop
Work the loop after Round 5. Join Color B (teal) with a sl st in the ch-2 tip sp of any point. Ch 20, then sl st in the same ch-2 sp. Fasten off and weave the tail back through the chain.
Folded, the loop measures about 1.5 in (3.8 cm). For a longer loop, add chains in multiples of 4. Each 4 ch adds about 0.25 in (0.6 cm) to the folded length.
Border
Border gauge: In DK cotton with a 3.5 mm hook, about 6 sc = 1 in (2.5 cm) along the edge. The edging adds about 0.125 in (0.3 cm) to each point, taking the star from 3.75 in (9.5 cm) to 4 in (10.2 cm) tip to tip.
Round 5 – Cream Single Crochet Edge
Join Color A (cream) with a sl st in any ch-3 tip sp.
Ch 1 (does not count as a st), (2 sc, ch 2, 2 sc) in the same sp.
*Sc in each of the next 4 sts (tr, 2 dc, hdc). Sc2tog across the ch-1 sp, working the first leg in the first valley sc and the second leg in the second valley sc. Sc in each of the next 4 sts (hdc, 2 dc, tr). Work (2 sc, ch 2, 2 sc) in the next ch-3 tip sp.
Rep from * 3 more times. End the last repeat after the 4 sc (hdc, 2 dc, tr). Join with a sl st to the first sc. Fasten off.
Count: 65 sc, 5 ch-2 tip sps.
Per point: 4 sc at the tip + 4 sc + 1 sc2tog + 4 sc = 13 sc. Five points × 13 sc = 65 sc.
Per edge, tip to tip: 2 sc (tip) + 4 sc + 1 sc2tog + 4 sc + 2 sc (next tip) = 13 sc. This count already includes the sc at both tips, so you don’t add any extra corner stitches.
Why the math works: Round 4 has 8 sts on each point and 2 sc in each valley. The edging puts exactly 1 sc in each of the 8 point sts, decreases the 2 valley sc into 1, and adds 4 sc in each tip sp. That is 8 + 1 + 4 = 13 per point.
The 4 extra sc at each tip let the edge turn sharply without pulling. The sc2tog in each valley tightens the inner angle so the star holds its shape. The ch-2 at each tip makes a small cream picot point.
Final Blocking
- Weave in all ends on the back, through stitches of the same color.
- Mist the star lightly with water until it is damp but not dripping. For stiff points, dip it in diluted stiffener instead and squeeze out the excess.
- Lay the star right side up on a blocking mat.
- Pin the ch-2 sp of each tip outward. Check that opposite tips sit about 4 in (10.2 cm) apart.
- Pin each valley sc2tog inward so all five valleys sit at the same depth.
- With a fingertip, gently open the cream center spokes and the ch-2 loops of Round 3.
- Let the star dry completely, for at least 6 hours, before unpinning.
Final Quality-Control Checklist
- Round 1 shows 10 even cream spokes.
- Round 2 has 5 teal corners and 5 teal side groups (35 dc).
- Round 3 has 5 cream corner shells and 5 valley sc.
- Round 4 has 5 teal points with an even ch-3 at each tip (50 sts).
- Round 5 has 65 sc and 5 ch-2 picot tips.
- The star measures about 4 in (10.2 cm) tip to tip.
- All five points are the same size and depth.
- The hanging loop sits centered on one tip and is securely fastened.
- No yarn tails show on the front.
Troubleshooting
The center hole won’t close. Pull the magic ring tail firmly before joining Round 1. Then weave the tail in a circle around the ring.
Round 2 ruffles. Your ch-1 spaces are too loose. Chain more tightly or go down half a hook size.
Round 3 cups. The ch-2 side spaces are too tight. Relax your chains, or work ch 3 instead of ch 2 on the sides only.
The points look rounded, not pointed. Make sure each tr is full height, and pin every tip when blocking.
One point is larger than the others. Recount Round 4. Each point must be exactly (hdc, 2 dc, tr, ch 3, tr, 2 dc, hdc).
The valleys gape in Round 5. Check that you worked an sc2tog in each valley, not 2 separate sc.
The color changes look messy. Join each new color in a corner or tip space, not in the middle of a side. Weave tails behind stitches of the same color.
Care
Hand wash gently in cool water, reshape the points and lay flat to dry. Store the star flat or hanging, where it won’t be crushed, so the points stay crisp.
Final Notes
The measurement chain is simple. A 1.25 in (3.2 cm) cream wheel grows to a 2 in (5.1 cm) teal pentagon and then to a 2.75 in (7.0 cm) cream setup round. Round 4 brings the teal points to 3.75 in (9.5 cm), and the cream edging finishes the star at 4 in (10.2 cm). Check your size at each stage and every star will match the last.
The stitch counts follow one steady sequence: 10 dc, 35 dc, 30 dc plus 5 sc, 50 sts and 65 sc. If your counts match these numbers, your star is right. Make a set in teal and cream, or try other color pairs for a whole tree of little stars.
Happy crocheting!