

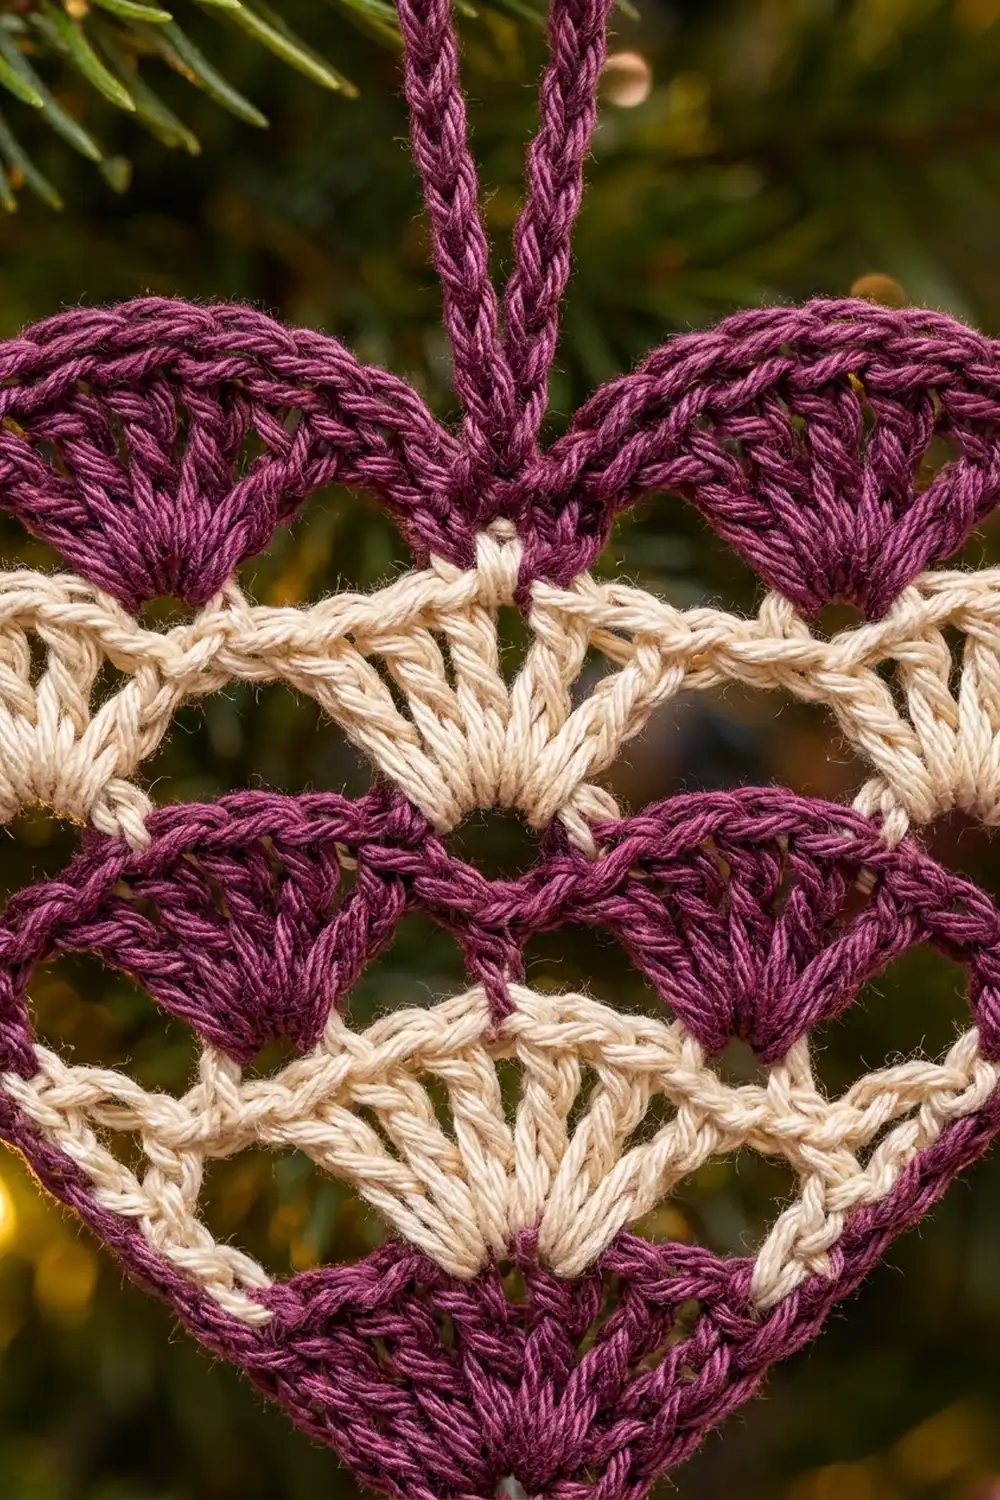
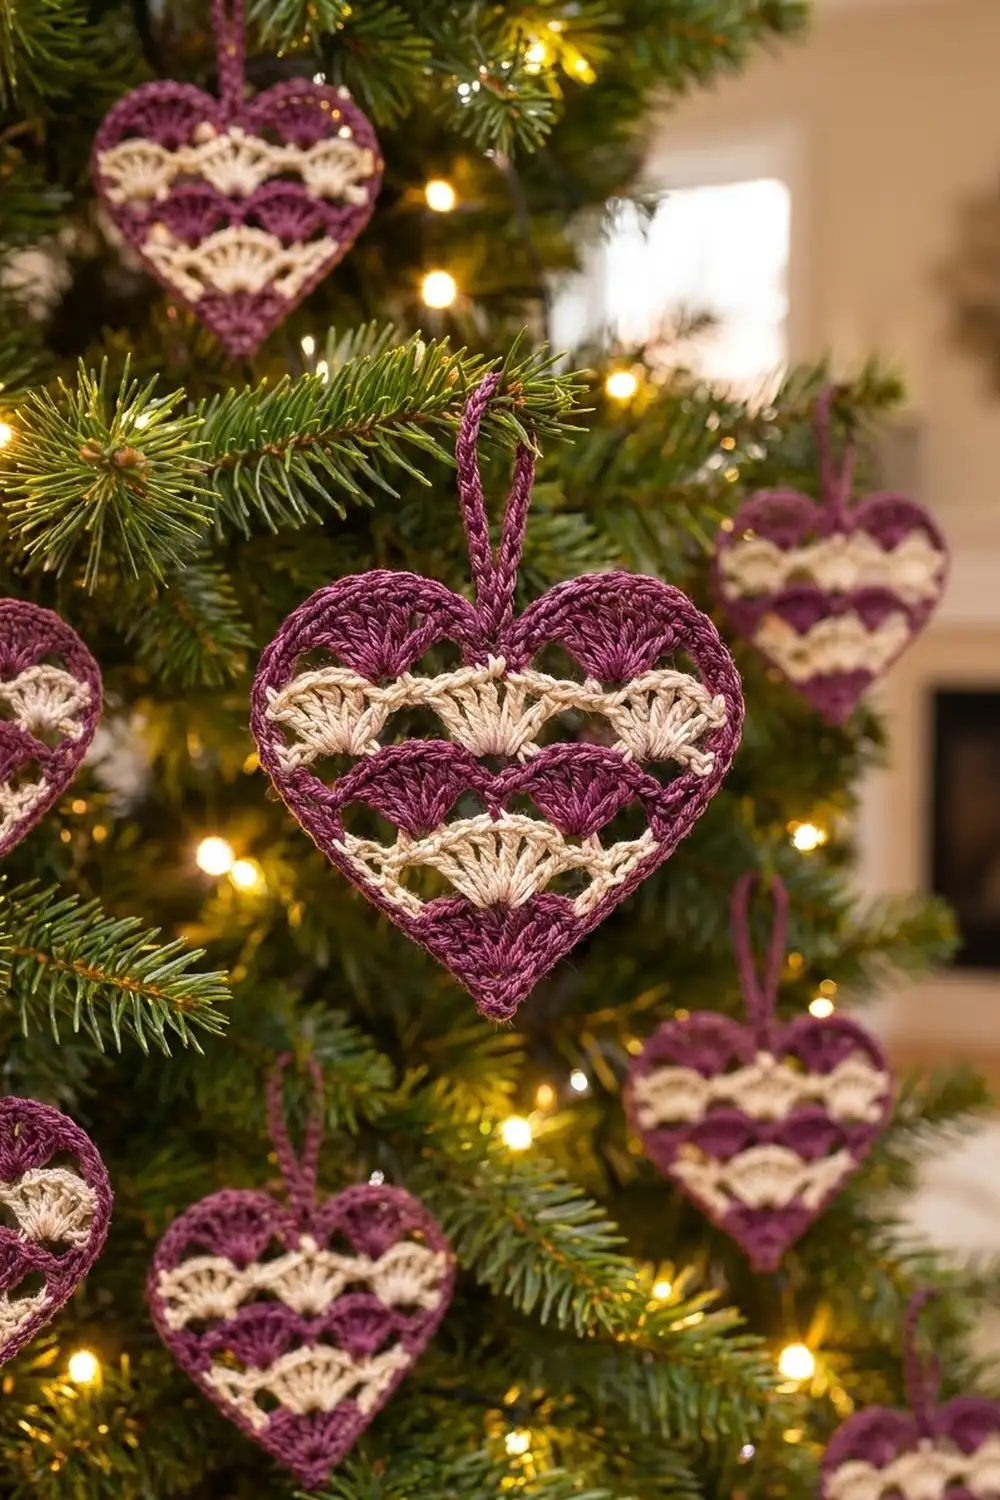
The Sugarplum Shell Heart is a small, lacy ornament built from stacked fans. Plum and cream bands of shell stitches climb from a solid plum point to two rounded plum lobes. A firm plum border frames the whole shape and keeps it crisp on the tree.
The two-color palette gives it a vintage, festive look. Deep plum reads as rich and wintry, and cream softens the stripes so every fan stands out. It works just as well as a Valentine’s gift tag or a sachet charm.
This pattern uses US crochet terms. The finished heart measures 4.5 in (11.4 cm) wide × 3.5 in (8.9 cm) tall, not counting the hanging loop, which adds about 1.5 in (3.8 cm).
You make it in one piece. It is worked flat in five turned rows from the bottom point up, changing color every row. Then two rounds of single crochet go all the way around, and the hanging loop is made as part of the last round. There is no sewing or joining.
Finished Size and Construction
- Finished size: 4.5 in (11.4 cm) wide × 3.5 in (8.9 cm) tall, without the loop
- Skill level: Easy–Intermediate
- Terminology: US
- Yarn weight: Sport / fine (2) mercerized cotton
- Hook: 2.75 mm (US C/2)
- Number of pieces: 1
- Layout: single heart, worked flat in rows from the point up
- Piece size: 4.5 in (11.4 cm) × 3.5 in (8.9 cm)
- Size before border: 4 in (10.2 cm) wide × 3 in (7.6 cm) tall
- Border depth: 0.25 in (0.6 cm) on every edge (2 rounds)
Materials
Choose a smooth, mercerized sport-weight cotton, about 150 m per 50 g. Mercerized cotton shows off the fan texture and holds its shape after blocking. Avoid fuzzy or very stretchy yarns, because the stitches will blur and the lobes will droop.
- Color A, plum: about 4 g / 12 m
- Color B, cream: about 2 g / 6 m
These quantities include a generous margin for swatching and color-change tails. The ornament itself uses roughly half of each amount.
Tools:
– 2.75 mm (US C/2) crochet hook
– Tapestry needle
– Small scissors
– 1 stitch marker
– Ruler or tape measure
– Blocking mat and rustproof pins
– Spray bottle with water
– Optional: fabric stiffener or light starch
Abbreviations (US Terms)
- ch – chain
- sl st – slip stitch
- sc – single crochet
- dc – double crochet
- tr – treble crochet
- st(s) – stitch(es)
- beg – beginning
- rnd – round
Special stitches:
– Shell: 7 dc in the same stitch.
– Half shell: 4 dc in the same stitch. At the start of a row, this is ch 3 (counts as the first dc) plus 3 dc in the same stitch.
– Lobe fan: 9 tr in the same stitch.
Color change: Work the last stitch of the row until 2 loops are left on the hook. Then yarn over with the new color and pull through. Cut the old color, leaving a 4 in (10.2 cm) tail. Every row starts with a fresh color, so the old yarn is never carried.
Gauge and Checkpoints
Gauge matters here because the border counts are fixed. Make one heart as your test piece, measure it at each checkpoint below, and adjust before you make a batch.
Key gauge: One shell = 1.25 in (3.2 cm) across its top arc. Each dc row adds 0.5 in (1.3 cm) of height.
Border gauge: 11 sc = 2 in (5.1 cm).
Checkpoints (measure flat, without stretching):
– After Row 1: 1.25 in (3.2 cm) wide, 0.75 in (1.9 cm) tall from the tip
– After Row 2: 2 in (5.1 cm) wide, 1.25 in (3.2 cm) tall
– After Row 3: 3.25 in (8.3 cm) wide, 1.75 in (4.4 cm) tall
– After Row 4: 4 in (10.2 cm) wide, 2.25 in (5.7 cm) tall
– After Row 5: 4 in (10.2 cm) wide, 3 in (7.6 cm) tall at the lobe tops
– After the border: 4.5 in (11.4 cm) × 3.5 in (8.9 cm)
If it is too big: go down one hook size, to 2.5 mm, or crochet more snugly. A heart 0.25 in (0.6 cm) too wide after Row 4 will end up about 0.25 in too wide overall.
If it is too small: go up to a 3.0 mm hook. Do not add or remove stitches, because the shell placement depends on the exact counts.
Heart Body
Rows are turned. The beginning ch-3 counts as a dc, and the ch-1 does not count as a stitch. Every row ends with a color change into the next row’s color.
Tip: Before you start each row, put the stitch marker in the center stitch of the row below: the center dc or the center sc. Every row is symmetrical around that marker, so you can check that both halves match before moving on.
Row 1 (plum): Ch 4, work 6 dc in the 4th ch from the hook. Change to cream. Turn.
(7 dc: 1 shell, counting the skipped ch-3 as a dc)
This is the solid point fan. Its center is the 4th dc.
Row 2 (cream): Ch 3 (counts as dc), 3 dc in the first st (half shell). Skip 2 dc, sc in the next dc (the center dc). Skip 2 dc, 4 dc in the top of the beg ch-3 (half shell). Change to plum. Turn.
(9 sts: 8 dc + 1 sc; 2 half shells)
Row 3 (plum): Ch 3 (counts as dc), 6 dc in the first st (edge shell). Skip 1 dc, sc in the next dc, skip 1 dc, shell in the next sc. Skip 1 dc, sc in the next dc, skip 1 dc, shell in the top of the beg ch-3. Change to cream. Turn.
(23 sts: 21 dc + 2 sc; 3 shells)
The two outer shells sit on the half shells and push the sides outward. The center shell sits in the Row 2 sc, staggered above the point fan.
Row 4 (cream): Ch 3 (counts as dc), 3 dc in the first st (half shell). Skip 2 dc, sc in the next dc (center of the shell). Skip 3 dc, shell in the next sc, skip 3 dc, sc in the next dc (center of the shell). Repeat from * to * once more. Skip 2 dc, 4 dc in the top of the beg ch-3 (half shell). Change to plum. Turn.
(25 sts: 22 dc + 3 sc; 2 shells + 2 half shells)
This is the widest band. The two cream shells and the two half shells sit between and outside the plum shells of Row 3.
Row 5 (plum, lobes): Ch 1, sc in the first dc. Skip 3 dc, lobe fan (9 tr) in the next sc. Skip 3 dc, sc in the next dc (center of the shell). Skip 3 dc, sl st in the next sc (the center dip). Skip 3 dc, sc in the next dc (center of the shell). Skip 3 dc, lobe fan in the next sc. Skip 3 dc, sc in the top of the beg ch-3. Do not cut the yarn and do not turn.
(23 sts: 18 tr + 4 sc + 1 sl st)
The tall tr fans rise above the sl st, which creates the two rounded lobes and the dip between them. Check the “After Row 5” measurement now.
Border
The border is worked in plum straight from Row 5. Work over the color-change tails along the sides as you go, so they are hidden inside the sc.
For counting, the heart is split into four sections:
– Side 1: from the end of Row 5 down to the point
– Point
– Side 2: from the point up to the start of Row 5
– Top: across Row 5
Border gauge reminder: 11 sc = 2 in (5.1 cm).
Rnd 1: Ch 1. Rotate to work down Side 1.
– Side 1: 4 sc around the end post of each of Rows 4, 3, 2 and 1 (16 sc).
– Point: 3 sc into the base of Row 1, in the chain where all the Row 1 dc were worked (3 sc).
– Side 2: 4 sc around the end post of each of Rows 1, 2, 3 and 4 (16 sc).
– Top:
– Sc in the first sc of Row 5 (1).
– First lobe: sc in the first tr, 2 sc in each of the next 7 tr, sc in the last tr (16).
– Sc in the sc, sc in the sl st, sc in the sc (3).
– Second lobe as the first (16).
– Sc in the last sc of Row 5 (1).
Join with a sl st to the first sc.
(72 sc: Side 1 16, Point 3, Side 2 16, Top 37)
Rnd 2: Ch 1, sc in the same st as the join.
– Side 1: Sc in each sc down to the point (16 sc, counting the first one).
– Point: Sc in the next sc, 3 sc in the center sc, sc in the next sc (5 sc).
– Side 2: Sc in each of the next 16 sc (16 sc).
– Top:
– Sc in the next sc (1).
– First lobe: sc in the next 5 sc, 2 sc in the next sc, sc in the next 4 sc, 2 sc in the next sc, sc in the next 5 sc (18).
– Center: sc in the next sc. In the middle sc, work (sc, ch 25, sc) for the hanging loop. Sc in the next sc (4 sc + loop).
– Second lobe as the first (18).
– Sc in the last sc (1).
Join with a sl st to the first sc. Fasten off and weave in the ends.
(79 sc + ch-25 loop: Side 1 16, Point 5, Side 2 16, Top 42)
Why the math works:
– Each side runs about 3 in (7.6 cm) on the diagonal. Sixteen sc at 11 sc per 2 in (5.1 cm) cover about 2.9 in (7.4 cm). That keeps the edge slightly firm, so it holds a crisp V instead of rippling.
– On top, the two lobe arcs plus the dip measure about 6.75 in (17.1 cm) around. Thirty-seven sc fit that length almost exactly.
– In Rnd 2, the outside curves get a little longer. The point gains 2 sc (3 to 5) and each lobe gains 2 sc (16 to 18), so the border lies flat around every curve.
– The straight sides keep 16 sc in both rounds.
– Each round adds 0.125 in (0.3 cm) per edge, so 2 rounds add 0.25 in (0.6 cm). That takes 4 in (10.2 cm) × 3 in (7.6 cm) to 4.5 in (11.4 cm) × 3.5 in (8.9 cm).
Final Blocking
- Weave in all the remaining tails along the inside of the border, not through the open fans.
- Spray the heart with water until it is evenly damp, or soak it briefly and press it in a towel.
- Lay it right side up on the blocking mat.
- Pin the bottom tip first. Then pin the two widest points of Row 4 so they are 4.5 in (11.4 cm) apart, measured across the border.
- Pin the top of each lobe so the heart is 3.5 in (8.9 cm) tall from tip to lobe top.
- Pin the center dip slightly downward so it reads clearly.
- Gently open each fan with your fingertips so the dc spread evenly and the small openings between bands are visible.
- For a stiffer ornament, brush on a light coat of starch or fabric stiffener now.
- Let it dry completely, then unpin. Hang it from the loop for a few hours so the loop relaxes straight.
Final Quality-Control Checklist
- Row counts were 7, 9, 23, 25 and 23 stitches.
- Five bands alternate plum, cream, plum, cream, plum.
- The fans in each band are staggered above the band below.
- Border Rnd 1 has 72 sc, and Rnd 2 has 79 sc plus the loop.
- The two sides have the same number of stitches (16 each).
- The heart measures 4.5 in (11.4 cm) × 3.5 in (8.9 cm), within 0.25 in (0.6 cm).
- The loop sits centered in the dip and hangs about 1.5 in (3.8 cm).
- No tails show through the openwork.
Troubleshooting
Fans cup or ruffle: Your dc are too tight at the base. Loosen the yarn-over on the shell stitches, or try a hook 0.25 mm larger.
Heart leans to one side: You probably skipped 2 dc where the pattern says 3, or the other way around. Recount the row against its stitch total, using the center marker.
Lobes look flat: Make sure Row 5 uses tr, not dc, and that the center is a sl st, not a sc.
Border ripples: Your sc are looser than the border gauge. Go down a hook size for the border only.
Border pulls in or puckers: Your sc are too tight. Use a larger hook for the border, but keep the same counts.
Color blips at the row ends: Pull each new color through the last 2 loops snugly, then tug the tails gently before you cut. The border covers what remains.
Loop twists: Block it as described above, or work the 25 ch more loosely.
Tails peek through: Re-weave them inside the border sc, where the plum hides them.
Care
Hand wash in cool water with a mild soap, press out the water in a towel, and reshape it flat to dry. If you starched the heart, re-starch it after washing.
Final Notes
The measurement chain for this heart is simple:
– One shell is 1.25 in (3.2 cm) across.
– The rows grow to 4 in (10.2 cm) × 3 in (7.6 cm) after Row 5.
– Two border rounds bring it to 4.5 in (11.4 cm) × 3.5 in (8.9 cm).
Check your test heart at each step, and every heart in the batch will match.
Make a few in plum and cream for the tree, or swap in red and white or soft pink for gifts.
Happy crocheting!