
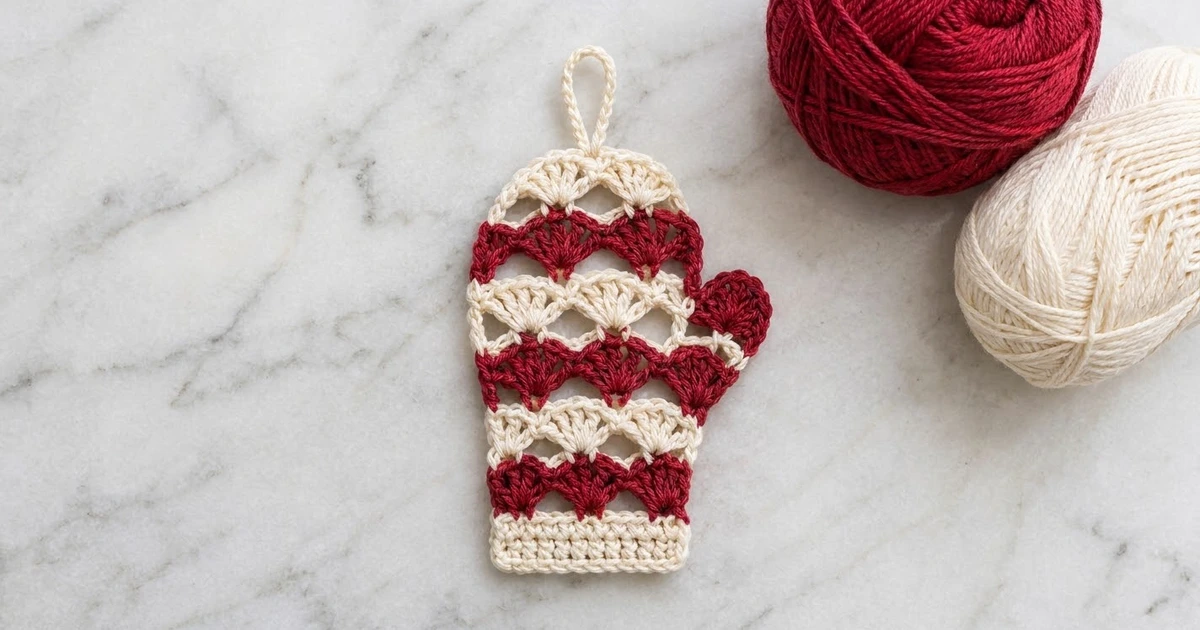
This little mitten looks like it came straight off a candy-cane-striped sweater. Rows of open shells alternate cranberry red and warm cream above a solid cream cuff, and a small round red thumb pokes out from one side. A thin cream edge and a chain loop finish it as a tree ornament.
You work the whole mitten flat in rows, starting at the cuff. The cuff is plain single crochet. The body is a classic shell stitch with chain gaps that give it a lacy look, and a last cream row with one taller fan rounds off the top. The thumb is a tiny half-circle fan that you sew on at the end.
This pattern uses US crochet terms. The finished mitten is 4 in (10.2 cm) wide across the body and 4.5 in (11.4 cm) tall, not counting the loop. Measured across the thumb, it is 4.6 in (11.7 cm) wide.
It’s a quick project that works well as a gift topper or for a whole tree of matching ornaments. Make one first, check the measurements, then make as many as you like.
Finished Size and Construction
- Finished size: 4 in (10.2 cm) wide x 4.5 in (11.4 cm) tall; 4.6 in (11.7 cm) wide across the thumb
- Skill level: Easy (advanced beginner)
- Terminology: US crochet terms
- Yarn weight: DK (light, #3) cotton or cotton blend
- Hook: 3.5 mm (E-4)
- Number of pieces: 1 mitten body + 1 small thumb, sewn together
- Layout: one flat ornament, worked in rows from the cuff up
- Piece size before border: 3.8 in (9.7 cm) wide x 4.3 in (10.9 cm) tall
- Border depth: 0.1 in (0.3 cm) on each edge, one round of single crochet
Materials
Choose a smooth cotton DK, either mercerized or soft. Cotton shows the shell texture clearly and blocks flat. Acrylic DK also works, but it may need steam to lie flat.
- Color A, cranberry red: about 4 g / 10 m (11 yd)
- Color B, cream: about 6 g / 15 m (16 yd)
These amounts include extra for yarn tails and for checking your gauge. One standard 50 g ball of each color will make many ornaments.
Tools:
- 3.5 mm (E-4) crochet hook
- Tapestry needle
- Scissors
- Ruler or tape measure
- Pins and a blocking mat or folded towel
- Spray bottle or steam iron
Abbreviations (US Terms)
- ch – chain
- sl st – slip stitch
- sc – single crochet
- dc – double crochet
- sk – skip
- sp – space
- st(s) – stitch(es)
- RS – right side
- WS – wrong side
Special stitches:
- Shell: 5 dc in the same stitch.
- Half shell: 3 dc in the same stitch (only at row ends).
- Crown fan: 7 dc in the same stitch.
- Standing sc: with a slip knot on the hook, insert the hook into the stitch, yarn over, pull up a loop, then yarn over and pull through both loops.
- Standing dc: with a slip knot on the hook, yarn over, insert the hook into the stitch, and finish a dc as usual.
Gauge and Checkpoints
Gauge is 5 sc and 5 sc rows = 1 in (2.5 cm). Each shell row is 0.5 in (1.3 cm) tall.
The ornament itself is your gauge swatch. Make the cuff and measure it before you go on.
Checkpoints:
- After the cuff (Row 4): 3.8 in (9.7 cm) wide x 0.8 in (2.0 cm) tall.
- After Row 7: 3.8 in (9.7 cm) wide x 2.3 in (5.8 cm) tall.
- After Row 11: 3.8 in (9.7 cm) wide x 4.3 in (10.9 cm) tall.
- After the border: 4 in (10.2 cm) wide x 4.5 in (11.4 cm) tall.
- Thumb: straight edge 1.2 in (3.0 cm) long, 0.6 in (1.5 cm) tall.
If your cuff is too wide (over 4 in / 10.2 cm), go down to a 3.25 mm hook. If it is too narrow (under 3.6 in / 9.1 cm), go up to a 3.75 mm hook. Small differences don’t matter much for an ornament, but keep the shell rows loose enough for the fans to spread open.
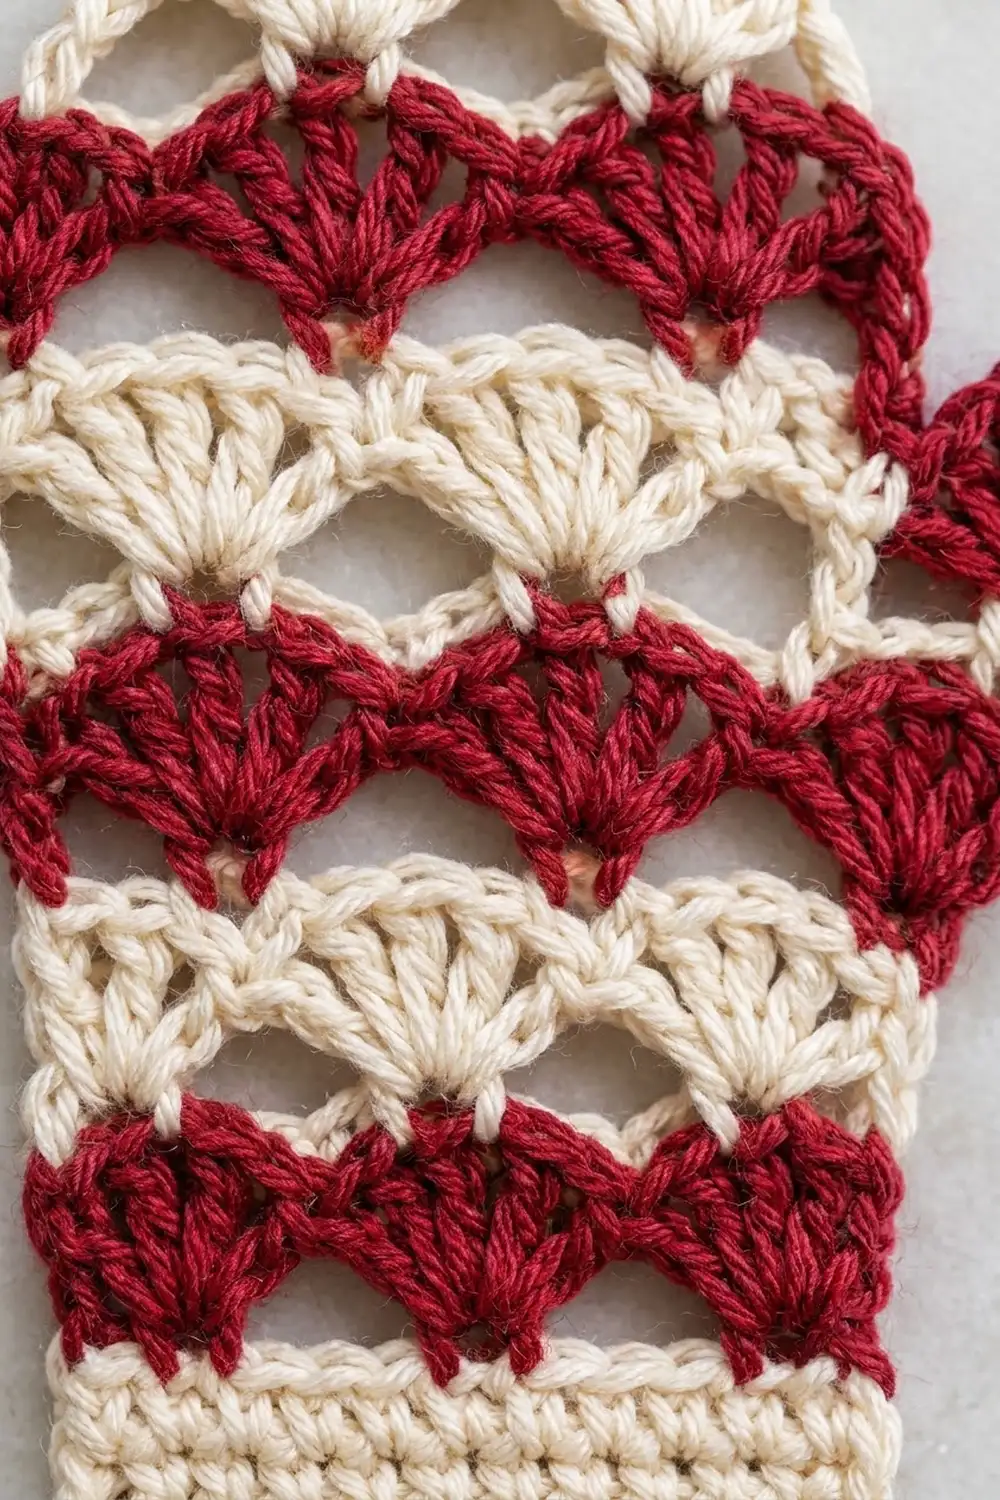
Mitten Body
Cuff
With Color B, ch 20.
Row 1: Sc in 2nd ch from hook and in each ch across, turn. (19 sc)
Rows 2–4: Ch 1 (does not count as a stitch), sc in each st across. Turn at the end of Rows 2 and 3 only. (19 sc)
The side facing you while you work Row 4 is the RS. Fasten off Color B.
Checkpoint: 3.8 in (9.7 cm) wide x 0.8 in (2.0 cm) tall.
Shell Rows
Rows 5 to 10 are all worked with the RS facing you. For each row, join the new color at the right-hand edge, work across, and fasten off at the left-hand edge. Leave 4 in (10.2 cm) tails and crochet over them where you can. The border will hide the rest.
Row 5 (Color A): With RS facing, join with a standing sc in the first sc of Row 4. Sk 2 sts, shell in next st, sk 2 sts, sc in next st; repeat from * 2 more times. Fasten off. (3 shells and 4 sc: 15 dc + 4 sc = 19 sts)
The math: 1 starting sc + 3 repeats of 6 stitches = 19, so every cuff stitch is used.
Row 6 (Color B): With RS facing, join with a standing dc in the first sc of Row 5, then work 2 dc in the same st (half shell made). Ch 2, sk 2 dc, sc in the center (3rd) dc of the next shell, ch 2, sk 2 dc, shell in the next sc; repeat from * once more. Ch 2, sk 2 dc, sc in the center dc of the last shell, ch 2, sk 2 dc, half shell in the last sc. Fasten off. (2 shells, 2 half shells and 3 sc: 16 dc + 3 sc = 19 sts, plus 6 ch-2 sps)
The cream shells now sit between the red shells, and the ch-2 spaces make the small lacy gaps.
Row 7 (Color A): With RS facing, join with a standing sc in the first dc of Row 6. Sk 2 dc and the ch-2 sp, shell in the next sc, sk the ch-2 sp and 2 dc, sc in the center dc of the next shell; repeat from * once more. Sk 2 dc and the ch-2 sp, shell in the next sc, sk the ch-2 sp and 2 dc, sc in the last dc. Fasten off. (3 shells and 4 sc: 15 dc + 4 sc = 19 sts)
Each red shell sits directly above the red shell two rows below.
Checkpoint: 3.8 in (9.7 cm) wide x 2.3 in (5.8 cm) tall.
Row 8 (Color B): Repeat Row 6. (19 sts, plus 6 ch-2 sps)
Row 9 (Color A): Repeat Row 7. (19 sts)
Top Shaping
Row 10 (Color B): With RS facing, join with a standing sc in the first sc of Row 9. Ch 3, sk 2 dc, sc in the center dc of the first shell, sk 2 dc, shell in the next sc, sk 2 dc, sc in the center dc of the next shell, sk 2 dc, shell in the next sc, sk 2 dc, sc in the center dc of the last shell, ch 3, sk 2 dc, sc in the last sc. Do not fasten off. (2 shells and 5 sc: 10 dc + 5 sc = 15 sts, plus 2 ch-3 sps)
This row has ch-3 spaces at the ends instead of half shells, so the outer edges of the top stay lower than the center. That starts the rounded top.
Row 11 (Color B): Ch 1, turn (WS facing). Sc in the first sc, 3 sc in the ch-3 sp, sc in the next sc, sk 2 dc, sc in the center dc of the shell, sk 2 dc, crown fan in the next sc (the center sc of the row), sk 2 dc, sc in the center dc of the next shell, sk 2 dc, sc in the next sc, 3 sc in the ch-3 sp, sc in the last sc. Fasten off. (1 crown fan and 12 sc: 7 dc + 12 sc = 19 sts)
The crown fan stands taller than the sc on each side of it, which rounds the top.
Checkpoint: 3.8 in (9.7 cm) wide x 4.3 in (10.9 cm) tall.
Thumb
With Color A, make a magic ring.
Row 1: Ch 3 (counts as dc), 10 dc in the ring, turn. Pull the ring closed so the stitches form a half circle. (11 dc)
Row 2: Ch 1, sc in the first dc, 2 sc in each of the next 9 dc, sc in the top of the ch-3. (1 + 18 + 1 = 20 sc)
Fasten off, leaving a 10 in (25.4 cm) tail for sewing.
Checkpoint: the straight edge is 1.2 in (3.0 cm) long and the fan is 0.6 in (1.5 cm) tall.
Border
The border is one round of sc in Color B. It uses the same gauge as the cuff: 5 sc = 1 in (2.5 cm). Along the sides, work 1 sc into the end of each sc row and 2 sc into the end of each shell row.
Round 1: With RS facing, join Color B with a standing sc in the top right-hand corner stitch of Row 11.
- Top: Sc in the same st as the join (2 sc in the corner st), sc in each of the next 17 sts, 2 sc in the last st. (19 sts worked 1 per st + 2 extra corner sts = 21 sc)
- Left side: 1 sc in the end of Row 11, 2 sc in the end of each of Rows 10 to 5, and 1 sc in the end of each of Rows 4 to 1. (1 + 12 + 4 = 17 sc)
- Bottom: Working into the other side of the foundation ch, 3 sc in the first ch, sc in each of the next 17 ch, 3 sc in the last ch. (19 sts worked 1 per ch + 4 extra corner sts = 23 sc)
- Right side: 1 sc in the end of each of Rows 1 to 4, 2 sc in the end of each of Rows 5 to 10, 1 sc in the end of Row 11. (4 + 12 + 1 = 17 sc)
Join with a sl st to the first sc. (21 + 17 + 23 + 17 = 78 sc)
Why the math works: the top and bottom each start from 19 stitches, so the border matches the body width exactly. The bottom corners get 3 sc so they stay square. The top corners get only 2 sc so they curve into the rounded top. On the sides, 2 sc per shell row fits the 0.5 in (1.3 cm) row height at 5 sc per inch, and 1 sc per sc row matches the cuff. The border adds 0.1 in (0.3 cm) to each edge. That takes the body from 3.8 in (9.7 cm) to 4 in (10.2 cm) wide and from 4.3 in (10.9 cm) to 4.5 in (11.4 cm) tall.
Hanging Loop
Don’t fasten off after the join. Sl st across the top to the 11th sc of the top edge, directly above the center of the crown fan. Ch 20, then sl st in the same st. Fasten off. The loop is about 1.5 in (3.8 cm) tall.
Attach the Thumb
Lay the mitten RS up with the cuff at the bottom. Pin the straight edge of the thumb against the right-hand side, centered on the line between Row 7 and Row 8, with the rounded edge pointing out. Whipstitch it to the border stitches with the Color A tail. The thumb sticks out 0.6 in (1.5 cm), so the total width is 4.6 in (11.7 cm).
Weave in all remaining ends along the row ends on the WS.
Final Blocking
- Lightly spray the mitten with water until it is damp but not soaked.
- Lay it RS up on a blocking mat or folded towel.
- Pin the bottom corners square, 4 in (10.2 cm) apart.
- Gently ease the body to 4.5 in (11.4 cm) tall and pin the top of the crown fan.
- Use your fingers to spread each shell into an even fan and open the ch-2 gaps.
- Pin the thumb into a smooth half circle.
- Let it dry completely, about 2 to 4 hours. For acrylic, hold a steam iron just above it instead of spraying, and let it cool before you unpin it.
Final Quality-Control Checklist
- The body measures 4 in (10.2 cm) x 4.5 in (11.4 cm).
- The cuff has 4 solid cream rows.
- The body has 3 red shell rows and 3 cream rows, with each red shell directly above the red shell two rows below.
- The cream shells sit centered between the red shells.
- The top has one centered crown fan and a rounded shape on each side.
- The border has 78 sc and doesn’t pucker at the corners.
- The thumb is on the right side, centered between Rows 7 and 8.
- The loop is centered above the crown fan.
- All ends are woven in and can’t be seen from the RS.
Troubleshooting
The shells don’t line up. Count your skips. Each shell row needs exactly 19 stitches, and every shell has 2 skipped stitches on each side.
The edges curl or ruffle. Curling means too few border stitches or tight tension; ruffling means too many stitches. Recount each side against the 21 / 17 / 23 / 17 counts.
The top is square instead of rounded. Check that Row 10 has ch-3 spaces at the ends, not half shells, and that the crown fan has 7 dc.
The thumb cups instead of lying flat. Row 2 needs all 20 sc. If it still cups, make the thumb with a hook one size larger.
The lacy gaps are closed up. Your ch-2s may be too tight. Work them loosely, then open the gaps when you block.
Too many tails. Crochet over the tails as you work each new row, and work the border sc over the side tails to hold them in place.
Care
Hand wash in cool water with mild soap, roll it in a towel to press out the water, and lay it flat to dry. Store it flat or hanging so the shells keep their shape.
Final Notes
All the measurements build on each other. The 19-stitch cuff sets the width at 3.8 in (9.7 cm), and every row keeps those 19 stitches. The four cuff rows are 0.8 in (2.0 cm), the six shell rows add 3 in (7.6 cm), and the crown row adds 0.5 in (1.3 cm), for 4.3 in (10.9 cm) before the border. The 78-stitch border brings the body to 4 in (10.2 cm) x 4.5 in (11.4 cm), and the thumb adds 0.6 in (1.5 cm) to one side.
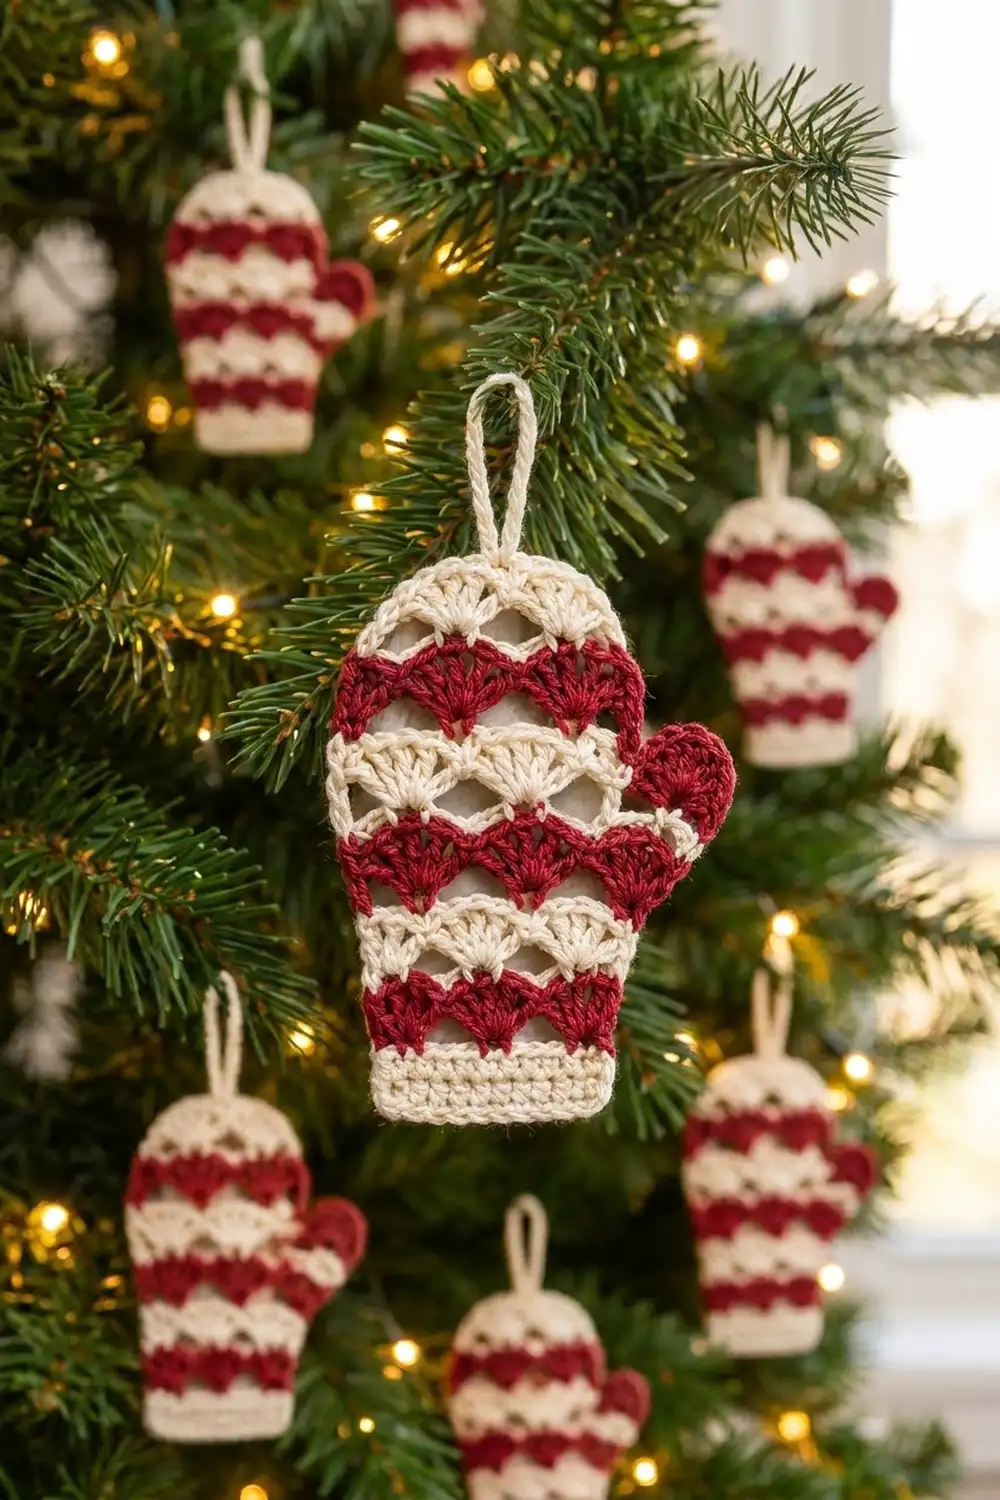
If your cuff matches its checkpoint, the rest should come out right. Make one, hang it up, then make enough for the whole tree.
Happy crocheting!