
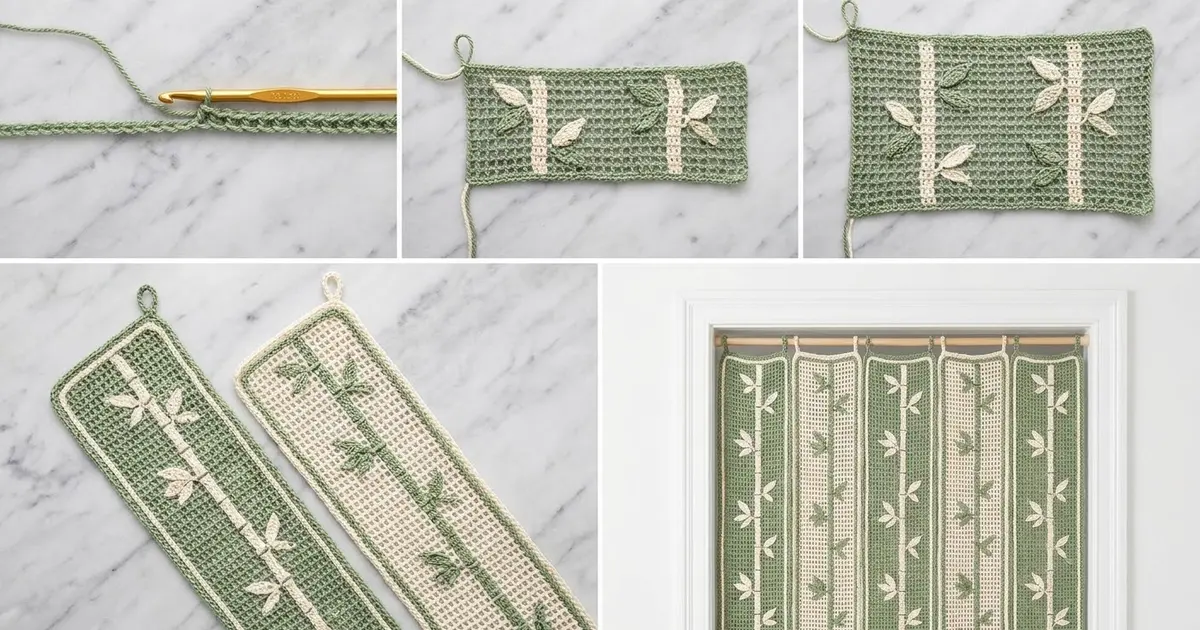
The Bamboo Breeze Door Curtain is made of six long filet-mesh strips. Each strip has a raised bamboo stalk and leaf appliqués. When the curtain hangs, light comes through the open grid, and the strips swing apart easily as you walk through.
The palette is cream and soft sage green. The strips come in two colorways that alternate across the doorway. Strip A has a sage border with a cream stalk. Strip B has a cream border with a sage stalk. Every node on both colorways carries one sage leaf and one cream leaf.
This pattern uses US crochet terms. Each finished strip measures 6 in × 73.5 in (15.2 cm × 186.7 cm), plus a 2 in (5.1 cm) hanging loop. Six strips side by side cover 36 in (91.4 cm).
Construction is simple and done in layers. You work a dc filet mesh body, add a three-round border, and make a hanging loop. Then you sew on two stalk cords, wrap the nodes, and attach the leaves. The strips are never joined to each other.
Finished Size and Construction
- Finished strip size: 6 in × 73.5 in (15.2 cm × 186.7 cm), plus a 2 in (5.1 cm) loop
- Curtain width: 36 in (91.4 cm) with six strips edge to edge
- Skill level: Intermediate
- Terminology: US
- Yarn weight: Worsted (#4) cotton
- Hook: 5.0 mm (H-8)
- Number of pieces: 6 strips (3 Strip A, 3 Strip B), plus 12 stalk cords and 144 leaves
- Layout: A–B–A–B–A–B, left to right
- Mesh body (size before border): 6 meshes × 96 rows = 4.5 in × 72 in (11.4 cm × 182.9 cm)
- Border depth: 0.75 in (1.9 cm) on every side
Materials
Use a smooth, firm worsted cotton or cotton blend of about 170 m per 100 g. Cotton holds the mesh square and won’t stretch much while the strips hang. Avoid splitty or very soft yarns, which make the stalk cords fuzzy.
- Cream: 765 g / 1,300 m (mesh bodies, Strip B borders, Strip A stalks and wraps, cream leaves)
- Sage green: 359 g / 610 m (Strip A borders, Strip B stalks and wraps, green leaves)
These quantities include a margin of about 10%.
Tools:
– 5.0 mm (H-8) crochet hook
– Tapestry needle
– Stitch markers
– Rust-proof pins and blocking mats (or a long towel-covered floor area)
– Measuring tape
– Curtain rod up to 1.25 in (3.2 cm) in diameter
Abbreviations (US Terms)
- ch – chain
- sl st – slip stitch
- sc – single crochet
- hdc – half double crochet
- dc – double crochet
- rev sc – reverse single crochet (crab stitch)
- sk – skip
- sp – space
- RS / WS – right side / wrong side
Reverse single crochet (rev sc): Work from left to right (right-handers). Insert the hook into the next stitch to the right, yarn over, pull up a loop, yarn over, and pull through both loops. It makes the rope-like edge you see on the border.
Mesh: One dc post plus a ch-2 space. A mesh is 3 stitches wide.
Gauge and Checkpoints
Gauge: 4 meshes and 4 rows = 3 in (7.6 cm) square in dc filet mesh. That makes each mesh 0.75 in (1.9 cm) wide and each row 0.75 in (1.9 cm) tall.
Border gauge: 4 sc = 1 in (2.5 cm).
Make one complete Strip A before you start the rest. Use it to confirm gauge, length and yarn use.
Checkpoints:
– After Row 4: 4.5 in wide × 3 in tall (11.4 cm × 7.6 cm)
– After Row 32: 24 in (61.0 cm) long
– After Row 64: 48 in (121.9 cm) long
– After Row 96: 72 in (182.9 cm) long
– After the border: 6 in × 73.5 in (15.2 cm × 186.7 cm)
If your work is too big: go down one hook size (4.5 mm). If only the rows are too tall, keep your hook but pull each dc a little shorter.
If your work is too small: go up to 5.5 mm. Don’t add rows to make up the length. The node spacing is based on exactly 96 rows.
Mesh Body (Make 6, all in Cream)
Foundation: Ch 23.
Row 1 (RS): Dc in 8th ch from hook. The 7 skipped ch count as the first dc, a ch-2 sp and 2 skipped foundation ch. Ch 2, sk 2 ch, dc in next ch 5 times. Turn.
(6 meshes, 7 dc posts)
Row 2: Ch 5 (counts as dc + ch 2). Sk first ch-2 sp, dc in next dc. Ch 2, dc in next dc 4 times. Ch 2, sk 2 ch of the turning ch, dc in next ch. Turn.
(6 meshes, 7 dc posts)
Rows 3–96: Repeat Row 2.
(6 meshes, 7 dc posts in every row)
Row 96 is a WS row. Fasten off.
Post 4 of 7 is the center post, with 3 meshes on each side. The bamboo stalk is built on this post column.
Border (Each Strip)
Use sage for Strip A and cream for Strip B. In this section, a side count includes both corner stitches, meaning the center stitch of each 3-sc corner group.
Round 1 (RS): Turn the body so the RS faces you, and join yarn in the last dc of Row 96 (top right corner).
- Top edge: 3 sc in corner dc. 2 sc in next ch-2 sp, sc in next dc 5 times. 2 sc in last sp, 3 sc in corner post (turning ch).
- Left side: 3 sc in each row-end down the side (288 sc).
- Bottom edge: Working in the free loops of the foundation ch: 3 sc in corner ch, sc in each ch across (17 sc), 3 sc in last corner ch.
- Right side: 3 sc in each row-end (288 sc).
- Sl st to first sc.
Count: 23 sts worked across each short edge and 288 down each long edge, for 622 sc. Corner-to-corner side counts are 21 per short side and 292 per long side.
Round 2: Ch 1. Sc in each sc around, with 3 sc in each corner center sc. Sl st to first sc.
(Side counts: short 23, long 294. Total 630 sc: 622 worked one per stitch + 8 added at corners.)
Round 3: Ch 1. Rev sc in each sc around, with no extra stitches at the corners. Sl st to first st.
(630 rev sc)
Why the math works: Each mesh is 3 stitches wide. On the short edges, the sc replace those stitches 1-for-1, so 19 stitches cover 4.5 in (11.4 cm), plus the corner groups. On the long sides, each row is 0.75 in (1.9 cm) tall, and 3 sc per row-end at 4 sc per inch fill that height exactly. The edges stay flat with no ruffling or cupping.
Hanging loop: Join the border color on the top edge. Count the 21 non-corner rev sc there and join in the 9th. Ch 14, sl st in the 13th st. The loop’s base is 5 sts wide and centered on the 11th st. Turn and work 22 sc into the loop, then sl st into the 9th st. Fasten off and weave in the ends.
The loop stands about 2 in (5.1 cm) tall and fits rods up to 1.25 in (3.2 cm) across.
Bamboo Stalk Cords (Make 2 per strip)
Use cream for Strip A and sage for Strip B. Hold 2 strands together.
Ch until the chain measures 72 in (182.9 cm) relaxed, which is about 216 ch. Sl st in the back bump of the 2nd ch from hook and in each ch across.
(About 215 sl st)
Leave a 12 in (30.5 cm) tail. Lay the cord against the strip body and check it: it should match the 72 in (182.9 cm) body length exactly. Add or remove chains if it doesn’t.
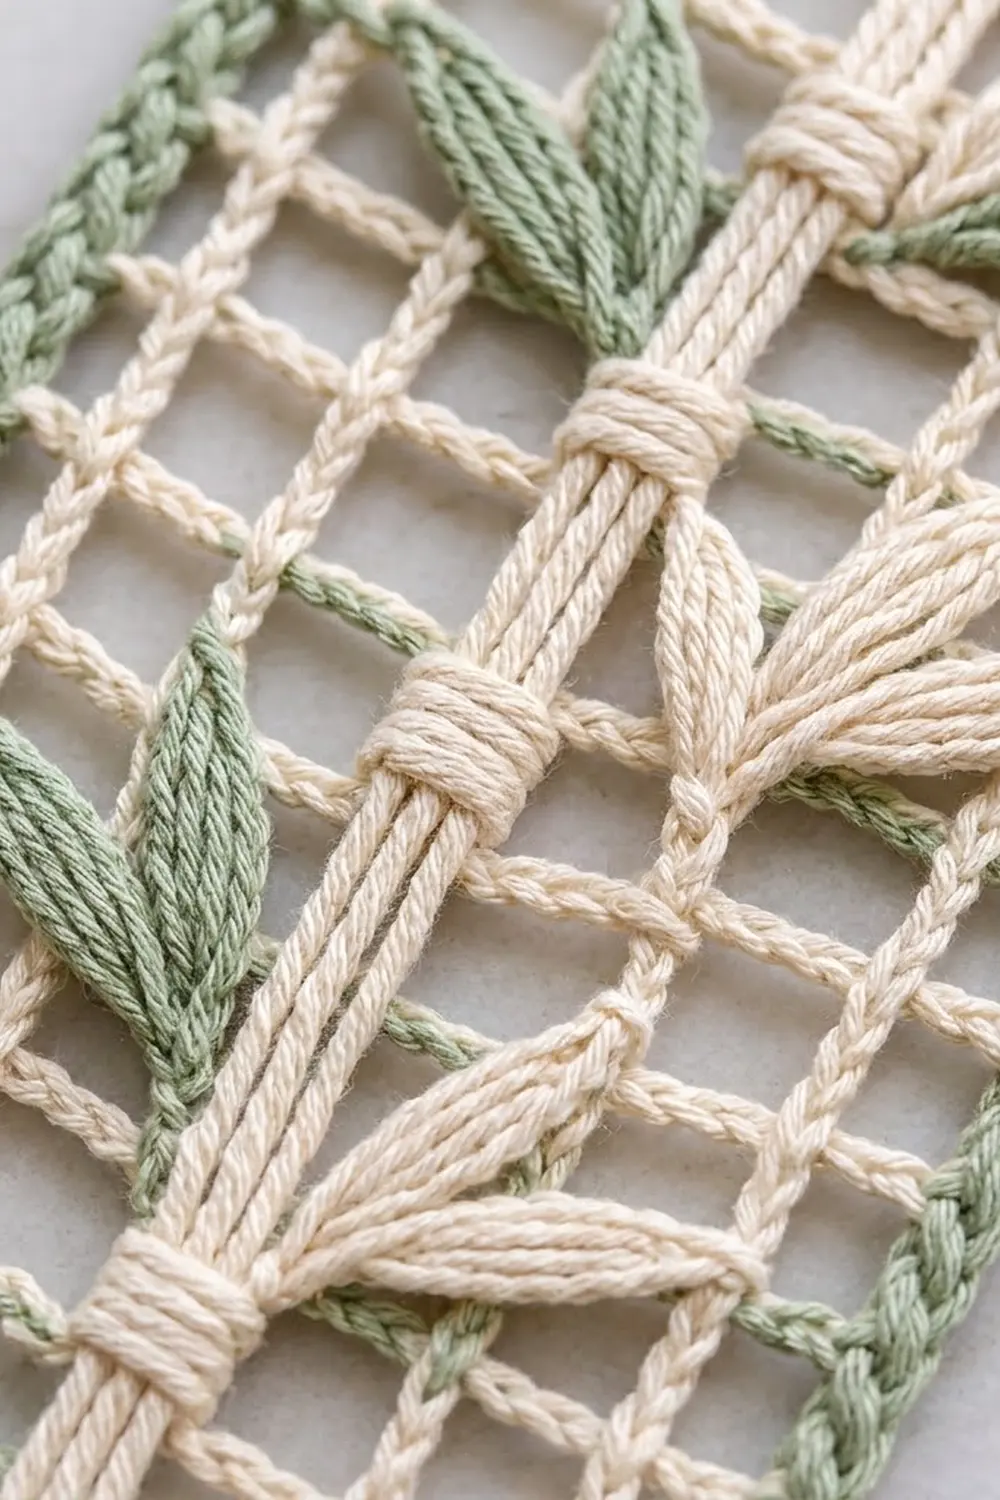
Attaching: On the RS, lay one cord along the left edge of center post 4 and one along its right edge. Run them from the top of Row 1 to the top of Row 96. Whipstitch each cord to the post every 1 in (2.5 cm), using the cord’s own tail or a matching strand. The post shows between the two cords, which gives the stalk its doubled look.
Nodes (12 per strip)
Mark the horizontal bar at the top of Rows 6, 14, 22, 30, 38, 46, 54, 62, 70, 78, 86 and 94. These 12 nodes sit 8 rows apart, every 6 in (15.2 cm).
Cut an 18 in (45.7 cm) strand in the stalk color. At each marked bar, wrap it 5 times tightly around both cords, the post and the bar. Keep the wraps side by side, not stacked. Thread the ends to the WS, knot them and weave them in.
Leaves (Make 24 per strip: 12 sage, 12 cream)
Foundation: Ch 10.
Side 1: Sl st in 2nd ch from hook, sc in next ch, hdc in next ch, dc in next 3 ch, hdc in next ch, sc in next ch.
(8 sts)
Tip: (Sc, ch 2, sc) in last ch.
Side 2: Working in the free loops on the other side of the foundation: sc in next ch, hdc in next ch, dc in next 3 ch, hdc in next ch, sc in next ch, sl st in next ch.
(8 sts)
Sl st in the first sl st. Fasten off and leave an 8 in (20.3 cm) tail.
(Total: 18 sts + ch-2 tip)
Each leaf is about 2.25 in (5.7 cm) long and 0.75 in (1.9 cm) wide at its widest point.
Attaching: Each node gets 2 leaves on one side of the stalk, with the bases tucked under the wraps. Sew the sage leaf lower, angled up at about 45°, and the cream leaf just above it at a steeper angle, about 30° from the stalk.
Switch sides at every node: left at Row 6, right at Row 14, and so on. Tack each leaf at its base, center and tip so it lies flat over the mesh. The tip should stay inside the border.
Make All Pieces
| Piece | Strip A (×3) | Strip B (×3) | Total |
|---|---|---|---|
| Mesh body | Cream | Cream | 6 cream |
| Border + loop | Sage | Cream | 3 sage, 3 cream |
| Stalk cords | 2 cream | 2 sage | 6 cream, 6 sage |
| Node wraps | 12 cream | 12 sage | 36 cream, 36 sage |
| Leaves | 12 sage + 12 cream | 12 sage + 12 cream | 72 sage, 72 cream |
Layout (seen from the room side):
| A | B | A | B | A | B |
 sage cream sage cream sage cream  ← border color
Joining (Hanging the Strips)
The strips aren’t sewn or crocheted together. They hang free so people can walk through the curtain.
- Slide the loops onto the rod in order A–B–A–B–A–B, with the RS facing into the room.
- Space the strips edge to edge without overlapping. Six strips measure 36 in (91.4 cm) across.
- For a wider door, leave equal gaps of up to 0.5 in (1.3 cm) between strips, or add strips in pairs (A + B).
- Tension check: Let the strips hang for 24 hours, then measure each one. Every strip should be 73.5 in ± 0.5 in (186.7 cm ± 1.3 cm) long, not counting the loop. If one hangs longer, re-block it (see below) and handle it gently.
The total hanging length, including the loop, is 75.5 in (191.8 cm).
Final Blocking
- Finish each strip completely, including all appliqués, before you block it.
- Soak it in cool water with a little wool wash for 15 minutes.
- Press out the water by rolling the strip in a towel. Don’t wring it.
- Lay it flat with the RS up and pin it to 6 in × 73.5 in (15.2 cm × 186.7 cm).
- Pin both long edges first, every 3 in (7.6 cm), and keep them straight.
- Square up the mesh: every opening should be 0.75 in (1.9 cm) across. Run a ruler down the post columns to check.
- Shape each leaf flat and pointed, and straighten the stalk cords.
- Leave the strip to dry completely, usually 24 hours, before you unpin it.
Final Quality-Control Checklist
- [ ] Every body has exactly 96 rows and 6 meshes
- [ ] Border Round 3 has 630 stitches with square corners
- [ ] Each strip measures 6 in × 73.5 in (15.2 cm × 186.7 cm) after blocking
- [ ] Hanging loop is centered on the 11th of 21 top stitches
- [ ] Stalk cords are flat, straight and secured every 1 in (2.5 cm)
- [ ] 12 nodes per strip, all at the same rows on every strip
- [ ] 24 leaves per strip, with sides alternating at each node
- [ ] Sage leaf below cream leaf at every node
- [ ] All ends woven in on the WS
- [ ] Strips hung in the A–B–A–B–A–B order
Troubleshooting
Mesh openings are tall rectangles: Your dc are too tall. Pull through the loops more snugly, or try a 4.5 mm hook just for the dc.
Border ruffles on the long sides: Your sc are smaller than 4 per inch. Go up a hook size for the border only.
Border pulls in the long sides: Check that every row-end got 3 sc, then check your sc gauge.
Stalk cord ripples: The cord is longer than the body. Pull out a few sl st and chains and re-finish the end.
Leaves curl: Steam them lightly and pin them flat. Tacking at the center and tip also keeps them from curling.
Strips twist while hanging: The loop is off-center. Re-attach it at stitches 9–13.
Care
Hand wash cool and lay flat to dry, reshaping the mesh while it’s damp. Don’t tumble dry. The weight of the wet fabric can stretch the strips.
Final Notes
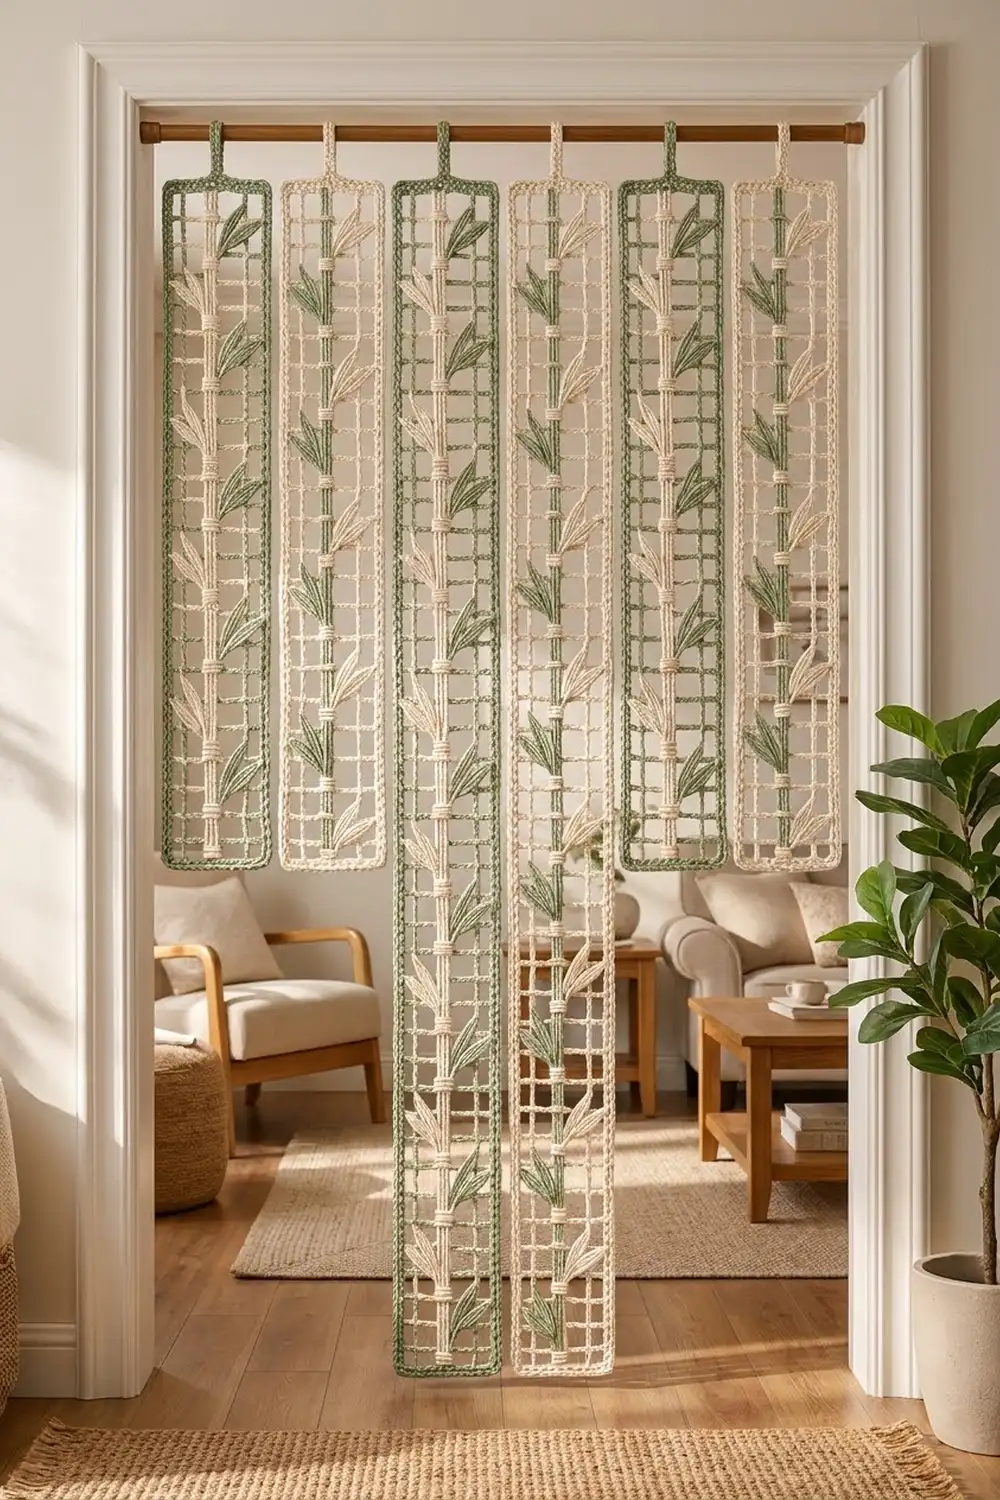
The measurements build on each other. A 0.75 in (1.9 cm) mesh gives a 4.5 in × 72 in (11.4 cm × 182.9 cm) body. Three border rounds add 0.75 in (1.9 cm) per side for a 6 in × 73.5 in (15.2 cm × 186.7 cm) strip. Six strips fill a 36 in (91.4 cm) doorway. If your gauge holds at the first checkpoint, every step after it will measure correctly.
Happy crocheting!