
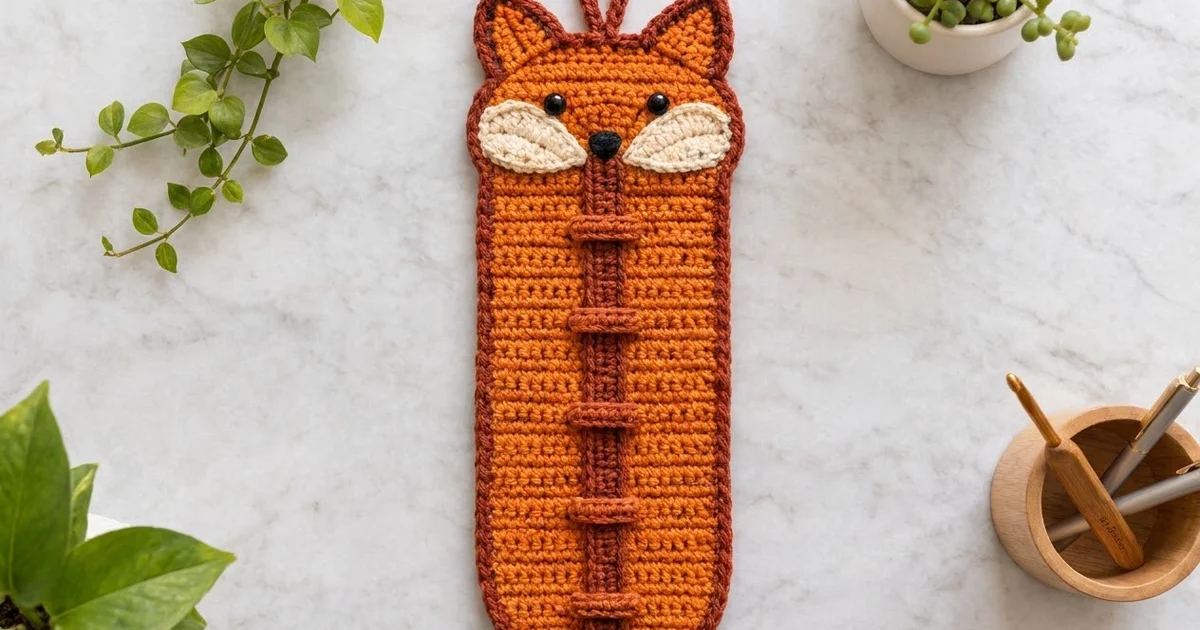
Meet the Foxy Keeper, a flat wall organizer that keeps charging cables tidy and adds a bit of woodland charm to your desk. The orange panel has a fox face at the top, and a rust strap with five keeper bands runs down the middle. Each keeper holds one folded cable.
The color scheme is warm and simple. The body is bright orange, the border, ears, strap, keepers and hanging loop are rust, the cheeks are cream, and the eyes and nose are black. The style is clean and graphic, so the fox reads clearly from across the room.
This pattern uses US crochet terms. The bordered panel measures 5.5 in (14.0 cm) wide and 13 in (33.0 cm) tall. With the ears and loop, it is about 14.5 in (36.8 cm) tall overall.
Here is how it’s built. You’ll work one panel in single crochet rows, with rounded corners shaped as you go, then add a two-round border. Next, you’ll make the ears, cheeks, strap, keepers and loop as small separate pieces and sew them on. Finally, you’ll add the eyes and nose.
Finished Size and Construction
- Finished size: 5.5 in x 13 in (14.0 cm x 33.0 cm), or about 14.5 in (36.8 cm) tall including the ears and loop
- Skill level: Easy to intermediate
- Terminology: US
- Yarn weight: Worsted (#4), cotton recommended
- Hook: 4.0 mm (G-6)
- Number of pieces: 1 main panel, plus appliqués: 2 ears, 2 cheeks, 1 strap, 5 keepers, 1 loop
- Layout: A single vertical panel. The face is at the top, and the strap runs down the center.
- Panel width: 18 sts across the widest rows
- Size before border: 4.5 in x 12 in (11.4 cm x 30.5 cm)
- Border depth: 0.5 in (1.3 cm) on each side, in 2 rounds
Materials
Choose a smooth worsted-weight cotton or cotton blend. Cotton holds its shape on the wall and stands up to cables being pulled in and out. The amounts below assume about 100 m per 50 g.
- Orange (main panel, ears): 45 g / 90 m
- Rust (border, ear edging, strap, keepers, loop): 30 g / 60 m
- Cream (cheeks): 5 g / 10 m
- Black (nose embroidery): 1 g / 2 m
All quantities include a margin of about 15%.
Tools:
– 4.0 mm (G-6) crochet hook
– Two 9 mm black safety eyes with washers (or black yarn to embroider the eyes)
– Tapestry needle
– Stitch markers
– Scissors
– Measuring tape
– Pins, plus a blocking mat or folded towel
Abbreviations (US Terms)
- ch – chain
- sc – single crochet
- hdc – half double crochet
- dc – double crochet
- sl st – slip stitch
- sc2tog – single crochet 2 together
- sc3tog – single crochet 3 together
- st(s) – stitch(es)
- RS – right side
Special stitch: reverse single crochet (rev sc, also called crab stitch). Work from left to right (right-handed). Insert the hook into the next stitch to the right, yarn over, pull up a loop, then yarn over and pull through both loops. This makes a twisted, rope-like edge.
Gauge and Checkpoints
Gauge: 16 sc x 18 rows = 4 in (10.2 cm) in sc rows.
That works out to 4 sts and 4.5 rows per inch. Every measurement in this pattern comes from these two numbers.
Test before you commit. Crochet Rows 1–4 of the panel, then measure. Row 4 (18 sts) should be 4.5 in (11.4 cm) wide.
Checkpoints:
– After Row 4: 4.5 in (11.4 cm) wide
– After Row 27: 6 in (15.2 cm) tall
– After Row 54: 12 in (30.5 cm) tall, 4.5 in (11.4 cm) wide
– After the border: 5.5 in x 13 in (14.0 cm x 33.0 cm)
Too big? Go down 0.5 mm in hook size. Too small? Go up 0.5 mm. Rip back and start again. Don’t add or remove stitches, because the border counts depend on 18 sts and 54 rows.
Main Panel
With orange, ch 13.
Row 1 (RS): Sc in 2nd ch from hook and in each ch across, turn. (12 sts)
Row 2: Ch 1, 2 sc in first st, sc in next 10 sts, 2 sc in last st, turn. (14 sts)
Row 3: Ch 1, 2 sc in first st, sc in next 12 sts, 2 sc in last st, turn. (16 sts)
Row 4: Ch 1, 2 sc in first st, sc in next 14 sts, 2 sc in last st, turn. (18 sts)
Rows 1–4 shape the two rounded bottom corners. Check that the panel is 4.5 in (11.4 cm) wide.
Rows 5–51: Ch 1, sc in each st across, turn. (18 sts)
That’s 47 straight rows. Check the height after Row 27: it should be 6 in (15.2 cm).
Row 52: Ch 1, sc2tog, sc in next 14 sts, sc2tog, turn. (16 sts)
Row 53: Ch 1, sc2tog, sc in next 12 sts, sc2tog, turn. (14 sts)
Row 54: Ch 1, sc2tog, sc in next 10 sts, sc2tog. (12 sts) Fasten off.
The top corners now round off to match the bottom ones. The panel should measure 4.5 in x 12 in (11.4 cm x 30.5 cm). If needed, pin it to size and lightly steam it before adding the border, because the border counts assume these exact edges.
Border
Border gauge: Each border round adds about 0.25 in (0.6 cm) on every side. Two rounds add 0.5 in (1.3 cm) per side.
Round 1 (sc): With the RS facing, join rust in the first st of Row 54.
- Top edge: 2 sc in the first st, sc in the next 10 sts, 2 sc in the last st. That’s 12 worked 1 per st, plus 2 extra, for 14 sts.
- Left side: Sc in the end of each row from Row 53 down to Row 2. (52 sts)
- Bottom edge: Working into the free loops of the foundation chain, 2 sc in the first ch, sc in the next 10 ch, 2 sc in the last ch. That’s 12 worked 1 per st, plus 2 extra, for 14 sts.
- Right side: Sc in the end of each row from Row 2 up to Row 53. (52 sts)
Sl st to the first sc. Total: 14 + 52 + 14 + 52 = 132 sts.
Round 2 (rev sc): Ch 1, rev sc in each st around. (132 sts) Sl st to the first st and fasten off.
Why the math works: The top and bottom edges each have 12 sts. The single extra stitch at each end eases the border around the curves, which gives 14. Each side has 54 row ends. Rows 1 and 54 are skipped because they sit inside the corner stitches already counted on the top and bottom edges, which leaves 52. Nothing is counted twice. One sc per row end matches the row gauge of 4.5 rows per inch, so the sides lie flat.
The bordered panel measures 5.5 in x 13 in (14.0 cm x 33.0 cm).
Ears (make 2)
With orange, ch 8.
Row 1: Sc in 2nd ch from hook and in each ch across, turn. (7 sts)
Row 2: Ch 1, sc2tog, sc in next 3 sts, sc2tog, turn. (5 sts)
Row 3: Ch 1, sc2tog, sc in next st, sc2tog, turn. (3 sts)
Row 4: Ch 1, sc3tog. (1 st) Fasten off.
Edging round: Join rust in the end of Row 1. Then work:
- Sc in the ends of Rows 1, 2 and 3. (3 sts)
- 3 sc in the Row 4 tip st. (3 sts)
- Sc in the ends of Rows 3, 2 and 1. (3 sts)
- Sc in the free loops of the 7 foundation ch. (7 sts)
Sl st to the first sc. Total: 16 sts. Fasten off and leave a 10 in (25.4 cm) tail.
Each ear is about 2.25 in (5.7 cm) wide and 1.25 in (3.2 cm) tall.
Cheeks (make 2)
With cream, ch 8.
Round 1: Work along the first side of the chain:
- Sc in the 2nd ch from hook, hdc in the next ch, dc in the next 2 ch, hdc in the next ch, sc in the next ch.
- 3 sc in the last ch. This makes the rounded outer end.
Working into the other side of the chain, sc, hdc, 2 dc, hdc and sc in the same 6 ch. Total: 15 sts.
For the point, work (sl st, ch 2, sl st) into the first sc. Fasten off and leave a tail.
Each cheek is about 1.75 in (4.4 cm) long and 1 in (2.5 cm) wide. It has one rounded end and one pointed tip.
Center Strap
With rust, ch 35.
Row 1: Sc in 2nd ch from hook and in each ch across, turn. (34 sts)
Rows 2–3: Ch 1, sc in each st across, turn. (34 sts) Don’t turn after Row 3.
Ridge: Holding the yarn behind the strap, work a line of surface sl sts along the middle of Row 2. This creates the raised center ridge. Fasten off and leave a long tail.
The strap measures 8.5 in x 0.7 in (21.6 cm x 1.8 cm).
Keepers (make 5)
With rust, ch 9.
Row 1: Sc in 2nd ch from hook and in each ch across, turn. (8 sts)
Row 2: Ch 1, sc in each st across. (8 sts) Fasten off and leave a tail.
Each keeper measures 2 in x 0.4 in (5.1 cm x 1.0 cm).
Hanging Loop
With rust, ch 20. Sl st in the 2nd ch from hook and in each ch across. (19 sl sts) Fasten off.
The strip is about 4 in (10.2 cm) long.
Assembly
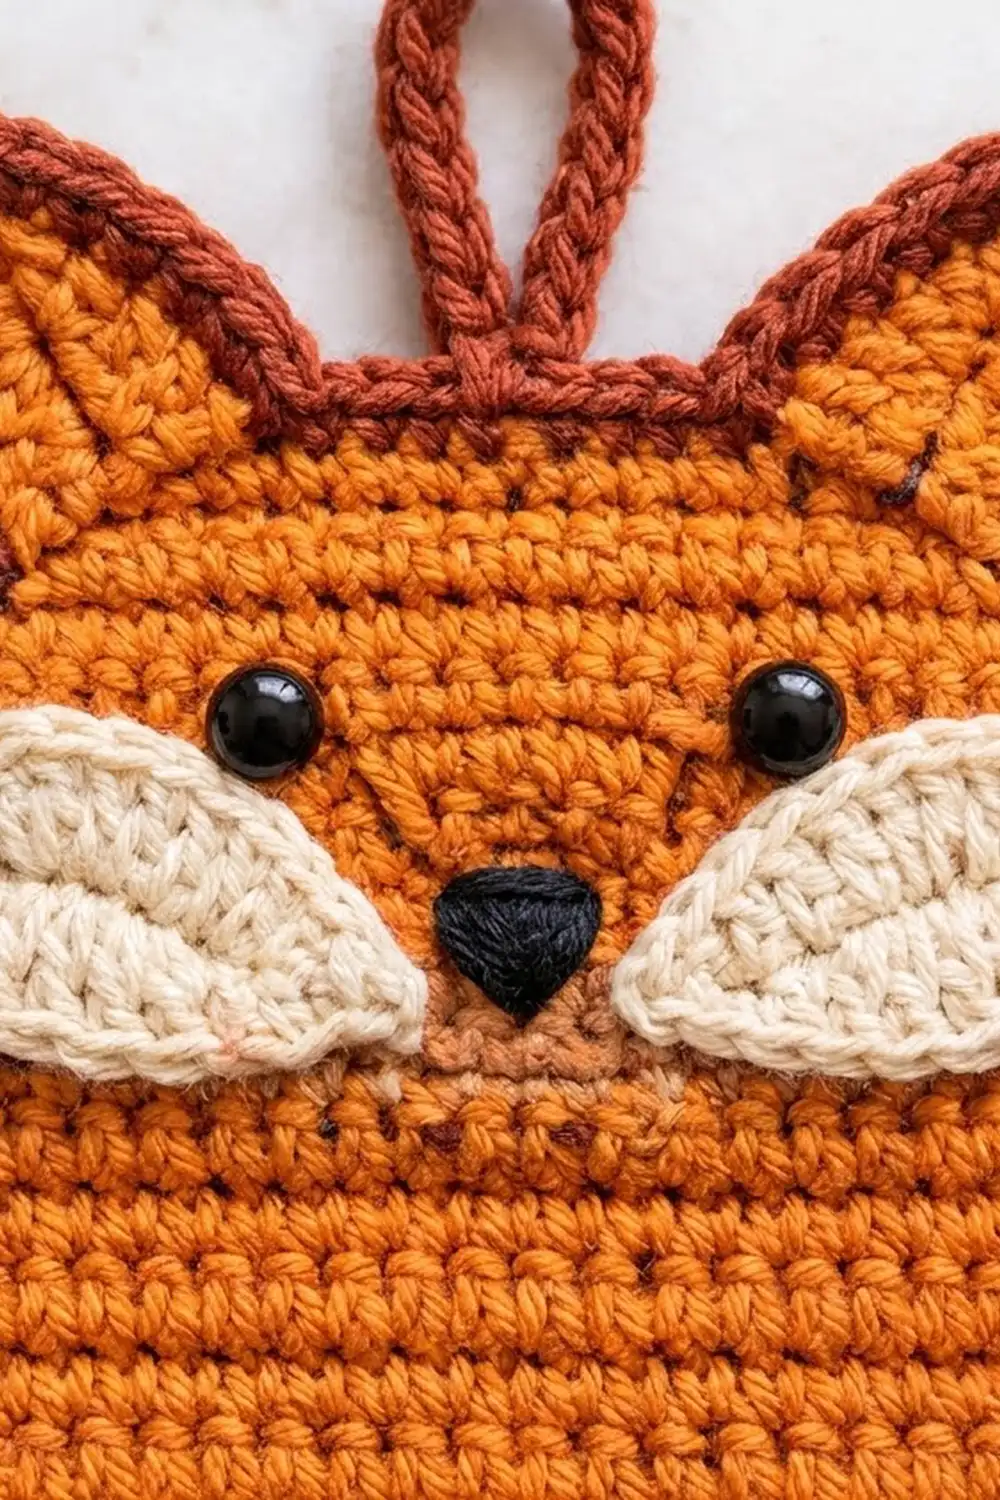
- Eyes: Place the safety eyes on Row 46 of the panel. Put one eye post between sts 7 and 8 and the other between sts 11 and 12, so the eyes sit 1 in (2.5 cm) apart. Snap the washers on at the back. If the organizer will be near small children, embroider the eyes with black yarn instead.
- Nose: With black yarn, satin-stitch a small downward-pointing triangle centered over sts 9–10 on Rows 42–43.
- Cheeks: Place one cheek on each side of the nose, across Rows 40–44. The pointed tips should angle toward the nose and almost touch just below it. The rounded ends should reach toward the side borders. Whipstitch all the way around each cheek.
- Ears: Pin each ear behind a top corner, angled slightly outward. Let the lower 0.5 in (1.3 cm) of each ear overlap behind the border, so about 0.75 in (1.9 cm) shows above it. Sew the ears down from the back.
- Loop: Fold the loop strip in half. Sew both ends to the back of the top center, overlapping 0.5 in (1.3 cm). About 1.5 in (3.8 cm) of loop stands above the border.
- Strap: Center the strap vertically on the panel, from just below the nose (Row 41) down to 0.5 in (1.3 cm) above the bottom edge before the border. Whipstitch both long edges and both ends flat to the panel.
- Keepers: Place the keepers across the strap at 1.25, 2.75, 4.25, 5.75 and 7.25 in (3.2, 7.0, 10.8, 14.6 and 18.4 cm) from the top of the strap, so they are 1.5 in (3.8 cm) apart. Sew only 0.4 in (1.0 cm) at each end of each keeper to the panel, on either side of the strap. That leaves a 1.2 in (3.0 cm) bridge over the 0.7 in (1.8 cm) strap. The extra 0.5 in (1.3 cm) of slack is what lets a folded cable slide underneath.
Weave in all ends on the back.
Final Blocking
- Lightly mist the piece, or hover a steam iron about 1 in (2.5 cm) above it. Don’t press the iron onto the safety eyes.
- Lay the piece face up on a blocking mat or folded towel.
- Pin the panel to 5.5 in x 13 in (14.0 cm x 33.0 cm), keeping the long sides straight.
- Smooth the curved corners so they match.
- Pin the ear tips to points and gently flatten the cheeks.
- Don’t pin the keepers flat. Slip a pencil under each one so it keeps its slack.
- Let it dry completely before unpinning.
Final Quality-Control Checklist
- [ ] The panel is 5.5 in x 13 in (14.0 cm x 33.0 cm).
- [ ] All four corners have the same curve.
- [ ] Border Round 1 has 132 sts (14 + 52 + 14 + 52).
- [ ] The rev sc border lies flat with no ruffling.
- [ ] The ears are mirror images, and each has 16 edging sts.
- [ ] The cheek tips point toward the nose and match each other.
- [ ] The eyes are 1 in (2.5 cm) apart and level.
- [ ] The strap is centered, straight, and 8.5 in (21.6 cm) long.
- [ ] All five keepers are 1.5 in (3.8 cm) apart, and each has slack.
- [ ] The loop is secure and centered.
- [ ] All ends are woven in on the back.
Troubleshooting
The border ruffles. You’re probably working more than one sc per row end. Recount the sides: there should be 52 sts on each.
The border pulls the corners in. You may have missed the 2-sc corner stitches. Each top and bottom edge needs 14 sts.
The corners don’t match. Check the counts for Rows 1–4 and Rows 52–54: 12, 14, 16, 18 at the bottom, then 16, 14, 12 at the top.
The keepers are too tight for cables. Unpick one end of the keeper and resew it closer to the strap to free up more slack.
The face looks off-center. Count stitches from both side edges before you fix the eyes. Safety eye washers can’t be removed once they’re on.
The panel is longer than 12 in (30.5 cm). Your row gauge is loose. Rip back and work fewer straight rows only if the width is also correct, then recalculate the side counts for the border as the total rows minus 2.
Care
Spot clean with mild soap and cool water, then reshape and lay flat to dry. Don’t tumble dry, because heat can loosen safety eye washers and distort cotton.

Final Notes
Everything starts from the gauge. At 16 sc and 18 rows per 4 in (10.2 cm), the 18-stitch panel is 4.5 in (11.4 cm) wide and the 54 rows are 12 in (30.5 cm) tall. The border then gives 14 sts on the top and bottom and 52 on each side, 132 in total, and two rounds add 0.5 in (1.3 cm) per side for a finished size of 5.5 in x 13 in (14.0 cm x 33.0 cm). The 8.5 in (21.6 cm) strap fits under the nose, and the five keepers 1.5 in (3.8 cm) apart each hold one cable. Check each stage against the checkpoints and your fox will come out right.
Happy crocheting!