
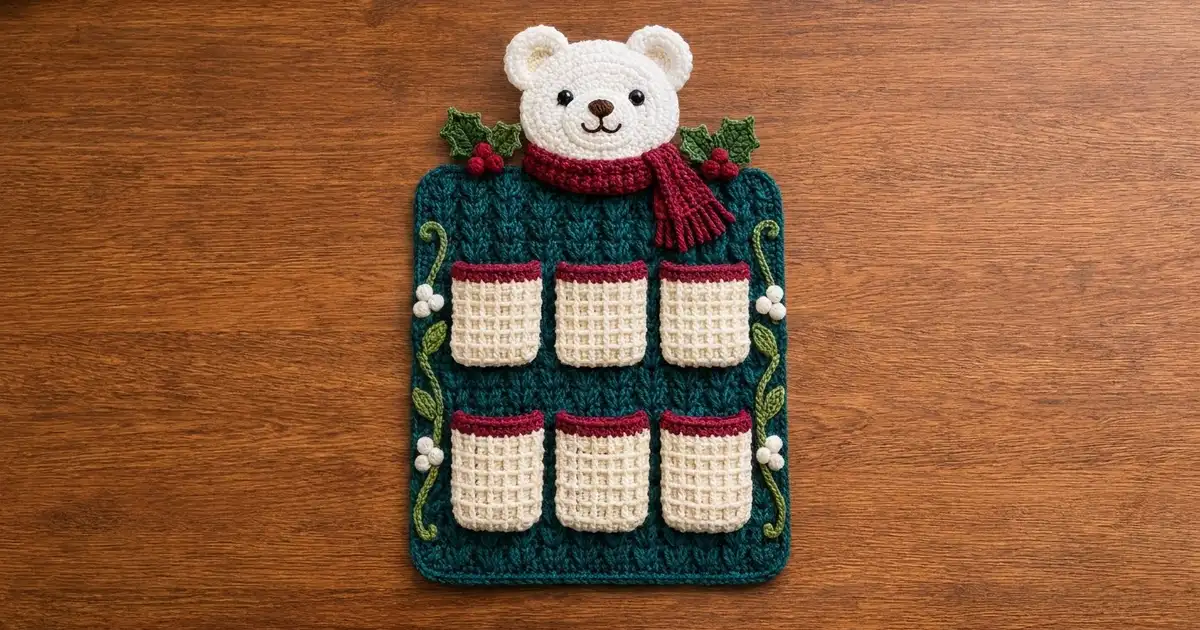
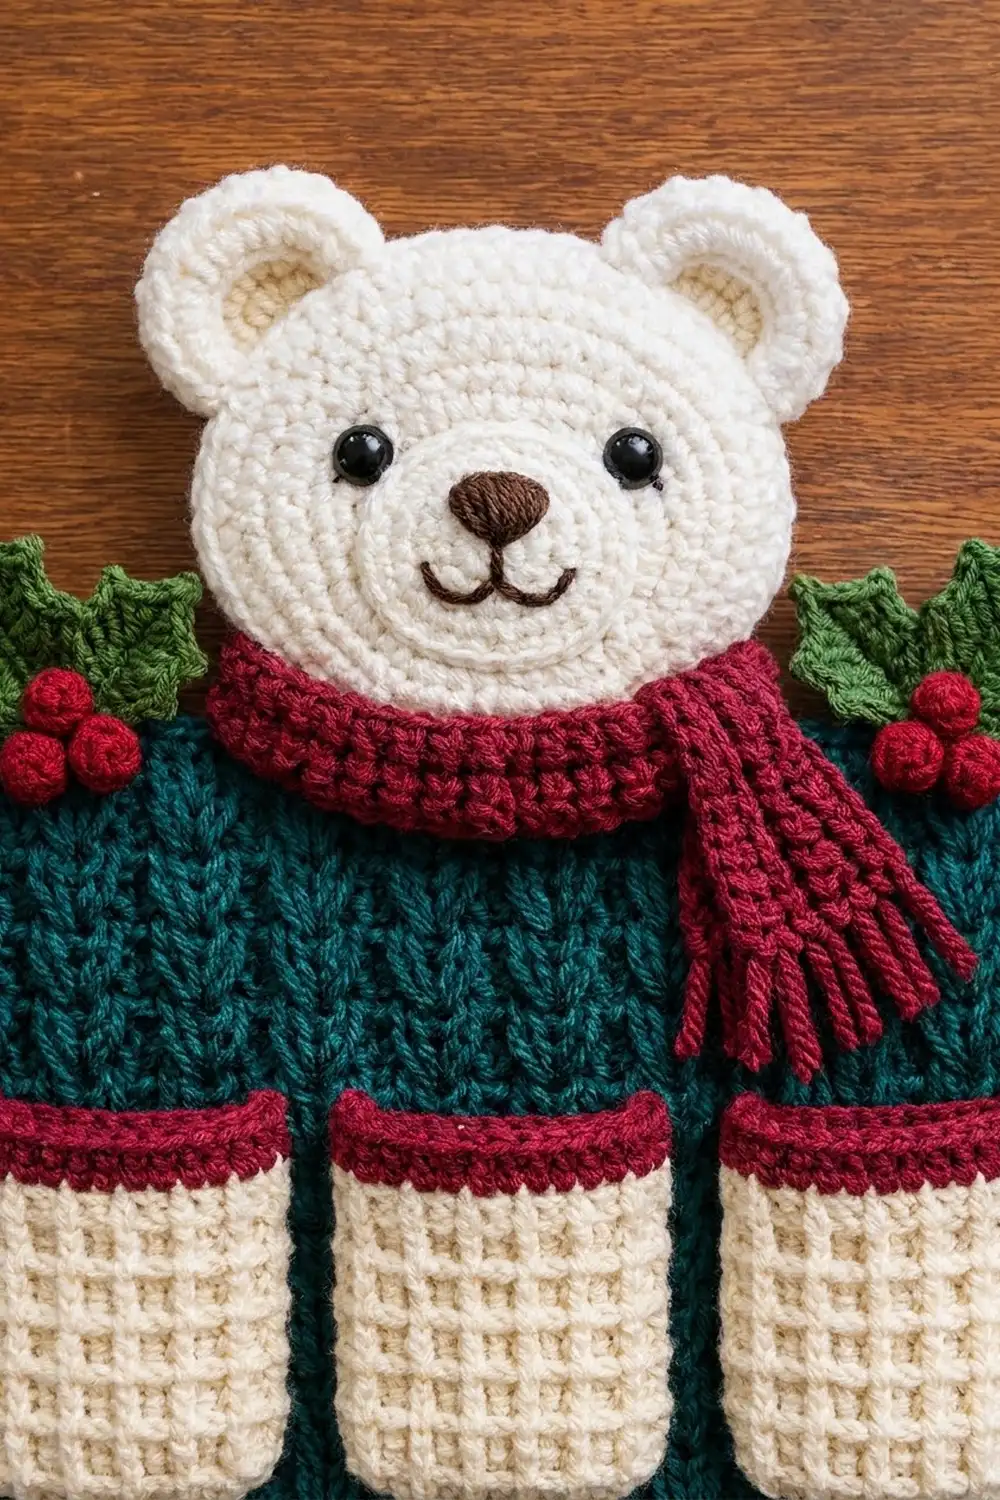
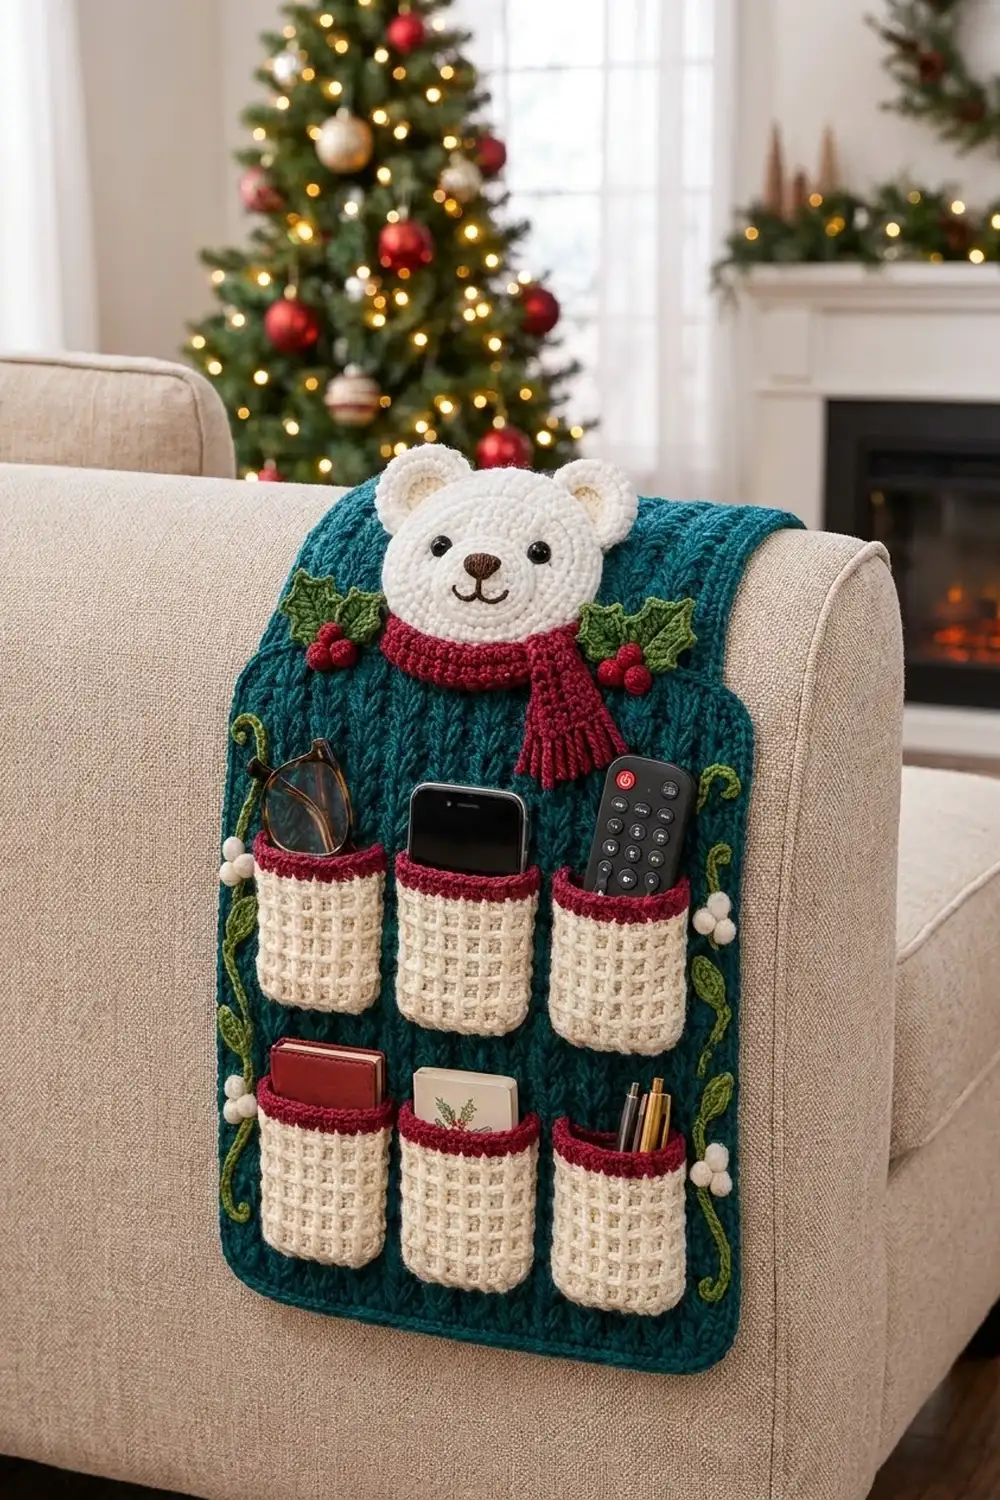
This cozy armrest caddy keeps your remote, phone, glasses and pens within reach all winter. A deep teal panel with raised knit-look columns forms the base. Six cream waffle-stitch pockets with burgundy bands sit on top, and a friendly polar bear in a fringed scarf peeks over the top edge.
The colors are classic holiday tones: teal, cream, burgundy, leaf green and berry red, plus small amounts of black and brown for the face. Holly sprigs sit on each side of the bear, and green vines with cream snowberries frame the long sides.
The pattern uses US crochet terms. The finished panel measures 11 x 15 in (27.9 x 38.1 cm). The overall height, including the bear’s ears, is about 18.5 in (47.0 cm).
You work the panel flat in rows, then add a two-round border. The pockets are worked flat in waffle stitch with a burgundy band and a slip-stitch edging. The appliqués are small, quick pieces. Everything is sewn on at the end.
Finished Size and Construction
- Finished size: 11 x 15 in (27.9 x 38.1 cm) panel; about 18.5 in (47.0 cm) tall including the bear
- Skill level: Intermediate (post stitches, waffle stitch, sewing)
- Terminology: US
- Yarn weight: Worsted (#4)
- Hook: 5.0 mm (H-8)
- Number of pieces: 1 panel, 6 pockets, and 45 appliqué parts:
- 1 head, 1 muzzle and 2 ears
- 1 collar and 1 scarf tail
- 4 holly leaves and 6 red berries
- 2 vines, 10 vine leaves and 18 snowberries
- Layout: pockets in 3 columns x 2 rows
- Pocket size: 2.75 x 3.5 in (7.0 x 8.9 cm)
- Panel size before border: 10 x 14 in (25.4 x 35.6 cm)
- Border depth: 0.5 in (1.3 cm) per side
Materials
Choose a smooth acrylic or acrylic blend in worsted weight. Smooth yarn shows the post-stitch texture clearly and holds up to daily handling. The quantities assume about 2 m per gram.
- Teal (MC): 170 g / 340 m
- Cream: 80 g / 160 m
- Burgundy: 25 g / 50 m
- Leaf Green: 20 g / 40 m
- Berry Red: 5 g / 10 m
- Black and brown: about 2 m each, for embroidery
All quantities already include a safety margin of roughly 15%.
Tools:
– 5.0 mm (H-8) hook
– Tapestry needle
– Scissors
– Stitch markers
– Rust-proof pins
– Blocking mat
– Spray bottle
– Optional: two 9 mm black safety eyes
Abbreviations (US Terms)
- ch – chain
- sl st – slip stitch
- sc – single crochet
- hdc – half double crochet
- dc – double crochet
- fpdc – front post double crochet
- bpdc – back post double crochet
- BLO – back loop only
- MR – magic ring
- st(s) – stitch(es)
- tch – turning chain
- RS / WS – right side / wrong side
- rep – repeat
Special stitches:
– fpdc: Yarn over, insert the hook from front to back around the post of the stitch, pull up a loop, then (yarn over, pull through 2) twice.
– bpdc: The same as fpdc, but insert the hook from back to front around the post.
– Picot: Ch 2, then sl st in the 2nd ch from the hook.
– Twin Post Rib: Pairs of raised fpdc columns separated by one recessed post stitch. The pairs read as stacked V’s.
– Waffle Stitch: Alternating fpdc and dc rows that build a raised grid.
Gauge and Checkpoints
- Twin Post Rib: 16 sts and 8 rows = 4 in (10.2 cm)
- Waffle Stitch: 16 sts and 8 rows = 4 in (10.2 cm)
- Single crochet: 16 sts and 16 rows = 4 in (10.2 cm)
Make one pocket first. It is a quick, real gauge test. After Row 6 it should measure 2.75 x 3 in (7.0 x 7.6 cm).
Panel checkpoints:
– Row 1: 10 in (25.4 cm) wide
– Row 8: 4 in (10.2 cm) tall
– Row 28: 10 x 14 in (25.4 x 35.6 cm)
– After the border: 11 x 15 in (27.9 x 38.1 cm)
If your piece is too big, go down 0.5 mm in hook size. If it is too small, go up 0.5 mm. Do not change the stitch counts. Post stitches tighten as you go, so measure with the piece lying flat and unstretched.
Panel (Teal)
Foundation: Ch 42.
Row 1 (WS): Dc in the 4th ch from the hook and in each remaining ch. Turn. (40 sts; the skipped ch-3 counts as 1 dc)
Row 2 (RS):
– Ch 3 (counts as dc throughout).
– Fpdc around each of the next 2 sts, bpdc around the next st. Rep from * 11 more times (12 repeats).
– Fpdc around each of the next 2 sts.
– Dc in the top of the tch. Turn.
(40 sts: 1 + 36 + 2 + 1; this makes 13 raised columns)
Row 3 (WS):
– Ch 3.
– Bpdc around each of the next 2 sts, fpdc around the next st. Rep from * 11 more times.
– Bpdc around each of the next 2 sts.
– Dc in the top of the tch. Turn. (40 sts)
The bpdc on WS rows pushes the paired columns toward the RS, so they stay raised on the front.
Rows 4–28: Rep Rows 2 and 3 alternately, ending with a Row 2. Do not fasten off. (40 sts per row, 28 rows total)
Checkpoint: 10 x 14 in (25.4 x 35.6 cm).
Pockets (Make 6)
Foundation (cream): Ch 13.
Row 1 (WS): Dc in the 4th ch from the hook and in each remaining ch. Turn. (11 sts)
Row 2 (RS):
– Ch 3.
– Fpdc around the next st, dc in each of the next 2 sts. Rep from * 2 more times.
– Dc in the top of the tch. Turn. (11 sts: 1 + 9 + 1)
Row 3:
– Ch 3.
– Fpdc around each of the next 2 sts, dc in the next st. Rep from * 2 more times.
– Dc in the top of the tch. Turn. (11 sts)
Rows 4–6: Work Row 2, then Row 3, then Row 2 again. Fasten off the cream. (11 sts per row)
Checkpoint: 2.75 x 3 in (7.0 x 7.6 cm).
Row 7 (burgundy): Join the burgundy yarn. Ch 1, sc in each st. Turn. (11 sc)
Row 8: Ch 1, sc in each st. Fasten off. (11 sc)
Rounded-corner edging (cream): With the RS facing, join the cream yarn at the top of the right side. Work down the side, across the bottom and up the other side:
– Down the side: 1 sl st in each of the 2 sc row-ends, then 2 sl st in each of the 6 dc row-ends. (14 sl sts)
– Bottom corner: Skip the corner stitch base.
– Across the bottom: Sl st in each of the next 9 foundation loops. (9 sl sts)
– Second corner: Skip the last corner base.
– Up the other side: Work 14 sl sts to mirror the first side.
(37 sl sts total; leave a 24 in / 61.0 cm tail for sewing)
Skipping each corner base pulls the bottom corners into a soft curve.
Pocket size: 2.75 x 3.5 in (7.0 x 8.9 cm).
Bear Appliqué (Cream)
Head
Work in continuous rounds. Mark the first stitch of each round.
- Round 1: 6 sc in a MR. (6)
- Round 2: 2 sc in each st. (12)
- Round 3: Sc in the next st, 2 sc in the next st around. (18)
- Round 4: Sc in the next 2 sts, 2 sc in the next st around. (24) Checkpoint: 2 in (5.1 cm) across.
- Round 5: Sc in the next 3 sts, 2 sc in the next st around. (30)
- Round 6: Sc in the next 4 sts, 2 sc in the next st around. (36)
- Round 7: Sc in the next 5 sts, 2 sc in the next st around. (42)
- Round 8: Sc in the next 6 sts, 2 sc in the next st around. Sl st to the next st and fasten off. (48)
The head should measure 4 in (10.2 cm) across.
Ears (Make 2)
- Round 1: 6 sc in a MR. (6)
- Round 2: 2 sc in each st. (12)
- Round 3 (BLO): Sc in the next st, 2 sc in the next st around. (18)
Working Round 3 in the back loops leaves a ridged inner ring on the front. Each ear measures 1.5 in (3.8 cm) across.
Muzzle
Ch 4.
- Round 1:
- Sc in the 2nd ch from the hook, sc in the next ch, 3 sc in the last ch.
- Working along the other side of the chain, sc in the next ch, then 2 sc in the last ch. (8)
- Round 2: 2 sc in the next st, sc in the next st, 2 sc in each of the next 3 sts, sc in the next st, 2 sc in each of the last 2 sts. (14)
The muzzle measures about 1.25 x 0.75 in (3.2 x 1.9 cm).
Face
- Add the eyes 0.5 in (1.3 cm) above the muzzle and 1.25 in (3.2 cm) apart. Use 9 mm safety eyes or black French knots.
- Sew on the muzzle.
- Satin-stitch a brown triangle nose at the top of the muzzle.
- Backstitch a brown “w” mouth below the nose.
Scarf (Burgundy)
Collar
- Ch 6.
- Row 1: Sc in the 2nd ch from the hook and in each remaining ch. (5)
- Rows 2–20: Ch 1, sc in the BLO of each st. Turn. (5 sts per row)
The collar measures 5 x 1.25 in (12.7 x 3.2 cm).
Tail
- Ch 5.
- Row 1: Sc in the 2nd ch from the hook and in each remaining ch. (4)
- Rows 2–12: Ch 1, sc in the BLO of each st. Turn. (4 sts per row)
The tail measures 3 x 1 in (7.6 x 2.5 cm).
Fringe: Cut 8 strands, each 4 in (10.2 cm) long. Knot 2 strands into each of the 4 stitches at the bottom of the tail. Trim the fringe to 1 in (2.5 cm).
Holly and Vines
Holly leaves (green, make 4)
Ch 9, then work along both sides of the chain:
1. Sc in the 2nd ch from the hook, hdc in the next ch.
2. (Dc, picot) in the next ch, dc in the next ch, (dc, picot) in the next ch.
3. Hdc in the next ch, sc in the next ch.
4. Work (sl st, picot, sl st) in the last ch for the tip.
5. Working along the other side of the chain: sc, hdc, (dc, picot), dc, (dc, picot), hdc, sc.
6. Sl st to the first sc.
Each leaf is about 1.75 in (4.4 cm) long.
Berries (red, make 6) and snowberries (cream, make 18)
- Work 5 sc in a MR.
- Pull the ring tight and sl st to the first sc.
- Tuck the tail inside the berry.
Each berry is about 0.4 in (1.0 cm) across.
Vines (green, make 2)
Ch 55. Sl st in the 2nd ch from the hook and in each ch back to the start. (54 sl sts; about 12 in / 30.5 cm long)
Vine leaves (green, make 10)
Ch 5, then:
1. Sl st in the 2nd ch from the hook, hdc in the next ch, dc in the next ch.
2. Work (hdc, picot, hdc) in the last ch.
3. Working along the other side of the chain: dc in the next ch, hdc in the next ch, sl st in the last ch.
Each leaf is about 1 in (2.5 cm) long.
Make All Pieces
Totals:
– Teal: 1 panel
– Cream: 6 pocket bodies and edgings, 1 head, 2 ears, 1 muzzle, 18 snowberries
– Burgundy: 6 pocket bands, 1 collar, 1 tail with fringe
– Green: 4 holly leaves, 2 vines, 10 vine leaves
– Red: 6 berries
Pocket layout (front view):
[P1] [P2] [P3]
[P4] [P5] [P6]
Horizontal spacing (11 in / 27.9 cm total):
– 0.875 in (2.2 cm) outer margin
– 3 pockets of 2.75 in (7.0 cm), with two 0.5 in (1.3 cm) gaps between them
– 0.875 in (2.2 cm) outer margin
Vertical spacing (15 in / 38.1 cm total):
– 4.5 in (11.4 cm) from the top edge to the top of the first pocket row
– 3.5 in (8.9 cm) for the first pocket row
– 1.5 in (3.8 cm) gap between rows
– 3.5 in (8.9 cm) for the second pocket row
– 2 in (5.1 cm) bottom margin
Joining
Block the panel and pockets before you join anything (see Final Blocking).
Stitch-to-stitch logic: Each pocket side has 14 edge sl sts over 3.5 in (8.9 cm). That height equals 7 panel rows. Each pocket bottom (9 sl sts plus 2 curved corners) covers 2.75 in (7.0 cm), or 11 panel sts. Use the rib columns as vertical guides so every pocket sits straight.
Method:
1. Pin each pocket in place.
2. Using the cream tail, whipstitch through each edge sl st and the panel stitch beneath it. Work down one side, around the bottom curve and up the other side.
3. Leave the burgundy top open.
4. Tack the top corner of each side twice for strength.
Tension: Keep the sewing snug but not tight. A pocket should lie flat with no puckering in the panel behind it.
Appliqué placement:
– Head: Sew the ears behind the head at the 10 and 2 o’clock positions. Then sew the head centered at the top, with its lower 1.25 in (3.2 cm) overlapping the panel.
– Scarf: Curve the collar along the bottom of the head and tuck its ends behind the head. Sew the tail under the right end of the collar so it hangs down and to the right.
– Holly: Sew 2 leaves and 3 red berries on each side of the head along the top edge.
– Vines: Center each vine within the 0.875 in (2.2 cm) side margin and curl the top end. Sew on 5 vine leaves and 3 clusters of 3 snowberries per vine.
Checkpoint: The panel still measures 11 x 15 in (27.9 x 38.1 cm) after sewing.
Border (Teal)
Border gauge: 16 sc = 4 in (10.2 cm).
Round 1: Continue from the last panel row; do not turn.
– Top corner: 3 sc in the first st of the last row.
– Top edge: Sc in each of the next 38 sts.
– Top corner: 3 sc in the last st.
– Side: 2 sc in each of the 28 row-ends. (56 sc)
– Bottom corner: 3 sc in the first foundation ch.
– Bottom edge: Sc in the next 38 ch.
– Bottom corner: 3 sc in the last ch.
– Side: 2 sc in each of the 28 row-ends. (56 sc)
– Sl st to the first sc.
Count: 2 x 38 + 2 x 56 + 4 corner groups x 3 = 200 sc.
Round 2:
– Ch 1. Sc in each st around, working 2 sc in the center st of each corner group.
– Sl st to the first sc and fasten off.
Between corner centers there are 40 sc on the top and bottom (1 + 38 + 1) and 58 sc on each side (1 + 56 + 1). Count: 2 x 40 + 2 x 58 + 4 corners x 2 = 204 sc.
Why the math works:
– The sides have 56 sc over 14 in, which matches the 16-sc gauge (4 sc per inch).
– The top and bottom have 40 sts over 10 in, which is also 4 sc per inch.
– Round 2 adds only 1 stitch per corner. A square corner needs about 2 extra stitches, so this slight shortfall pulls each corner into a soft curve.
– Two sc rounds add 0.5 in (1.3 cm) per side. The panel grows from 10 x 14 in to 11 x 15 in (27.9 x 38.1 cm).
The border is worked before any sewing. Your work order is: panel and border, then pockets and appliqués, then blocking, then joining.
Final Blocking
- Pin the bordered panel RS up to 11 x 15 in (27.9 x 38.1 cm). Ease the corners into curves.
- Pin each pocket to 2.75 x 3.5 in (7.0 x 8.9 cm).
- Mist with water until damp. Do not press, or the post columns will flatten.
- Pat the head and leaves flat by hand.
- Let everything dry completely, then join.
- After sewing, mist lightly once more and smooth the pockets.
Final Quality-Control Checklist
- [ ] The panel has 40 sts per row and 28 rows.
- [ ] Border rounds: 200 sc, then 204 sc.
- [ ] Panel measures 11 x 15 in (27.9 x 38.1 cm).
- [ ] All 6 pockets have 11 sts, 8 rows and 37 edge sl sts.
- [ ] Pocket rows are level, with even 0.5 in (1.3 cm) gaps.
- [ ] Pocket tops are open and corner-tacked.
- [ ] The bear is centered and the eyes are level.
- [ ] Fringe is trimmed evenly.
- [ ] No yarn ends are visible on the RS.
Troubleshooting
- Panel narrows as you go: Post stitches are too tight. Pull up a taller loop before each yarn-over.
- Columns don’t stand out: Check that the WS rows use bpdc over the paired columns.
- Waffle grid looks flat: You have swapped Rows 2 and 3. Keep the fpdc positions alternating.
- Border ruffles: Use a smaller hook or work 3 sc per 2 row-ends.
- Border cups: Use a larger hook for the border.
- Pockets gape: The whipstitches are too loose. Resew at 1 stitch per edge sl st.
- Head ripples: Your increases are stacking. Stagger them, or go down one hook size.
Care
Hand wash in cool water, roll the caddy in a towel and dry it flat. Do not tumble dry, which can blur the post-stitch texture.
Final Notes
Every measurement builds on the one before it:
– Gauge: 16 sts = 4 in (10.2 cm)
– 40-st panel: 10 in (25.4 cm) wide
– 28 rows: 14 in (35.6 cm) tall
– Two border rounds: 11 x 15 in (27.9 x 38.1 cm)
– 11-st pockets: 2.75 in (7.0 cm) wide, which fit three across with even margins
If you check each stage, the layout works out. Hang the caddy over your favorite armrest and fill the pockets.
Happy crocheting!