
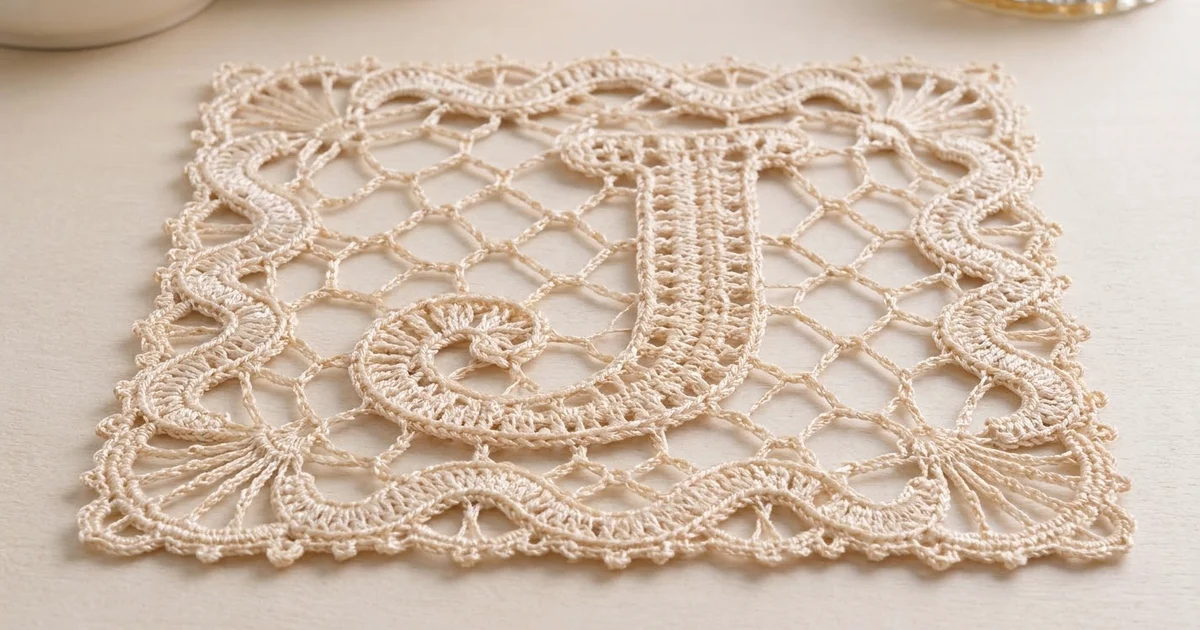
The Jardin Lace Monogram J Square is a small heirloom-style thread lace square with a raised initial in the center. The letter J has a ladder-stitch spine, a flat serif across the top, and a curled tail at the bottom. It sits on an airy diamond net, framed by a wavy ridged band, spoked corner fans, and a scalloped picot edge.
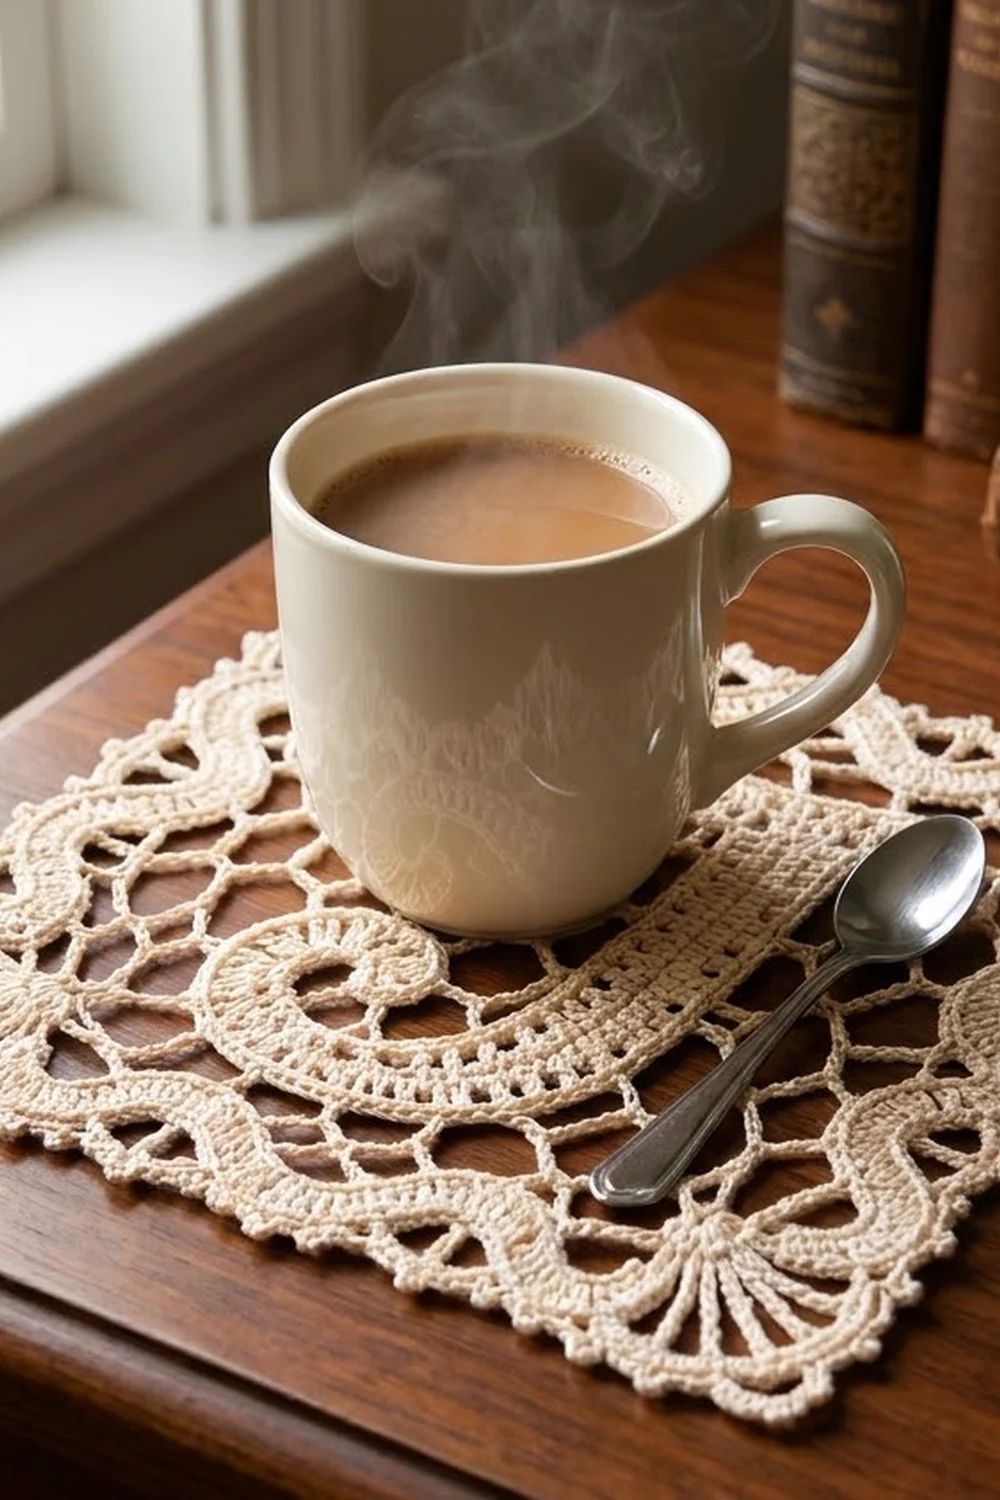
The whole piece is worked in a single cream cotton thread, so the stitch textures carry the design instead of color changes. It works well as a doily, a framed monogram, a gift-box topper, or a keepsake for anyone whose name starts with J.
This pattern uses US crochet terms. The finished square measures 6.75 in x 6.75 in (17.1 cm x 17.1 cm) after blocking.
Construction is simple:
1. Crochet the J as a separate ladder strip.
2. Crochet the square mesh ground in rows.
3. Sew the J onto the mesh.
4. Work five border rounds around everything.
The result is one finished square.
Finished Size and Construction
- Finished size: 6.75 in x 6.75 in (17.1 cm x 17.1 cm)
- Skill level: Intermediate (thread work, basic shaping, simple appliqué)
- Terminology: US crochet terms
- Yarn weight: Size 10 cotton crochet thread (lace weight)
- Hook: 1.5 mm steel hook
- Number of pieces: 1 finished square (letter strip + mesh ground, sewn and bordered as one)
- Layout: Single motif, no joining
- Mesh ground size: 4.5 in x 4.5 in (11.4 cm x 11.4 cm)
- Size before border (after Rnd 1): 4.75 in x 4.75 in (12.1 cm x 12.1 cm)
- Border depth: 1 in (2.5 cm) per side
- Letter J height: about 3.5 in (8.9 cm), including serif and curl
Materials
Thread: Use a mercerized size 10 cotton crochet thread. Mercerized cotton gives crisp picots, holds starch well, and keeps the ladder bars of the J clean. Avoid fuzzy or very soft threads, because the mesh will lose its diamond shape.
- Cream / ecru: 20 g (approx. 110 m)
This amount includes a margin of about 30% for swatching and blocking tests. The square itself uses about 14 g.
Tools:
– 1.5 mm steel crochet hook
– Fine tapestry needle (size 24–26)
– Sewing pins with flat or glass heads (rustproof)
– Blocking board or foam mat
– Spray bottle and optional fabric starch
– Small scissors
– 2 removable stitch markers
Abbreviations (US Terms)
- ch – chain
- sl st – slip stitch
- sc – single crochet
- hdc – half double crochet
- dc – double crochet
- tr – treble crochet
- blo – back loop only
- sk – skip
- sp – space
- st(s) – stitch(es)
- rnd – round
Special stitch – picot: Ch 3, sl st in the 3rd ch from hook.
Stitch counts in the border: Each side’s count covers only the stitches along that side. Corner stitches and corner chain spaces are listed separately and are never included in the side count.
Gauge and Checkpoints
Make the mesh ground first and measure it before you crochet the letter. It is the base of every measurement that follows.
Gauge:
– Mesh: 12 ch-5 loops = 4.5 in (11.4 cm) wide; 14 rows = 4.5 in (11.4 cm) tall, lightly pinned. Each loop spans about 0.375 in (1.0 cm).
– Single crochet: 49 sc along one side of Rnd 1 = 4.75 in (12.1 cm).
Checkpoints:
1. J strip (before curling): about 4.4 in (11.2 cm) long and 0.45 in (1.1 cm) wide.
2. Mesh after Row 14: 4.5 in x 4.5 in (11.4 cm x 11.4 cm).
3. After Border Rnd 1: 4.75 in x 4.75 in (12.1 cm x 12.1 cm).
4. After Border Rnd 3: about 5.5 in x 5.5 in (14.0 cm x 14.0 cm).
5. After Border Rnd 5, blocked: 6.75 in x 6.75 in (17.1 cm x 17.1 cm).
If your mesh is too big, change to a 1.25 mm hook, or make your ch-5 loops tighter. If it is too small, change to a 1.75 mm hook. Always change the hook rather than the stitch counts, because the border math depends on 49 stitches per side.
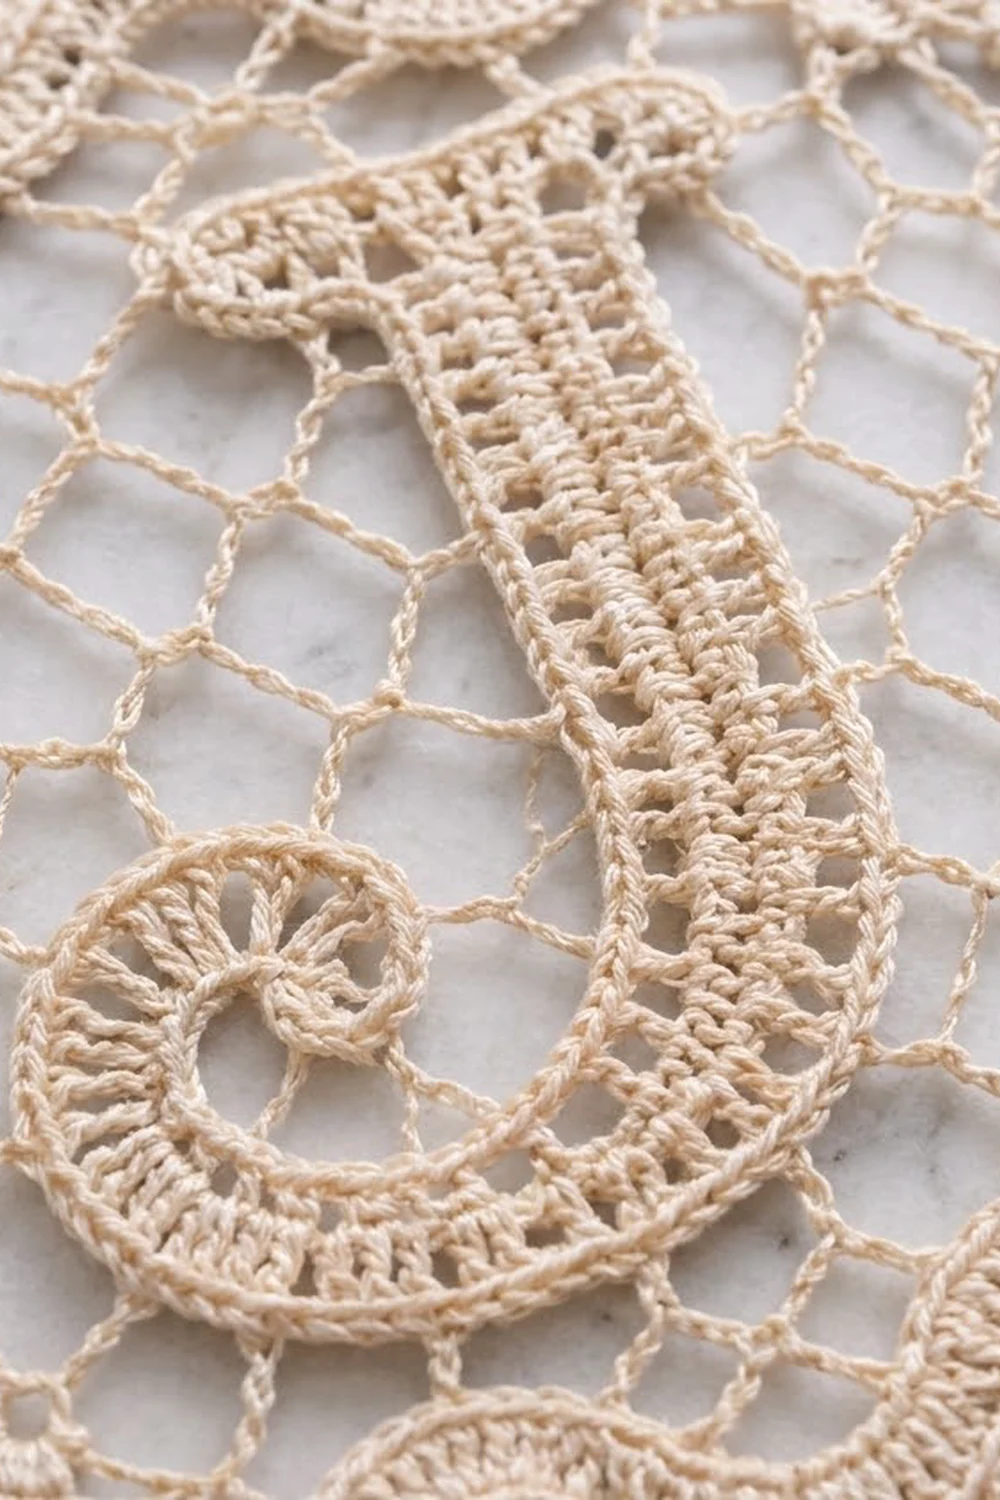
Part 1: The Letter J
The J is worked lengthwise along a foundation chain in three rows. You then add a serif bar at the top and roll the bottom end into a curl.
Foundation: Ch 46.
Row 1: Sc in 2nd ch from hook and in each ch across, turn. (45 sc)
Row 2 (ladder row): Ch 5 (counts as tr + ch 1), sk next st, tr in next st, ch 1, sk next st, tr in next st; repeat from * across, turn. (23 tr, 22 ch-1 sps)
The trebles form the rungs of the ladder down the center of the letter.
Row 3: Ch 1, sc in first tr, sc in next ch-1 sp, sc in next tr; repeat from * across, ending with sc in the 4th ch of the turning ch-5. (45 sc)
Do not fasten off. You are now at the end that becomes the top of the J.
Top Serif
The serif is a wider flat bar centered across the short end of the strip.
Serif Row A: Ch 4. Sc in 2nd ch from hook and in the next 2 ch (3 sc). Working across the short end of the strip, sc in the Row 3 row-end, 3 sc in the Row 2 row-end, and sc in the Row 1 row-end. Ch 4. (8 sc + 4 ch)
Serif Row B: Turn. Sc in 2nd ch from hook and in the next 2 ch, then sc in each of the 8 sc. (11 sc)
Serif Row C: Ch 1, turn, sc in each sc across. (11 sc)
Fasten off, leaving a 16 in (40.6 cm) tail for sewing. The serif is about 1 in (2.5 cm) wide.
Shaping the Curl
Lay the strip with the serif at the top. The upper 30 stitches form the straight stem, about 3 in (7.6 cm) long. Bend the lower 15 stitches to the left in a U-shape to make the hook of the J. Roll the last 5–6 stitches inward into a tight spiral about 0.75 in (1.9 cm) across.
Thread the starting tail on the needle. Tack the spiral in place with 3–4 small stitches through the sc rails on the back. Pin the shape and spray it lightly so it holds.
Part 2: The Diamond Mesh Ground
Foundation: Ch 50.
Row 1 (RS): Sc in 2nd ch from hook, ch 5, sk 3 ch, sc in next ch; repeat from * across, turn. (13 sc, 12 ch-5 loops)
Row 2: Ch 5 (counts as dc + ch 2), sc in first ch-5 loop, ch 5, sc in next ch-5 loop; repeat from * 10 more times, ch 2, dc in last sc, turn. (12 sc, 11 ch-5 loops + 2 half loops)
Row 3: Ch 1, sc in dc, ch 5, sc in next ch-5 loop; repeat from * 10 more times, ch 5, sc in 3rd ch of turning ch-5, turn. (13 sc, 12 ch-5 loops)
Rows 4–13: Repeat Rows 2–3 five more times. Row 13 ends with 13 sc and 12 ch-5 loops.
Row 14 (squaring row): Ch 1, turn, sc in first sc, 3 sc in next ch-5 loop, sc in next sc; repeat from * across. (1 + 12 x 4 = 49 sc)
Do not fasten off. Place a marker in your loop. Measure: the mesh should be 4.5 in x 4.5 in (11.4 cm x 11.4 cm) when lightly stretched into diamonds.
Part 3: Sewing the J to the Mesh
Lay the mesh flat with the right side up and Row 14 at the top. Place the J so that:
– the serif sits about 0.5 in (1.3 cm) below Row 14,
– the stem runs slightly right of center,
– the curl sits in the lower left quarter.
This should leave about 0.5 in (1.3 cm) of mesh showing below the hook.
Using the long serif tail, whipstitch the outer sc rails of the J to every mesh sc or chain loop they cross. Space the stitches about 0.25 in (0.6 cm) apart and keep them loose enough that the mesh stays flat. Do not sew through the ladder trebles; leave them free so the openwork shows. Weave in the tail on the back of the J’s rail.
Put the live loop back on your hook.
Part 4: Border
Border gauge: 49 sc per side = 4.75 in (12.1 cm). All five rounds are built on 49 stitches per side, which divides into exact repeats:
– Rnd 2: 1 + (6 x 8) = 49
– Rnd 4: 1 + (12 x 4) = 49
Border Rnd 1 (conversion round)
Ch 1, do not turn. Sc in each of the 49 sts of Row 14 (top side), then ch 2 for the corner.
First side: Work 49 sc along the row-ends:
– 1 sc in the shared row-end of Rows 14 and 13,
– then 4 sc in each row-end of Rows 12 to 1 (12 row-ends x 4 = 48).
Ch 2 for the corner.
Bottom: Sc in each of the 49 foundation chains. Ch 2.
Second side: 4 sc in each row-end of Rows 1 to 12 (48), then 1 sc in the shared row-end of Rows 13–14 (1). Ch 2.
Join with sl st to the first sc.
Count: 49 sc per side (top: 49 Row-14 sts worked 1 per st, plus 0 added) + 4 ch-2 corner sps. (196 sc)
Checkpoint: 4.75 in x 4.75 in (12.1 cm x 12.1 cm).
Border Rnd 2 (wave round)
Ch 1. On each side, work as follows:
1. Sc in the first st.
2. Then repeat this sequence 6 times: [hdc, dc, tr, tr, dc, hdc, sc, sc], one stitch in each of the next 8 sts.
3. At the corner: ch 1, sc in corner ch-2 sp, ch 1.
Join with sl st to the first sc.
Count: 49 sts per side (1 + 6 x 8) + 4 corner sc. (196 side sts + 4 corner sc = 200 sts, plus 8 ch-1 sps)
The changing stitch heights make 6 wave crests along each side.
Border Rnd 3 (ridge and fan round)
Ch 1. On each side, sc blo in each of the 49 sts, skipping the ch-1 sps. In each corner sc, work 9 tr for the fan.
Join with sl st to the first sc.
Count: 49 sc per side + 9 tr per corner. (196 + 36 = 232 sts)
Working in the back loops leaves a raised ridge that follows the wave, which creates the dense ribbed band.
Checkpoint: about 5.5 in x 5.5 in (14.0 cm x 14.0 cm).
Border Rnd 4 (loop and spoke round)
Ch 1.
Each side: Sc in first sc, ch 5, sk 3 sts, sc in next st; repeat from * 11 more times. This uses 1 + 48 = 49 sts.
Each corner: Ch 2, dc in first tr of fan, ch 2, dc in next tr; repeat from * 7 more times, ch 2.
Join with sl st to the first sc.
Count per side: 13 sc, 12 ch-5 loops.
Count per corner: 9 dc, 10 ch-2 sps.
The dc spokes open the fans into radiating rays.
Border Rnd 5 (picot scallops)
Sl st into the first ch-5 loop.
Each side: In each ch-5 loop, work (2 sc, hdc, dc, picot, dc, hdc, 2 sc). Sl st in each sc between loops.
Each corner: In each ch-2 sp, work (sc, picot, sc).
Join with sl st and fasten off.
Count: 12 scallops per side, 10 picots per corner. (48 + 40 = 88 picots)
Why the math works: Every round keeps exactly 49 stitches per side. The corners get their own separate stitches (corner sc, then 9-tr fans, then 10 spaces), so the sides never need extra stitches. That keeps all four edges straight and equal.
Final Blocking
- Weave in all ends along solid rails or the wavy ridge band, never through the mesh.
- Soak the square in cool water for 10 minutes. Gently squeeze out the water; do not wring.
- Roll it in a towel to remove extra moisture.
- Pin it right side up to 6.75 in x 6.75 in (17.1 cm x 17.1 cm), starting with the four corner fans.
- Pin the center picot of each scallop, then open each mesh diamond with a pin if needed.
- Shape the J’s curl and serif with your fingertips.
- For crisp lace, mist with starch.
- Let it dry completely, usually 6–12 hours, before unpinning.
Final Quality-Control Checklist
- Square measures 6.75 in (17.1 cm) on all four sides
- 49 stitches per side confirmed in Rnds 1–4
- 6 wave crests per side in the ridged band
- 9 spokes in each corner fan
- 12 scallops per side, every picot open
- J ladder rungs visible and not stitched through
- Curl tight and secured
- Serif centered across the top of the stem
- Mesh diamonds even, with no twisted loops
- All ends hidden and trimmed
Troubleshooting
Mesh slants into a parallelogram. You probably skipped the half loops in even rows. Each even row must start with ch 5 and end with ch 2, dc.
Edges ruffle in Rnd 2 or 3. Your tr are too loose. Go down 0.25 mm in hook size for the border only.
Corners cup instead of lying flat. Make sure the fan has exactly 9 tr. Add an extra ch to each corner ch-2 sp in Rnd 4 if needed.
J puckers the mesh. You sewed too tightly. Snip and re-sew with looser whipstitches.
Picots close up. Pin each picot open with a pin while blocking.
Side count is off in Rnd 1. Recount the row-end placements: 12 x 4 + 1 = 49.
Care
Hand wash in cool water with a mild soap and lay flat to dry, pinning to shape if needed. Re-starch after washing if you want crisp edges.
Final Notes
Your measurement chain:
– J strip: 4.4 in (11.2 cm) long
– Mesh: 4.5 in (11.4 cm) square
– After Rnd 1: 4.75 in (12.1 cm), with 49 sts per side
– After Rnd 3: 5.5 in (14.0 cm)
– Finished: 6.75 in (17.1 cm) with a 1 in (2.5 cm) border
If each checkpoint matches, the finished square will come out right. Swap the letter shape for other initials once you know the ladder-strip method.
Happy crocheting!