
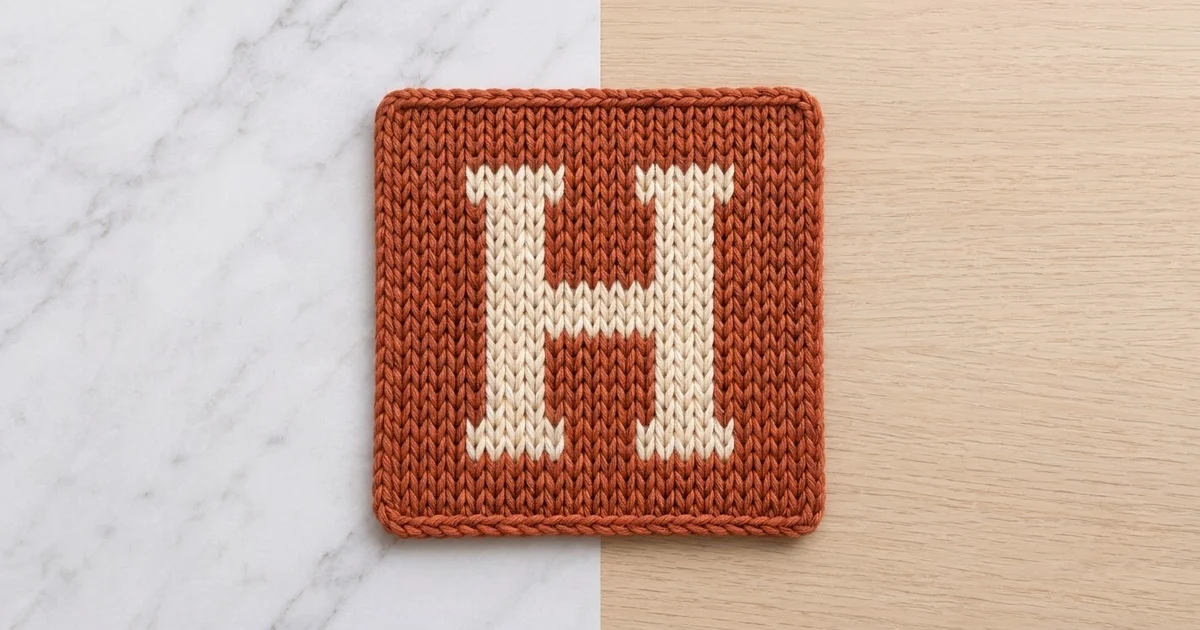
The Heritage Monogram H Square is a crisp, knit-look crochet square with a bold cream letter “H” set on a warm rust background. Waistcoat stitch makes neat columns of little V shapes that look like stockinette knitting, so the letter comes out with clean, graphic edges.
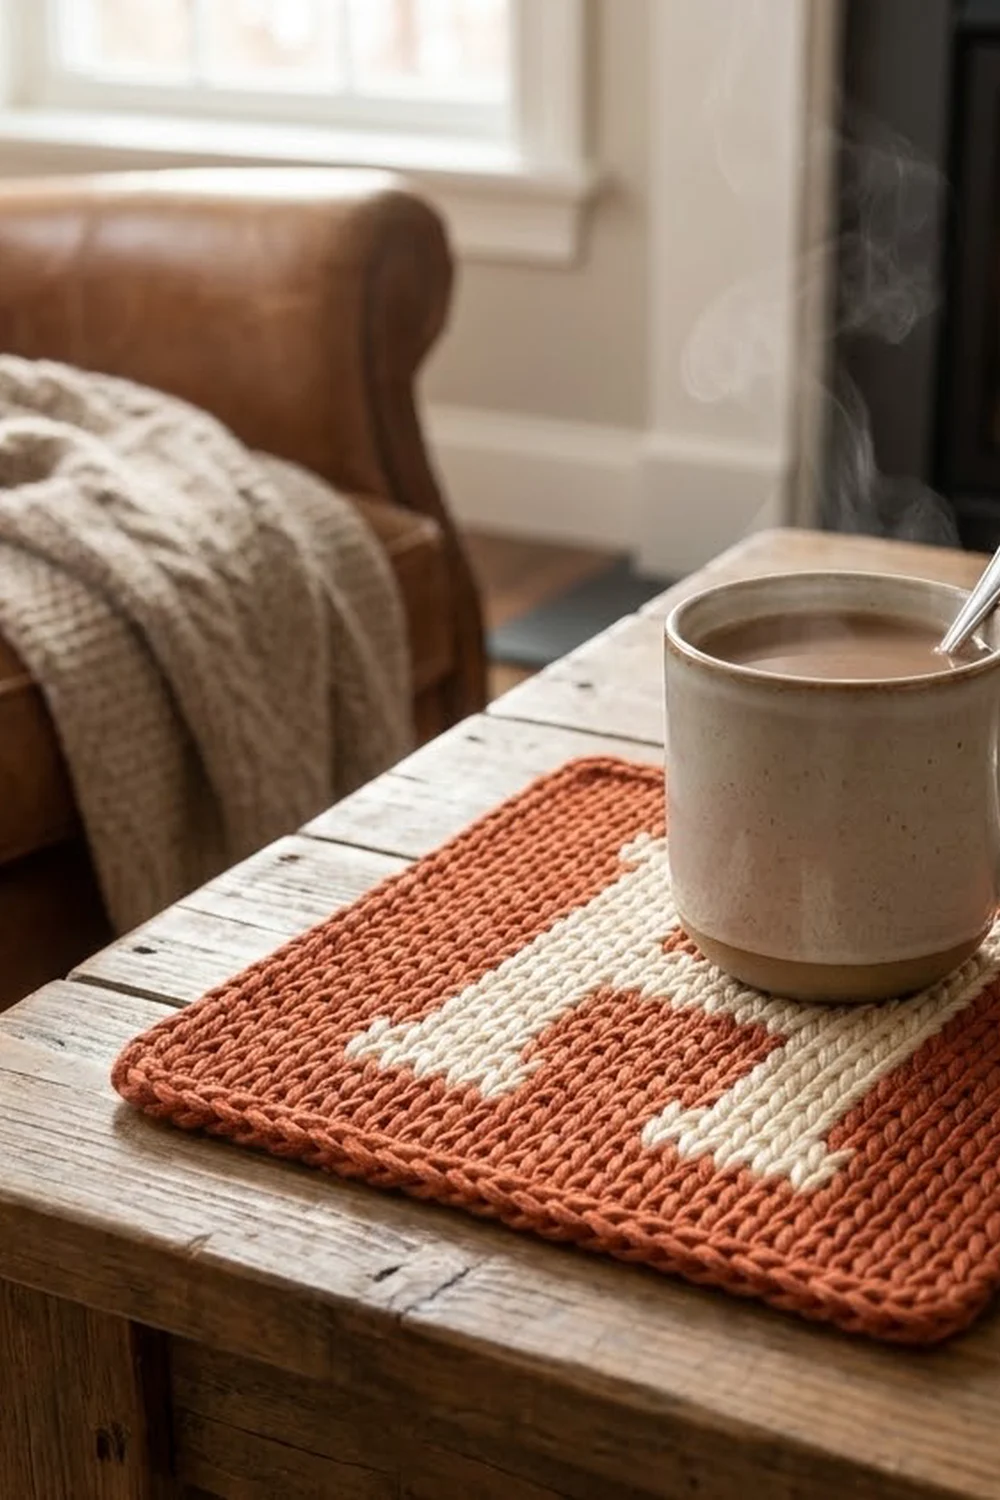
The design uses two colors: a rich terracotta rust for the background and border, and a soft cream for the letter. The serif “H” has a classic, collegiate look. It works well as a mug rug, a small hot pad, a monogram gift, or a decorative square for a shelf or desk.
This pattern uses US crochet terms. The finished square measures 7 x 7 in (17.8 x 17.8 cm) after blocking.
You’ll make one rectangular panel in rows of waistcoat stitch, using tapestry-style color changes for the letter. Every row is worked with the right side facing. Then you’ll add a three-round border in rust that covers all the row tails and gives the square a firm, rounded edge.
Finished Size and Construction
- Finished size: 7 x 7 in (17.8 x 17.8 cm)
- Skill level: Intermediate (color changes and tension control)
- Terminology: US crochet terms
- Yarn weight: Worsted (#4), cotton or cotton blend
- Hook: 5.0 mm (H-8)
- Number of pieces: 1
- Layout: Single square, no joining
- Panel size before border: 6 x 6 in (15.2 x 15.2 cm), 27 stitches x 30 rows
- Border depth: 0.5 in (1.3 cm) on each side
Materials
Yarn: Use a smooth worsted-weight cotton or cotton blend. Cotton shows off the V columns clearly and handles heat well if you plan to use the square as a hot pad. Avoid fuzzy or very splitty yarns, because waistcoat stitch places the hook between strands of the stitch below.
- Main Color (MC), Rust: 40 g / 80 m (88 yd)
- Contrast Color (CC), Cream: 15 g / 30 m (33 yd)
These quantities include a margin for your gauge swatch and the extra tails left at the end of every row.
Tools:
- 5.0 mm (H-8) crochet hook
- Tapestry needle
- Scissors
- Locking stitch markers (4)
- Measuring tape or ruler
- Blocking mat and rust-proof pins
- Spray bottle with water
Abbreviations (US Terms)
- ch: chain
- sc: single crochet
- sl st: slip stitch
- st(s): stitch(es)
- MC / CC: main color / contrast color
- wst: waistcoat stitch (see below)
- RS: right side
- BLO: back loop only
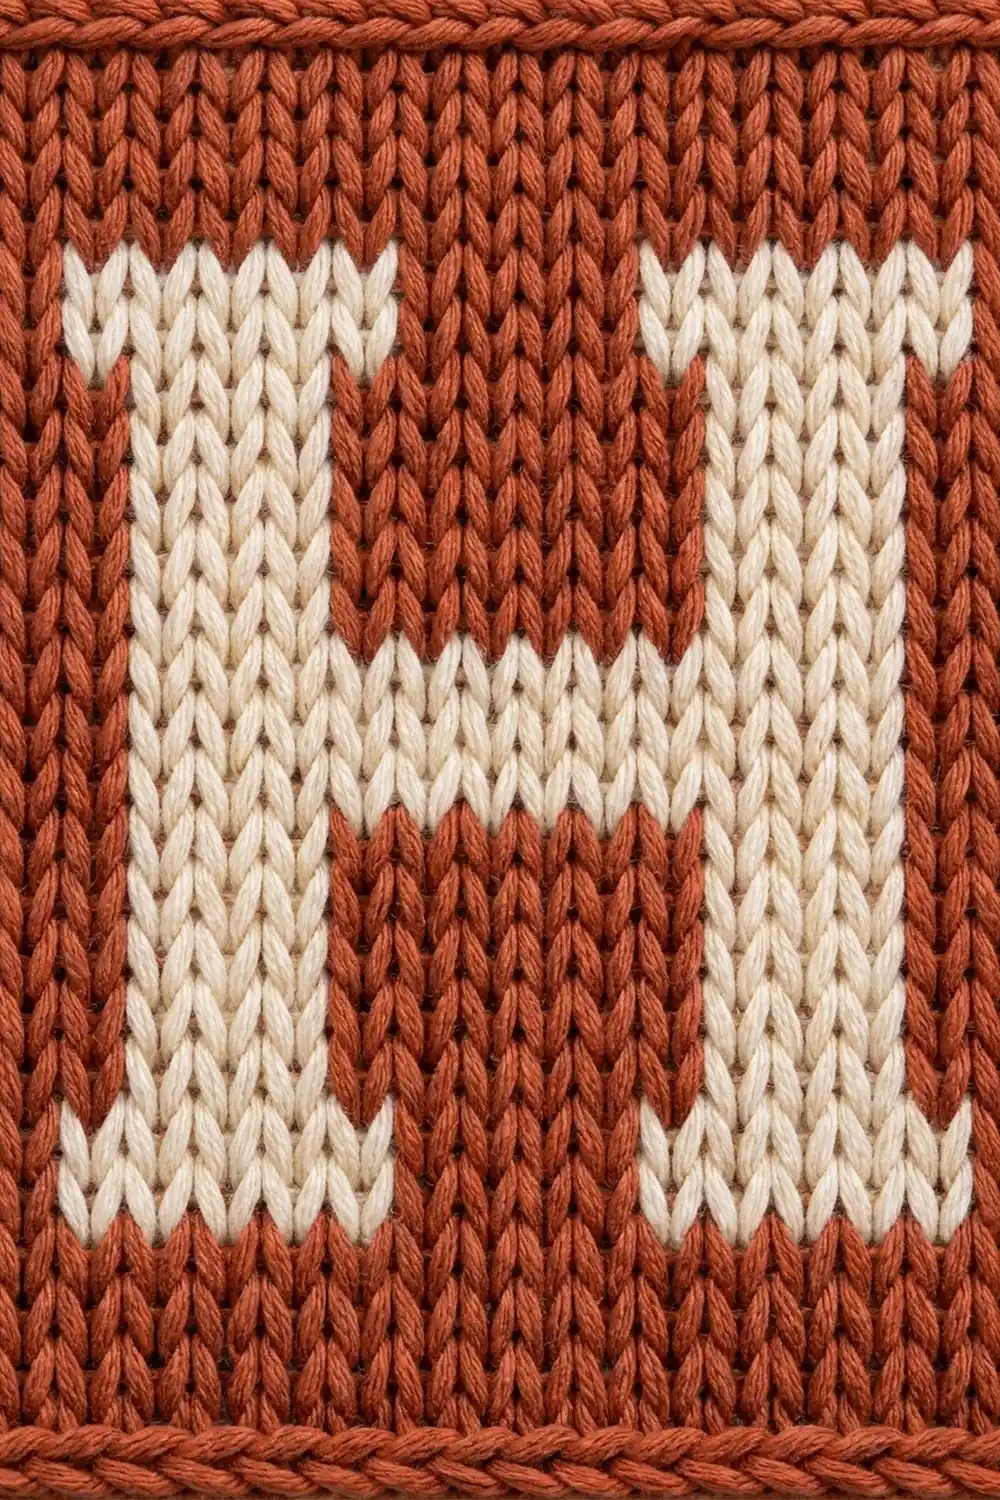
Waistcoat stitch (wst): Look at the stitch below and find the V on its front face. Put your hook through the center of that V, between its two legs and under the horizontal strands behind them, so the hook comes out the back of the fabric. Yarn over, pull up a loop, yarn over, and pull through both loops on the hook. It’s simply a single crochet worked into the center of the stitch below, not under the top loops.
Standing sc: Start with a slip knot on the hook. Insert the hook in the stated stitch and finish a sc as usual.
Color change: Work the stitch before the color change until 2 loops remain on the hook. Yarn over with the new color and pull through. Keep the unused color laid along the tops of the stitches and work over it so it’s carried inside the fabric.
Gauge and Checkpoints
Gauge: 18 sts and 20 rows = 4 in (10.2 cm) in waistcoat stitch, worked with the RS always facing.
Waistcoat stitch is dense, and most crocheters work it tightly. Make a swatch of 22 sts x 22 rows using the same method as the pattern (every row on the RS, yarn cut at each row end), then measure the center 4 in (10.2 cm).
- More than 18 sts per 4 in: your fabric is too tight. Go up a hook size.
- Fewer than 18 sts per 4 in: your fabric is too loose. Go down a hook size.
- Row gauge off by 1-2 rows: usually fine. Check the checkpoints below and add or remove one background row at the top if needed.
Measurement checkpoints:
- After Row 1: width 6 in (15.2 cm)
- After Row 5: height 1 in (2.5 cm)
- After Row 13: height 2.6 in (6.6 cm)
- After Row 17: height 3.4 in (8.6 cm)
- After Row 30: panel 6 x 6 in (15.2 x 15.2 cm)
- After Border Round 1: 6.5 x 6.5 in (16.5 x 16.5 cm)
- After Border Round 2: 7 x 7 in (17.8 x 17.8 cm)
Check each one before moving on. Gauge problems are much easier to fix early.
Panel
Method notes:
- Every row is worked with the RS facing. Don’t turn. At the end of each row, cut the yarn and leave a 3 in (7.6 cm) tail. Start each new row at the right edge with a standing sc.
- The first and last stitches of Rows 2-30 are always MC. Those edge stitches stay a clean rust frame, and the border hides all the tails.
- In Rows 6-25, join CC with MC at the start of the row and carry it inside the stitches for the whole row. Cut both colors at the end of the row.
- Every row has 27 stitches. Count after each row.
Row 1 (MC): Ch 28. Sc in 2nd ch from hook and in each ch across. Fasten off. (27 sts)
Because the first row is plain sc into the chain, it makes a firm, flat lower edge.
Rows 2-5 (MC): Standing sc into the center of the first st. Wst in each st across. Fasten off. (27 MC sts)
Make sure the standing sc goes into the center of the first stitch too, so the edge column lines up.
Checkpoint: The panel is 6 in (15.2 cm) wide and 1 in (2.5 cm) tall.
The Letter H
The H covers Rows 6-25 (20 rows, 4 in / 10.2 cm tall). The plain legs and the crossbar sit in columns 6-10 and 18-22. The serif rows widen each leg by 1 stitch on each side, to columns 5-11 and 17-23. Columns are counted from the right-hand edge, where every row begins.
Rows 6-7 (bottom serifs): With MC, standing sc in the first st. Wst in the next 3 sts (4 MC). With CC, wst in the next 7 sts. With MC, wst in the next 5 sts. With CC, wst in the next 7 sts. With MC, wst in the last 4 sts. Fasten off both colors.
(4 MC + 7 CC + 5 MC + 7 CC + 4 MC = 27 sts)
Rows 8-13 (legs): With MC, standing sc in the first st. Wst in the next 4 sts (5 MC). With CC, wst in the next 5 sts. With MC, wst in the next 7 sts. With CC, wst in the next 5 sts. With MC, wst in the last 5 sts. Fasten off both colors.
(5 MC + 5 CC + 7 MC + 5 CC + 5 MC = 27 sts)
On Row 8, each leg steps in by 1 stitch on each side. That step is what makes the serif flare.
Checkpoint: The panel is 2.6 in (6.6 cm) tall.
Rows 14-17 (crossbar): With MC, standing sc in the first st. Wst in the next 4 sts (5 MC). With CC, wst in the next 17 sts. With MC, wst in the last 5 sts. Fasten off both colors.
(5 MC + 17 CC + 5 MC = 27 sts)
The 17 cream stitches cover both legs (5 + 5) plus the 7-stitch gap between them, so the crossbar joins the legs smoothly.
Checkpoint: The panel is 3.4 in (8.6 cm) tall. The crossbar is 4 rows, or 0.8 in (2 cm), deep.
Rows 18-23 (legs): Repeat Rows 8-13.
(5 MC + 5 CC + 7 MC + 5 CC + 5 MC = 27 sts)
Rows 24-25 (top serifs): Repeat Rows 6-7.
(4 MC + 7 CC + 5 MC + 7 CC + 4 MC = 27 sts)
The letter is symmetrical: 2 serif rows, 6 leg rows, 4 crossbar rows, 6 leg rows, 2 serif rows = 20 rows.
Top Margin
Rows 26-30 (MC): Standing sc in the first st. Wst in each st across. Fasten off. (27 MC sts)
The top margin is 5 rows, the same as the bottom margin (Rows 1-5), so the H sits centered vertically. The side margins are 4 rust stitches next to the serifs and 5 next to the legs on both sides, so it’s centered horizontally too.
Checkpoint: The panel is 6 x 6 in (15.2 x 15.2 cm), with 27 sts across and 30 rows up.
Managing the Tails
At each side edge, tie each row’s tails in a loose square knot with the tails from the next row (Rows 1 and 2, Rows 3 and 4, and so on). Then lay them flat along the edge, pointing toward the nearest corner. Border Round 1 is worked over these tails and encloses them. Trim any leftover length after Round 2.
Border
Border gauge: 4.5 sc per 1 in (2.5 cm), the same as the panel’s stitch gauge. The rows run 5 per inch, so along the side edges you work 9 sc for every 10 row ends.
Round 1 (MC): With the RS facing, join MC with a standing sc in the last st of Row 30 (the top-left corner). Work 2 more sc in that same st (3 sc corner made).
- Left side: Work 25 sc across the row ends of Rows 29-2. That’s 28 row ends, so skip 3 of them, one each at Rows 25, 15 and 5. Work over the tails as you go.
- Bottom-left corner: 3 sc in the first foundation ch of Row 1.
- Bottom edge: 1 sc in each of the next 25 foundation chs.
- Bottom-right corner: 3 sc in the last foundation ch.
- Right side: 25 sc across the row ends of Rows 2-29, skipping Rows 5, 15 and 25.
- Top-right corner: 3 sc in the first st of Row 30.
- Top edge: 1 sc in each of the next 25 sts.
Join with a sl st to the first sc. Put a marker in the center sc of each corner.
(4 sides x 25 sc + 4 corners x 3 sc = 112 sts)
Why the math works: Each side has 27 stitch positions: 25 side stitches plus the 2 corner stitches that each 3-sc group is worked into. At 4.5 sc per inch, 27 positions measure 6 in (15.2 cm), exactly the panel width. On the sides, 30 rows at 5 rows per inch is also 6 in (15.2 cm). The 2 corner rows take the 3-sc groups and the other 28 row ends take 25 sc, again 27 positions. Because the top, bottom and sides all have the same count, the square won’t flare or pucker.
Checkpoint: 6.5 x 6.5 in (16.5 x 16.5 cm).
Round 2 (MC): Ch 1. Sc in each st around, working 3 sc in each marked corner center st. Move the markers up to the new corner centers. Join with a sl st to the first sc.
(Each side now has 27 sc between corner groups: the 25 side sts plus the 2 outer sts of the previous corner groups. 4 x 27 + 4 x 3 = 120 sts)
Checkpoint: 7 x 7 in (17.8 x 17.8 cm).
Round 3 (MC, rope edge): Ch 1. Sl st in the BLO of each st around, keeping your tension even and slightly loose. At each corner, work 1 sl st in each of the 3 corner sts with no increase. This rounds the corners off gently. Join with a sl st to the first sl st and fasten off.
(120 sl sts: 4 x 27 + 4 x 3)
This round adds no measurable width. It leaves a raised, chain-like line on the RS that looks like the rope rim in the photo, and it firms up the outer edge.
Weave in the border tails. Trim the knotted row tails close to the stitches they’re hidden in.
Final Blocking
- Lightly mist both sides of the square until it’s damp but not wet.
- Lay it RS up on a blocking mat.
- Pin one corner. Measure 7 in (17.8 cm) along the edge and pin the next corner. Repeat for all four corners.
- Measure both diagonals. They should match, at about 9.9 in (25.1 cm) each. If they don’t, adjust the pins until they do.
- Add pins along each side about every 1 in (2.5 cm) to straighten the edges.
- Smooth the cream letter with your fingertips so the V columns sit straight up and down.
- Leave it to dry completely, which usually takes 12-24 hours. Remove the pins.
Waistcoat stitch tends to lean slightly. Blocking straightens the columns and helps the square lie flat.
Final Quality-Control Checklist
- The square measures 7 x 7 in (17.8 x 17.8 cm) on every side.
- Every row of the panel had 27 stitches.
- The H is centered, with 5 rust rows above and below it.
- Both legs are 5 stitches wide, and the serifs are 7 stitches wide.
- The crossbar is 17 stitches wide and 4 rows deep.
- No rust is showing through the cream areas, and no cream is showing through the rust.
- No row tails are visible along the side edges.
- The corners are evenly rounded and the edges lie flat.
- Round 3 forms a smooth, continuous rope line.
Troubleshooting
The square leans into a parallelogram.
That’s normal for waistcoat stitch. Block it firmly to a true square. Next time, check that you’re putting the hook through the exact center of each V.
The carried color peeks through.
Keep the carried strand along the very top of the stitches and tug it gently every few stitches. A thicker or darker yarn may need a smaller hook for the CC sections.
The fabric is stiff and hard to work into.
Go up half a hook size and pull each loop up a little taller before you finish the stitch.
The panel is narrower than 6 in (15.2 cm).
Your stitch gauge is too tight. Go up a hook size and restart, because a full stitch on each side can’t be added afterward.
The panel is shorter than 6 in (15.2 cm) after Row 30.
Add one extra MC row at the top. On Border Round 1, skip one fewer row end on each side so you still work 25 sc.
The border ruffles.
Skip one more row end on each side in Round 1, or go down a hook size for the border.
The border pulls in or cups.
Skip fewer row ends, or work Round 3 more loosely.
The serif steps look blurry.
Make the color change on the last yarn over of the stitch before, never partway through the new-color stitch.
Care
Hand wash in cool water with mild soap, press out the water in a towel, and dry flat, reshaping it to 7 x 7 in (17.8 x 17.8 cm). Cotton squares can also be machine washed on a gentle cycle in a laundry bag.
Final Notes
The whole square depends on one simple measurement chain. A gauge of 18 sts and 20 rows per 4 in (10.2 cm) gives a 27-stitch x 30-row panel of 6 x 6 in (15.2 x 15.2 cm). The 20-row letter is 4 in (10.2 cm) tall, with matching 5-row margins above and below. Border Round 1 matches 27 positions to each 6 in (15.2 cm) side and brings the square to 6.5 in (16.5 cm). Round 2 brings it to 7 in (17.8 cm), and Round 3 adds the rope rim without changing the size. If you keep those checkpoints true at each stage, your monogram will come out sharp, flat and square.
Happy crocheting!