
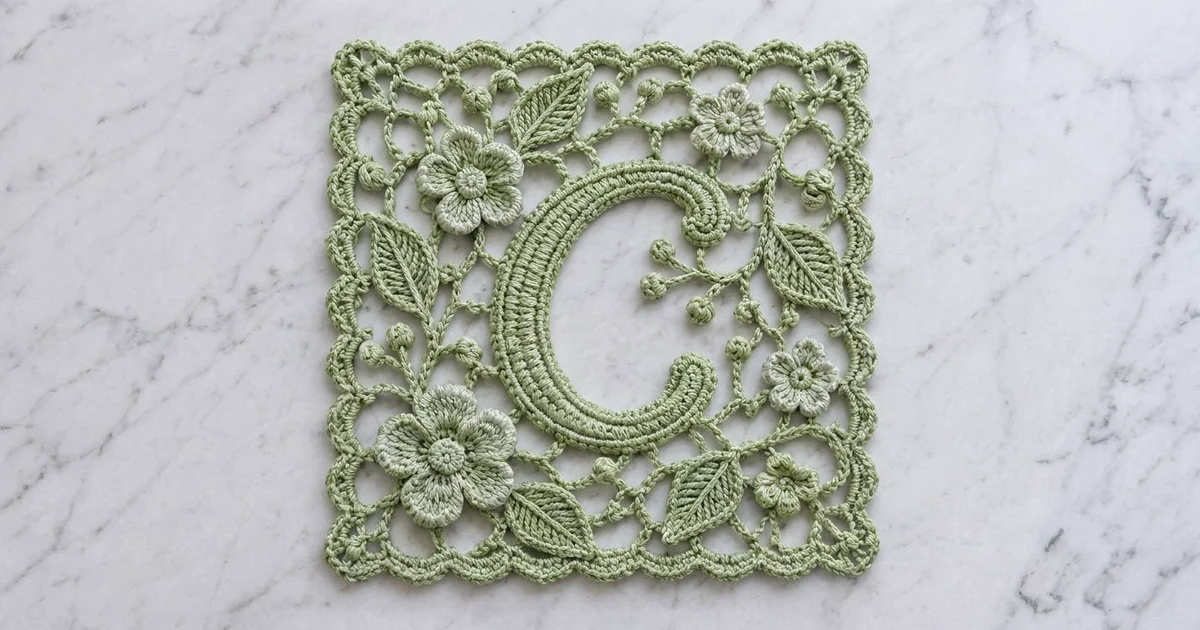
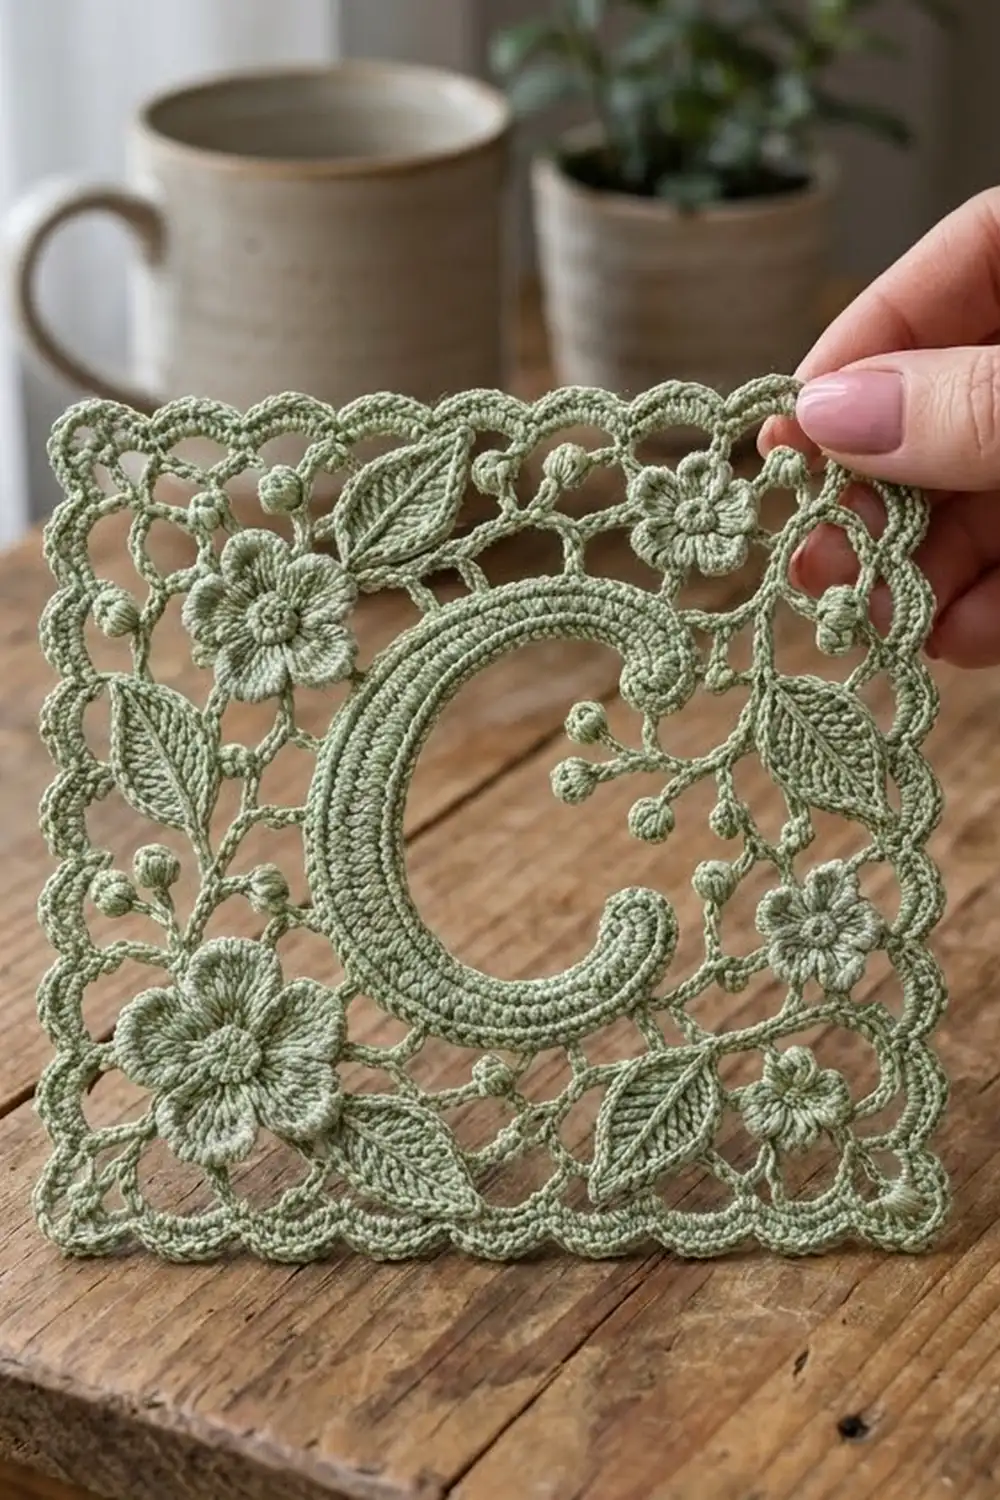
The Sage Garden Monogram Square is one square of Irish-style crochet lace in a soft sage green. It has a bold, ridged letter “C” in the center. Layered five-petal flowers, veined leaves and small berry sprigs sit around the letter. An open chain-loop mesh holds everything together, and a scalloped edge finishes the square.
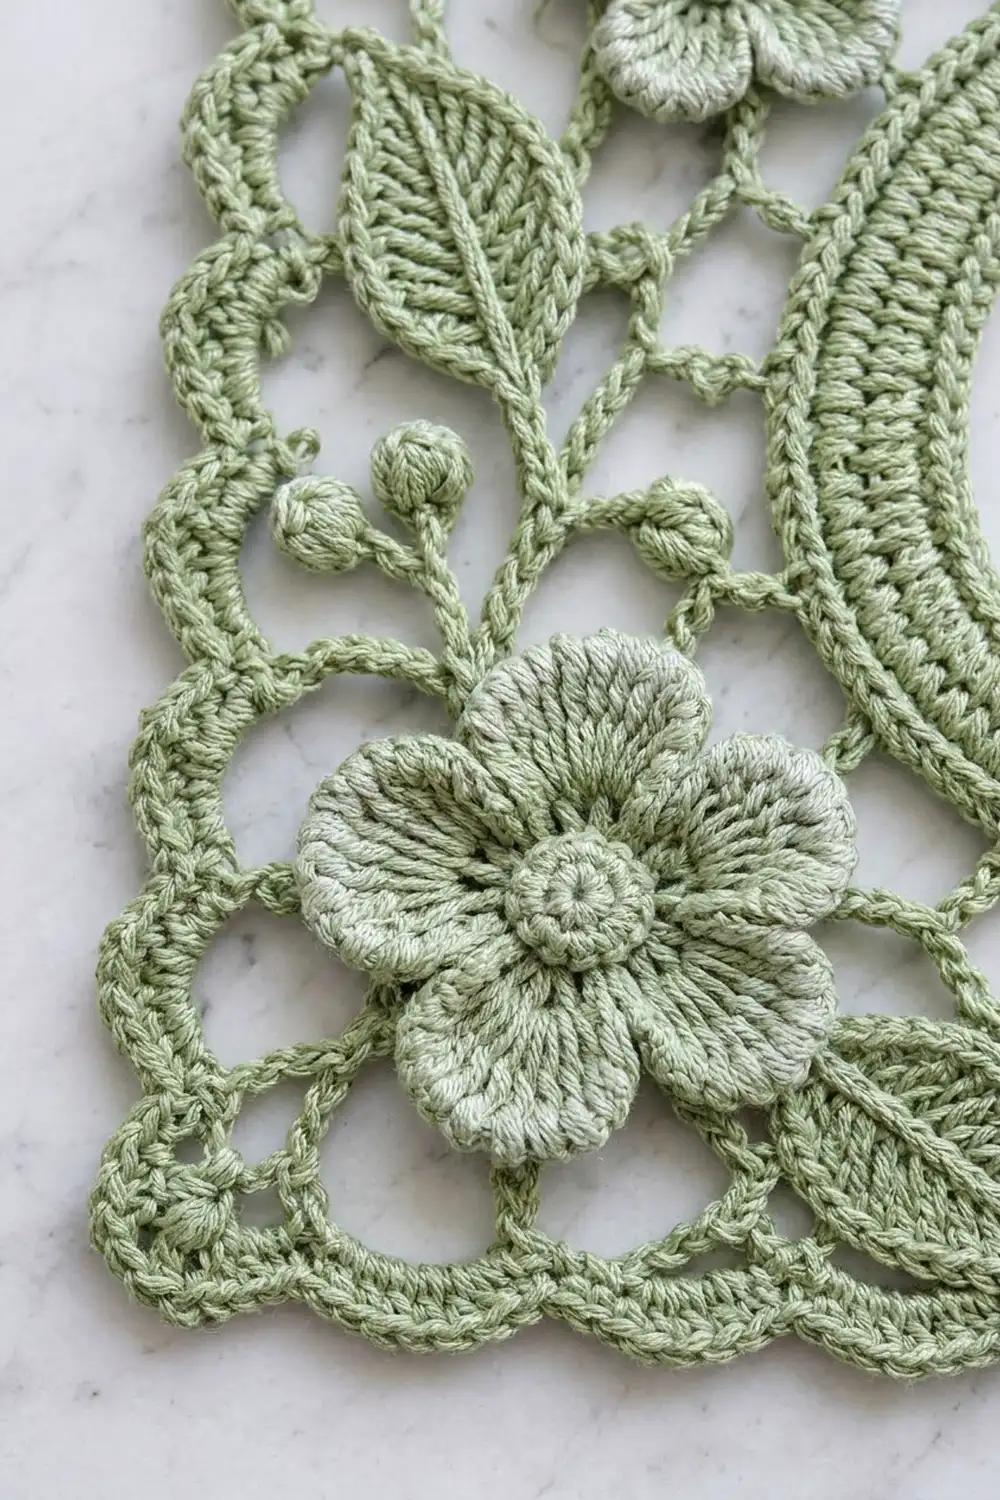
The design uses one color, so the texture carries the look. The C has raised ridges and a corded rim, the flowers have domed centers, and the leaves have slanted veins. Whatever the square sits on shows through the open mesh.
All instructions use US crochet terms. After blocking, the square measures 6½ in x 6½ in (16.5 cm x 16.5 cm). You can use it as a monogram coaster, a small doily, or a framed initial.
The construction follows the classic Irish crochet method. You crochet a chain-and-single-crochet frame and then each motif separately. Next you pin everything face down inside the frame and fill the gaps with chain loops. Last, you work a three-round scalloped border around the outside.
Finished Size and Construction
- Finished size: 6½ in x 6½ in (16.5 cm x 16.5 cm)
- Skill level: Intermediate to experienced
- Terminology: US crochet terms
- Yarn weight: Size 3 crochet cotton thread (Super Fine, #1)
- Hook: 2.25 mm (US B-1)
- Number of pieces: 1 finished square, made from 1 frame and 16 small motifs
- Layout: One square on its own, not joined to any others
- Piece size before border (frame): 5½ in x 5½ in (14.0 cm x 14.0 cm)
- Border depth: ½ in (1.3 cm) on each side
Materials
Yarn: Use mercerized cotton crochet thread in size 3. It keeps the stitches crisp, which you need for the ridges on the letter and the bobble berries. A matte or fuzzy yarn will blur these details.
- Sage Green: 25 g, about 110 m (120 yd)
This amount includes a margin of about 30 percent. The square itself uses about 18 g.
Tools:
- 2.25 mm (US B-1) crochet hook
- Tapestry needle with a small eye
- 4 stitch markers
- Foam blocking mat and rustproof pins
- Washable fabric marker, for marking a 5½ in (14.0 cm) square on the mat
- Spray bottle with water
- Scissors
Abbreviations (US Terms)
- ch: chain
- sl st: slip stitch
- sc: single crochet
- hdc: half double crochet
- dc: double crochet
- blo: back loop only
- rev sc: reverse single crochet (crab stitch)
- st(s): stitch(es)
- sp: space
Special stitch: Berry. Ch 3, then work 4 dc in the 3rd ch from the hook. Drop the loop from your hook. Insert the hook from front to back into the first dc of the group, pick up the dropped loop and pull it through. Ch 1 to lock it. The Berry’s 3 chains belong to the Berry and are never counted as part of a stem.
Gauge and Checkpoints
Gauge: 7 sc and 8 sc rows = 1 in (2.5 cm).
Make one small flower first. It is quick and shows whether your tension is right. It should measure 1 in (2.5 cm) across. If it is bigger, switch to a 2.0 mm hook. If it is smaller, switch to a 2.5 mm hook.
Checkpoints:
- Small flower: 1 in (2.5 cm) across
- Medium flower: 1¼ in (3.2 cm) across
- Large flower: 1¾ in (4.4 cm) across
- Leaf: 1¼ in (3.2 cm) long and ¾ in (1.9 cm) wide
- Berry sprig: 1½ in (3.8 cm) long
- Letter C after curling: 3½ in (8.9 cm) tall and 2¾ in (7.0 cm) wide, with a stroke ⅝ in (1.6 cm) wide
- Frame, pinned: 5½ in (14.0 cm) per side
- Finished square: 6½ in (16.5 cm) per side
You can ease motifs by about ⅛ in (0.3 cm) when you pin them. If a pinned side of the frame is more than ¼ in (0.6 cm) off, remake the frame with a different hook. The border math depends on the frame’s stitch count.
The Frame
The frame is the outline of the square. The mesh attaches to its inner edge, and the border is worked into its outer edge.
Ch 152. Join with a sl st to the first ch, making sure the chain is not twisted.
Rnd 1: Ch 1, sc in each ch around. Join with a sl st to the first sc. (152 sc)
Place markers in sc 1, sc 39, sc 77 and sc 115. These are the corner stitches. Each side has 39 sc, counting the corner stitch at each end. Neighboring sides share a corner, so the total is 4 x 39 − 4 = 152. Fasten off.
Pin the frame onto the marked 5½ in (14.0 cm) square with a marker at each corner. The free loops of the foundation chain should face the inside of the square.
The Letter C
You make the letter as a curved strip, add a corded edge, and roll each end into a scroll.
Ch 46.
Row 1: Sc in 2nd ch from hook and in each ch across, turn. (45 sc) This row forms the inner edge of the C.
Row 2 (growth): Ch 1, sc blo in next 4 sts, 2 sc blo in next st; repeat from * 9 times, turn. (54 sc)*
Row 3: Ch 1, sc blo in each st across, turn. (54 sc)
Row 4 (growth): Ch 1, sc blo in next 5 sts, 2 sc blo in next st; repeat from * 9 times, turn. (63 sc)*
Row 5: Ch 1, sc blo in each st across. Do not turn. (63 sc)
The increases make the outer edge longer than the inner edge, so the strip curves into a C. The back-loop rows create the raised ridges along the letter.
Edging Rnd 1 (trim): Ch 1. Work around the whole strip, putting 1 sc in each stitch or row-end. That is 63 sts along Row 5, 5 row-ends on the first short edge, 45 free loops of the foundation chain, and 5 row-ends on the second short edge. Work 2 extra sc in each of the 4 corner sts. Join with a sl st. (118 sts worked 1-per-stitch + 8 added = 126 sc)
Edging Rnd 2: Ch 1, rev sc in each sc around. Join with a sl st. (126 rev sc) Fasten off, leaving a 10 in (25.4 cm) tail.
Shape the scrolls: Roll the top 1¼ in (3.2 cm) of the strip toward the inner edge to make a full, round curl, and tack it with the tail. Roll the bottom 1 in (2.5 cm) upward and inward the same way. The top curl should be slightly fuller than the bottom one.
Flowers
Large Flower (make 1)
The large flower has a domed center, a front layer of 5 petals and a larger back layer of 5 petals.
Make a magic ring.
Rnd 1: Ch 1, 10 sc in ring. Join. (10 sc)
Rnd 2 (growth): Ch 1, 2 sc in each st. Join. (20 sc)
Rnd 3: Ch 1, sc in next st, ch 4, skip 3 sts; repeat from * 5 times. Join to first sc. (5 sc, 5 ch-4 sps)*
Rnd 4: In each ch-4 sp, work (sc, hdc, 5 dc, hdc, sc). Join. (45 sts, 5 petals)
Rnd 5: Fold the petals toward you. Ch 6, then working from the back, sc around the post of the next Rnd 3 sc; repeat from * 5 times. (5 ch-6 sps)*
Rnd 6: In each ch-6 sp, work (sc, hdc, 7 dc, hdc, sc). Join. (55 sts, 5 back petals)
Fasten off. Pull the magic ring tight so Rnds 1–2 puff up into a dome.
Medium Flower (make 1)
Work Rnds 1–4 of the Large Flower. (45 sts, 5 petals) Fasten off.
Small Flower (make 3)
Make a magic ring.
Rnd 1: Ch 1, 10 sc in ring. Join. (10 sc)
Rnd 2: Ch 3, skip 1 st, sc in next st; repeat from * 5 times. The last sc goes in the joining st. (5 ch-3 sps)*
Rnd 3: In each ch-3 sp, work (sc, hdc, 3 dc, hdc, sc). Join. (35 sts, 5 petals) Fasten off.
Leaves (make 5)
Ch 10.
Rnd 1: Sc in 2nd ch from hook, hdc in next ch, dc in next 5 ch, hdc in next ch. Work 3 sc in the last ch to form the base of the leaf. Then work along the other side of the chain: hdc in next ch, dc in next 5 ch, hdc in next ch, sc in last ch. Ch 2, sl st in first sc. (19 sts + tip ch-2 sp)
Rnd 2: Ch 1, sc blo in each of the 19 sts, then work (sc, ch 2, sc) in the tip ch-2 sp. Join. (21 sc + tip ch-2 sp)
Working in the back loops leaves a ridge around the edge, and the dc in the middle create the slanted veins. Fasten off, leaving a 6 in (15.2 cm) tail.
Berry Sprigs (make 5)
Ch 11 for the stem, then make a Berry at the tip.
Work back down the stem. Sl st in the next 3 stem ch. For a branch, ch 3, make a Berry, then sl st in each of the 3 branch ch back to the stem. Sl st in the next 3 stem ch. Make a second branch the same way. Sl st in the remaining 5 stem ch. (11 stem sts: 3 + 3 + 5; 3 Berries)
Fasten off, then bend the sprig into a gentle curve with your fingers.
Arranging the Motifs
Lay the motifs face down inside the pinned frame. Leave about ⅜ in (1.0 cm) between pieces for the mesh.
- Letter C: Center it, shifted slightly to the left. The top scroll curls downward at the upper right, and the bottom scroll curls upward at the lower right.
- Large flower: Lower left, slightly overlapping the bottom curve of the C.
- Medium flower: Upper left, next to the top of the C.
- Small flowers: Upper right, right middle beside the opening of the C, and lower right.
- Leaves: Top left, left edge, upper right, bottom center, and lower right.
- Berry sprigs: One inside the opening of the C, then one each at the top center, right edge, left side and bottom.
Pin each motif in at least two places. Where two motifs touch, join them with 2–3 small whipstitches on the wrong side.
Filling the Mesh
The mesh is a freeform net, so you can’t count it exactly. These rules keep it even:
- Join the thread with a sl st at the inner edge of the frame, in the top left corner.
- Ch 6, then sc into the nearest motif edge or frame loop. One ch-6 loop spans about ½ in (1.3 cm).
- Keep working across the square. Anchor each loop to a motif, to the frame, or to the middle of an earlier loop.
- Use ch 4 in tight spots and ch 8 in wide ones.
- Keep every opening ½ in (1.3 cm) or smaller across. Let the chains curve gently rather than pulling them tight.
- Attach every motif to the mesh in at least 3 places, and the C in at least 10.
Weave in the ends as you go. Before unpinning, check that the frame still measures 5½ in (14.0 cm) on every side.
Border
Border gauge: 7 sc = 1 in (2.5 cm), the same as the main gauge. The border is worked into the outer sc of the frame and adds ½ in (1.3 cm) to each side.
Rnd 1 (conversion): Join the thread in any corner sc. Ch 1, sc in each sc around, working 3 sc in each of the 4 corner sts. Join. (152 sts worked 1-per-stitch + 8 added = 160 sc)
Move each marker to the center sc of its corner group. Each side now has 41 sc, counting the corner center at each end, and 4 x 41 − 4 = 160.
Rnd 2: Sl st over to a corner center sc. Ch 1, then work (sc, ch 7, sc) in that corner sc. [Ch 5, skip 3 sts, sc in next st] 10 times; the last sc lands in the next corner center. Work (ch 7, sc) in that same corner st. Repeat from * for the next 2 sides. On the last side, work the bracketed repeat 9 times, then ch 5 and join to the first sc.
(10 ch-5 arches per side = 40 arches; 4 ch-7 corner loops; 44 sc)*
Rnd 3: Sl st into the first corner loop. In each ch-7 corner loop, work (2 sc, hdc, 2 dc, ch 3, 2 dc, hdc, 2 sc). In each ch-5 arch, work (sc, hdc, 3 dc, hdc, sc). Join.
(Per side: 10 scallops x 7 sts = 70 sts. Each corner: 10 sts + 1 ch-3 loop. Total: 280 + 40 = 320 sts and 4 corner loops)
Fasten off and weave in the end.
Why the math works: Each side runs from one corner center (st 1) to the next (st 41), which is 40 stitches. Each arch moves 4 stitches (3 skipped + 1 sc), and 40 ÷ 4 = 10. So the 10th arch on every side ends exactly in the corner, and the scallops come out evenly on all four sides.
Final Blocking
- Soak the square in cool water for 10 minutes, then press the water out gently. Do not wring it.
- Roll it in a towel to remove more water.
- Lay it face up over a 6½ in (16.5 cm) square marked on the mat.
- Pin the four corner loops first, then the center of each side.
- Pin the tip of every scallop.
- Use your fingers to shape the C scrolls, round the flower centers and lift the petals.
- Mist with water if any area dries before you finish shaping.
- Let it dry completely, 12–24 hours.
Final Quality-Control Checklist
- All four sides measure 6½ in (16.5 cm).
- The frame measures 5½ in (14.0 cm) per side.
- Each side has 10 scallops between the 2 corner loops.
- Both C scrolls are tacked securely.
- Each motif is attached to the mesh in at least 3 places.
- No mesh opening is wider than ½ in (1.3 cm).
- The square lies flat, and all ends are woven in on the wrong side.
Troubleshooting
The C stays straight. You may have missed increases. Check that you have 54 sts after Row 2 and 63 sts after Row 4.
The C curls too tightly. Your increase rows are tighter than your plain rows. Use a hook one size larger for Rows 2 and 4.
The center cups. The mesh chains are too short. Replace the tightest loops with longer chains.
The edges ripple. The mesh is too loose. Re-pin the frame and shorten the loops near the edges.
The berries are flat. Make sure you pull the dropped loop through the first dc and lock it with ch 1.
The corners pull. Count your stitches after border Rnd 1: you should have 41 per side.
Care
Hand wash in cool water with a mild soap and dry flat, pinning the square back into shape. If it needs pressing, use a cool iron on the wrong side with a cloth between the iron and the lace.
Final Notes
Each measurement depends on the one before it. A gauge of 7 sc = 1 in (2.5 cm) gives a 1 in (2.5 cm) small flower and a 3½ in (8.9 cm) letter C. The 152-stitch frame pins to 5½ in (14.0 cm), with 39 sts per side. Border Rnd 1 brings each side to 41 sts, Rnd 2 divides that into exactly 10 arches, and Rnd 3 turns the arches into scallops. The result is a 6½ in (16.5 cm) square. Check each stage as you go and the square will come out the right size.
Happy crocheting!