
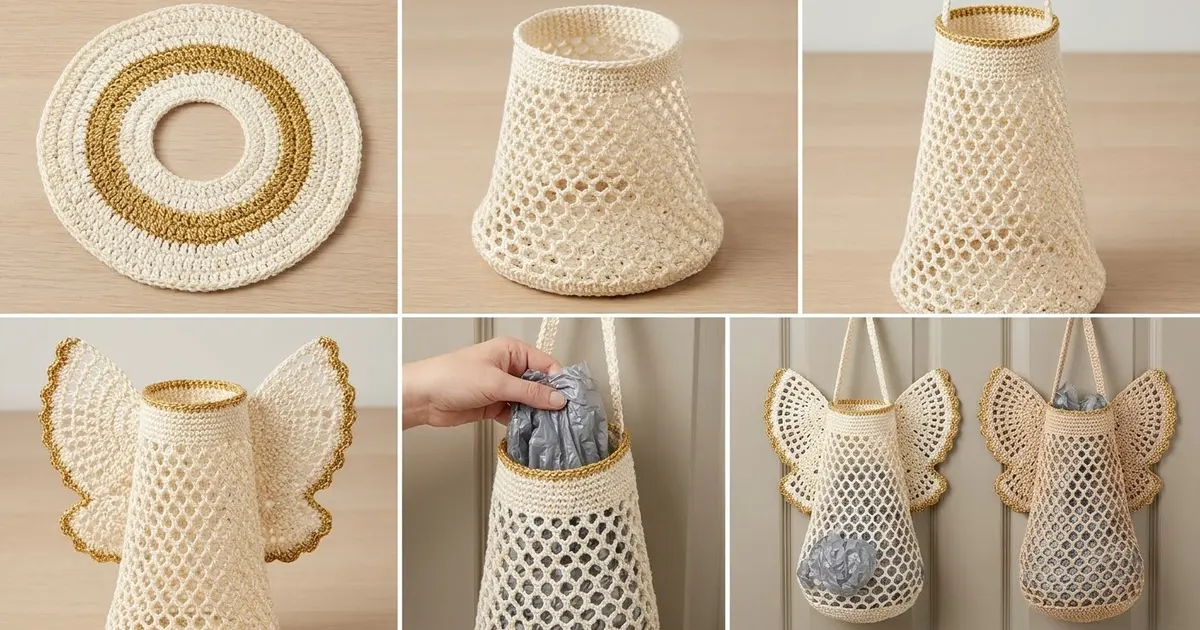
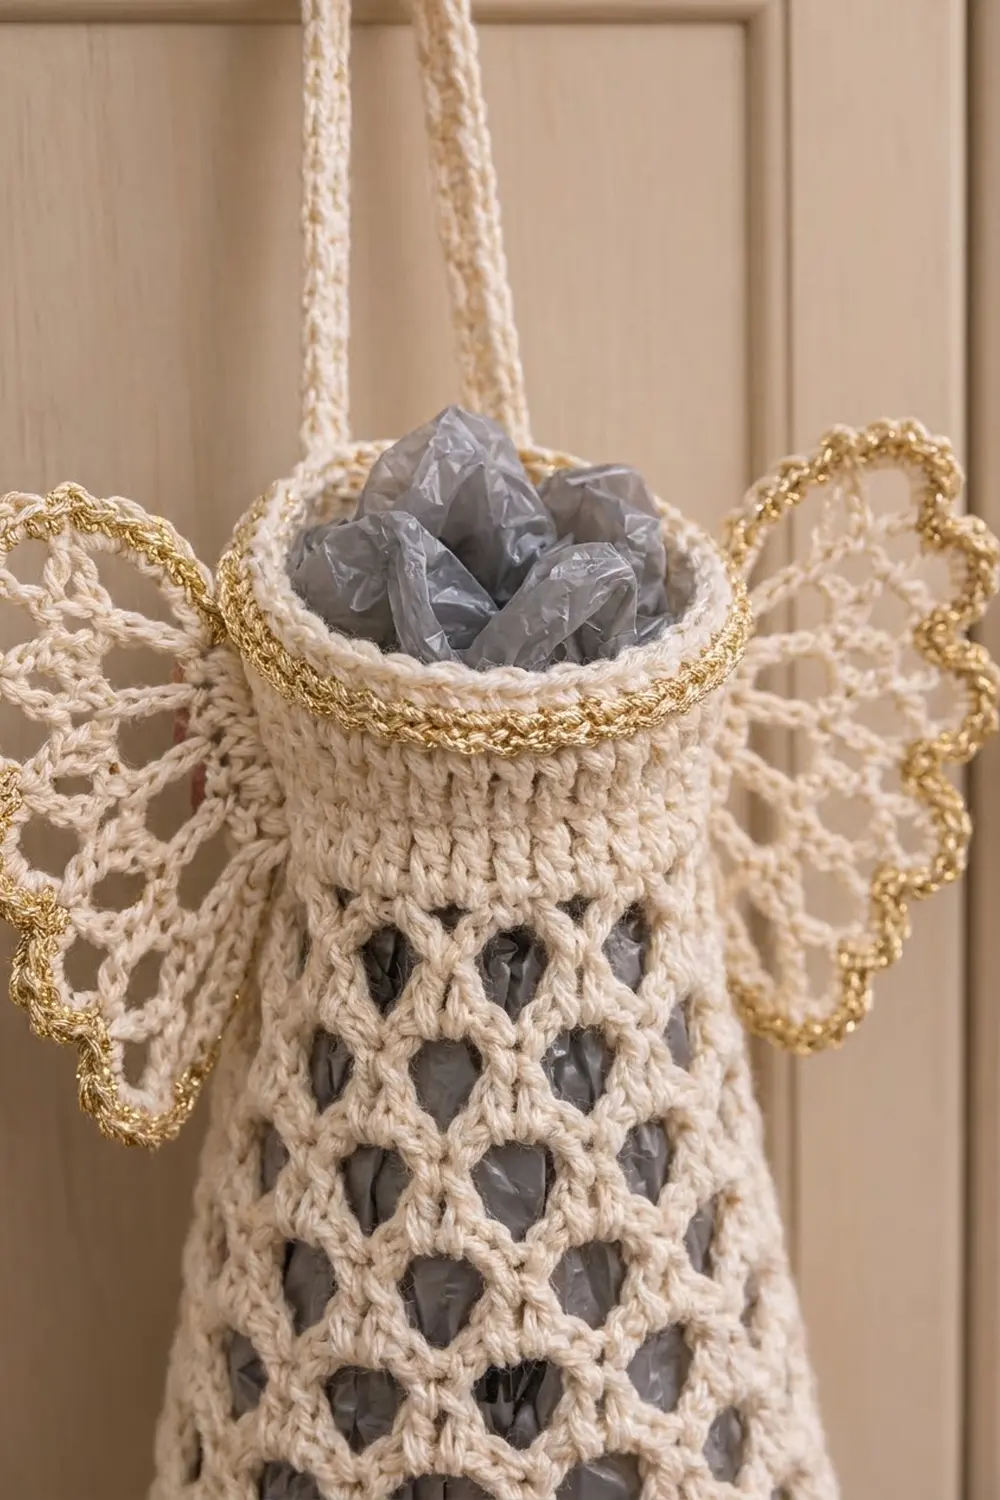
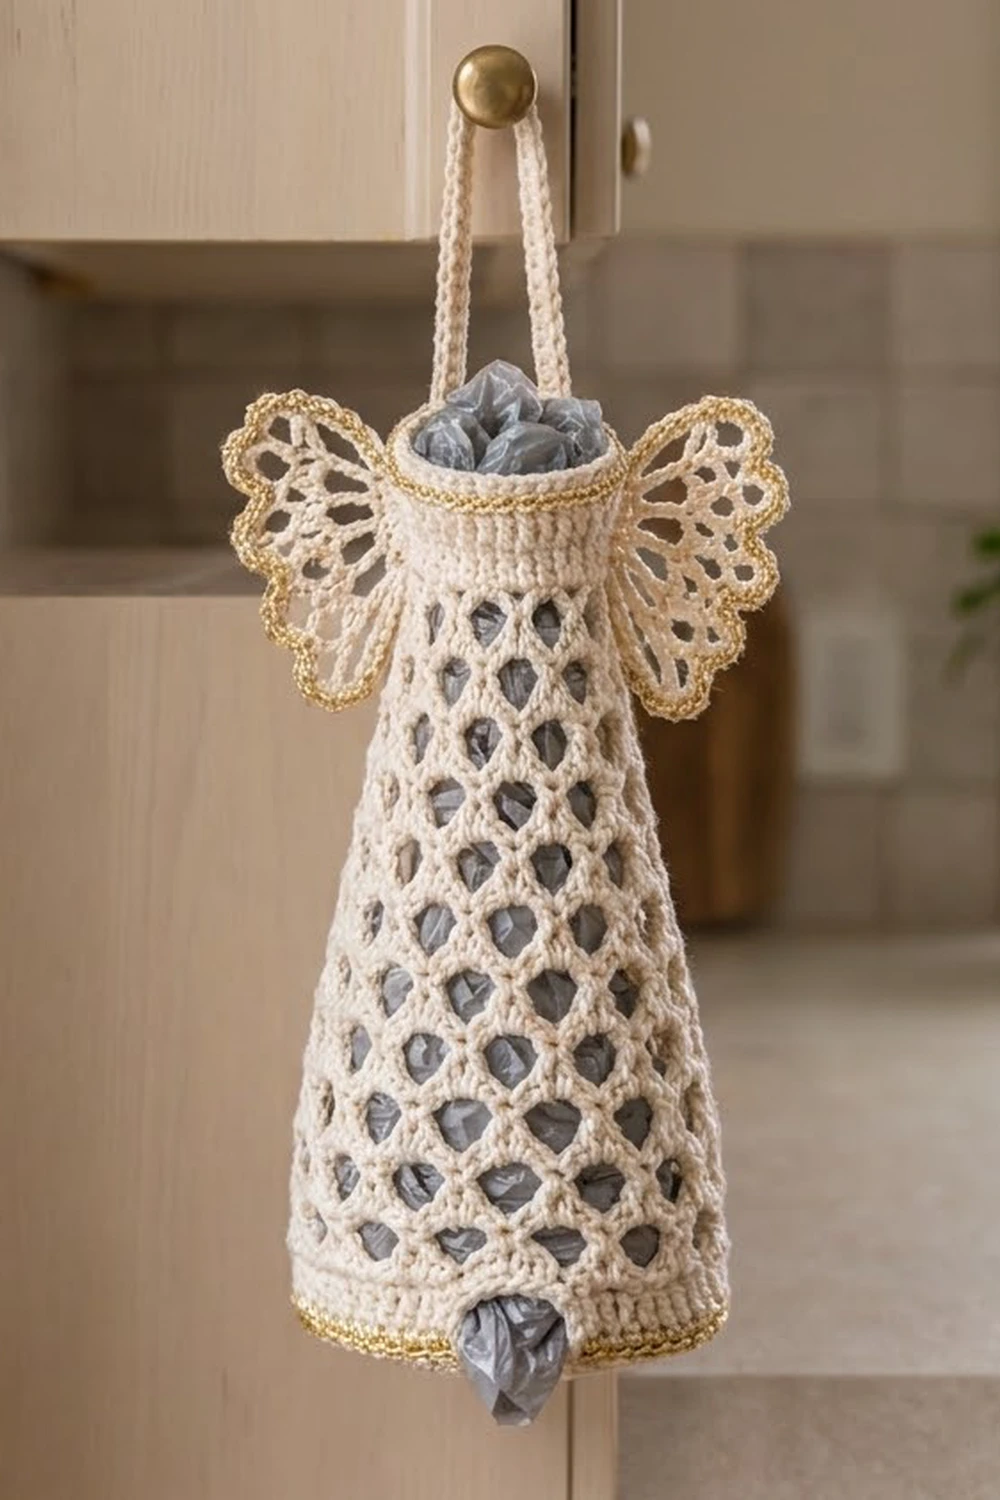
This angel bag holder turns a kitchen chore into a small piece of holiday decor. The body is a tall cone of open honeycomb mesh with a solid collar for the angel’s “head,” two lacy wings, and a strap that hooks over a cabinet knob. You push bags in at the top and pull them out through the opening in the base.
The main color is a soft cream. Metallic gold is used for the base band, the collar trims and the scalloped wing edges. Light sand with gold also works well.
The pattern uses US crochet terms. The finished body is about 14 in (35.6 cm) tall and about 7 in (17.8 cm) across at the base. With the wings attached, the holder is about 11 in (27.9 cm) across.
You’ll work the body in one piece from the bottom up: a flat hdc base ring, a gold band, mesh rounds that shorten their chains to shape the cone, then the collar. The two wings are made separately and sewn on, and the strap goes on last.
Finished Size and Construction
- Finished size: 14 in (35.6 cm) tall; base 7 in (17.8 cm) across; collar about 4.75 in (12.1 cm) across
- Skill level: Intermediate (easy stitches, careful counting)
- Terminology: US
- Yarn weight: Worsted (#4) cotton, plus a worsted-weight metallic gold
- Hook: 4.5 mm (US 7)
- Number of pieces: 4 (1 body, 2 wings, 1 strap)
- Layout: One hanging holder with a wing on each side
- Wing size: about 4 in (10.2 cm) tall x 3 in (7.6 cm) wide
- Body size before top trim: about 13.5 in (34.3 cm) tall
- Gold trim depth: 2 rounds, about 0.5 in (1.3 cm)
Materials
Use a smooth mercerized or matte cotton, or a cotton blend. Cotton holds the cone’s shape and won’t stretch out under the weight of the bags. For the gold, pick a metallic yarn of similar thickness, or hold a fine metallic thread together with cream cotton.
- Cream (main color): 100 g, about 190 m (208 yd)
- Metallic gold (trim): 25 g, about 50 m (55 yd)
These quantities include a margin of about 15%.
Tools:
– 4.5 mm (US 7) crochet hook
– Locking stitch markers
– Tapestry needle and scissors
– Measuring tape
– Rust-proof pins, a blocking mat and a spray bottle
– A 2 L plastic bottle or a rolled towel to block the cone on
Abbreviations (US Terms)
- ch – chain
- sl st – slip stitch
- sc – single crochet
- hdc – half double crochet
- dc – double crochet
- tr – treble crochet
- sc2tog – single crochet 2 together
- BLO – back loop only
- sp(s) – space(s)
- st(s) – stitch(es)
- rev sc – reverse single crochet
Special stitch – rev sc (crab stitch): Don’t turn. Work from left to right (right to left if you crochet left-handed): insert the hook into the next stitch to the right, yarn over, pull up a loop, then yarn over and pull through both loops. This makes the twisted gold cord.
Joining loops: Each mesh round ends with a short chain plus a tall stitch into the first sc. This closes the last loop and puts your hook in the middle of it, ready for the next round:
– ch 2, tr = one ch-6 loop
– ch 2, dc = one ch-5 loop
– ch 1, dc = one ch-4 loop
Gauge and Checkpoints
- Sc: 16 sts and 18 rounds = 4 in (10.2 cm)
- Hdc: 16 sts and 12 rounds = 4 in (10.2 cm)
Check your gauge on the base itself. It’s the first part you make, and the whole cone depends on it.
Checkpoints:
1. After Rnd 9, the flat base measures 7 in (17.8 cm) across, and the center opening is about 2 in (5.1 cm).
2. After Rnd 13, the solid wall stands about 1 in (2.5 cm) tall.
3. After Rnd 19, the body is about 5.5 in (14.0 cm) tall and still about 7 in (17.8 cm) across.
4. After Rnd 25, the body is about 9 in (22.9 cm) tall and about 6 in (15.2 cm) across.
5. After Rnd 31, the body is about 12 in (30.5 cm) tall and about 5 in (12.7 cm) across.
6. After Rnd 37, the body is about 13.5 in (34.3 cm) tall.
Base too big? Go down half a hook size. Base too small or cupping? Go up half a hook size. If the mesh looks right but the base doesn’t, keep your hook and just adjust your tension on the hdc rounds.
Body
Start every round with ch 1 (or ch 2 for hdc). This turning chain does not count as a stitch. Join each round with a sl st to the first stitch, unless the round says otherwise.
Base (cream)
Foundation: Ch 24 and join with a sl st to the first ch to form a ring. Make sure the chain isn’t twisted.
Rnd 1: Ch 2, hdc in each ch around, join. (24 hdc)
Rnd 2: Ch 2, hdc in next 2 sts, 2 hdc in next st; repeat from * 8 times total, join. (32 hdc)
Rnd 3: Ch 2, hdc in next 3 sts, 2 hdc in next st x 8, join. (40 hdc)
Rnd 4: Ch 2, hdc in next 4 sts, 2 hdc in next st x 8, join. (48 hdc)
Rnd 5: Ch 2, hdc in next 5 sts, 2 hdc in next st x 8, join. (56 hdc)
Rnd 6: Ch 2, hdc in next 6 sts, 2 hdc in next st x 8, join. (64 hdc)
Rnd 7: Ch 2, hdc in next 7 sts, 2 hdc in next st x 8, join. (72 hdc)
Rnd 8: Ch 2, hdc in next 8 sts, 2 hdc in next st x 8, join. (80 hdc)
Rnd 9: Ch 2, hdc in next 9 sts, 2 hdc in next st x 8, join. (88 hdc)
The base should lie flat at 7 in (17.8 cm) across. Fasten off the cream.
Gold Band and Wall
Rnd 10 (gold): Join the gold in any st. Ch 1, sc in BLO of each st around, join. (88 sc) The unused front loops make a crisp fold, and the work starts to turn upward into a wall.
Rnd 11 (gold): Ch 1, sc in each st around, join. (88 sc) Fasten off the gold.
Rnds 12–13 (cream): Join the cream. Ch 1, sc in each st around, join. (88 sc)
Honeycomb Mesh (cream)
Rnd 14: Ch 1, sc in first st, ch 6, skip 3 sts, sc in next st; repeat from * 21 times total. To close: ch 2, tr in first sc. (22 ch-6 loops)
Math check: each repeat uses 4 sts. After 21 repeats you are on st 85, and the joining loop skips sts 86–88. That gives 88 ÷ 4 = 22 loops.
Rnds 15–19: Ch 1, sc around the post of the joining tr, ch 6, sc in next ch-6 loop x 21, ch 2, tr in first sc. (22 ch-6 loops)
The ch-6 rounds keep the lower body at about 22 in (55.9 cm) around, the same as the base, so it stands upright.
Rnd 20: Ch 1, sc around the post of the joining tr, ch 5, sc in next loop x 21, ch 2, dc in first sc. (22 ch-5 loops)
Rnds 21–25: Ch 1, sc around the post of the joining dc, ch 5, sc in next loop x 21, ch 2, dc in first sc. (22 ch-5 loops)
Rnd 26: Ch 1, sc around the post of the joining dc, ch 4, sc in next loop x 21, ch 1, dc in first sc. (22 ch-4 loops)
Rnds 27–31: Repeat Rnd 26 five more times. (22 ch-4 loops)
The loop count stays at 22 the whole way up. The cone narrows only because the chains get shorter (6, then 5, then 4), so the honeycomb cells stay evenly lined up.
Collar
Rnd 32 (cream): Ch 1, 3 sc in the joining space (around the dc post), 3 sc in each of the next 21 ch-4 sps, join. (66 sc)
Rnd 33 (gold): Join the gold. Ch 1, sc in next 9 sts, sc2tog x 6, join. (60 sc) That’s 54 sc worked one into each stitch plus 6 decreases, and each sc2tog counts as 1 stitch. Fasten off the gold.
Rnds 34–37 (cream): Join the cream. Ch 2, hdc in each st around, join. (60 hdc) The collar is now a firm tube about 4.75 in (12.1 cm) across. Fasten off.
The gold top trim (Rnds 38–39) is in the Border section.
Wings (make 2, cream then gold)
The wings are worked flat in turned rows, as a half-circle fan.
Row 1: Ch 4, sl st to first ch to form a ring. Ch 3 (counts as dc), 8 dc in ring, turn. (9 dc)
Row 2: Ch 5 (counts as dc + ch 2), dc in next dc, ch 2 x 7, dc in top of turning ch, turn. (9 dc, 8 ch-2 sps)
Row 3: Ch 6 (counts as dc + ch 3), dc in next dc, ch 3 x 7, dc in 3rd ch of turning ch, turn. (9 dc, 8 ch-3 sps)
Row 4: Ch 1, sc in first dc, [ch 7, sc in next dc] x 4, [ch 5, sc in next dc] x 4. (9 sc, 4 ch-7 loops, 4 ch-5 loops)
The four long loops form the large upper lobe, and the four short loops form the smaller lower lobe. The change in loop length makes the notch between the two lobes. Fasten off the cream. Edge the wing in gold as given in the Border section.
Strap (cream)
Row 1: Ch 46, sc in 2nd ch from hook and in each ch across, turn. (45 sc)
Rows 2–3: Ch 1, sc in each st across, turn. (45 sc)
The strap measures about 11.25 in (28.6 cm) x 0.75 in (1.9 cm). Leave a long tail for sewing.
Border: Gold Trims
This piece has no square border. The “border” is the gold trim at the top of the collar and around each wing. Use the same gauge as the body: 16 sc = 4 in (10.2 cm).
Collar top, Rnd 38 (gold): Join the gold. Ch 1, sc in each st around, join. (60 sc)
Rnd 39 (gold): Ch 1, rev sc in each st around, join. (60 rev sc) Fasten off.
Why it works: both trim rounds keep exactly 60 sts, one per collar stitch. That means the rim can’t ruffle or pull in. It stays 4.75 in (12.1 cm) across and adds about 0.5 in (1.3 cm) of height.
Wing edging, Row 5 (gold): With the right side facing, join the gold in the first sc of Row 4. Ch 1, sc in same st, then:
– [(2 sc, hdc, 3 dc, hdc, 2 sc) in next ch-7 loop, sc in next sc] x 4
– [(sc, hdc, 3 dc, hdc, sc) in next ch-5 loop, sc in next sc] x 4
(73 sts: 1 + 4 x 10 + 4 x 8) Fasten off.
Why it works: the 9-stitch shells sit on 7-chain loops, and the 7-stitch shells sit on 5-chain loops. Each shell has about 2 more stitches than its loop has chains, which is just enough to make a scallop that curves without frilling. You get 8 scallops in total, 4 large and 4 small.
Assembly
- Fold each strap end 0.5 in (1.3 cm) and sew it to the inside of the collar, over Rnds 34–37. Place one end above st 1 and the other above st 31, so the ends are directly opposite each other.
- Put the joining seam of the body at center back. Pin one wing at each side, just below the gold Rnd 33, with the straight row-end edge running vertically down the top mesh rounds. The large lobe points up and outward. Flip the second wing over so its large lobe is also on top.
- Using the cream tail, whipstitch each straight edge (about 3.5 in, 8.9 cm) to the sc and chain loops underneath. Catch only the front layer of mesh.
- Weave in all ends along stitches of the same color.
Final Blocking
- Mist the body until it is evenly damp, but not dripping.
- Slide it over a 2 L bottle or a rolled towel shaped into a cone. Ease the mesh so the honeycomb cells line up vertically.
- Pat the base flat and check that it is 7 in (17.8 cm) across.
- Pin the wings flat on the mat. Open each scallop and each spoke space with your fingers.
- Let everything dry completely, usually 12–24 hours.
- Lightly steam the gold trims. Hold the iron above the yarn without touching it, because metallic yarn can melt.
Final Quality-Control Checklist
- Base: 88 sts, 7 in (17.8 cm) across, lies flat
- Opening: about 2 in (5.1 cm), with no gaps at the foundation join
- Mesh: 22 loops in every round from Rnd 14 to Rnd 31
- Height: about 14 in (35.6 cm)
- Collar: 60 sts, 4.75 in (12.1 cm) across, gold on both edges
- Wings: 73-stitch edging with 8 scallops; both large lobes point up
- Strap: centered and firmly sewn; holds the weight of 15–20 bags
- No loose ends showing through the mesh
Troubleshooting
- Base ruffles: Your increases are too loose. Go down a hook size for Rnds 1–9.
- Base cups into a bowl: Your stitches are too tight. Go up a hook size for Rnds 1–9.
- Mesh loops slant in a spiral: Make sure the first sc of each round goes around the post of the joining stitch, not into the next loop.
- Loop count drifts: Put a marker in the first sc of every round, and count the loops at the end of Rnds 19, 25 and 31.
- Collar flares: Work Rnds 34–37 with a 4.0 mm hook.
- Wing lobes look the same size: Check Row 4. The first four loops must be ch 7 and the last four ch 5.
- Bags fall out of the bottom: Work one round of sc around the foundation ring, decreasing evenly, to make the opening smaller.
Care
Hand wash in cool water with mild soap, press out the water in a towel, and dry the holder over a bottle to keep its shape. Don’t tumble dry, because metallic yarn can fray.
Final Notes
Everything depends on one measurement chain. The 88 sts in the base give a 7 in (17.8 cm) circle. That base turns into 22 ch-6 loops that hold the same width. Shortening the chains to 5 and then 4 narrows the cone to about 5 in (12.7 cm). The 66 sc are decreased to 60 for a 4.75 in (12.1 cm) collar, and the gold trims keep exactly 60 sts. If each checkpoint matches, the finished angel will stand 14 in (35.6 cm) tall and hang neatly from a cabinet knob.
Happy crocheting!