
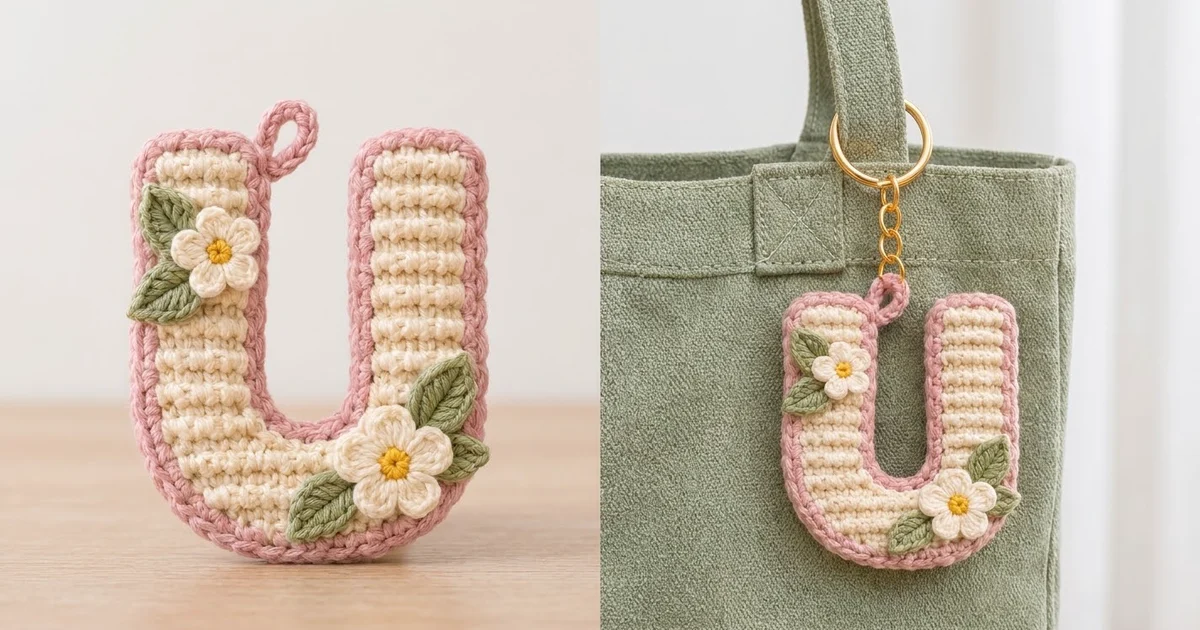
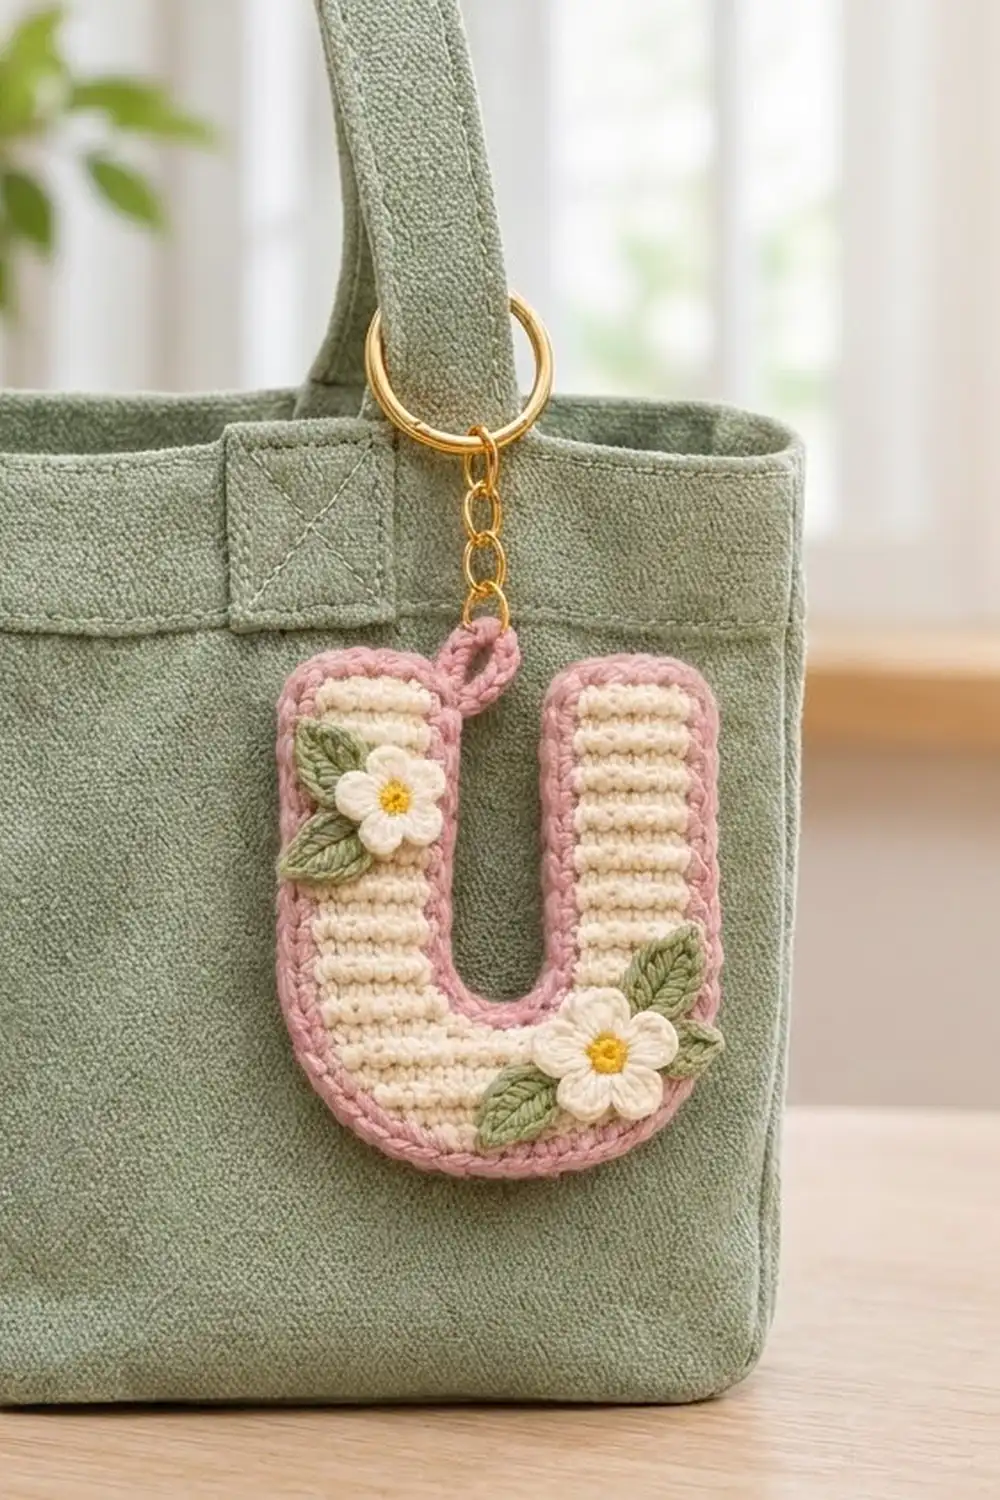
This little letter U keychain is a soft, cheerful way to put your initial on a bag, a pencil case or a set of keys. The body is a cream letter worked in ridged single crochet. A dusty pink border with a raised, braid-like edge frames it, and two tiny cream flowers with yellow centers and sage green leaves finish it off.
The palette is gentle and cottage-style: cream, dusty pink, sage green and a touch of sunny yellow. Everything is written in US crochet terms.
The finished keychain measures 3.5 in (8.9 cm) wide by 4.1 in (10.4 cm) tall, not counting the hanging loop. It is one flat piece, with no seams and no stuffing.
Here is how it comes together. You work the U from the bottom up in rows, shaping the rounded bottom with increases. Then you split the work and make each arm separately. Next comes a two-round pink border with a hanging loop. Finally, you sew on two small flowers and four leaves and attach the hardware.
Finished Size and Construction
- Finished size: 3.5 in (8.9 cm) wide x 4.1 in (10.4 cm) tall, plus a 0.5 in (1.3 cm) hanging loop
- Skill level: Easy / advanced beginner
- Terminology: US crochet terms
- Yarn weight: DK (#3) cotton or cotton blend
- Hook: 3.25 mm (US D-3)
- Number of pieces: 1 letter body, plus 2 flowers and 4 leaves as appliqués
- Layout: a single upright letter U with 2 arms; no joining
- Arm size: each arm is 1 in (2.5 cm) wide, and the gap between the arms at the top is 1 in (2.5 cm)
- Size before border: 3 in (7.6 cm) wide x 3.6 in (9.1 cm) tall
- Border depth: 0.25 in (0.6 cm) on every edge
Materials
Use a smooth, mercerized or combed cotton in DK weight. Cotton gives crisp ridges and holds the letter shape well on a keychain that gets handled a lot. Fuzzy or very splitty yarns will blur the ridges.
- Cream (body and petals): 10 g, about 25 m
- Dusty pink (border and loop): 5 g, about 13 m
- Sage green (leaves): 3 g, about 8 m
- Yellow (flower centers): 1 g, about 3 m
Tools:
- 3.25 mm (US D-3) crochet hook
- Tapestry needle
- 2 to 4 locking stitch markers
- Scissors
- Rust-proof pins and a blocking mat or folded towel
- Gold split ring, 1 in (2.5 cm), with a short chain and jump ring
- Optional: a dab of clear fabric glue for the appliqués
All quantities include a margin of about 30%, so you have room for a test piece and for weaving in ends.
Abbreviations (US Terms)
- ch – chain
- sl st – slip stitch
- sc – single crochet
- hdc – half double crochet
- dc – double crochet
- sc2tog – single crochet 2 together
- BLO – back loop only
- st(s) – stitch(es)
- RS / WS – right side / wrong side
Special stitch: BLO sc. Insert your hook under the back loop only of the stitch (the loop farther from you), then complete a normal single crochet. If you work every row in BLO, a horizontal ridge forms on the fabric, and that ridge is what gives the letter its striped texture.
Gauge and Checkpoints
Gauge: 20 BLO sc x 20 rows = 4 in (10.2 cm), which is 5 sts and 5 rows per inch.
Before you begin, work one test piece. Chain 21, then work 20 rows of BLO sc with 20 sts per row. Measure it flat without stretching. The pattern depends on this square gauge, because the border places 1 sc in each row end.
Checkpoints:
- After Row 4, the work is 15 sts and measures 3 in (7.6 cm) across.
- After Row 7, the bottom section measures 1.4 in (3.6 cm) tall.
- After Row 18, the letter body measures 3.6 in (9.1 cm) tall and each arm is 1 in (2.5 cm) wide.
- After the border, the letter measures 3.5 in (8.9 cm) x 4.1 in (10.4 cm).
If your piece is too big, go down to a 3.0 mm hook. If it is too small, go up to a 3.5 mm (US E-4) hook. If your stitch width is right but your rows are too short or too tall, keep the hook and adjust your tension on the yarn-over pull-through. A mismatch between rows and stitches will make the border ripple or pucker.

Letter Body
Use cream. Ch 1 at the start of each row does not count as a stitch. From Row 2 on, every stitch is worked in BLO.
Rounded Bottom Section
Row 1 (RS): Ch 10. Sc in 2nd ch from hook and in each ch across. Ch 1, turn. (9 sts)
Row 2: 2 sc in the first st, sc in the next 7 sts, 2 sc in the last st. Ch 1, turn. (11 sts)
Row 3: 2 sc in the first st, sc in the next 9 sts, 2 sc in the last st. Ch 1, turn. (13 sts)
Row 4: 2 sc in the first st, sc in the next 11 sts, 2 sc in the last st. Ch 1, turn. (15 sts)
The increases on Rows 2 to 4 curve the two lower corners of the U. Check your width now: 3 in (7.6 cm).
Rows 5–6: Sc in each st across. Ch 1, turn. (15 sts per row)
Row 7: Sc in each st across. (15 sts) Do not ch 1 or turn yet.
First Arm
Row 8 (WS): Ch 1, turn. Sc in the first 6 sts only. Leave the remaining 9 sts unworked. Ch 1, turn. (6 sts)
Row 9: Sc2tog over the first 2 sts (this is the inner edge), then sc in the next 4 sts. Ch 1, turn. (5 sts)
Rows 10–18: Sc in each st across. Ch 1, turn. (5 sts per row, 9 rows)
Fasten off after Row 18. The arm is 11 rows (Rows 8–18), so it measures 2.2 in (5.6 cm) tall.
Second Arm
Return to Row 7. Counting from where the first arm began, skip sts 7–9. These 3 sts become the base of the inner arch. With the WS facing, join cream in st 10.
Row 8 (WS): Ch 1, sc in the same st as the join and in the next 5 sts, ending in st 15. Ch 1, turn. (6 sts)
Row 9: Sc in the first 4 sts, then sc2tog over the last 2 sts (this is the inner edge). Ch 1, turn. (5 sts)
Rows 10–18: Sc in each st across. Ch 1, turn. (5 sts per row)
Fasten off and weave in all cream ends on the WS.
Stitch check for Row 8: 6 + 3 skipped + 6 = 15, which matches Row 7. After Row 9, each arm has 5 sts, and the gap between the arms is 5 sts or 1 in (2.5 cm) wide. At the bottom of the gap, the 3 skipped sts and the two decreases form a narrow rounded arch, just like the inside curve of a printed U.
Pink Border
Border gauge: 1 sc per stitch along the top and bottom, and 1 sc per row end along the sides. Because the gauge is 5 sts and 5 rows per inch, a sc placed in each row end takes up the same width as a stitch, so the edges lie flat.
Hold the letter RS facing. Join pink in the first foundation ch at a bottom corner.
Round 1: Ch 1. Work each edge in this order:
- Bottom edge: 2 sc in the first ch, sc in the next 7 ch, 2 sc in the last ch. (11 sc)
- Outer side of the first arm: 1 sc in each row end, Rows 1–18. (18 sc)
- Top of the first arm: 2 sc in the first st, sc in the next 3 sts, 2 sc in the last st. (7 sc)
- Inner side of the first arm: 1 sc in each row end, Rows 18–8. (11 sc)
- Arch: sc in each of the 3 skipped sts of Row 7. (3 sc)
- Inner side of the second arm: 1 sc in each row end, Rows 8–18. (11 sc)
- Top of the second arm: 2 sc in the first st, sc in the next 3 sts, 2 sc in the last st. (7 sc)
- Outer side of the second arm: 1 sc in each row end, Rows 18–1. (18 sc)
Sl st to the first sc to join. (86 sc)
Check the total: 11 + 18 + 7 + 11 + 3 + 11 + 7 + 18 = 86.
Round 2: Ch 1. Sl st loosely in the BLO of each sc around. Join with a sl st to the first sl st. (86 sl sts) Fasten off.
This round of slip stitches lies on top of the sc round like a little raised chain, which is what gives the border its braided look. Keep the stitches loose, or the edge will cup.
Why the math works: The six convex corners (2 bottom corners and 4 arm-top corners) each get one extra stitch, which rounds them without making them flare. The concave corners at the arch get no extra stitches, so the inside curve stays snug. Every straight edge gets exactly one border stitch per stitch or row, so the border adds a steady 0.25 in (0.6 cm) on every edge. That takes the size from 3 in x 3.6 in (7.6 cm x 9.1 cm) to 3.5 in x 4.1 in (8.9 cm x 10.4 cm).
Hanging Loop
Hold the letter RS facing. Find the 7 border stitches on top of the left arm, and join pink in the center (4th) stitch. Ch 10 and sl st into the same stitch to form a ring. Work 14 sc into the ch-10 space, then sl st into the base stitch. Fasten off and weave in the end. The loop stands about 0.5 in (1.3 cm) tall.
Flowers, Leaves and Assembly
Small Flower (make 1)
With yellow, make a magic ring and work 5 sc into it. Pull the ring closed and join with a sl st. Fasten off.
Join cream in any sc. In each sc around, work (ch 1, 2 hdc, ch 1, sl st). (5 petals) Fasten off and leave a 6 in (15.2 cm) tail. The flower measures about 0.6 in (1.5 cm) across.
Large Flower (make 1)
Make the center exactly as for the small flower. Join cream in any sc. In each sc around, work (ch 2, 2 dc, ch 2, sl st). (5 petals) Fasten off and leave a 6 in (15.2 cm) tail. The flower measures about 0.8 in (2.0 cm) across.
Leaf (make 4)
With sage green, ch 6. Starting in the 2nd ch from the hook, work sl st, sc, hdc, dc, sc into the chains. (5 sts)
Ch 1 and rotate the piece to work along the other side of the chain: sc, dc, hdc, sc, sl st. (5 sts) Sl st into the tip to join. Fasten off and leave a tail.
Each leaf is about 0.75 in (1.9 cm) long, and its foundation chain makes a natural center vein.
Assembly
- Block the letter first, following the steps under Final Blocking.
- Upper left cluster: Lay the small flower over the outer edge of the left arm, about 1 in (2.5 cm) below the top, overlapping the pink border slightly. Tuck one leaf under it pointing up and out, and another pointing down and out.
- Lower right cluster: Lay the large flower over the lower right curve, overlapping the border. Tuck one leaf under it pointing up toward the right arm, and the other pointing down and to the left along the bottom.
- Pin all the pieces in place. Sew each leaf at its base, then sew each flower with small stitches around its yellow center and at each petal tip. Keep all stitches out of sight on the RS.
- Open the jump ring, slip it through the pink loop and close it firmly.
Final Blocking
- Weave in all the ends of the body and border before you block.
- Spritz the letter with cool water until it is damp all the way through, but not dripping.
- Lay it RS up on a blocking mat or folded towel.
- Pin the outer corners so the letter measures 3.5 in (8.9 cm) wide and 4.1 in (10.4 cm) tall.
- Pin the top of each arm so each arm is 1.5 in (3.8 cm) wide including its border, and the gap is 0.5 in (1.3 cm) wide between the borders.
- Smooth the ridges so they run straight and horizontal across both arms.
- Let it dry completely, then unpin it and attach the appliqués.
Final Quality-Control Checklist
- Row 7 has 15 sts, and each arm has 5 sts from Row 9 on.
- Both arms are 11 rows tall and end level with each other.
- Border Round 1 has 86 sc, and Round 2 has 86 sl sts.
- The arm tops and bottom corners are rounded, and the arch lies flat.
- The finished size is 3.5 in x 4.1 in (8.9 cm x 10.4 cm).
- The loop is centered on the top of the left arm and firmly anchored.
- The flowers and leaves are stitched at the center and at each tip, with no loose petals.
- All ends are woven in on the WS, and the split ring is closed tight.
Troubleshooting
The border ruffles along the sides. Your rows are shorter than your stitches. Rework Round 1, skipping 1 row end every 6 rows, or retension the body to match the gauge.
The border pulls in or cups. The sl st round is too tight. Rework it with a looser hand, or with a hook 0.5 mm larger.
The arms lean apart. Check that you worked the sc2tog on the inner edge of each arm, and pin the arms parallel when blocking.
The arch looks square. Make sure you skipped exactly 3 sts on Row 7, and that Round 1 has no extra stitches in the arch.
The ridges show on only one side. That’s normal for BLO rows. Choose the side you like best as the RS before the border.
The flowers curl. Steam them lightly before sewing, and add a second tacking stitch at each petal tip.
Care
Hand wash in cool water with mild soap, press out the water in a towel, and dry flat. Remove the metal ring before washing to avoid marks.
Final Notes
The whole design rests on one simple measurement chain. A square gauge of 5 sts and 5 rows per inch gives a body 15 sts wide (3 in / 7.6 cm) and 18 rows tall (3.6 in / 9.1 cm). An 86-stitch border adds 0.25 in (0.6 cm) on every edge, for a finished letter of 3.5 in x 4.1 in (8.9 cm x 10.4 cm). Check your gauge, count at each checkpoint, and your U will come out crisp, flat and ready for its flowers.
Happy crocheting!