

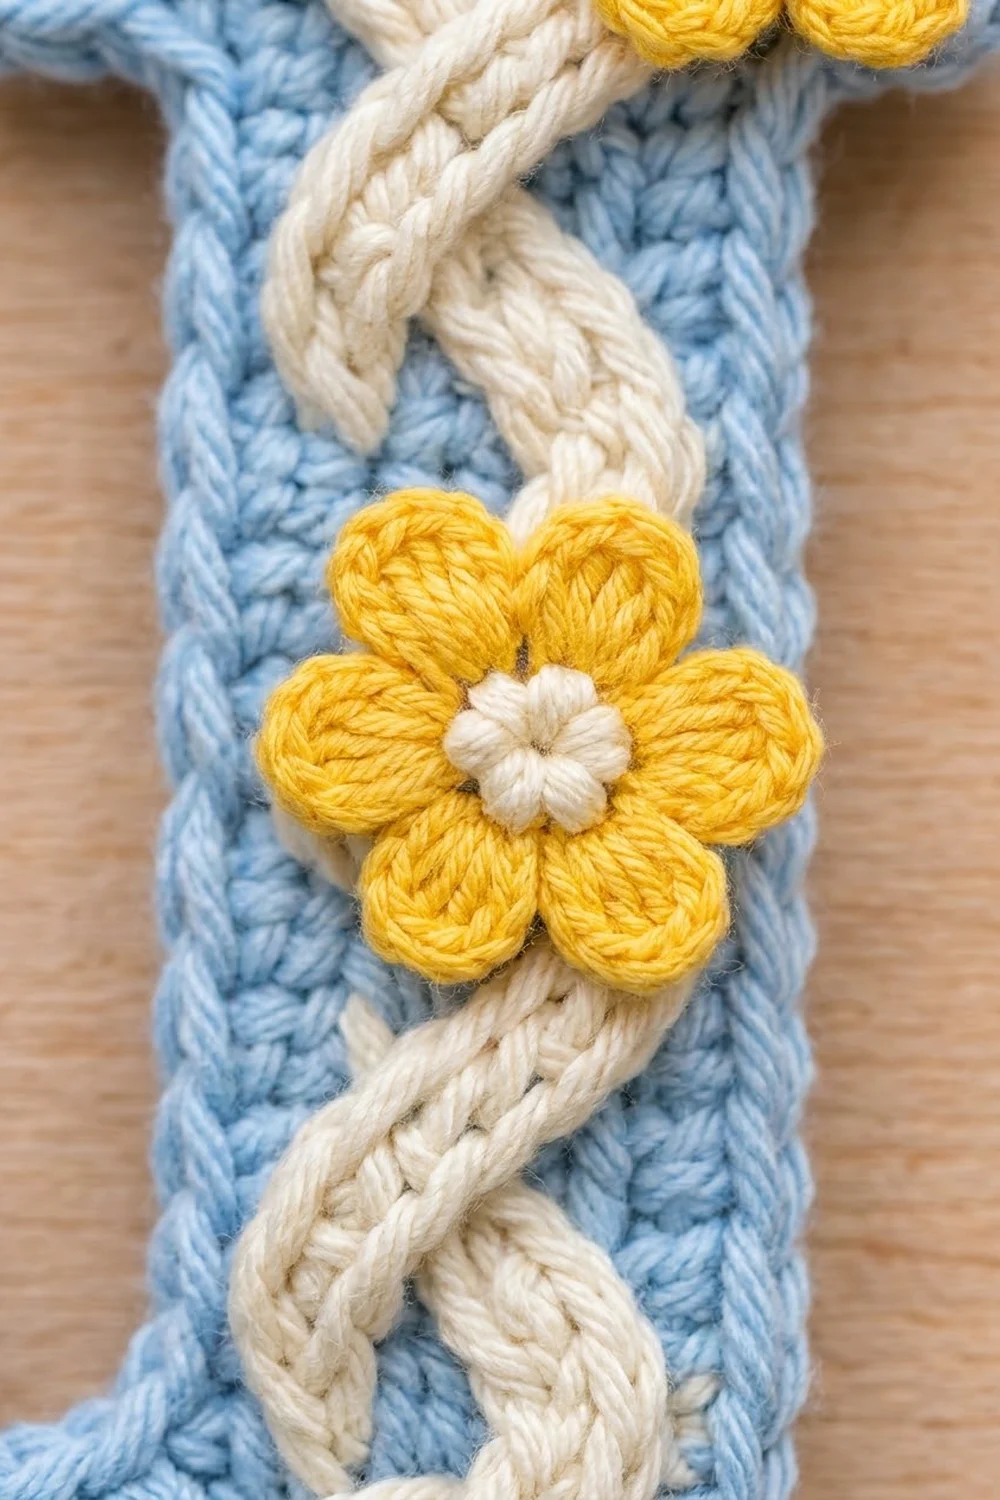
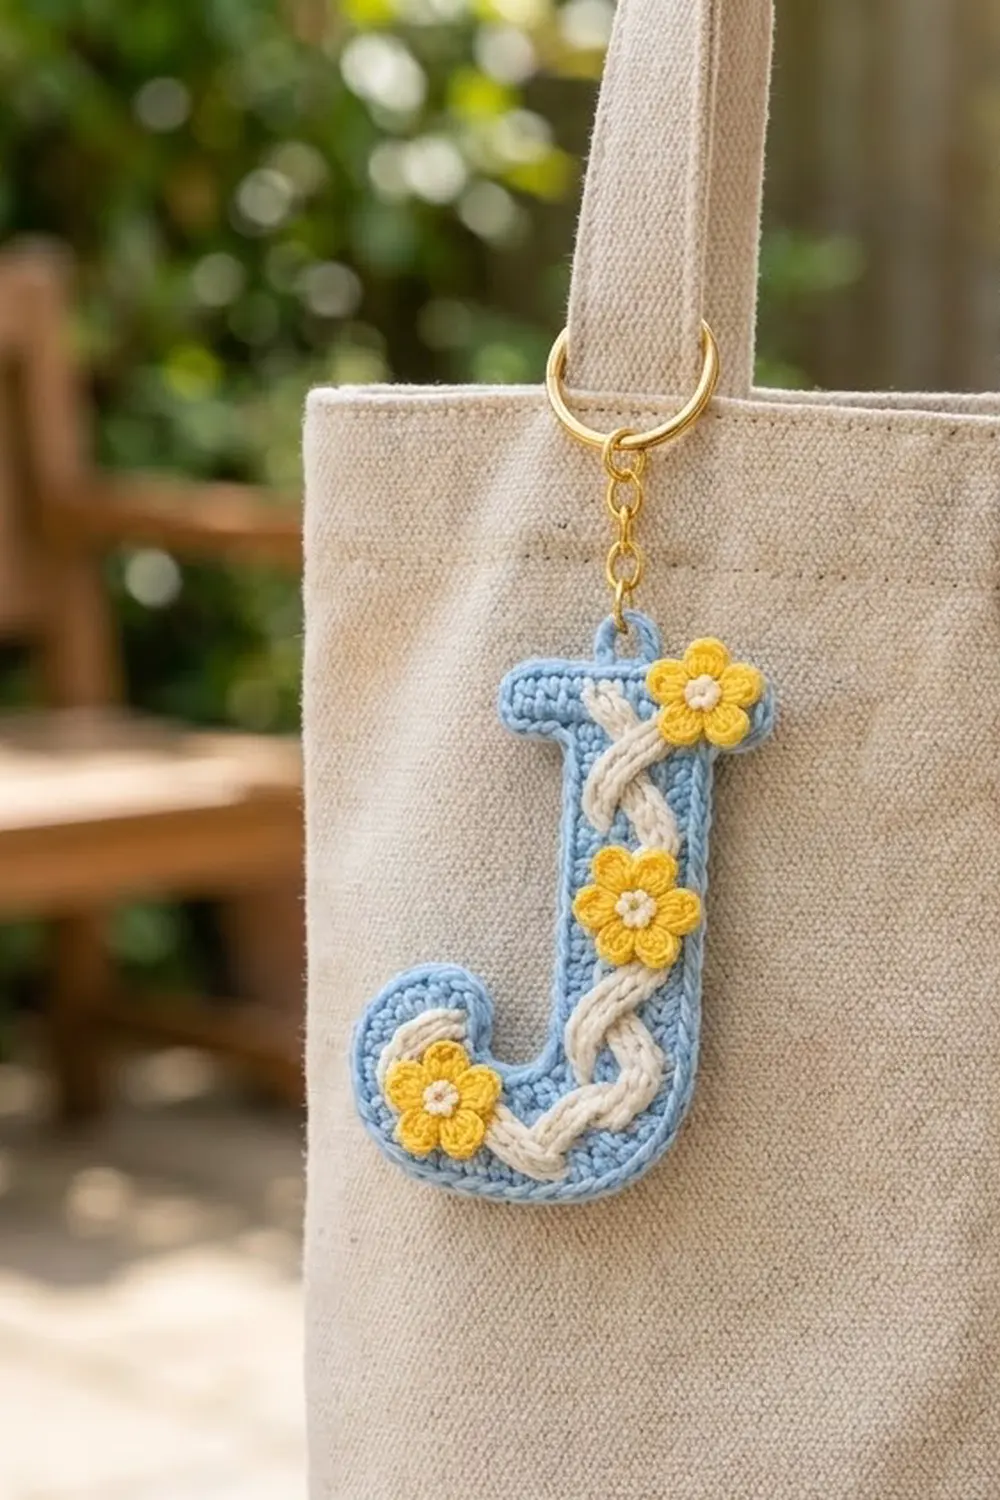
This little letter J is a fresh, springy keychain. It has a soft blue base, a cream braid that winds down the letter, and three cheerful yellow flowers. It makes a sweet personal gift or a quick bag charm, and it uses only small amounts of yarn.
The colors are light blue for the letter, cream for the braid and flower centers, and sunny yellow for the petals. The style is tidy and graphic. A firm single crochet base keeps the letter crisp, and the raised cords and flowers add texture.
This pattern uses US crochet terms. The finished letter measures 4.0 in (10.2 cm) tall and 3.0 in (7.6 cm) wide, not counting the hardware.
The construction is simple. You work the J flat in rows of single crochet from the bottom of the bowl up to the top bar, then add one border round that includes the hanging loop. Next you make two cream cords and sew them on as a woven braid. Finally you add three small flowers and attach the keychain hardware.
Finished Size and Construction
- Finished size: 4.0 in (10.2 cm) tall x 3.0 in (7.6 cm) wide
- Skill level: Easy / advanced beginner
- Terminology: US crochet terms
- Yarn weight: DK / light (3), cotton or cotton blend
- Hook: 3.5 mm (E-4)
- Number of pieces: 1 letter base, plus 2 appliqué cords and 3 appliqué flowers
- Layout: Single letter, no joining
- Letter size before border: 3.6 in (9.1 cm) tall x 2.6 in (6.6 cm) wide
- Border depth: 1 round, 0.2 in (0.5 cm) on every edge
- Size after border: 4.0 in (10.2 cm) x 3.0 in (7.6 cm)
Materials
Choose a smooth, mercerized or matte cotton DK yarn. Cotton holds its shape well on a keychain and shows the stitch definition of the braid. Avoid fuzzy yarns, because the braid will lose its plaited look.
- Light blue: 10 g, about 24 m (letter base and border)
- Cream: 5 g, about 12 m (braid cords and flower centers)
- Yellow: 3 g, about 7 m (flower petals)
These quantities include a margin for a gauge swatch and sewing tails.
Tools:
– 3.5 mm (E-4) crochet hook
– Tapestry needle
– 2 stitch markers
– Scissors
– Rustproof pins
– Gold jump ring, about 0.25 in (0.6 cm)
– Gold chain, about 1.25 in (3.2 cm)
– Gold split key ring, about 1 in (2.5 cm)
– 2 pairs of small pliers
Abbreviations (US Terms)
- ch – chain
- sl st – slip stitch
- sc – single crochet
- dc – double crochet
- sc2tog – single crochet 2 together: insert hook in next st, pull up a loop, insert hook in following st, pull up a loop, yarn over and draw through all 3 loops
- st(s) – stitch(es)
- rep – repeat
Special technique – back-bump slip stitch cord: Make a chain. Then work 1 sl st into the back bump (the ridge on the back of the chain) of each chain. This gives a firm cord with a plaited ridge on top.
Gauge and Checkpoints
Gauge: 10 sc x 10 rows = 2 in (5.1 cm), or 5 sts and 5 rows per inch.
Since this keychain is a single piece, you can use the letter itself as your gauge test. Stop at each checkpoint below and measure before you go on.
- After Row 5: bowl is 2.4 in (6.1 cm) wide x 1.0 in (2.5 cm) tall
- After the tip (Row 8): tip reaches 1.6 in (4.1 cm) from the bottom edge
- After Row 16: stem reaches 3.2 in (8.1 cm) from the bottom edge
- After Row 18: letter is 3.6 in (9.1 cm) x 2.6 in (6.6 cm)
- After the border: letter is 4.0 in (10.2 cm) x 3.0 in (7.6 cm)
If your piece is too big, change to a 3.25 mm (D-3) hook. If it is too small, change to a 3.75 mm (F-5) hook. If your stitch width matches but your rows come out shorter, keep the stitch counts as they are. The letter will just be slightly shorter.
Letter Base
With light blue, work in rows. Either face can be the front. When you finish, choose the face where the tip sits on the left.
Bowl
Row 1: Ch 10. Sc in 2nd ch from hook and in each ch across. Turn. (9 sts)
Place a marker in the last st you worked. This edge is the tip side.
Row 2: Ch 1. 2 sc in first st, sc in next 7 sts, 2 sc in last st. Turn. (11 sts)
Row 3: Ch 1. Sc in next 10 sts, 2 sc in last st (tip side). Turn. (12 sts)
Rows 4–5: Ch 1. Sc in each st across. Turn. (12 sts)
At the end of Row 5 you should be at the tip side. Check the bowl measurement: 2.4 in (6.1 cm) x 1.0 in (2.5 cm).
Here is how the 12 stitches of Row 5 are used, starting from the tip side: 4 sts for the tip, 1 st left as the gap, then 7 sts for the stem. That makes 4 + 1 + 7 = 12.
Tip
Row 6: Ch 1. Sc in first 4 sts. Turn, leaving the rest unworked. (4 sts)
Row 7: Ch 1. Sc in each st across. Turn. (4 sts)
Row 8: Ch 1. Sc2tog twice. (2 sts)
Fasten off. The two decreases round off the top of the tip.
Stem
Row 6: On Row 5, skip the 1 st next to the tip (this is the gap). Join light blue in the following st. Ch 1, sc in the same st and in the next 6 sts. Turn. (7 sts)
Rows 7–16: Ch 1. Sc in each st across. Turn. (7 sts)
The stem is 1.4 in (3.6 cm) wide. Check the height: 3.2 in (8.1 cm).
Top Bar
Row 17: Ch 1. 2 sc in first st, sc in next 5 sts, 2 sc in last st. Turn. (9 sts)
This row is 7 sts worked 1 per existing st, plus 2 extra sts added at the ends.
Row 18: Ch 1. Sc in each st across. (9 sts)
Fasten off. The bar flares out to 1.8 in (4.6 cm) wide. The full letter is now 3.6 in (9.1 cm) x 2.6 in (6.6 cm).
Border
Border gauge: You work 1 sc into each stitch along the top and bottom edges, and 1 sc into the end of each row along the sides. The gauge is square (5 sts and 5 rows per inch), so 1 sc per row-end matches 1 sc per stitch, and every edge lies flat.
Hold the letter with the front facing you. Join light blue with a sl st in the first st of Row 18 at the top-left corner. You will work counterclockwise.
Border round:
1. Top-left corner and loop: Ch 1, (sc, ch 6, sc) in the same st. (2 sc + ch-6 loop)
2. Left side of stem: 1 sc in the end of each row from Row 17 down to Row 6. (12 sc)
3. Gap: 1 sc in the skipped st of Row 5. (1 sc)
4. Inner side of tip: 1 sc in the end of Row 6 and 1 sc in the end of Row 7. (2 sc)
5. Top of tip: 1 sc in the end of Row 8, 3 sc in each of the 2 sts of Row 8, then 1 sc in the other end of Row 8. (8 sc)
6. Outer side of tip: 1 sc in the end of each row from Row 7 down to Row 2. (6 sc)
7. Bottom-left curve: 2 sc in the end of Row 1. (2 sc)
8. Bottom edge: 1 sc in each foundation ch loop. (9 sc)
9. Bottom-right curve: 2 sc in the other end of Row 1. (2 sc)
10. Right side: 1 sc in the end of each row from Row 2 up to Row 17. (16 sc)
11. Top-right corner: 3 sc in the last st of Row 18. (3 sc)
12. Top edge: 1 sc in each of the next 7 sts. (7 sc)
Sl st to the first sc to join. Fasten off.
Total: 70 sc plus 1 ch-6 loop.
Why the math works: Every row-end is used exactly once. Row 1’s ends are used in the bottom curves, Row 18’s ends are covered by the corner stitches, and Row 8’s ends are counted in the tip top. Rows 2–17 on the right side give 16 sc. Rows 2–7 on the outer tip give 6 sc. Rows 6–17 on the stem’s left side give 12 sc. Extra stitches go only at the outer curves and corners, where the edge needs to grow. Inner corners get none, so they stay flat. One border round adds 0.2 in (0.5 cm) to each edge. That makes 3.6 + 0.4 = 4.0 in (10.2 cm) tall and 2.6 + 0.4 = 3.0 in (7.6 cm) wide. The ch-6 loop measures about 0.5 in (1.3 cm).
Braid Cords (Make 2)
With cream:
Ch 34. Sl st in the back bump of the 2nd ch from hook and in the back bump of each ch across. (33 sl st)
Fasten off, leaving an 8 in (20.3 cm) tail for sewing. Each cord should measure about 5.5 in (14.0 cm) when relaxed. If yours comes out shorter, add chains. If it comes out longer, remove chains.
Braid Placement
The braid follows the center line of the letter. That line runs about 4.4 in (11.2 cm) from just under the top bar, down the stem and around the bowl to the tip. The waves use up the extra cord length.
- Mark 5 crossing points with pins along the center line. Place 4 of them on the stem, every 3 rows (0.6 in / 1.5 cm), starting at Row 16. Place the 5th at the bottom of the bowl.
- Pin the first cord in an S-wave. Start just under the top bar, then swing left and right of the center line, passing through each crossing point.
- Pin the second cord as the mirror wave, so it crosses the first cord at every pin.
- Weave the cords as you go. At the 1st, 3rd and 5th crossings, put Cord A on top. At the 2nd and 4th crossings, put Cord B on top.
- Follow the bowl curve with both cords and finish just below the top of the tip.
- With the cream tails, tack each cord down at every wave peak and every crossing, catching only the surface loops of the base. Tuck the cord ends under and stitch them flat.
Flowers (Make 3)
Rnd 1 (cream): Make a magic ring. Ch 1, 5 sc in the ring. Pull the ring closed and sl st to the first sc. (5 sts)
Fasten off cream.
Rnd 2 (yellow): Join yellow in any sc. (Ch 2, 3 dc, ch 2, sl st) in the same st, sl st in the next st. Rep from * 4 more times, working the last sl st into the joining st. (5 petals)*
Fasten off, leaving a 6 in (15.2 cm) tail. Each flower measures about 0.9 in (2.3 cm) across. The cream center forms a small raised dot.
Placement:
– Flower 1: right end of the top bar, overlapping the top of the braid
– Flower 2: right side of the stem, around Rows 9–12
– Flower 3: lower left of the bowl, around Rows 2–5, overlapping the curve of the braid
Sew around the base of the petals and through the center so the flowers sit flat on top of the braid.
Hardware
Open the jump ring with two pairs of pliers. Thread it through the ch-6 loop and the end link of the chain, then close it fully. Attach the split ring to the other end of the chain.
Final Blocking
- Weave in all remaining tails on the back.
- Lightly spritz the letter with water until it is damp, not soaked.
- Pin it face up to a blocking board at 4.0 in (10.2 cm) x 3.0 in (7.6 cm).
- Pin the outer bowl curve and the tip into a smooth, rounded shape.
- Ease the top bar so it is straight and even.
- Press the braid and flowers gently with your fingers. Do not flatten them.
- Let the piece dry completely before attaching the hardware.
Final Quality-Control Checklist
- [ ] Row counts are correct: 9, 11, 12, 12, 12, then tip 4, 4, 2, stem 7 x 11 rows, bar 9, 9
- [ ] Border has 70 sc plus the ch-6 loop
- [ ] Letter measures 4.0 in (10.2 cm) x 3.0 in (7.6 cm)
- [ ] Braid crossings alternate over and under
- [ ] No sewing stitches show on the front of the braid
- [ ] Flowers are flat and firmly secured
- [ ] Jump ring is fully closed
Troubleshooting
- Border ruffles: Your border is too loose. Go down one hook size for the border only.
- Inner corners pucker: Replace the gap sc with a sc2tog worked over the gap st and the end of Row 6.
- Braid sags: Tack the cords at more points along the wave peaks.
- Braid pulls the letter in: The cords are too short. Add 2–3 chains to each cord.
- Petals curl: Steam them lightly and pin them flat to dry.
- Tip looks pointed: Work 4 sc instead of 3 sc in each st at the top of the tip.
Care
Hand wash in cool water and lay flat to dry. Remove the metal hardware before washing to prevent tarnish.
Final Notes
Your measurements build on each other. Gauge is 5 sts and 5 rows per inch. The bowl reaches 1.0 in (2.5 cm), the tip 1.6 in (4.1 cm), the stem 3.2 in (8.1 cm) and the full letter 3.6 in (9.1 cm) x 2.6 in (6.6 cm). One border round brings it to 4.0 in (10.2 cm) x 3.0 in (7.6 cm). If you check each stage, the braid and flowers will fit right away.
Happy crocheting!