

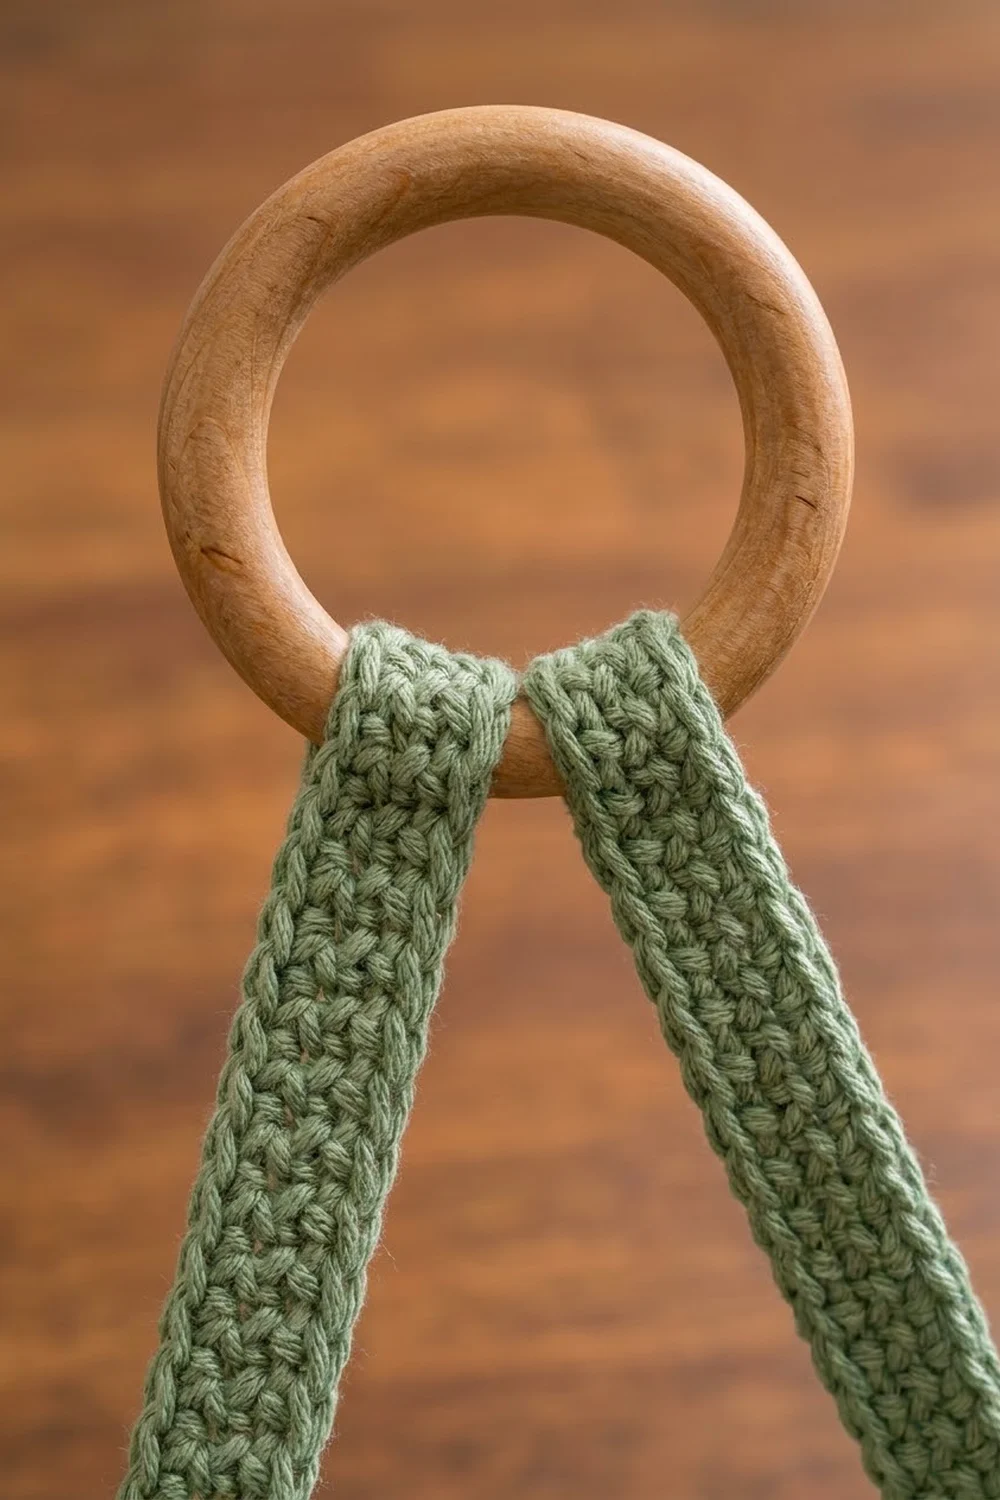
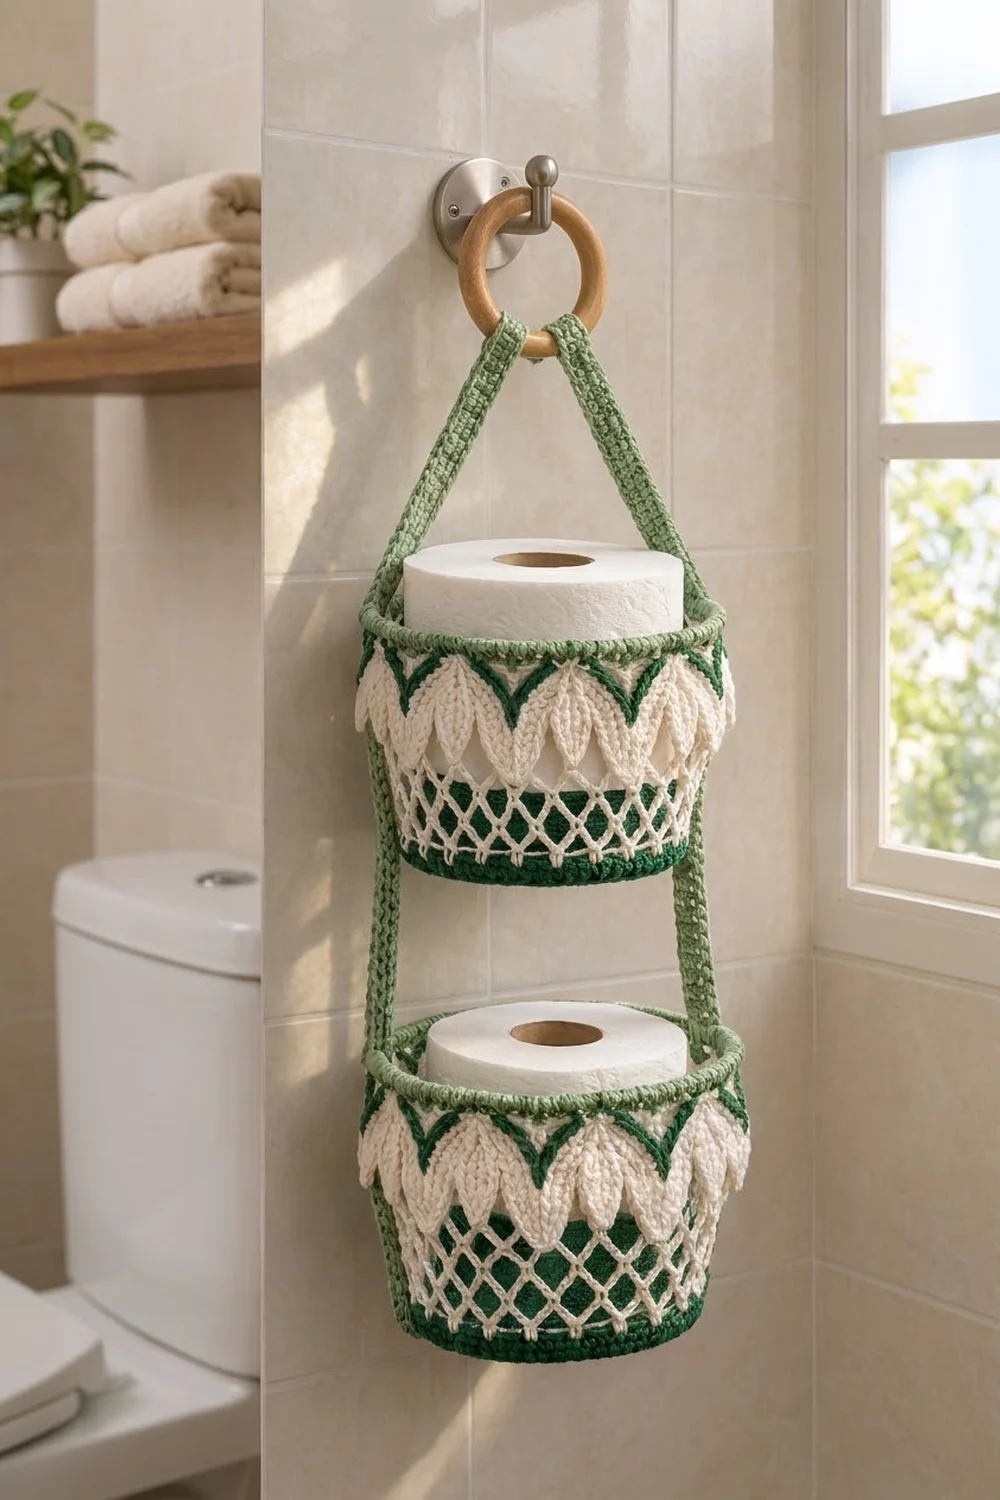
The Leafy Lattice holder is a two-tier hanging basket for spare toilet rolls. Each basket has an open cream mesh wall and a band of plump leaves that point downward. A dark green zigzag line edges the leaves, and a sage green rim finishes the top. Two sage straps join both baskets to a wooden ring, so the holder hangs from any towel hook.
The colors are dark forest green, sage green and cream. The dark green base shows through the lower mesh and gives each basket a solid-looking bottom. The style is fresh and a little botanical, so it suits a bathroom.
This pattern uses US crochet terms. Each basket is 5.75 in (14.6 cm) across and 5.25 in (13.3 cm) tall. The holder hangs about 20.25 in (51.4 cm) from the top of the ring to the bottom of the lower basket. Each basket holds one standard roll about 4.5 in (11.4 cm) across.
Here is how it’s built. You crochet each base in the round with a short lip. You work each wall flat in mesh and leaf rows, seam it into a tube and single crochet it onto the base. Then you add a sage rim. Finally, you sew two straps to both baskets and fold them around the ring.
Finished Size and Construction
- Basket size: 5.75 in (14.6 cm) diameter × 5.25 in (13.3 cm) tall
- Hanging length: about 20.25 in (51.4 cm)
- Skill level: Intermediate
- Terminology: US
- Yarn weight: Worsted (#4) cotton
- Hook: 4.0 mm (G-6)
- Number of pieces: 6 crocheted pieces (2 bases, 2 wall panels, 2 straps) plus 1 wooden ring
- Layout: two baskets stacked vertically and joined by two straps placed on opposite sides
- Wall panel size (flat): 18.25 in (46.4 cm) wide × 4 in (10.2 cm) tall
- Size before rim: 5.75 in (14.6 cm) diameter × 4.65 in (11.8 cm) tall
- Rim depth: 0.6 in (1.5 cm)
Materials
Use a smooth worsted-weight cotton or cotton blend. Cotton holds its shape well, copes with bathroom humidity and makes the leaves stand out clearly. Avoid fuzzy acrylic, because it blurs the mesh.
- Dark forest green (bases and join rounds): 45 g, about 72 m
- Cream (wall panels): 65 g, about 104 m
- Sage green (rims and straps): 45 g, about 72 m
These quantities include a margin of about 30% over what I used.
Tools:
– 4.0 mm (G-6) crochet hook
– Wooden ring, 2.75 in (7.0 cm) outer diameter
– Wall hook with screws and anchors (or an existing towel hook)
– Tapestry needle
– 6 locking stitch markers
– Scissors, tape measure, spray bottle and rust-proof pins
Abbreviations (US Terms)
- ch – chain
- sl st – slip stitch
- sc – single crochet
- hdc – half double crochet
- dc – double crochet
- inc – 2 sc in the same stitch
- sc2tog – single crochet 2 together
- BLO – back loop only
- st(s) – stitch(es)
- rev sc – reverse single crochet (crab stitch): work sc from left to right.
Special stitch – Spike sc: Insert the hook into the stitch 1 row below the next stitch, so the hook goes down past the dc of Row 8 into the Row 7 sc it was worked into. Pull up a long loop to the current row height, yo and pull through both loops on the hook.
Gauge and Checkpoints
Gauge: 16 sc and 18 rounds/rows = 4 in (10.2 cm) in sc, worked firmly.
Make one complete base first and measure it before you go further. Everything else matches its 72-stitch circumference.
Checkpoints:
– Base after Round 6 (36 sts): about 2.9 in (7.4 cm) across.
– Base after Round 12 (72 sts): 5.75 in (14.6 cm) across, which is a circumference of 18 in (45.7 cm).
– Wall panel Row 1 (73 sc): 18.25 in (46.4 cm) wide.
– Each mesh row: about 0.5 in (1.3 cm) tall.
– Finished flat panel: 4 in (10.2 cm) tall.
– Strap: 19 in (48.3 cm) long × 0.9 in (2.3 cm) wide.
If your base is too big: go down to a 3.75 mm hook. If it’s too small: go up to a 4.5 mm hook. Change the hook rather than the stitch counts, because the wall panel and rim depend on exactly 72 stitches. A difference of 0.25 in (0.6 cm) in diameter is fine.
Base (make 2)
Use dark forest green. Work in continuous spiral rounds and mark the first stitch of each round.
Round 1: Magic ring, 6 sc in ring. (6)
Round 2: Inc in each st around. (12)
Round 3: Sc in next st, inc 6 times. (18)
Round 4: Sc in next 2 sts, inc 6 times. (24)
Round 5: Sc in next 3 sts, inc 6 times. (30)
Round 6: Sc in next 4 sts, inc 6 times. (36)
Round 7: Sc in next 5 sts, inc 6 times. (42)
Round 8: Sc in next 6 sts, inc 6 times. (48)
Round 9: Sc in next 7 sts, inc 6 times. (54)
Round 10: Sc in next 8 sts, inc 6 times. (60)
Round 11: Sc in next 9 sts, inc 6 times. (66)
Round 12: Sc in next 10 sts, inc 6 times. (72)
Check the base against the 5.75 in (14.6 cm) checkpoint now.
Round 13 (turning round): Sc in BLO of each st around. (72) This round turns the edge upward.
Round 14–15: Sc in each st around. (72)
Sl st in the next st and fasten off. Leave the live edge for joining. The lip is now 3 rounds, or about 0.67 in (1.7 cm), tall.
Wall Panel (make 2)
Use cream. Work flat in turned rows.
Row 1: Ch 74, sc in 2nd ch from hook and in each ch across. (73 sc)
Row 2 (mesh): Ch 1, turn, sc in first st, ch 5, sk 3 sts, sc in next st 18 times. (19 sc, 18 ch-5 loops)
Row 3 (offset mesh): Ch 5 (counts as dc + ch 2), turn, sc in first ch-5 loop, ch 5, sc in next loop 17 times, ch 2, dc in last sc. (18 sc, 17 full loops, 2 half loops)
Row 4: Ch 1, turn, sc in first dc, ch 5, sc in next ch-5 loop 17 times, ch 5, sc in 3rd ch of turning ch. (19 sc, 18 loops)
Row 5: Repeat Row 3.
Row 6: Repeat Row 4. (19 sc, 18 loops)
The 5 mesh rows (Rows 2–6) should measure about 2.5 in (6.4 cm) together when gently stretched.
Row 7 (conversion row): Ch 1, turn, sc in first sc, 3 sc in next ch-5 loop, sc in next sc 18 times. Count: 19 sc worked 1 per existing sc + 54 sc worked in the loops (18 × 3) = 73 sc.
Row 8 (leaf fans): Ch 3 (counts as dc), turn, sk 1 st, 5 dc in next st, sk 1 st, dc in next st 18 times. That’s 19 single dc + 18 fans of 5 dc, so 109 dc. Each fan is narrow where it’s worked into one stitch and wide at the top, which gives a leaf that points downward.
Row 9 (zigzag): Change to dark forest green. Ch 1, turn. Work a spike sc over the first dc into the Row 7 st below it. Then sc in each of the next 5 fan dc, spike sc over the next single dc 18 times. Count: 1 + (18 × 6) = 109 sts. The sc rows follow the arched tops of the fans, and the spikes pull the green line down between leaves to make the zigzag. Fasten off green.
Row 10 (cupping row): Join cream. Ch 1, turn, sc in first spike sc, sc2tog, sc in next st, sc2tog, sc in next spike sc 18 times. Count: 1 + (18 × 4) = 73 sc. These decreases pull the fan tops in, so the leaves cup outward and stand out from the mesh.
Fasten off and leave a 16 in (40.6 cm) tail. The flat panel should measure 18.25 in (46.4 cm) × 4 in (10.2 cm).
Strap (make 2)
Use sage green.
Row 1: Ch 77, sc in 2nd ch from hook and in each ch across. (76 sc)
Rows 2–4: Ch 1, turn, sc in each st across. (76 sc)
Fasten off and leave a 20 in (50.8 cm) tail. The strap measures 19 in (48.3 cm) × 0.9 in (2.3 cm).
Make All Pieces
- Dark forest green: 2 bases, plus the Row 9 zigzag of both panels and both join rounds
- Cream: 2 wall panels
- Sage green: 2 rims (worked onto the baskets) and 2 straps
Layout (front view, hanging):
        [ wooden ring ]
        /             \
   strap A           strap B
       |  [ TOP BASKET ]  |
       |   3 in gap       |
       |  [BOTTOM BASKET] |
Strap A covers the side seam of each basket. Strap B sits directly opposite it, 36 stitches away.
Joining
1. Seam the panel into a tube. Fold the panel right side out so the two short edges meet. Use the cream tail to whipstitch the edges together row by row, from Row 10 down to Row 1. Stack the last stitch of each row directly on top of the first stitch, so the two edge columns become one stitch column. Each of the 73-stitch rows (Rows 1, 7 and 10) now has 72 stitch positions around: 71 single stitches plus 1 merged seam stitch. This seam is where the extra stitch goes. No other stitches are added.
2. Join the wall to the base. Slide the tube over the base lip so the Row 1 edge sits on top of base Round 15. Keep the panel on the outside and both right sides facing out. Line up the seam with the base’s end-of-round marker. Join dark forest green at the seam. Ch 1, then sc through the top of each base st and the matching foundation loop of panel Row 1, working 1 to 1, all the way around. Treat the merged seam column as a single st. Count: 72 sc (72 base sts = 72 panel positions). Sl st to the first sc and fasten off.
The join round adds about 0.22 in (0.6 cm). The lip and join round together are about 0.9 in (2.3 cm) tall.
Tension: Work the join round at the same firm tension as the base. If you pull too tight, the wall flares. If you work too loosely, the seam line shows through the mesh.
Checkpoint: Before the rim, the basket should measure 5.75 in (14.6 cm) across and about 4.65 in (11.8 cm) tall. That’s 0.9 in (2.3 cm) of lip and join round plus 3.75 in (9.5 cm) of panel above it.
3. Attach the straps (after the rims are done, see below). Measure from one end of a strap and mark these points:
- 0 to 1.5 in (0 to 3.8 cm): the fold-back tail
- 1.5 in to 5.5 in (3.8 cm to 14.0 cm): the leg below the ring, 4 in (10.2 cm)
- 5.5 in to 10.75 in (14.0 cm to 27.3 cm): sewn to the top basket, 5.25 in (13.3 cm)
- 10.75 in to 13.75 in (27.3 cm to 34.9 cm): the free gap, 3 in (7.6 cm)
- 13.75 in to 19 in (34.9 cm to 48.3 cm): sewn to the bottom basket, 5.25 in (13.3 cm)
Pass the tail through the ring and fold it back 1.5 in (3.8 cm). Sew it flat onto the leg. Whipstitch both long edges of the basket sections to the outside wall, from the top of the rim to the bottom of the base. In the mesh area, catch the sc at the corner of each mesh diamond. Center Strap A over the seam column and Strap B over the 37th stitch from the seam.
Checkpoint: Hang the holder and check that both baskets sit level. Total length should be about 20.25 in (51.4 cm).
Border (Rim)
Rim gauge: The same as the base, 16 sc = 4 in (10.2 cm). Because of this, 72 sts gives exactly 18 in (45.7 cm) around and the rim stays as wide as the base.
Use sage green and work into panel Row 10.
Round 1: Join at the seam column, ch 1, sc in each st around, working the merged column as 1 st. (72 sc: 18 sc in each quarter)
Round 2: Sc in each st around. (72 sc, 18 per quarter)
Round 3: Ch 1, rev sc in each st around. (72 rev sc, 18 per quarter)
Sl st to join and fasten off.
Why the math works: Each of the 4 quarters of the basket has 18 stitches. Each quarter of the base, wall rows and rim measures 4.5 in (11.4 cm), and 4 × 4.5 in = 18 in (45.7 cm). The base, panel and rim all have exactly 72 stitch positions, so the walls rise straight with no flare or pinch. The quarter divisions also line up with the strap positions at stitch 1 and stitch 37.
Final Blocking
- Weave in all ends, except leave the strap tails until the straps are sewn on.
- Wrap a towel around a can or jar until it measures 5.75 in (14.6 cm) across, and slip it inside a basket.
- Spray the basket until it’s damp but not dripping.
- Pull the mesh down gently so the diamonds open up evenly.
- Push each leaf outward with your fingertip and pin the leaf tips if needed.
- Smooth the rim flat and check that it’s level all the way around.
- Leave the basket to dry completely, usually 24 hours, then repeat for the second basket.
- Sew on the straps after blocking so the measurements stay accurate.
Final Quality-Control Checklist
- Both bases have 72 sts and measure 5.75 in (14.6 cm) across.
- Each panel has 18 leaves, and every zigzag dip sits between two leaves.
- The side seams are flat, and the merged column counts as 1 st.
- Each join round has 72 sc, and no gaps show at the base.
- Each rim has 72 sts, 18 per quarter, with an even crab-stitch edge.
- Both baskets are 5.25 in (13.3 cm) tall.
- The straps are 19 in (48.3 cm) long and sewn on opposite sides, with Strap A over the seams.
- The baskets hang level, with a 3 in (7.6 cm) gap between them.
Troubleshooting
- The base cups or ruffles: Your tension isn’t matching gauge. Change hook size and redo the base before going further.
- The panel is wider than 18.25 in (46.4 cm): The mesh relaxes over time. Block it to size. If it’s still more than 0.5 in (1.3 cm) too wide, work it again with a smaller hook.
- The leaves lie flat: You skipped the decreases in Row 10. Work 2 sc2tog per leaf.
- The zigzag is faint: Pull the spike loops up to the full row height so the V doesn’t sag.
- The wall flares at the rim: Count the rim stitches. It must be 72, not 73.
- The baskets tilt: Re-measure the strap sections and make sure the left and right straps match.
Care
Hand wash in cool water and lay flat to dry over the towel form. Don’t tumble dry, because the leaves will lose their shape.
Final Notes
The whole holder depends on a short chain of measurements. Your gauge of 16 sc = 4 in (10.2 cm) gives a 72-stitch base that is 5.75 in (14.6 cm) across. The 73-stitch panel becomes 72 stitch positions once seamed, so it joins 1 to 1 onto the base, and the 72-stitch rim keeps the walls straight. Two 19 in (48.3 cm) straps hang the baskets 3 in (7.6 cm) apart, for a total length of about 20.25 in (51.4 cm). If you check each stage, the finished holder will hang level.
Happy crocheting!