

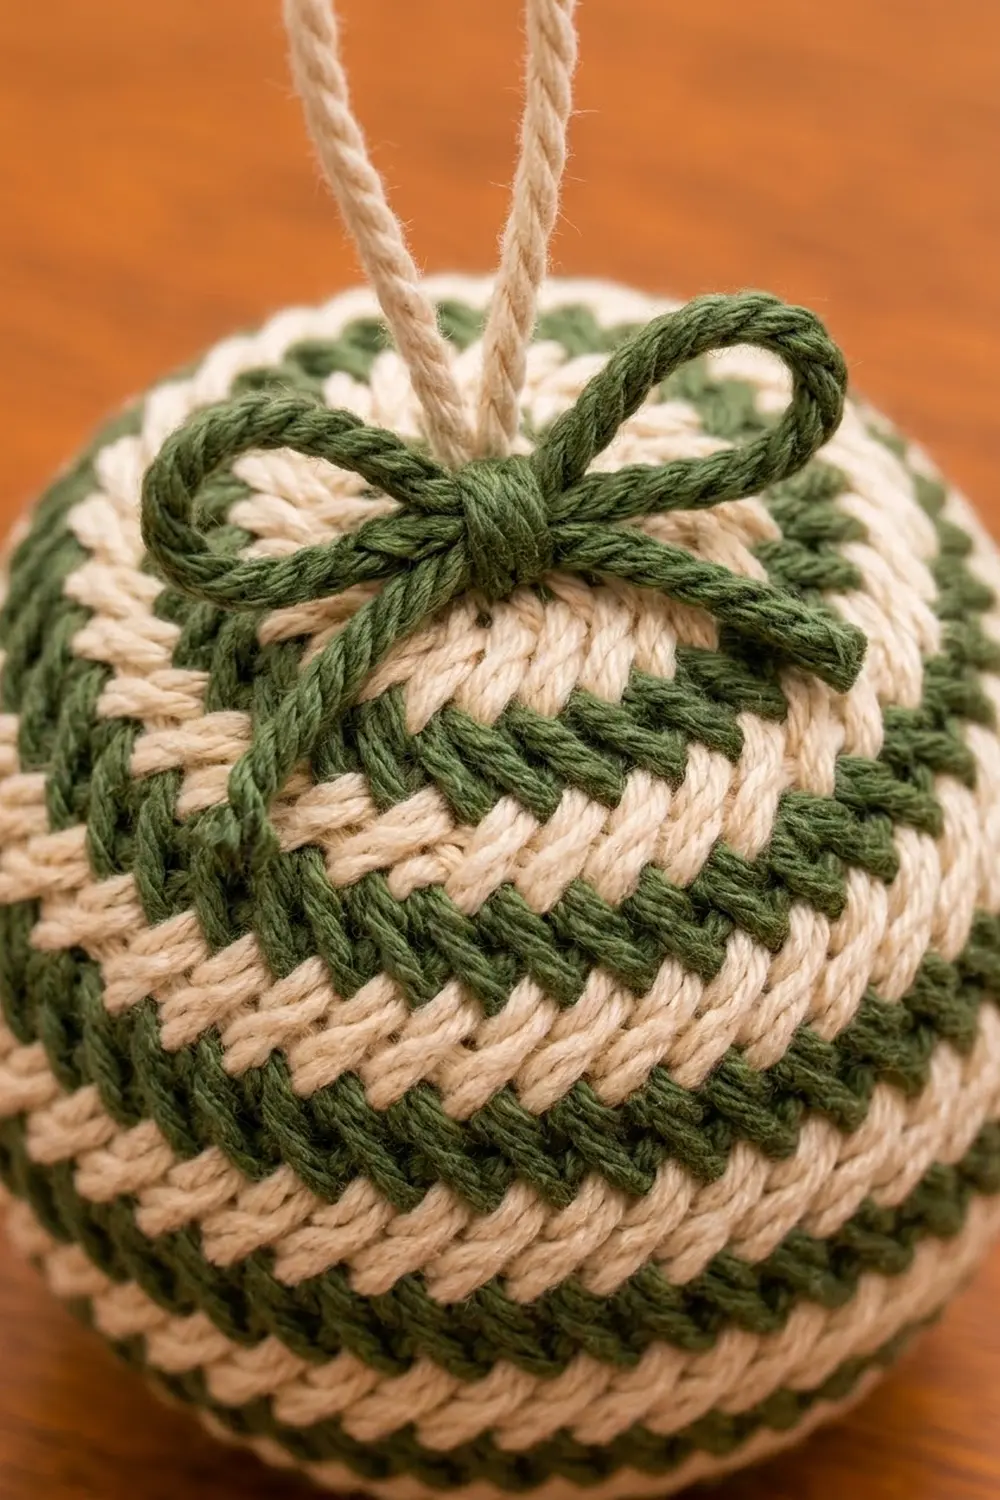
The Evergreen Stripe Ball is a soft, stuffed Christmas ornament made from one flat panel. Forest green and warm cream stripes wrap around the ball, and the herringbone half double crochet stitch gives each stripe a slanted, braided texture that looks like twisted rope. A cream twisted-cord loop and a small green bow finish the top.
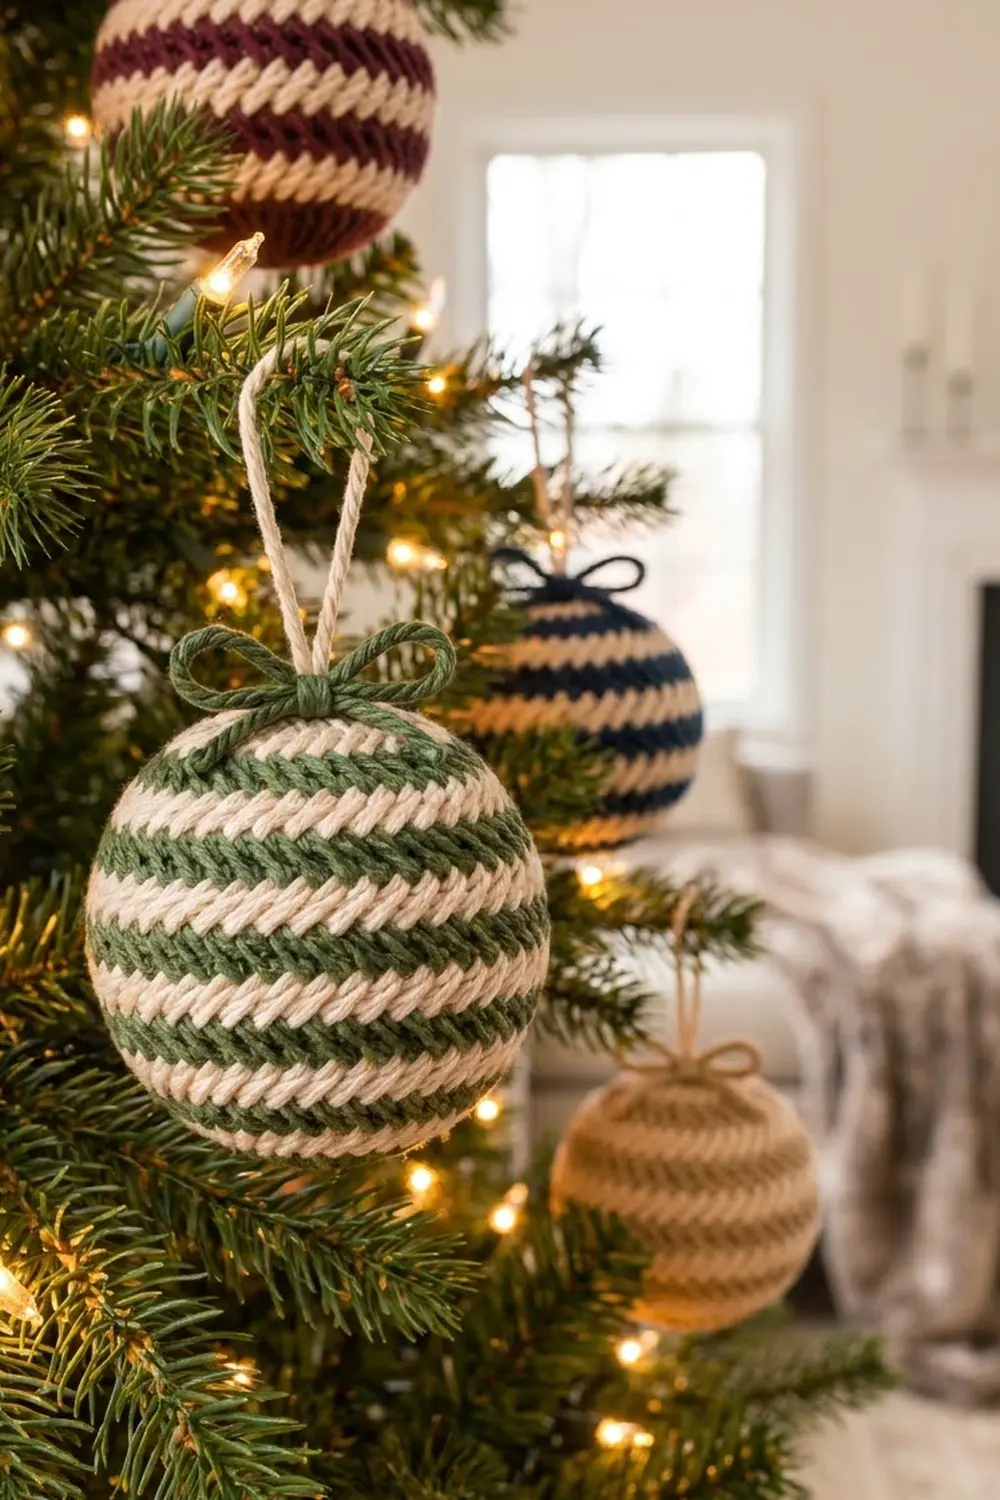
The look is cozy and rustic, in the style of farmhouse decor. Green and cream is the classic version. Burgundy, navy, or tan stripes on cream work just as well, so you can make a whole tree’s worth in matching colors.
This pattern uses US crochet terms. The finished ornament is about 3.5 in (8.9 cm) across. The hanging loop adds about 3 in (7.6 cm) above the top.
Construction is simple. You crochet one flat rectangle in rows and add a single crochet edging all around it. Then you seam the short edges to make a tube, gather the bottom closed, stuff it, gather the top, and add the cord loop and bow. There are no rounds to count and no increases or decreases.
Finished Size and Construction
- Finished ornament: about 3.5 in (8.9 cm) diameter, stuffed
- Skill level: Easy to Intermediate
- Terminology: US crochet terms
- Yarn weight: Worsted (#4)
- Hook: 4.0 mm (G-6)
- Number of pieces: 1 panel (plus 2 twisted cords)
- Layout: single rectangle, seamed into a tube
- Panel size before border: 10 in x 4 in (25.4 cm x 10.2 cm)
- Border depth: about 0.25 in (0.6 cm) per side
- Panel size after border: 10.5 in x 4.5 in (26.7 cm x 11.4 cm)
Materials
Use a smooth worsted-weight yarn with good stitch definition, such as cotton, a cotton blend, or soft acrylic. Plied, slightly twisted yarns show the herringbone slant best. Avoid fuzzy or brushed yarns because they hide the texture.
- Color A, Forest Green: 12 g, about 22 m (24 yd), for the panel, border, seam, gathering, and bow
- Color B, Cream: 8 g, about 14 m (15 yd), for the panel and hanging loop
- Fiberfill stuffing, about 15 g
- 4.0 mm (G-6) crochet hook
- Tapestry needle
- Scissors
- Stitch marker
- Measuring tape
- Blocking mat and pins (optional)
All quantities include a margin of about 20% for your gauge swatch, seaming, and the cords.
Abbreviations (US Terms)
- ch – chain
- sc – single crochet
- st(s) – stitch(es)
- sp – space
- RS / WS – right side / wrong side
- HBhdc – herringbone half double crochet (see below)
Special stitch – Herringbone Half Double Crochet (HBhdc): Yarn over, insert your hook in the stitch, yarn over, and pull up a loop. Pull that loop straight through the first loop on your hook as well (2 loops remain on the hook). Yarn over and pull through both loops. This stitch is a little shorter than a normal hdc and leans to one side. That lean makes the braided stripe texture.
Color change: Work the last HBhdc of the row until 2 loops remain. Then yarn over with the new color and pull through both loops.
Gauge and Checkpoints
Gauge: 16 sts and 14 rows = 4 in (10.2 cm) in HBhdc.
You only need one piece, so test with the piece itself. Work Rows 1–7 and then measure.
- Checkpoint 1 (after the foundation row): Row 1 should measure 10 in (25.4 cm) wide.
- Checkpoint 2 (after Row 7): The panel should be 10 in x 2 in (25.4 cm x 5.1 cm).
- Checkpoint 3 (after Row 14): The panel should be 10 in x 4 in (25.4 cm x 10.2 cm).
- Checkpoint 4 (after the border): The panel should be 10.5 in x 4.5 in (26.7 cm x 11.4 cm).
If your panel is too big: Go down to a 3.75 mm (F-5) hook and start again. A loose panel makes a larger, softer ball, and the stuffing may show through.
If your panel is too small: Go up to a 4.5 mm (7) hook. A tight panel is hard to gather and makes a smaller ball, about 3.25 in (8.3 cm).
Width matters most because it becomes the circumference of the ball. If your width is within 0.5 in (1.3 cm) of the target, keep going.
Panel
Leave a 6 in (15.2 cm) tail at the start. The panel has 7 stripes, and each stripe is 2 rows. Change color at the end of every even-numbered row. That way all color changes happen at the same side edge. Carry the unused color loosely up that edge instead of cutting it. The border and seam will hide it.
Stripe sequence:
– Rows 1–2: Color A (green)
– Rows 3–4: Color B (cream)
– Rows 5–6: Color A
– Rows 7–8: Color B
– Rows 9–10: Color A
– Rows 11–12: Color B
– Rows 13–14: Color A
That makes 4 green stripes and 3 cream stripes, with green at both long edges.
Foundation: With Color A, ch 42.
Row 1 (RS): HBhdc in the 3rd ch from the hook and in each ch across. Turn. (40 sts) The skipped 2 ch do not count as a stitch.
Row 2: Ch 2 (does not count as a stitch), HBhdc in each st across. In the last st, change to Color B. Turn. (40 sts)
Rows 3–14: Ch 2 (does not count), HBhdc in each st across. Turn. (40 sts in every row) Follow the stripe sequence, and change color in the last st of Rows 4, 6, 8, 10, and 12. At the end of Row 14, do not fasten off Color A. Cut Color B, leaving a 4 in (10.2 cm) tail.
The stitch count stays at 40 in every row. If a row has 39 or 41 sts, check that you skipped the turning ch and worked into the last stitch.
Check: The panel measures 10 in x 4 in (25.4 cm x 10.2 cm). It has 7 clear horizontal stripes, and each stripe shows a row of slanted, braid-like stitches.
Border
The green border neatens all four edges. It also gives you even stitches for seaming and gathering.
Border gauge:
– Along the long edges, work 1 sc in each HBhdc. That gives 16 sc per 4 in (10.2 cm), which matches the panel.
– Along the short edges (row ends), work 21 sc across 14 rows. That gives about 5.25 sc per inch, which suits the height of HBhdc rows.
– At each corner, work (sc, ch 1, sc). The corner ch-1 sp is not counted in the side totals. The two sc on either side of it belong to the sides they sit on.
Border Round (RS): With Color A still on the hook, ch 1. Do not turn.
- Long side 1 (along Row 14): Rotate to work along the top. Sc in each of the 40 sts. (40 sc)
- Corner: Ch 1.
- Short side 1 (row ends): Work 1 sc in each row end and 1 extra sc in every 2nd row end. (14 + 7 = 21 sc)
- Corner: Ch 1.
- Long side 2 (foundation ch): Sc in the underside of each of the 40 foundation ch that hold Row 1 sts. (40 sc)
- Corner: Ch 1.
- Short side 2 (row ends): Work the same as short side 1, enclosing the carried yarn as you go. (14 + 7 = 21 sc)
- Corner: Ch 1. Slip stitch to the first sc.
Border total: 40 + 21 + 40 + 21 = 122 sc, plus 4 corner ch-1 sps.
Why the math works: The long sides match the panel 1 to 1 (40 HBhdc = 40 sc), so the width stays at 10 in (25.4 cm) and does not flare or pull in. Each short side has 21 sc. The two short sides are seamed to each other stitch for stitch (21 to 21), so the seam lies flat. The border adds about 0.25 in (0.6 cm) on every side. That makes 10 + 0.25 + 0.25 = 10.5 in (26.7 cm) wide and 4 + 0.25 + 0.25 = 4.5 in (11.4 cm) tall.
Fasten off and leave a 16 in (40.6 cm) tail of Color A for seaming. Weave in all other ends now, before blocking.
Assembly
Seam the tube: Fold the panel in half with the RS facing out, so the two short sides meet. Match the stripes. Using the long tail and a tapestry needle, whipstitch through both loops of the 21 sc on one short side and the 21 sc on the other, 1 to 1. Keep the tension even and snug, but not tight. The seam should stretch as much as the fabric. You now have a tube about 10.5 in (26.7 cm) around and 4.5 in (11.4 cm) tall.
Gather the bottom: Cut 12 in (30.5 cm) of Color A. Weave it in and out through every 2nd sc along one long edge, for 20 weave points. Pull firmly until the hole closes completely. Knot it, then pass the tails into the inside of the tube.
Stuff: Turn the gathered end down. Add fiberfill in small pieces, pushing it toward the sides first so the ball rounds out evenly. Use about 15 g. Stop when the stripes are slightly stretched but you cannot see stuffing between the stitches.
Gather the top: Weave a second 12 in (30.5 cm) strand of Color A through every 2nd sc of the top edge, for 20 weave points. Pull it closed, adding a little more stuffing just before it closes completely. Knot it, but do not cut it yet. You will use it to attach the hanger.
Hanging loop (cream twisted cord): Cut 2 strands of Color B, each 30 in (76.2 cm) long. Knot them together at both ends. Twist until the strands kink back on themselves. Fold the cord in half and let it twist around itself. This gives a cord about 10 in (25.4 cm) long. Cut 6 in (15.2 cm) of it, knot both ends, and fold it into a 3 in (7.6 cm) loop. Sew the knotted ends firmly to the center of the top gather.
Bow (green twisted cord): Cut 2 strands of Color A, each 36 in (91.4 cm) long. Make a twisted cord the same way. It will be about 12 in (30.5 cm) long. Tie it in a bow around the base of the loop, with bow loops about 1 in (2.5 cm) wide. Trim the tails to 1 in (2.5 cm). Tack the knot of the bow to the ornament with a few stitches so it stays in place.
Final Blocking
- Before seaming, pin the bordered panel flat to 10.5 in x 4.5 in (26.7 cm x 11.4 cm).
- Mist it lightly with water, or hover a steam iron about 1 in (2.5 cm) above it. Never press the iron onto the stitches.
- Let the panel dry completely while pinned. This straightens the stripes and evens out the edges.
- After stuffing and closing the ball, roll it gently between your palms to round it out.
- If the seam or gathers have left flat spots, steam them lightly, then shape them with your fingers while they are still warm.
- Leave the ornament to dry and cool completely before hanging it.
Final Quality-Control Checklist
- Every row has 40 sts.
- There are 7 stripes in the order green, cream, green, cream, green, cream, green.
- The border has 40 / 21 / 40 / 21 sc with 4 corner ch-1 sps (122 sc total).
- The flat panel measured 10.5 in x 4.5 in (26.7 cm x 11.4 cm) after blocking.
- The stripes line up across the seam.
- Both gathers are fully closed with no visible hole.
- The ball is round, firm, and about 3.5 in (8.9 cm) across.
- The hanging loop is sewn through the gather, not just tied on top.
- All ends are hidden inside the ball.
Troubleshooting
The panel slants or skews into a parallelogram. HBhdc naturally leans. Turn at the end of every row, as written, so the lean alternates. Then block the panel square before seaming.
The edges are wavy. Check that you used ch 2 at the start of each row and that you did not count it as a stitch.
The stripes don’t match at the seam. Count the 21 border sc on each short side. Then pin the stripe lines together before you whipstitch.
There is a hole at the top or bottom. Weave through every sc instead of every 2nd sc, and pull more firmly.
Stuffing shows through the stitches. Your gauge is too loose. Use a smaller hook, or put a small nylon stocking pouch around the stuffing.
The ball is egg-shaped. You have too much stuffing in the middle and too little at the ends. Add small pieces at each pole before closing.
The color carry shows at the side. Tug the carried strand snug every 2 rows, and enclose it in the border sc.
Care
Spot clean with mild soap and cool water, then reshape and air dry. Store it wrapped in tissue so the bow and loop don’t get crushed.
Final Notes
The measurement chain is short and easy to check. At 16 sts and 14 rows per 4 in (10.2 cm), 40 sts by 14 rows makes a 10 in x 4 in (25.4 cm x 10.2 cm) panel. The border adds 0.25 in (0.6 cm) per side, for 10.5 in x 4.5 in (26.7 cm x 11.4 cm). Seamed, that makes a tube 10.5 in (26.7 cm) around. Stuffed and gathered, it makes a ball about 3.5 in (8.9 cm) across. If each checkpoint matches, your ornament will match too.
Make one in green and cream, then try burgundy, navy, or tan stripes for a coordinated tree.
Happy crocheting!