
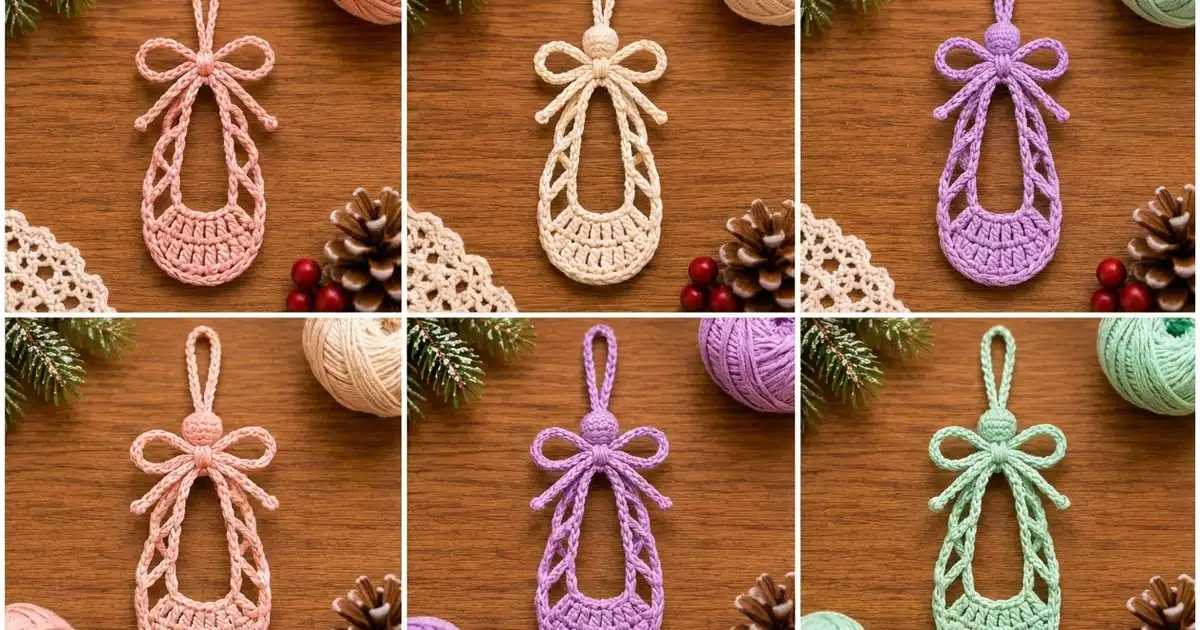
This little ballet-slipper ornament is lacy and flat. It has a solid toe, open lattice sides and a chain bow tied at the top, and it hangs like a tiny pointe shoe on the tree.
The sample is blush pink. The design also works well in cream, lavender or mint, so you can make a whole set in different colors. Mercerized cotton gives the outlines a crisp, braided look and keeps the lattice from sagging.
This pattern uses US crochet terms. The finished body measures 2.5 in (6.4 cm) wide by 4 in (10.2 cm) tall, and the full ornament hangs about 6.5 in (16.5 cm) long including the loop.
Here is the construction in order. First you work a two-row toe crescent. Next comes a border that chains up and over to form the outer frame. Then you add an inner frame for the opening and work crossing chains between the two frames. Last, you make and attach a separate bow, tails, center ball and hanging loop.
Finished Size and Construction
- Finished body size: 2.5 in (6.4 cm) wide x 4 in (10.2 cm) tall
- Total hanging length: about 6.5 in (16.5 cm)
- Skill level: Easy-Intermediate
- Terminology: US crochet terms
- Yarn weight: Sport (2), mercerized cotton
- Hook: 3.25 mm (US D-3)
- Number of pieces: 1 ornament body plus 4 small trim parts (bow strip, tail strip, center ball, hanging loop)
- Layout: single ornament, worked flat
- Toe crescent before border: about 2.3 in (5.8 cm) wide x 0.8 in (2.0 cm) deep
- Border depth: about 0.3 in (0.8 cm)
Materials
Yarn: Use a smooth sport-weight mercerized cotton of about 150 m per 50 g. Cotton holds the open frame flat, while acrylic tends to curl. Each ornament uses one color.
- Blush Pink (sample): 10 g / 30 m per ornament
- Optional colorways: Cream, Lavender or Mint, 10 g / 30 m each per ornament
These quantities include a margin of about 25% for your gauge swatch and for weaving in ends.
Tools:
– 3.25 mm (US D-3) crochet hook
– Tapestry needle
– Scissors
– Stitch markers (4 or more)
– A pinch of fiberfill or yarn scraps (for the center ball)
– Blocking mat and rust-proof pins
– Spray bottle, plus optional spray starch
Abbreviations (US Terms)
- ch – chain
- sl st – slip stitch
- sc – single crochet
- dc – double crochet
- sc2tog – single crochet 2 together
- st(s) – stitch(es)
- RS – right side
Special technique – lattice anchor: Remove your hook from the loop. Insert it from front to back through the named stitch, pick up the dropped loop again, and pull it through. This attaches a chain neatly without adding bulk.
Gauge and Checkpoints
Gauge: 24 sc = 4 in (10.2 cm), which is 6 stitches per inch. Chains work up at roughly the same rate. One dc row is about 0.4 in (1.0 cm) tall.
Make one complete ornament body before you buy yarn for a full set. Measure at each checkpoint:
- After Row 1: 12 dc measure 2 in (5.1 cm) across.
- After Row 2: the crescent measures about 2.3 in (5.8 cm) straight across its widest point.
- After Border Round 1: the ch-40 arc, laid in a smooth curve, rises about 3.2 in (8.1 cm) above the toe.
- Finished body: 2.5 in (6.4 cm) x 4 in (10.2 cm) after blocking.
If your piece is too big, go down to a 3.0 mm hook. If it is too small, go up to a 3.5 mm (US E-4) hook. Keep the stitch counts the same in both cases, because every frame and lattice position depends on them.
Part 1: Toe Crescent
The toe is worked in rows. Row 1 becomes the straight inner edge of the toe, facing the opening. Row 2 increases at both ends, which bends the outer edge into a curve.
Row 1: Ch 14. Dc in 4th ch from hook and in each ch across. Turn. (12 dc; the skipped ch-3 counts as the first dc)
Row 2: Ch 3 (counts as dc), dc in same st, 2 dc in next st, dc in each of next 8 sts, 2 dc in each of last 2 sts (the last one is the top of the turning ch). (16 dc)
Check: 2 + 2 + 8 + 2 + 2 = 16. The four end increases make the crescent fan open. Do not fasten off.
Checkpoint: about 2.3 in (5.8 cm) across and 0.8 in (2.0 cm) deep.
Part 2: Border (Outer Frame)
The border has two jobs. It outlines the toe, and it builds the outer frame that arches up over the top of the slipper.
Border gauge: 6 sc per inch, the same as the main gauge. Work the sc firmly so the frame stays smooth and doesn’t wave.
Border Round 1: Ch 1. Rotate the work so you are working down the row ends of the side you just finished. Work 4 sc evenly across the row ends (2 sc per dc row), ending at the Row 1 corner. Ch 40; this is the outer arc. Without twisting the chain, work 4 sc evenly across the row ends on the opposite side, from the Row 1 corner down to the Row 2 corner. Sc in each of the 16 dc of Row 2. Sl st to first sc.
Count: 4 sc + 40 ch + 4 sc + 16 sc = 64 sts
Border Round 2: Ch 1, sc in each st around, working into each ch of the arc exactly once. Sl st to first sc. (64 sc)
Per-side counts for Round 2:
– Right side: 4 sc on the row ends + 20 sc on the arc = 24
– Left side: 20 sc on the arc + 4 sc on the row ends = 24
– Toe curve: 16 sc
– Total: 24 + 24 + 16 = 64 sc
Fasten off and weave in the ends.
Mark arc sc 20 and sc 21; the top point sits between them. Number the arc stitches on each side from the toe upward: O1 to O20 on the right side and O1 to O20 on the left side.
Why the math works: Forty arc stitches at 6 per inch give 6.7 in (17.0 cm) of frame. That is enough to rise about 3.2 in (8.1 cm) on each side and turn at the top. Because Round 2 works exactly one sc per stitch of Round 1, the count stays at 64 and the frame lies flat. The 8 row-end stitches (2 per dc row) match the height of the crescent, so the corners don’t pucker.
Part 3: Inner Frame (Opening)
Inner Round 1: With RS facing, join yarn in the first free foundation loop of Row 1 at one corner. Ch 1. Sc in each of the 12 foundation loops: 11 at the bases of the dc and 1 at the base of the turning ch. Ch 30, then sl st to first sc. (12 sc + 30 ch)
Inner Round 2: Ch 1, sc in each of the 12 sc. Sc in each of the next 15 ch. Now attach the frames: insert your hook into outer arc sc 20 and sl st. Sc in each of the remaining 15 ch, then sl st to first sc. (42 sc; the joining sl st is not counted)
Fasten off and weave in the ends.
Number the inner arc stitches on each side from the toe upward: I1 to I15. The opening now forms a U that meets the outer frame at the top point.
Checkpoint: the inner U is about 5 in (12.7 cm) around its arc, and the side gaps are widest at mid-height.
Part 4: Side Lattice
Each side gets two zigzag passes. Pass 2 crosses Pass 1 three times and forms three X’s. Work the right side first, then mirror the steps on the left side.
Pass 1 (upward): Join yarn with a sl st in O3. Ch 7, then use the lattice anchor in I6. Ch 7, lattice anchor in O13. Ch 7, lattice anchor in I14. Fasten off.
Pass 2 (downward): Join yarn with a sl st in O18. Ch 7, lattice anchor in I10. Ch 7, lattice anchor in O8. Ch 7, lattice anchor in I2. Fasten off.
Crossing check: each Pass 2 segment should cross the matching Pass 1 segment.
– O3–I6 crosses I2–O8.
– I6–O13 crosses O8–I10.
– O13–I14 crosses I10–O18.
That gives 3 X’s per side and 6 in total.
Lay every Pass 2 chain over the Pass 1 chains. If you like, tack each crossing with a single stitch of matching thread.
If a chain looks slack or pulls the frame inward, rework that segment with ch 6 or ch 8. Change the left and right sides by the same amount so they stay symmetrical.
Part 5: Bow, Tails, Center Ball and Hanging Loop
Bow strip: Ch 51. Sc in 2nd ch from hook and in each ch across. (50 sc, about 8.3 in / 21.1 cm) Fasten off, leaving a 6 in (15.2 cm) tail.
Tail strip: Ch 41. Sc in 2nd ch from hook and in each ch across. (40 sc, about 6.7 in / 17.0 cm) Fasten off.
Center ball:
– Rnd 1: 6 sc in a magic ring. (6)
– Rnd 2: 2 sc in each st. (12)
– Rnd 3: Sc in each st. (12)
– Rnd 4: Sc2tog 6 times. (6)
Stuff firmly. Fasten off, then thread the tail through the remaining 6 sts and pull closed.
Hanging loop: Ch 31. Sc in 2nd ch from hook and in each ch across. (30 sc, about 5 in / 12.7 cm) Fasten off and leave a tail.
Assembly:
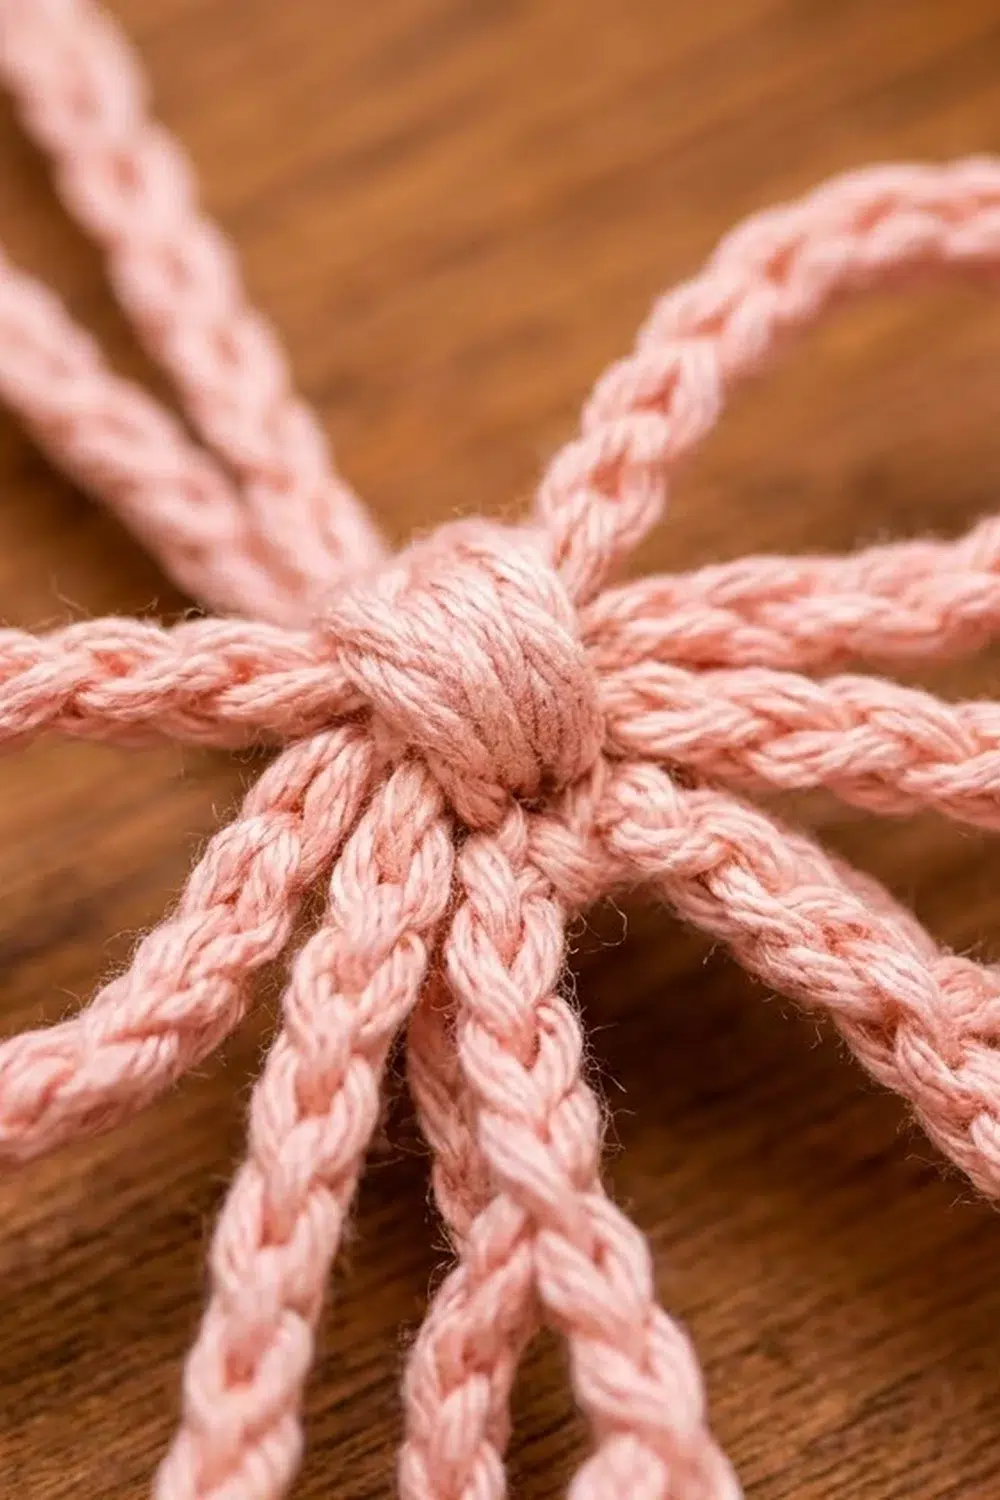
1. Bring both ends of the bow strip to the center so they overlap by about 3 sts. This makes two loops of about 22 sts each. Wrap the center tightly with the yarn tail.
2. Fold the tail strip in half to find its center. Stitch that center to the back of the bow, so 20 sc hang down on each side, about 3.3 in (8.4 cm) each.
3. Sew the bow to the outer frame at the top point, covering outer arc sc 20 and 21.
4. Sew the center ball over the bow center.
5. Fold the hanging loop in half and stitch both ends behind the ball. This makes a loop with about 2.5 in (6.4 cm) of drop.
6. Drape the bow tails diagonally across the upper lattice and tack them in two places on each side.
Final Blocking
- Lightly spray the ornament with water until it is damp but not soaked.
- Lay it RS up on the blocking mat.
- Pin the toe curve first to 2.3 in (5.8 cm) across.
- Pin the outer frame into a smooth teardrop 2.5 in (6.4 cm) wide and 4 in (10.2 cm) tall.
- Pin the inner U so it is centered, with matching side gaps.
- Straighten each lattice chain and center every X.
- Pin the bow loops open and the tails flat.
- Mist with spray starch if you want extra stiffness.
- Let it dry completely, then unpin.
Final Quality-Control Checklist
- Row 1 = 12 dc; Row 2 = 16 dc
- Border Rounds 1 and 2 = 64 sts each (24 + 24 + 16)
- Inner Round 2 = 42 sc, joined at outer sc 20
- 3 X’s per side, symmetrical left and right
- Body measures 2.5 in (6.4 cm) x 4 in (10.2 cm)
- Bow is centered over the top point, and the ball is secure
- Hanging loop is firmly stitched
- All ends are woven in and invisible from the front
Troubleshooting
- Toe curls upward: Row 2 is tight. Rework it with a looser tension, or block it flat with starch.
- Outer arc ripples: you probably have extra stitches. Recount to 40 per arc in Round 2.
- Frame pulls into a narrow shape: the lattice chains are too short. Add 1 ch to each segment.
- Lattice sags: the chains are too long. Remove 1 ch from each segment.
- Top point twists: the inner and outer arcs were joined off-center. Confirm the join is at outer sc 20 after inner ch 15.
- Bow flops: wrap the center tighter, or starch the loops.
Care
Hand wash in cool water and lay flat to dry. If needed, re-block and re-starch before storing the ornament flat between tissue.

Final Notes
Here is the measurement chain from start to finish:
- 12 dc measure 2 in (5.1 cm).
- The 16-dc crescent measures 2.3 in (5.8 cm).
- The 64-stitch border, with its 40-stitch arc, frames a body of 2.5 in (6.4 cm) by 4 in (10.2 cm).
- The 42-sc inner frame forms the opening.
- Six crossing chains per side, three per pass, fill each side with three X’s.
- The bow and the 30-sc loop bring the hanging length to 6.5 in (16.5 cm).
Check your gauge on the first ornament, and every one after it will match.
Happy crocheting!