
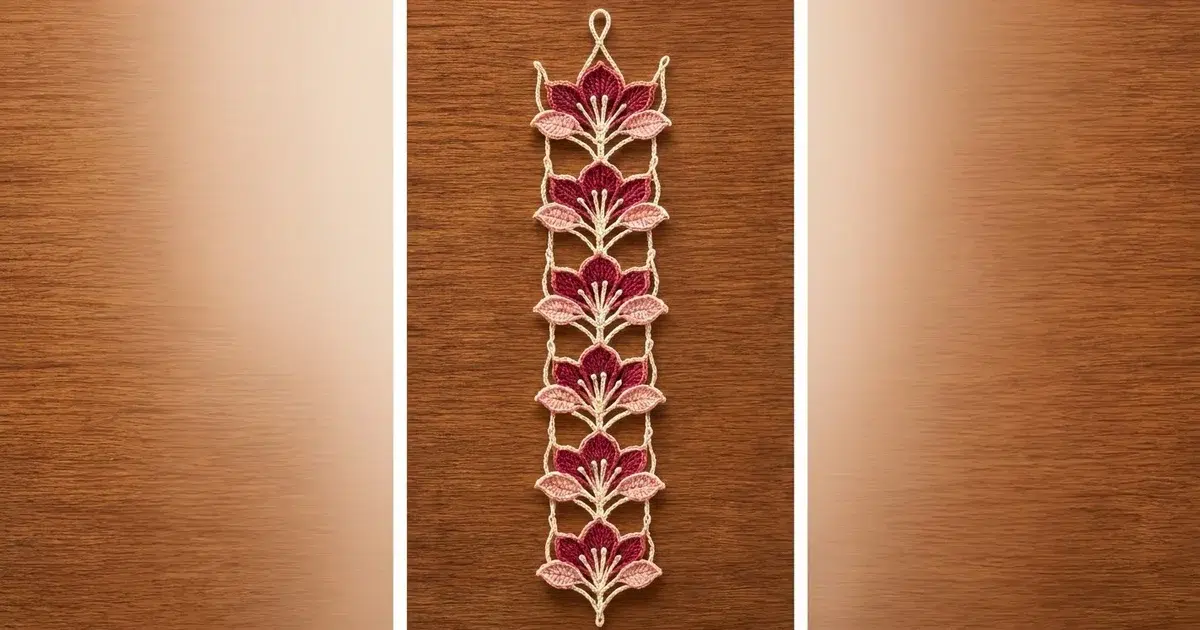
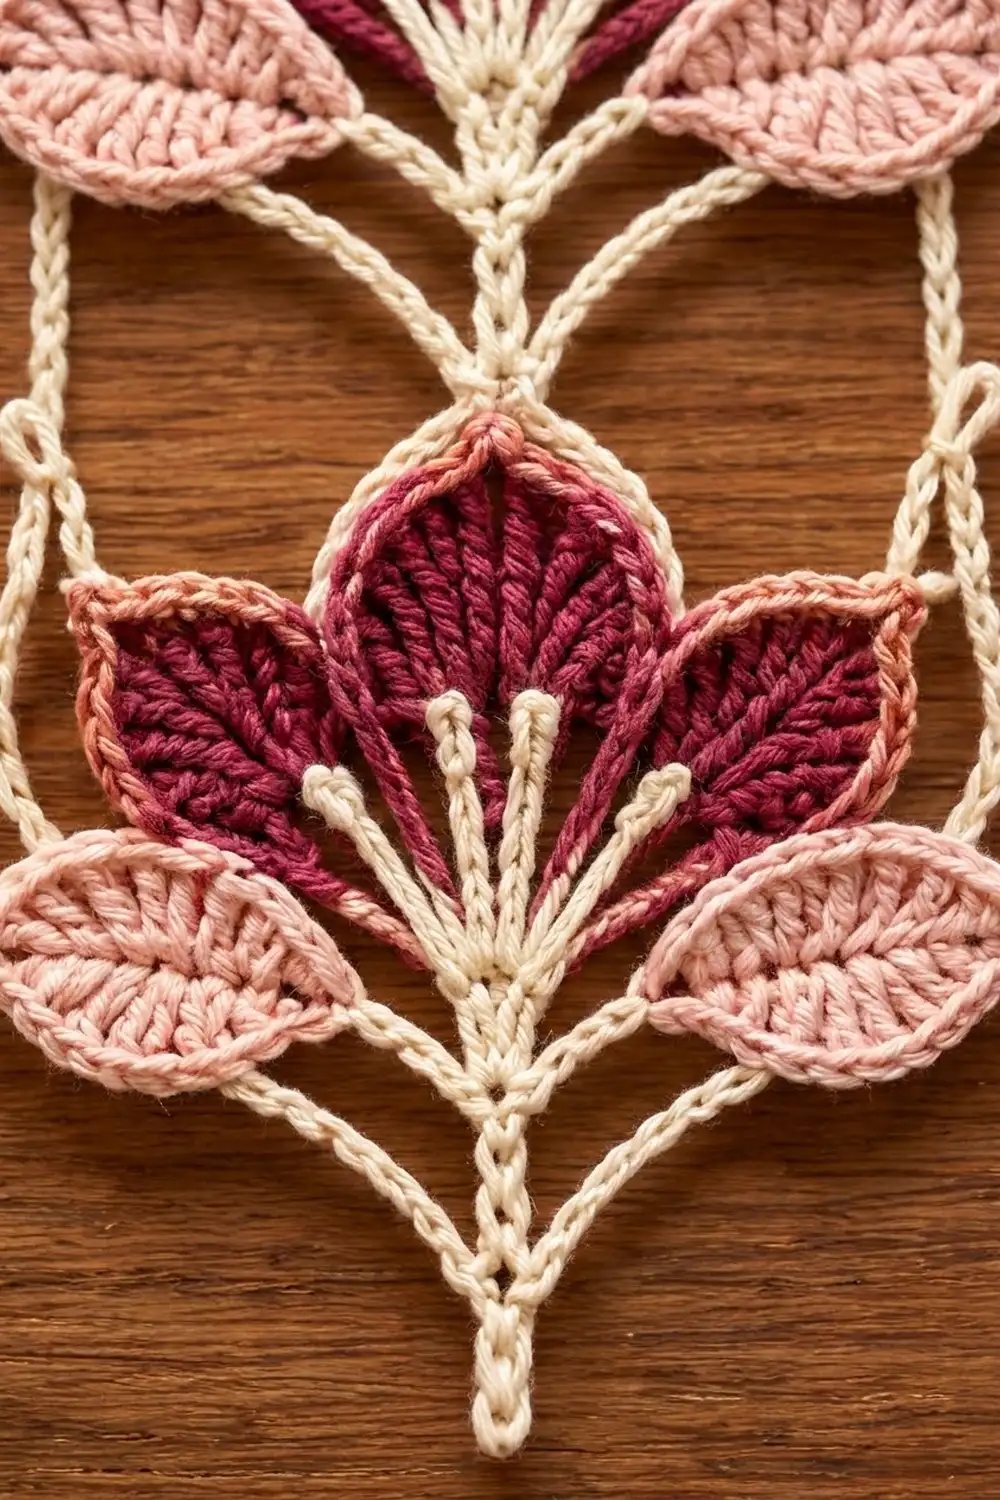
The Magnolia Cascade strip is a vertical lace panel made from six flower motifs that stack one on top of the next. Each flower has three ridged burgundy petals with soft pink edges, two pale pink leaves outlined in cream, and a fan of cream stamens. A light cream chain frame holds everything together, and the strip ends in a neat hanging loop at the top.
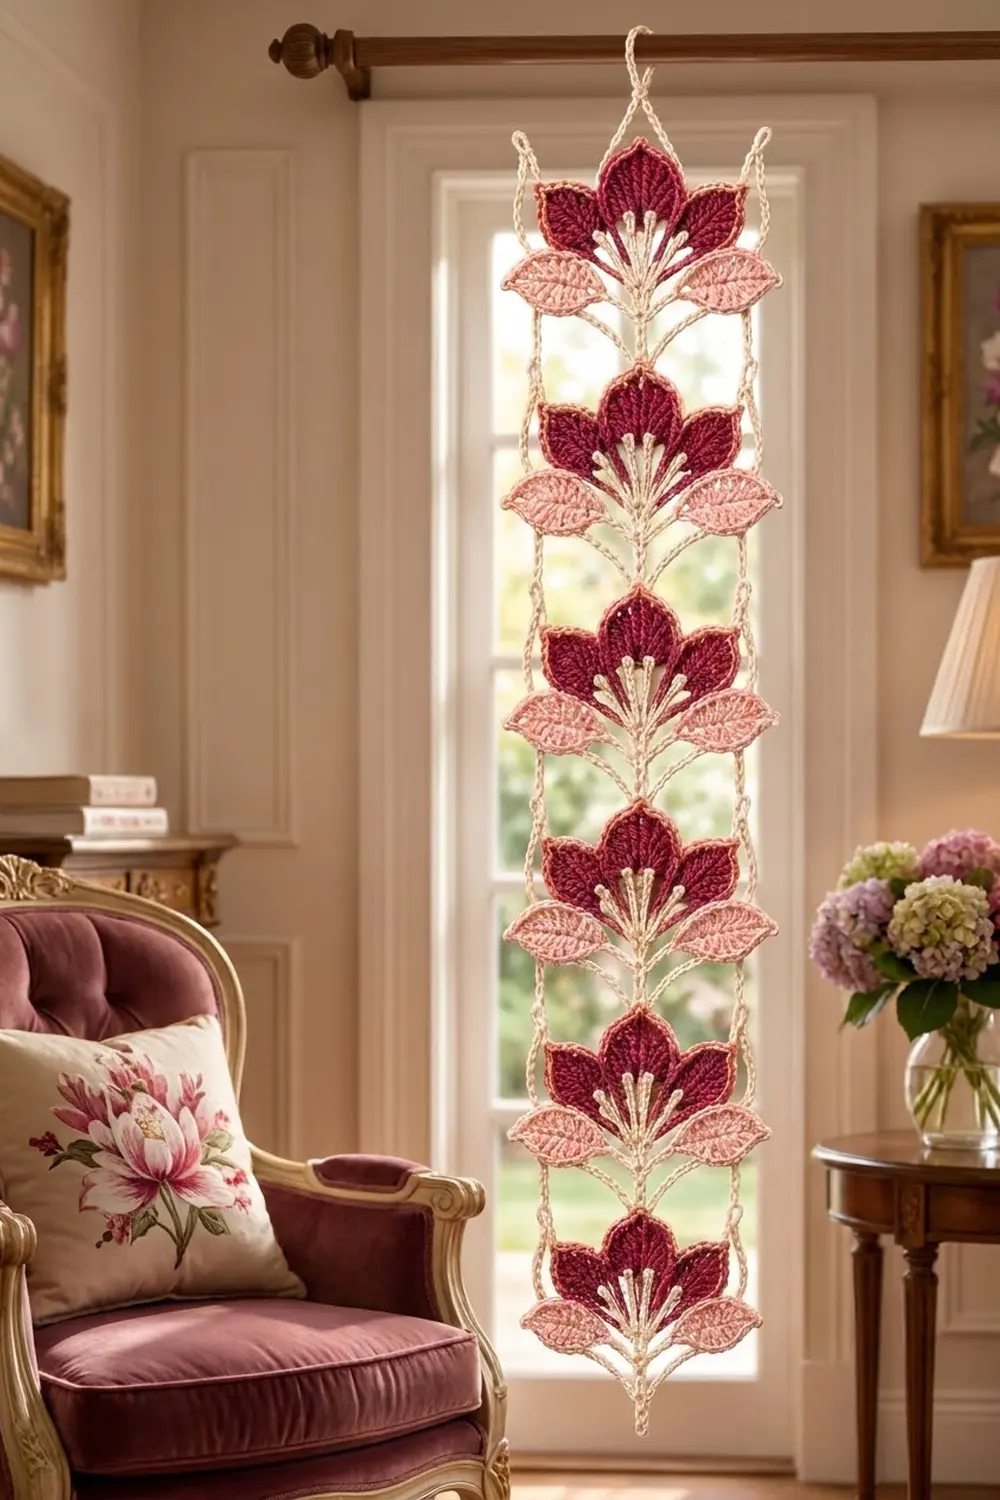
There are three colors: deep burgundy, pale blush pink, and cream. The style is vintage and botanical. Hang one strip in a narrow window or doorway, from a shelf edge, or as a wall accent. Make several and hang them side by side for a curtain.
This pattern uses US crochet terms. The finished strip is 5.5 in (14.0 cm) wide and 22 in (55.9 cm) long, including the hanging loop.
How it’s made: you crochet each petal and leaf separately, sew them into a flower, and add a stamen spray. Then you work a cream chain frame around the flower. From the second motif on, you join each frame to the motif above as you go. Two rows of side rails finish the long edges.
Finished Size and Construction
- Finished size: 5.5 in x 22 in (14.0 cm x 55.9 cm)
- Skill level: Intermediate
- Terminology: US
- Yarn weight: DK (3) cotton
- Hook: 3.0 mm
- Number of pieces: 6 motifs, joined into 1 strip
- Layout: 1 column x 6 motifs
- Single motif size: 5 in wide x 3.5 in tall (12.7 cm x 8.9 cm), from the top point to the end of the stem
- Size before border: 5 in x 22 in (12.7 cm x 55.9 cm), including the 1 in (2.5 cm) hanging loop
- Border depth: 0.25 in (0.6 cm) on each long side
Materials
Use a smooth mercerized cotton or a cotton blend in DK weight. Cotton gives the petals crisp ridges and keeps the chain frame from stretching as the strip hangs. Avoid fuzzy or very stretchy yarns. They blur the stamen lines and let the strip sag.
- Color A, burgundy: 30 g / 63 m (petals)
- Color B, blush pink: 25 g / 53 m (petal edges, leaves)
- Color C, cream: 40 g / 84 m (leaf outlines, veins, stamens, frames, rails)
These amounts include a margin of about 20% for gauge swatches and differences in tension.
Tools:
- 3.0 mm crochet hook
- Tapestry needle
- Locking stitch markers
- Rustproof pins and a blocking board
- Spray bottle
- Ruler or tape measure
Abbreviations (US Terms)
- ch – chain
- sl st – slip stitch
- sc – single crochet
- hdc – half double crochet
- dc – double crochet
- BLO – back loop only
- sp – space
- st(s) – stitch(es)
- rnd – round
Special stitches
- Picot point: ch 3, sl st in 3rd ch from hook.
- Knob stamen (length L): ch L + 3, sl st in 3rd ch from hook (this makes the knob), then sl st in each of the next L ch back to the base.
Gauge and Checkpoints
Gauge: 20 sc and 22 rows = 4 in (10.2 cm). Chains: 5 ch = 1 in (2.5 cm).
Make one complete motif before you make the rest. Check these sizes along the way:
- Center petal after Rnd 3: 2.25 in long x 1.75 in wide (5.7 cm x 4.4 cm)
- Side petal after Rnd 3: 2 in x 1.5 in (5.1 cm x 3.8 cm)
- Leaf after Rnd 3: 2 in x 1.25 in (5.1 cm x 3.2 cm)
- Framed motif: 5 in wide x 3.5 in tall (12.7 cm x 8.9 cm)
If your pieces are too big, go down to a 2.75 mm hook. If they’re too small, go up to a 3.25 mm hook. If only the frame is off, change just the hook you use for the frame chains. The frame needs to sit flat around the flower without bowing or pulling.
Center Petal (make 1 per motif)
Use Color A.
Ch 10.
Rnd 1: Sc in 2nd ch from hook, hdc in next 2 ch, dc in next 4 ch, hdc in next ch, (sc, ch 2, sc) in last ch for the tip. Now work along the other side of the foundation chain: hdc in next ch, dc in next 4 ch, hdc in next 2 ch, sc in last ch. Sl st to the first sc to join. (18 sts + tip ch-2 sp)
Rnd 2 (BLO): Ch 1. Work every stitch in this round through the back loop only, which makes the ridged texture.
- Side 1: sc in next 3 sts, 2 sc in next dc, sc in next 2 dc, 2 sc in next dc, sc in next hdc (10 sts).
- Tip: sc in tip sc, (sc, ch 2, sc) in ch-2 sp, sc in next tip sc (4 sts).
- Side 2: sc in next hdc, 2 sc in next dc, sc in next 2 dc, 2 sc in next dc, sc in next 3 sts (10 sts).
Join. (24 sts + ch-2 sp) Fasten off Color A.
Rnd 3 (edging): Join Color B with a sc in any stitch. Sc in each stitch around, working (sc, ch 2, sc) in the tip ch-2 sp. Join and fasten off. (24 worked 1-per-stitch + 2 added at the tip = 26 sc + ch-2 sp)
Side Petals (make 2 per motif)
Use Color A.
Ch 8.
Rnd 1: Sc in 2nd ch from hook, hdc in next ch, dc in next 3 ch, hdc in next ch, (sc, ch 2, sc) in last ch for the tip. Now work along the other side: hdc in next ch, dc in next 3 ch, hdc in next ch, sc in last ch. Join. (14 sts + ch-2 sp)
Rnd 2 (BLO): Ch 1.
- Side 1: sc in next 2 sts, 2 sc in next dc, sc in next dc, 2 sc in next dc, sc in next hdc (8 sts).
- Tip: sc in tip sc, (sc, ch 2, sc) in ch-2 sp, sc in next tip sc (4 sts).
- Side 2: sc in next hdc, 2 sc in next dc, sc in next dc, 2 sc in next dc, sc in next 2 sts (8 sts).
Join. (20 sts + ch-2 sp) Fasten off Color A.
Rnd 3: Join Color B. Sc in each stitch around, working (sc, ch 2, sc) in the tip sp. Join and fasten off. (20 worked 1-per-stitch + 2 added at the tip = 22 sc + ch-2 sp)
Leaves (make 2 per motif)
Use Color B.
Ch 9.
Rnd 1: Sc in 2nd ch from hook, hdc in next ch, dc in next 3 ch, hdc in next ch, sc in next ch, (sc, ch 2, sc) in last ch. Now work along the other side: sc in next ch, hdc in next ch, dc in next 3 ch, hdc in next ch, sc in last ch. Join. (16 sts + ch-2 sp)
Rnd 2 (BLO): Ch 1.
- Side 1: sc in next 2 sts, 2 sc in next dc, sc in next dc, 2 sc in next dc, sc in next 2 sts (9 sts).
- Tip: sc in tip sc, (sc, ch 2, sc) in sp, sc in next tip sc (4 sts).
- Side 2: repeat Side 1 (9 sts).
Join. (22 sts + ch-2 sp) Fasten off Color B.
Rnd 3 (outline): Join Color C. Sc in each stitch around, working (sc, ch 2, sc) in the tip sp. Join. (22 worked 1-per-stitch + 2 added at the tip = 24 sc + ch-2 sp)
Vein: Without cutting the yarn, surface sl st up the center of the leaf, from the base to just below the tip (about 8 sts). Fasten off.
Stamen Spray (make 1 per motif)
Use Color C.
Ch 3 to make the base. Then work the stamens below in this order, finishing each one with a sl st into the last base ch:
- Knob stamen L = 5
- Knob stamen L = 7
- Knob stamen L = 9
- Knob stamen L = 10 (center)
- Knob stamen L = 9
- Knob stamen L = 7
- Knob stamen L = 5
(7 stamens) Leave a 6 in (15.2 cm) tail and fasten off.
Flower Assembly
- Lay the center petal tip-up.
- Tuck the side petals behind it. Tilt each one outward about 30 degrees and let it overlap the center petal’s lower edge by 0.5 in (1.3 cm). All three bases should meet at one point, called the bottom center.
- Slide the leaves under the side petals so they point outward and slightly down. Their bases also meet at the bottom center.
- Whipstitch the pieces together on the back with the tails.
- Sew the stamen base at the bottom center. Fan the stamens across the center petal and tack each knob down with one small stitch.
Motif Frame
The frame is worked with Color C in one continuous strand. It is anchored to the tip ch-2 sp of each leaf and side petal.
First motif (top of the strip): Join with a sl st at the bottom center.
- Stem: Ch 6, sl st in 2nd ch from hook and in next 4 ch, sl st at the bottom center. (5 sl st)
- Ch 12, sc in the right leaf tip sp.
- Ch 8, picot point (this is the right corner point).
- Ch 6, sc in the right side-petal tip sp.
- Ch 8, then make the top point. On Motif 1 only, make it a hanging loop: ch 15, sl st in 15th ch from hook.
- Ch 8, sc in the left side-petal tip sp.
- Ch 6, picot point (left corner point).
- Ch 8, sc in the left leaf tip sp.
- Ch 12, sl st at the bottom center. Fasten off.
Frame count: 77 outline ch (counting a 3-ch top point and both corner picots) + 6 stem ch. The Motif 1 loop uses 12 more ch than a regular top point.
Pin the motif flat and check the size: 5 in x 3.5 in (12.7 cm x 8.9 cm), not counting the loop.
Make All Pieces
For one strip, make:
- Color A: 6 center petals and 12 side petals
- Color B: 6 center-petal edges, 12 side-petal edges, and 12 leaves
- Color C: 12 leaf outlines and veins, 6 stamen sprays, 6 frames, and 2 rail rows
Layout (1 column):
[Loop]
[Motif 1]
[Motif 2]
[Motif 3]
[Motif 4]
[Motif 5]
[Motif 6]
Joining
Motifs 2 through 6 are joined as you work their frames. Follow the frame instructions with one change:
- Step 5: ch 8, ch 1, sl st into the end of the stem on the motif above, ch 2. Then continue with Step 6.
The 1 ch + 2 ch replace the 3 chains of a top point, so the frame count stays at 77 outline ch + 6 stem ch.
Each stem is 1 in (2.5 cm) long, so the motifs repeat every 3.5 in (8.9 cm).
Keep your chains even in tension and the same as on Motif 1. Tight chains make the strip pucker. Loose chains make the flowers droop forward.
Checkpoint: 6 motifs x 3.5 in = 21 in (53.3 cm). Add the 1 in (2.5 cm) loop for a total of 22 in (55.9 cm) long and 5 in (12.7 cm) wide.
Border (Side Rails)
The rails are worked separately on each long side, never across the top or bottom. They keep the frame points free and the strip hanging straight.
Border gauge: 5 sts = 1 in (2.5 cm).
Per-side count for one motif: 10 working points: 1 corner picot sp, 8 frame ch, and 1 leaf-tip sc.
Row 1: Work this row on the right side first, then repeat it on the left side.
- Join Color C with a sl st in the corner picot of Motif 1. Ch 1, sc in the same sp, sc in each of the 8 frame ch, sc in the leaf-tip sc.
- Then repeat the following 5 times: ch 8, sc in the corner picot of the next motif, sc in each of the 8 frame ch, sc in the leaf-tip sc.
(6 motifs x 10 = 60 sc, plus 5 bridges x 8 ch = 40 ch, for 100 sts per side)
Row 2: Ch 1, turn. Loosely sl st in each stitch across, including each bridge ch. (100 sl st per side) Fasten off.
Why the math works: Each motif adds 10 sts and each bridge adds 8 ch, so every repeat is 18 sts = 3.6 in (9.1 cm). That covers the 3.5 in (8.9 cm) motif repeat plus the slight outward curve at each leaf tip. As a result, the rails lie flat without waving or pulling.
The rails add 0.25 in (0.6 cm) to each side: 5 in + 0.5 in = 5.5 in (14.0 cm).
Final Blocking
- Weave in all ends along the back of the petals or inside the frame chains.
- Spray the strip until it’s damp but not soaked.
- Pin the hanging loop, then the stem tips, in a straight vertical line 22 in (55.9 cm) long.
- Pin the leaf tips 5 in (12.7 cm) apart, then pin the rails straight down both sides.
- Pin each corner point upward.
- Ease the petal tips into points and press the stamens flat.
- Leave to dry completely, which takes about 24 hours.
Final Quality-Control Checklist
- Every petal has 3 rounds, and the pink edge is even all the way around.
- Each leaf has a cream outline and a centered vein.
- There are 7 stamens per motif, each with a firm knob.
- Each frame has 77 outline ch, and every anchor sits in a tip sp.
- All 5 joins are centered.
- Each rail has 100 sts, and the two sides match.
- The strip measures 5.5 in x 22 in (14.0 cm x 55.9 cm).
Troubleshooting
- Petals cup: add a sc in the tip region on Rnd 2, or block them firmly.
- Petals ruffle: your tension is loose. Go down one hook size.
- The frame bows outward: your chains are too long or too loose. Work the frame with a smaller hook.
- The strip curls sideways: the rail is tighter on one side. Count both rails (100 sts each) and redo the tight one.
- The stamens twist: steam them lightly and pin each knob while drying.
- A join is off-center: undo back to Step 5 of that frame and sl st into the exact end of the stem above.
Care
Hand wash in cool water with mild soap, then press out the water in a towel. Dry flat and pinned to shape, and keep the strip out of strong direct sunlight to stop the burgundy from fading.
Final Notes
The measurements build on each other in a chain:
- Gauge of 20 sc = 4 in (10.2 cm)
- Center petal: 2.25 in x 1.75 in (5.7 cm x 4.4 cm)
- Framed motif: 5 in x 3.5 in (12.7 cm x 8.9 cm)
- Six joined motifs plus loop: 22 in (55.9 cm)
- Rails at 0.25 in (0.6 cm) per side: 5.5 in x 22 in (14.0 cm x 55.9 cm)
If each stage matches its checkpoint, the finished strip will hang straight and true. Make one strip for a window accent or several for a curtain.
Happy crocheting!