
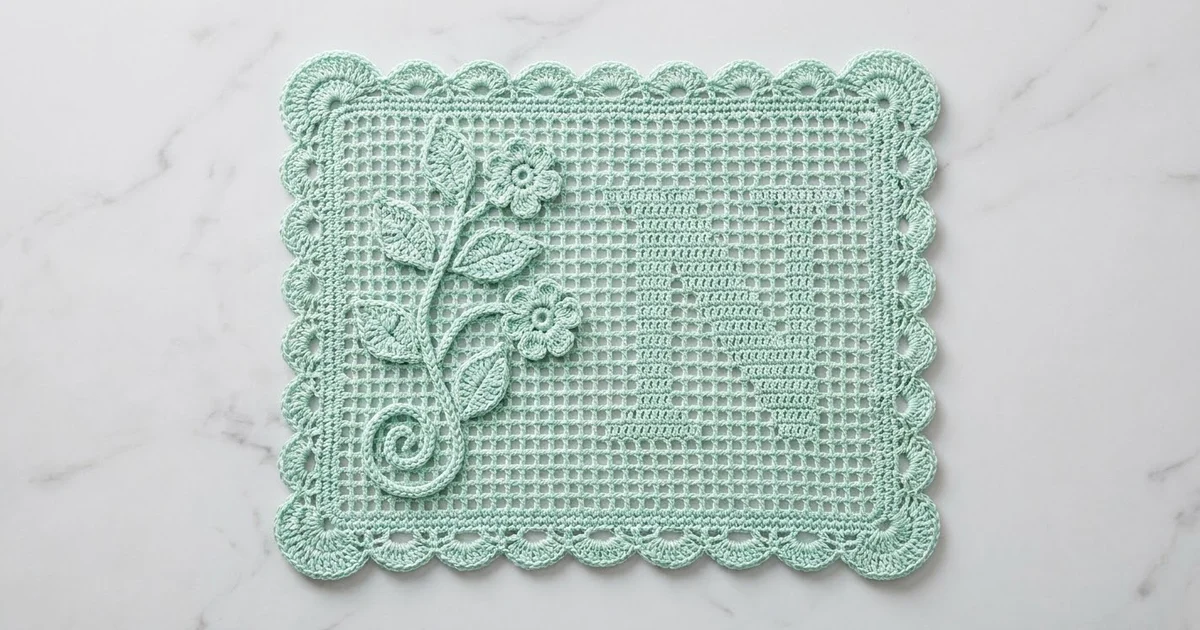
This filet crochet panel has a bold serif letter N worked into an open mesh grid. A raised flower vine is stitched onto the left side, and a scalloped border runs all the way around. The whole piece is one soft mint green, so all the contrast comes from texture: solid blocks against open squares, and a padded appliqué against flat lace.
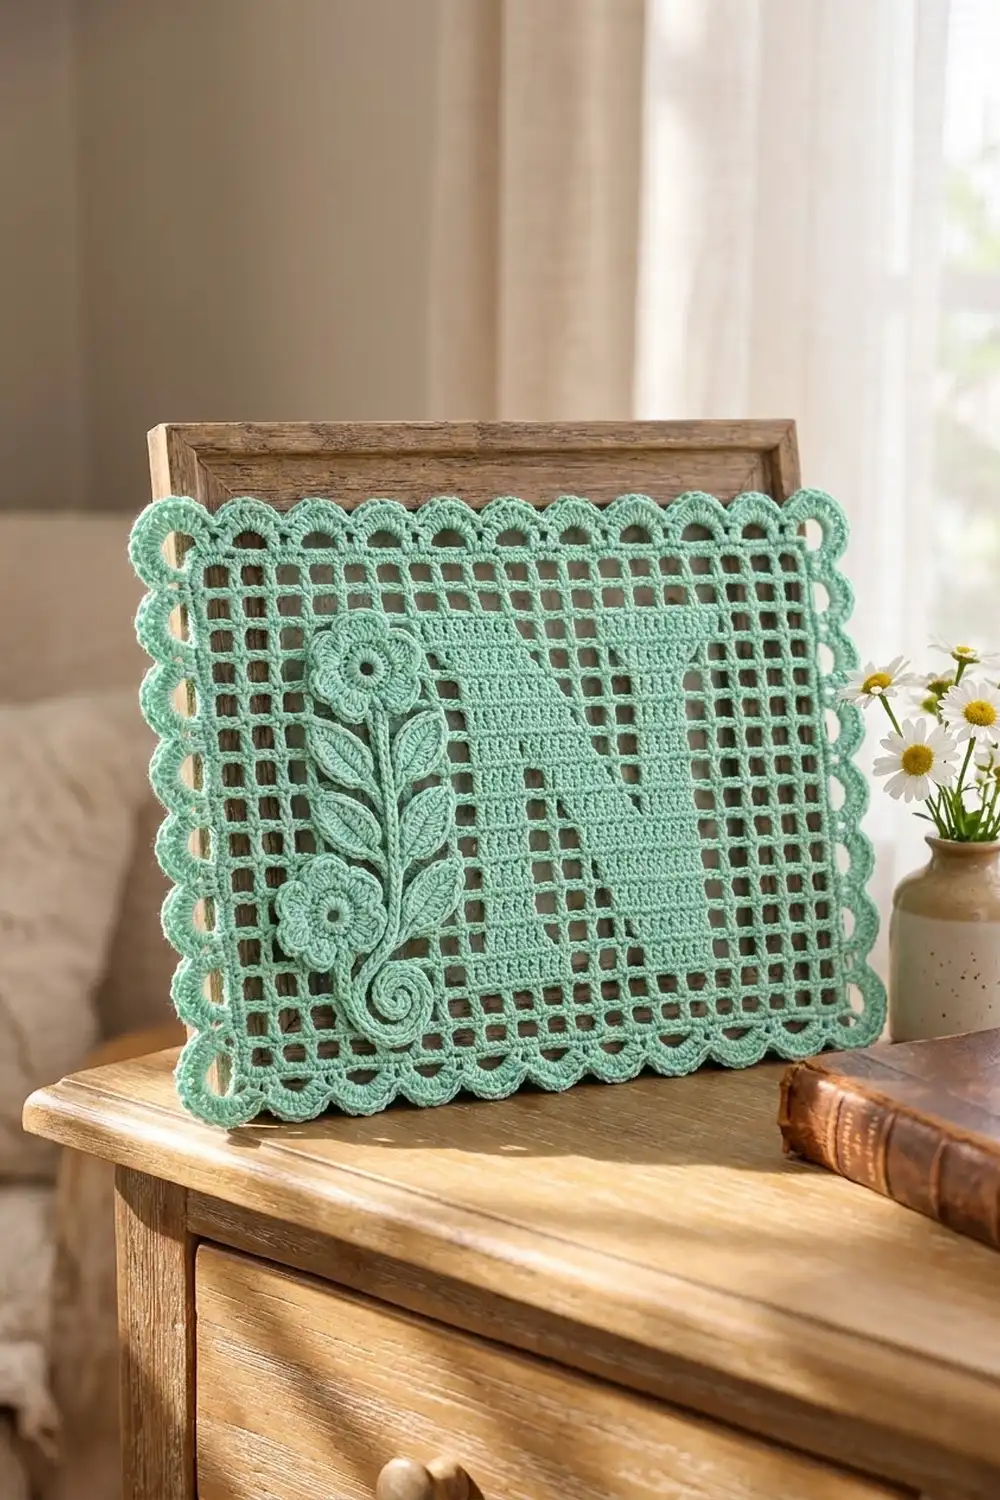
The style is cottage-meets-typography. Frame it, hang it over a nursery door, prop it on a desk, or make a full set of initials. The design is the letter N, but the chart method works for any letter you plot on the same grid.
The pattern uses US crochet terms. The finished panel measures about 9.2 in x 7.2 in (23.4 cm x 18.3 cm) after blocking.
Construction is simple. You work the filet mesh back and forth in rows from a foundation chain, with the letter charted as solid blocks. Then you add a two-round scalloped border. Last, you make a stem, six leaves, a branch and two flowers, and sew them over the open mesh at the left.
Finished Size and Construction
- Finished size: 9.2 in x 7.2 in (23.4 cm x 18.3 cm)
- Skill level: Intermediate
- Terminology: US crochet terms
- Yarn weight: Super fine (#1) fingering-weight mercerized cotton
- Hook: 2.75 mm (US C/2)
- Number of pieces: 1 filet panel, plus 10 small appliqué parts sewn on
- Layout: Single rectangular panel, landscape orientation
- Mesh size: 20 blocks wide x 15 rows tall
- Size before border: 8.0 in x 6.0 in (20.3 cm x 15.2 cm)
- Border depth: 0.6 in (1.5 cm) per side
Materials
Yarn: Choose a smooth, tightly plied mercerized cotton. Stitch definition matters in filet work, and cotton holds the squares crisp after blocking. Avoid fuzzy or very stretchy fibers, because they blur the letter.
- Mint green: 30 g / 102 m total
- Panel and border: about 22 g / 75 m
- Appliqué: about 5 g / 17 m
These quantities include a margin of about 10% for your gauge swatch and sewing tails.
Tools:
- 2.75 mm (US C/2) crochet hook
- Tapestry needle
- Stitch markers (4)
- Rust-proof pins and a blocking board
- Spray bottle
- Ruler or tape measure
Abbreviations (US Terms)
- ch – chain
- sl st – slip stitch
- sc – single crochet
- hdc – half double crochet
- dc – double crochet
- sk – skip
- sp – space
- st(s) – stitch(es)
- RS / WS – right side / wrong side
Special stitches:
- Open block (O): ch 2, sk 2 sts, dc in next dc. Over an open block, this is simply “ch 2, dc in next dc.”
- Solid block (S): Over an open block, work 2 dc in the ch-2 sp and dc in next dc. Over a solid block, work dc in each of the next 3 dc.
- Shell: (dc, ch 1, dc, ch 1, dc) in the same st.
- Corner fan: (dc, ch 1) 4 times, then dc, all in the same corner sp.
Gauge and Checkpoints
Gauge: 5 blocks x 5 rows = 2 in (5.1 cm) square in filet mesh. One block is 0.4 in (1.0 cm) wide and tall.
Before starting the panel, test your gauge. Ch 20 and work 5 rows of open mesh (5 blocks across), then measure. If it is too big, go down a hook size. If it is too small, go up a size. Filet blocks should be square. If yours are taller than they are wide, try a tighter yarn-over on each dc rather than changing the hook.
Checkpoints:
- After Row 5: the panel is 8.0 in (20.3 cm) wide and 2.0 in (5.1 cm) tall.
- After Row 15: the panel is 8.0 in x 6.0 in (20.3 cm x 15.2 cm).
- After Border Rnd 1: 8.3 in x 6.3 in (21.1 cm x 16.0 cm).
- After Border Rnd 2 and blocking: 9.2 in x 7.2 in (23.4 cm x 18.3 cm).
Filet Panel
Each row has 61 sts, counting every dc and every ch: 20 blocks x 3 sts + 1 closing dc.
Every row begins with an open block. Turning chain: ch 5 (counts as dc + ch 2), turn, dc in next dc. That completes the first open block. Every row ends with “ch 2, dc in 3rd ch of turning ch-5.”
RS rows (odd numbers) read the chart from right to left. WS rows (even numbers) read it from left to right. The written rows below are already listed in working order.
Foundation (Row 1, RS): Ch 65. Dc in 8th ch from hook. [Ch 2, sk 2 ch, dc in next ch] 19 times. You now have 20 open blocks (21 dc, 40 ch).
The 7 skipped chains form the first open block.
Row 2 (WS): Ch 5, turn, dc in next dc. [Ch 2, dc in next dc] 18 times. Ch 2, then dc in the 5th of the 7 skipped beginning chains, counting up from Row 1’s first dc. This makes 20 O.
Row 3 (RS): 1 O, 5 S, 3 O, 4 S, 7 O. (39 dc, 22 ch)
Row 4 (WS): 8 O, 2 S, 4 O, 4 S, 2 O. (33 dc, 28 ch)
Row 5 (RS): 2 O, 2 S, 1 O, 2 S, 3 O, 2 S, 8 O. (33 dc, 28 ch)
Row 6 (WS): 8 O, 2 S, 3 O, 2 S, 1 O, 2 S, 2 O.
Row 7 (RS): 2 O, 2 S, 2 O, 2 S, 2 O, 2 S, 8 O.
Row 8 (WS): 8 O, 2 S, 2 O, 2 S, 2 O, 2 S, 2 O.
Row 9 (RS): Repeat Row 7.
Row 10 (WS): 8 O, 2 S, 1 O, 2 S, 3 O, 2 S, 2 O.
Row 11 (RS): 2 O, 2 S, 3 O, 2 S, 1 O, 2 S, 8 O.
Row 12 (WS): 8 O, 4 S, 4 O, 2 S, 2 O. (33 dc, 28 ch)
Row 13 (RS): 1 O, 4 S, 3 O, 5 S, 7 O. (39 dc, 22 ch)
Rows 14–15: 20 O each. Fasten off after Row 15.
Every row should total 20 blocks. If a row comes out to 19 or 21, frog it back to the start of the row and recount.
Chart (viewed from RS, X = solid, . = open, columns 1–20 left to right):
Row 15  ....................
Row 14  ....................
Row 13  .......XXXXX...XXXX.
Row 12  ........XXXX....XX..
Row 11  ........XX.XX...XX..
Row 10  ........XX.XX...XX..
Row  9  ........XX..XX..XX..
Row  8  ........XX..XX..XX..
Row  7  ........XX..XX..XX..
Row  6  ........XX...XX.XX..
Row  5  ........XX...XX.XX..
Row  4  ........XX....XXXX..
Row  3  .......XXXX...XXXXX.
Row  2  ....................
Row  1  ....................
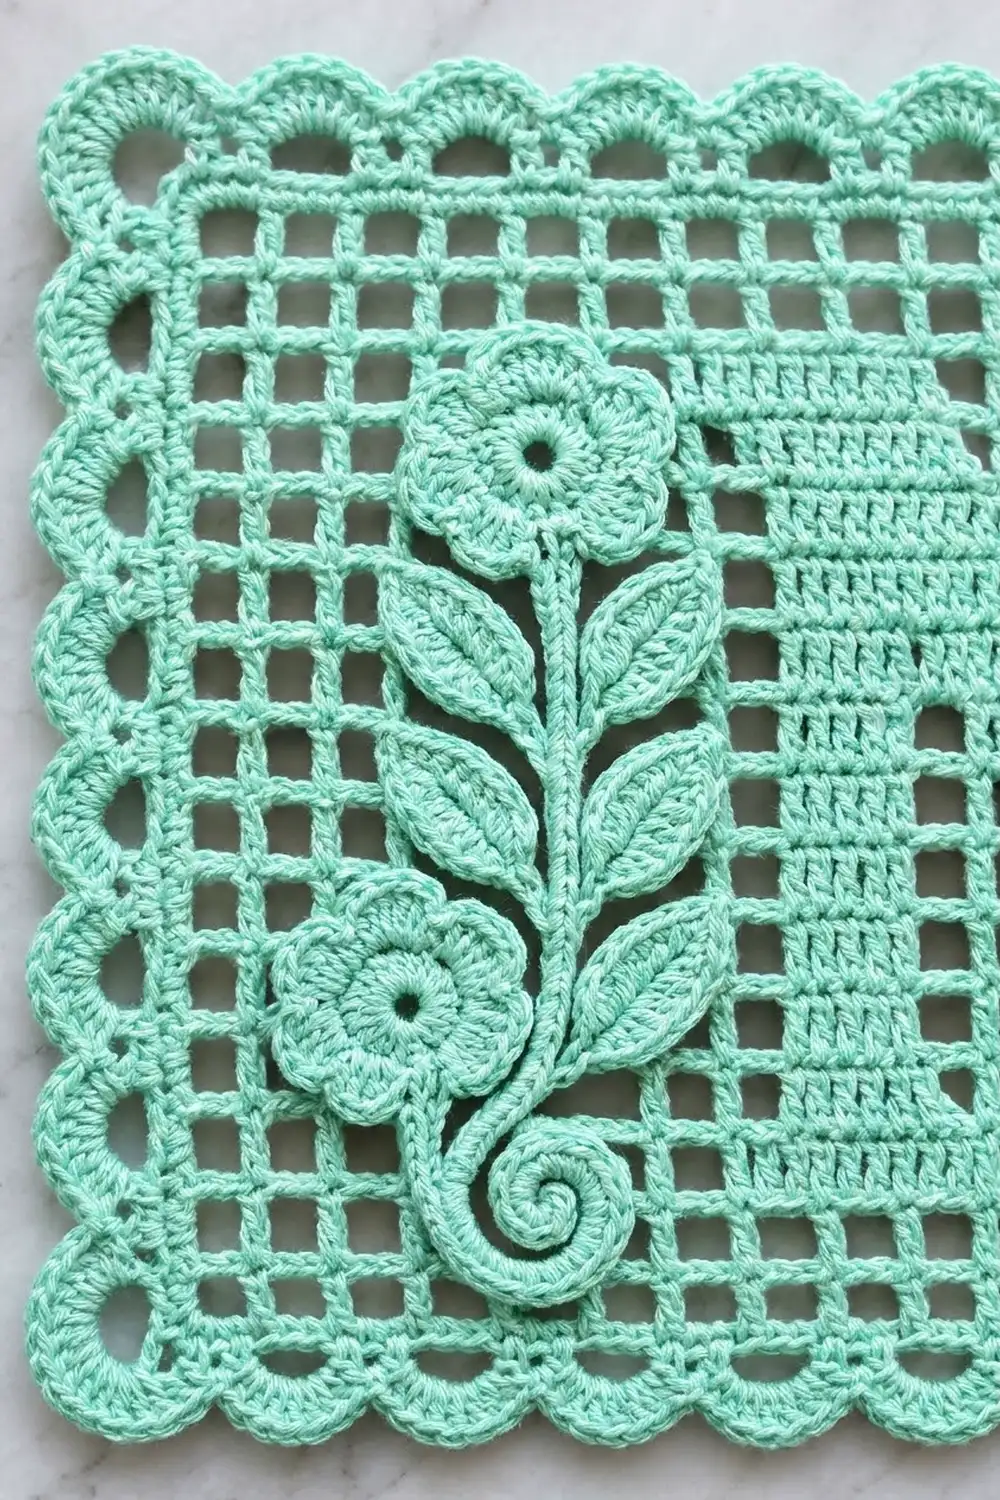
Columns 1–8 stay open on most rows. The flower vine will sit over columns 2–7.
Appliqué Pieces
All appliqué pieces are worked in mint green. Leave a 12 in (30.5 cm) tail on each one for sewing.
Stem (make 1): Ch 46. Sc in 2nd ch from hook and in each ch across: 45 sc. Ch 1, turn, and sl st in the back loop of each sc across to make a firm, raised cord: 45 sl st. The stem is about 6.0 in (15.2 cm) long.
Branch (make 1): Ch 9. Sc in 2nd ch from hook and in each ch across: 8 sc. The branch is about 1.0 in (2.5 cm) long.
Leaf (make 6): Ch 8.
- Side 1: Starting in the 2nd ch from hook, work sc, hdc, 2 dc, hdc, sc. Work 3 sc in the last ch.
- Side 2: Working into the other side of the chain, work sc, hdc, 2 dc, hdc, sc. You should have 15 sts.
- Tip: Ch 2, sl st in 2nd ch from hook to make a pointed tip.
- Vein: Surface sl st along the center of the leaf from the tip toward the base.
Each leaf is about 1.0 in x 0.5 in (2.5 cm x 1.3 cm).
Flower (make 2):
- Rnd 1: Ch 4, sl st to the first ch to form a ring. Ch 1, work 10 sc in the ring, then join: 10 sc. The ring leaves an open eyelet center.
- Rnd 2: Ch 1. Sc in next sc, (hdc, 3 dc, hdc) in next sc. Repeat from * 4 more times, then join: 5 petals, 30 sts.
Each flower is about 1.1 in (2.8 cm) across.
Border
Border gauge: 15 sc = 2 in (5.1 cm) on the outer edge of the mesh, which works out to 3 sc per block or per row.
Rnd 1 (RS): With RS facing, join yarn with a standing sc in the 3rd ch of the turning ch at the top right corner of Row 15.
- Top: Work 1 sc in each dc and each ch across: 61 sc. Ch 2 for the corner.
- Left side: Work 3 sc around each row-end post or turning chain: 45 sc. Ch 2.
- Bottom: Work 1 sc in each foundation ch: 61 sc. Ch 2.
- Right side: Work 45 sc up the right side. Ch 2.
- Join with a sl st to the first sc.
Rnd 1 totals 212 sc and 4 corner ch-2 sps. Place a marker in each corner sp. The per-side counts (61 and 45) do not include the corner spaces.
Rnd 2 (RS): Ch 1, sc in the same st as the join.
- Top: [Sk 1, shell in next sc, sk 1, sc in next sc] 15 times. Work a corner fan in the corner sp.
- Left side: Sc in first sc. [Sk 1, shell in next, sk 1, sc in next] 11 times. Corner fan.
- Bottom: Sc in first sc, then repeat the bracket 15 times. Corner fan.
- Right side: Sc in first sc, then repeat the bracket 11 times. Corner fan in the last corner sp.
- Join with a sl st to the first sc and fasten off.
Rnd 2 totals 52 shells, 56 sc and 4 corner fans.
Why the math works: Each scallop repeat uses 4 sc, and each side opens with 1 sc. The top and bottom have 61 = 1 + (4 x 15) sts, and the sides have 45 = 1 + (4 x 11) sts. Every side starts and ends with an sc, and the corner fans sit in their own spaces, so nothing is counted twice. That gives 15 scallops along the long sides, 11 along the short sides, and a rounded fan at each corner.
Attaching the Appliqué
Pin the pieces to the panel before blocking. Start with the RS of the panel facing you and the letter N on the right.
- Stem: Lay the stem vertically over columns 4–5, from the top of Row 13 down to Row 3. Coil the bottom 1.2 in (3.0 cm) of the stem into a tight clockwise spiral that rests on Rows 2–3 and curls toward the letter.
- Top flower: Place one flower at the top of the stem, centered over Rows 12–13.
- Branch and lower flower: Attach the branch to the left of the stem at about Row 6. Angle it down and out, and set the second flower at its end, over columns 2–3.
- Leaves: Arrange the six leaves along the stem: three on the right, and three on the left above the branch. Point each tip upward and outward, with each base tucked against the stem.
- Sew: Working from the WS, sew each piece with small running stitches through the mesh bars and the edge of the appliqué. Keep the stitches hidden in the solid sts. Do not pull tight, or the mesh will pucker.
Final Blocking
- Weave in all ends along solid blocks or border sts.
- Soak the panel in cool water for 10 minutes, then press out the water in a towel. Do not wring it.
- Pin the panel to 9.2 in x 7.2 in (23.4 cm x 18.3 cm). Use the inner mesh rectangle of 8.0 in x 6.0 in (20.3 cm x 15.2 cm) as your guide.
- Pin each mesh line straight. A ruler laid across the rows helps.
- Pin the tip of each scallop and each corner fan so they open evenly.
- Lift the flowers gently with your fingertips so they stay dimensional.
- Let it dry completely before unpinning.
Final Quality-Control Checklist
- Every row has 20 blocks and 61 sts.
- The letter N reads correctly from the RS, with serifs at the top left, top right, bottom left and bottom right.
- The open blocks are square, not tall rectangles.
- Border Rnd 1 has 61 / 45 / 61 / 45 sc.
- There are 15 scallops on each long side, 11 on each short side and 4 corner fans.
- The appliqué sits flat with no puckering in the mesh behind it.
- Size is 9.2 in x 7.2 in (23.4 cm x 18.3 cm).
- All ends are hidden in solid areas.
Troubleshooting
- The letter is mirrored. You read an RS row from left to right. Odd rows start at column 20.
- Blocks lean or slant. Make sure each solid block ends with a dc worked into the dc below, not into the ch-sp.
- Panel too wide. Your ch-2s are loose. Tighten them, or drop a hook size.
- The border ruffles. Your shells are too full for your tension. Work the shells and fans with a hook one size smaller.
- The border cups. You worked fewer than 3 sc per row-end on the sides. Recount for 45.
- Mesh puckers behind the vine. Clip the sewing stitches, re-pin the pieces and sew more loosely.
- The spiral will not stay flat. Tack the coil down at 3–4 points underneath.
Care
Hand wash in cool water with mild soap and lay flat to dry, reshaping the scallops. Press lightly from the WS under a cloth if needed, but avoid flattening the flowers.
Final Notes
The measurement chain is easy to follow. Each block measures 0.4 in (1.0 cm). That gives a mesh of 20 x 15 blocks, or 8.0 in x 6.0 in (20.3 cm x 15.2 cm). Border Rnd 1 brings it to 8.3 in x 6.3 in (21.1 cm x 16.0 cm). The scalloped round and blocking bring it to a finished 9.2 in x 7.2 in (23.4 cm x 18.3 cm). If your gauge is right at each checkpoint, the scallops and corners will land exactly where they should.
Happy crocheting!